
NVR Version | 7X.9.0.1 or above | Update | 2018.12.11 |
1. What is Retrieve function ?
In NVR’s new firmware(used from 7X.9.0.X), there is a new-added Retrieve interface, which is different from Playback interface.
In Playback interface, the main function is to view the searched video files, and you can clip and backup the video files in one day.
In Retrieve interface, you can search and backup video files or picture files across days and events via different conditions. There are Common Backup, Event Backup and Picture Backup.
In Common Backup interface, you can search for all types of video files set in record schedule interface.
In Event Backup interface, you can search for different event types of video files as long as an alarm action triggers the recording.
Please refer to the following steps about how to backup files in Playback interface and Retrieve interface.
2. How to Retrieve and backup files in new firmware?
2.1 Backup on monitor
(1)Backup in Playback interface
In Playback interface, you can export clipped video, playback snapshot and locked file to various devices, including USB flash drives (USB flash disk, USB HDD) and eSATA, etc.
And in Playback interface you can only clip and backup the video files in one day.
Step1. Go to Playback interface, select the channel and date you want to backup, then select the time at timeline and click  , then drag the timeline to select the start time and end time of video.

Step2. Click  to save the clipped video. Step3. Click
  to pop up File Management interface. Select the video you clipped, or you can select playback snapshot and locked file, and click Export to export video.
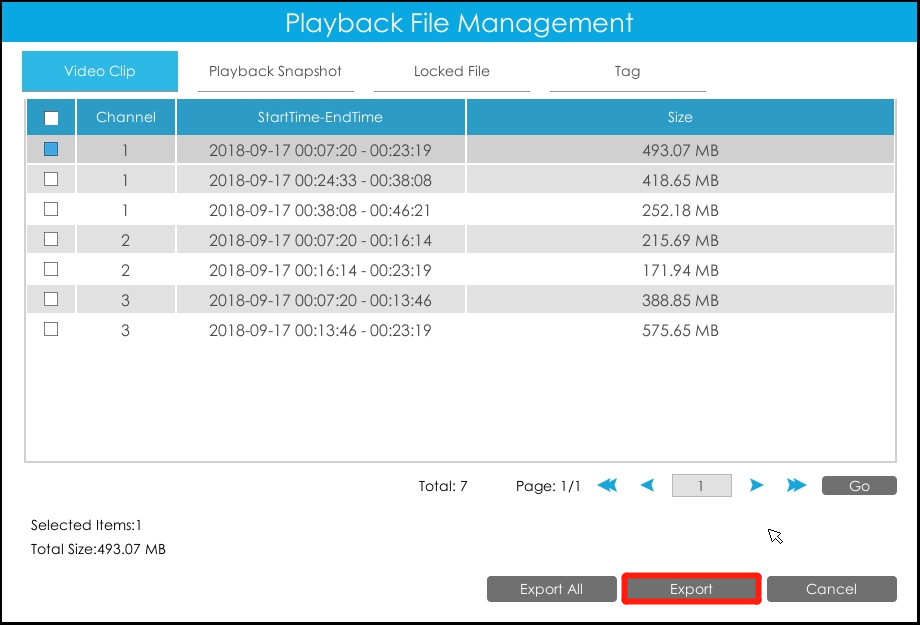
Step4. Select the device to storage exported video and then click Export.
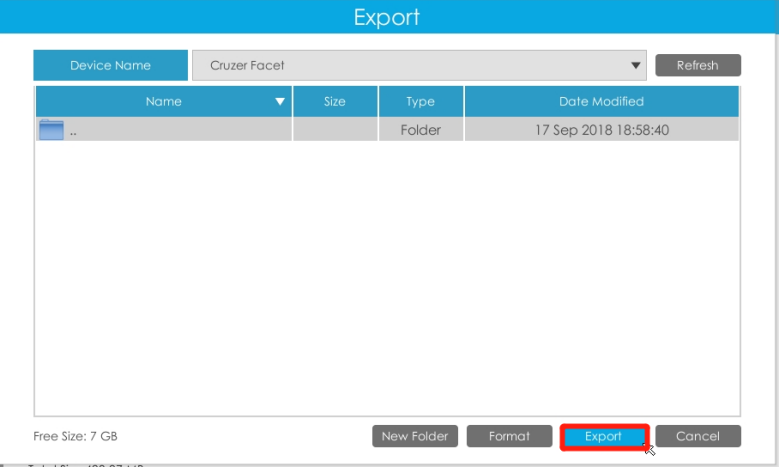
You can also directly format and create new folder of storage device here.
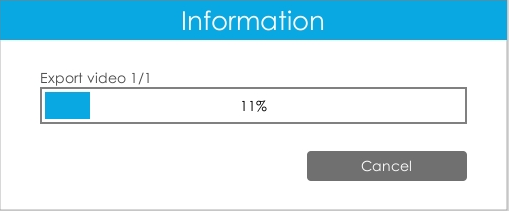
There is an information promoted showing the export progress.
Note:
①The download time of files depends on the time length of video you want to backup.
②In playback interface, all operations are one-time. Once you exit the playback interface, all clipped, locked and tagged marks will be erased.
(2)Backup files in Retrieve interface
In Retrieve interface, you can search for video files or picture files according to different conditions, and backup to various devices, including USB flash drives (USB flash disk, USB HDD) and eSATA, etc.
In Retrieve interface, you can search and backup files across days and events.
There are three backup methods: Common Backup, Event Backup and Picture Backup.
2.1.1Common Backup
In Common Backup interface, you can search for all types of video files set in record schedule interface.
It supports to search out record file according to different stream type, record type and file type you set.
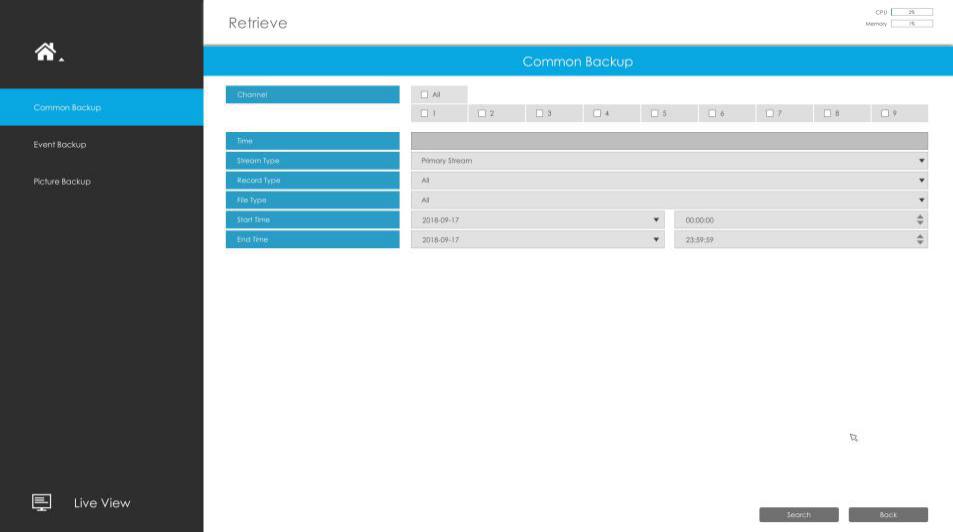
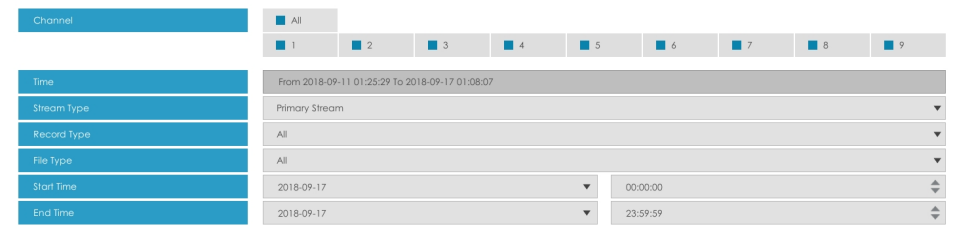
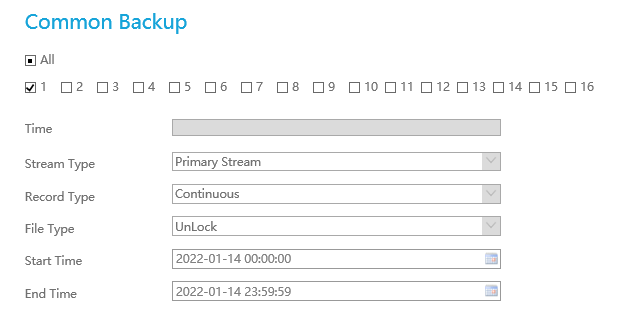
Step1: Set the search condition including Channel, Stream Type, Record Type, File Type, Start Time and Stop Time, and click Search to search video.
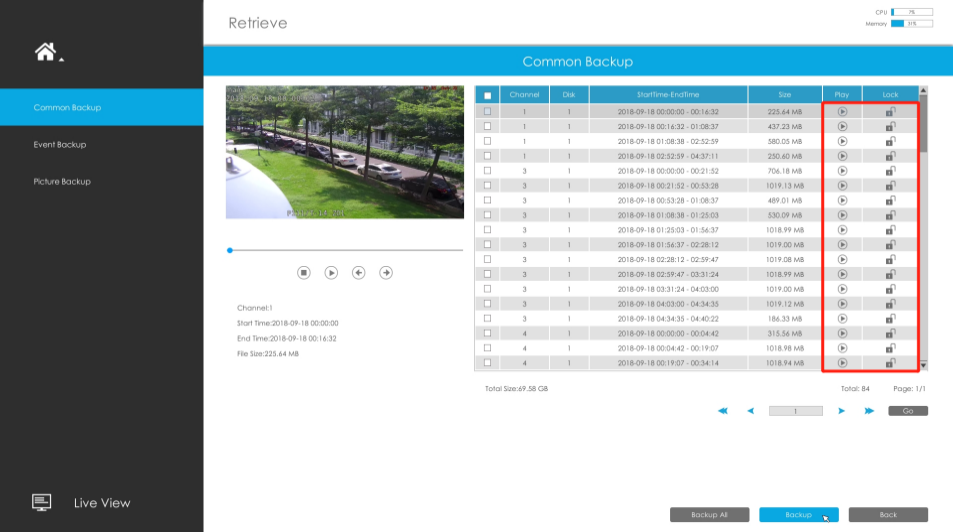
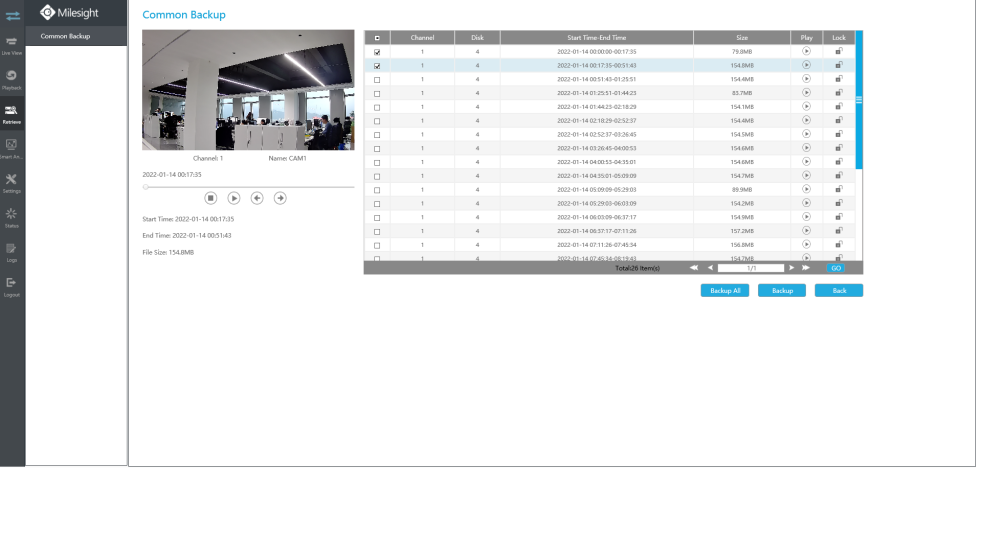
Step2: Select the file you want to backup and click Backup. Also, you can click Backup All to backup all recorded videos.
In Common Backup interface, play, lock and unlock video are supported. Click  to play and
  to lock. Once the video is locked, the whole file where the video located won’t be overwritten.
2.2.2Event Backup
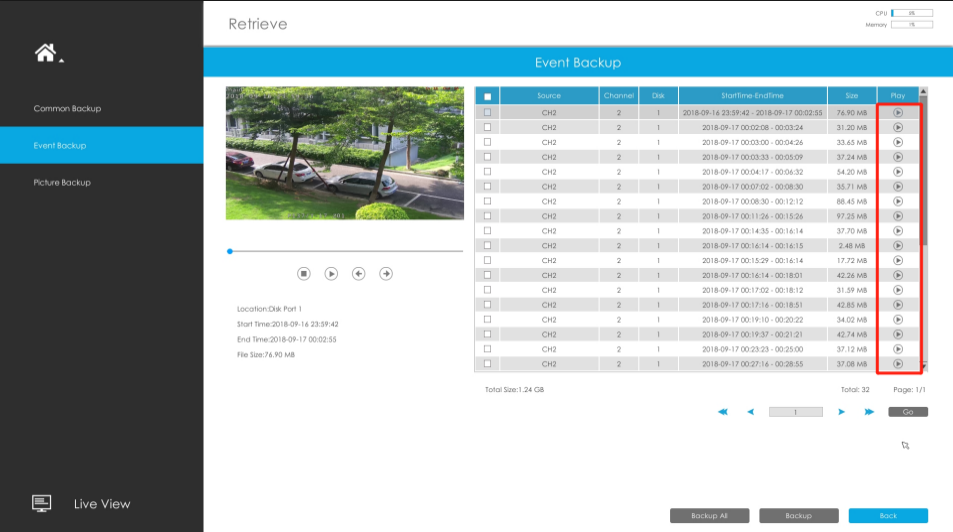
In Event Backup interface, you can search for different event types of video files as long as an alarm action triggers the recording.
The event type includes Motion Detection, Alarm Input, VCA and Smart Analysis.
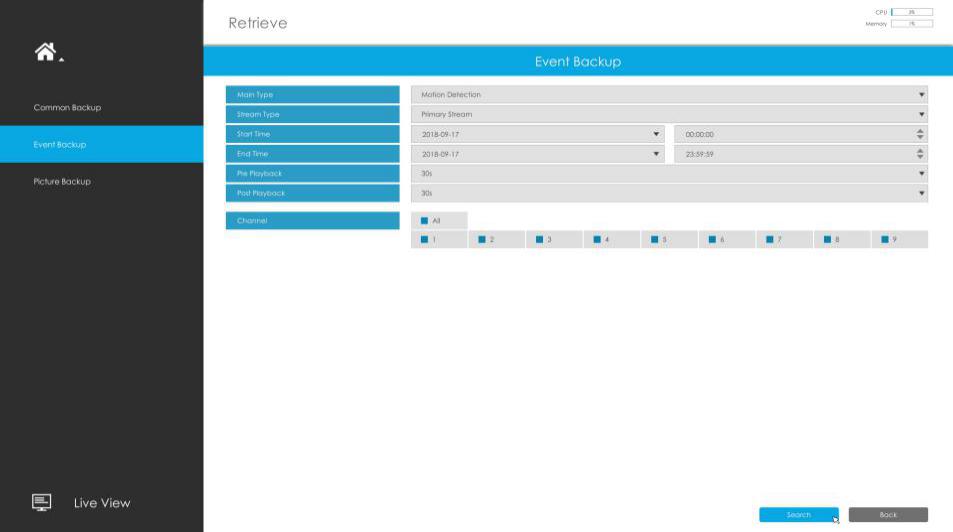
Step1: Set the search condition including Event type, Stream Type, Channel, Start Time, Stop Time, Pre Playback, Post Playback and Channel, and click Search to search video.
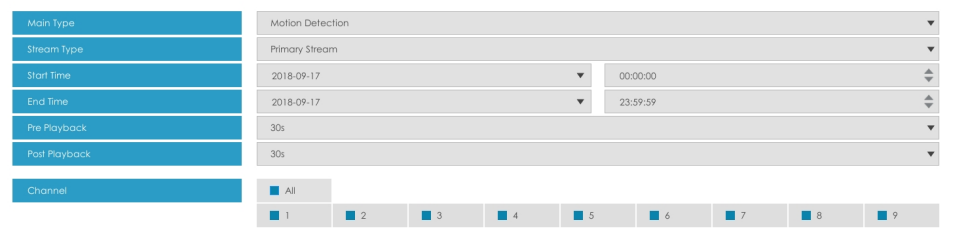
Step2: Select the file you want to backup and click Backup.Also, you can click Backup All to backup all recorded video.
In Event Backup interface, you can click  to play the video.
2.2.3Picture Backup
Support to search out and backup picture according to picture type. The picture type includes All, Live View Snapshot and Playback Snapshot, Continuous Snapshot and Event Snapshot.
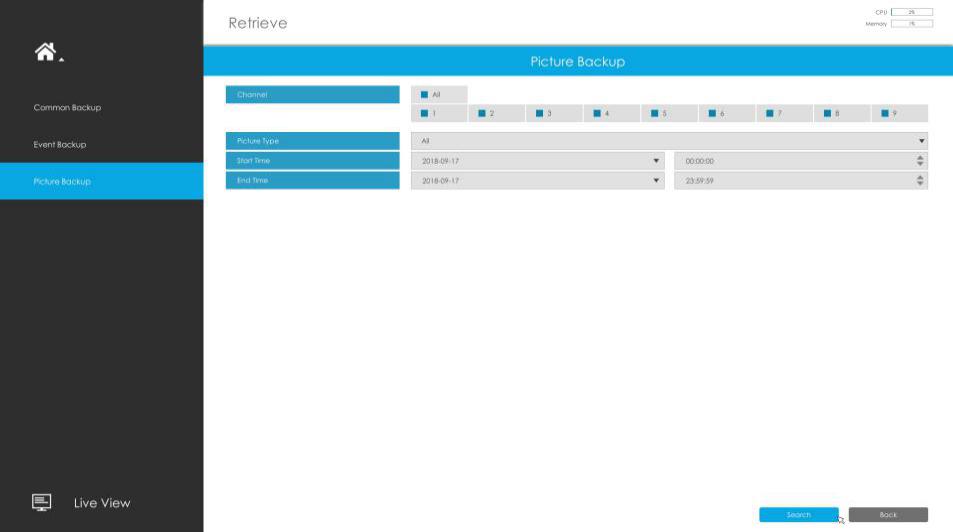
Step1: Set the search condition including Channel, Picture Type, Start Time and Stop Time, and click Search to search snapshot.

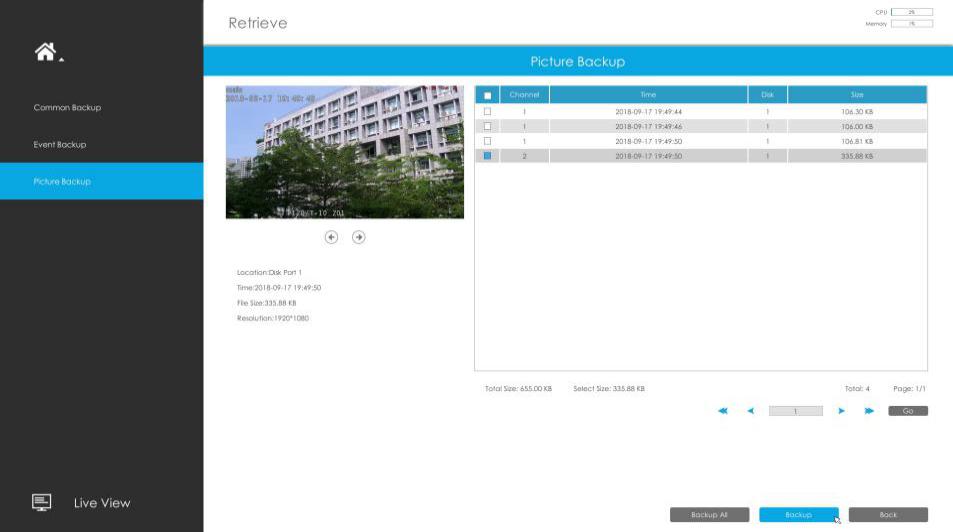
Step2: Select the file you want to backup and click Backup. Also, you can click Backup All to backup all recorded videos.
2.2 Backup on web
2.2.1Backup video files
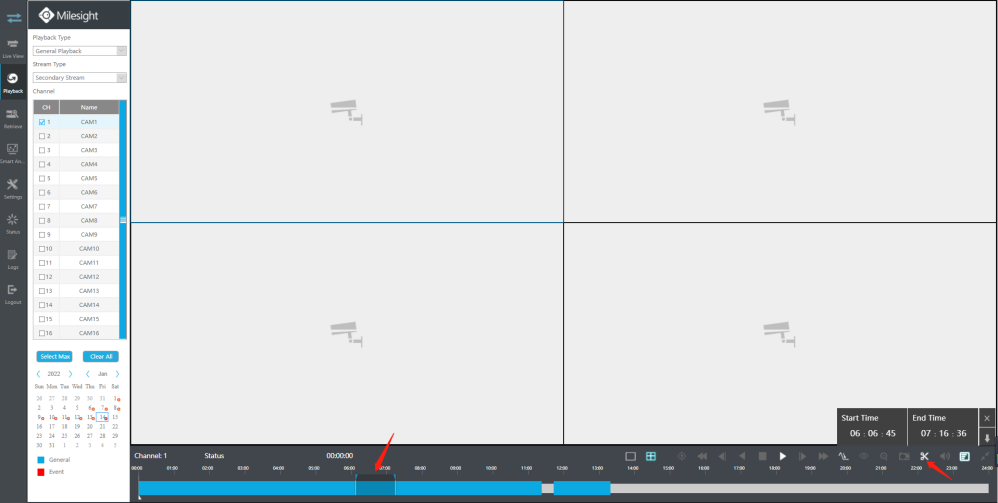
Step1. In playback interface, select camera, the date and time to playback.
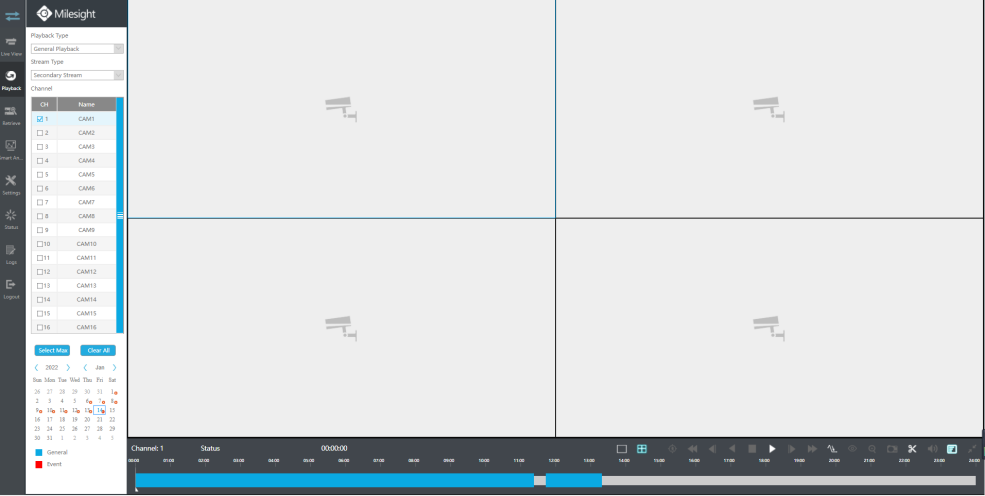
Step2. Select Recorded files for Backup.
Click  , then select start time and end time by dragging the vertical line on the time bar.
Step3. Backup the recorded files.
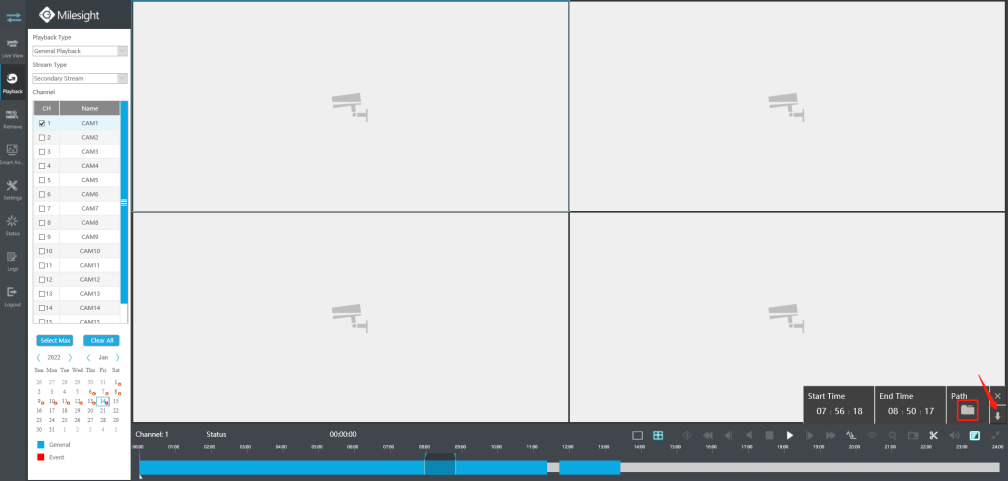
Click  to select file path, then click
  to back up recorded files.
2.2.2Backup picture files
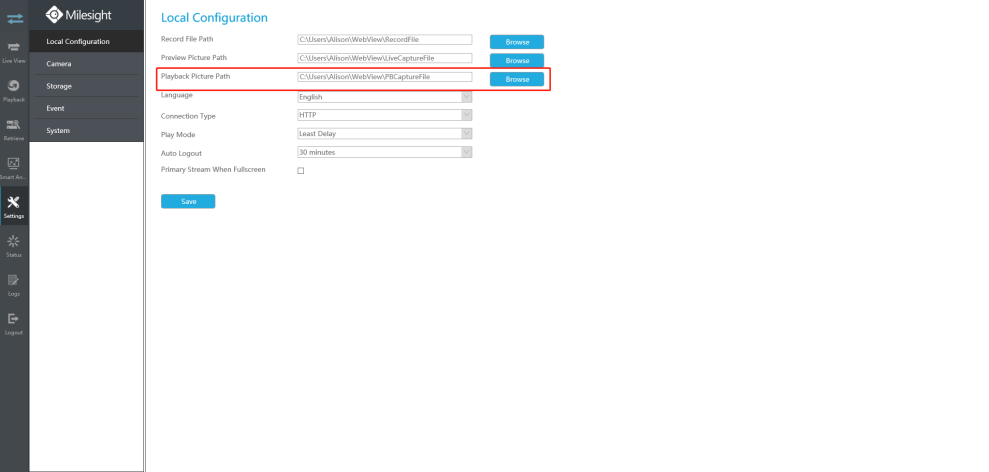
Step1. Browse a file path in Local Configuration interface.
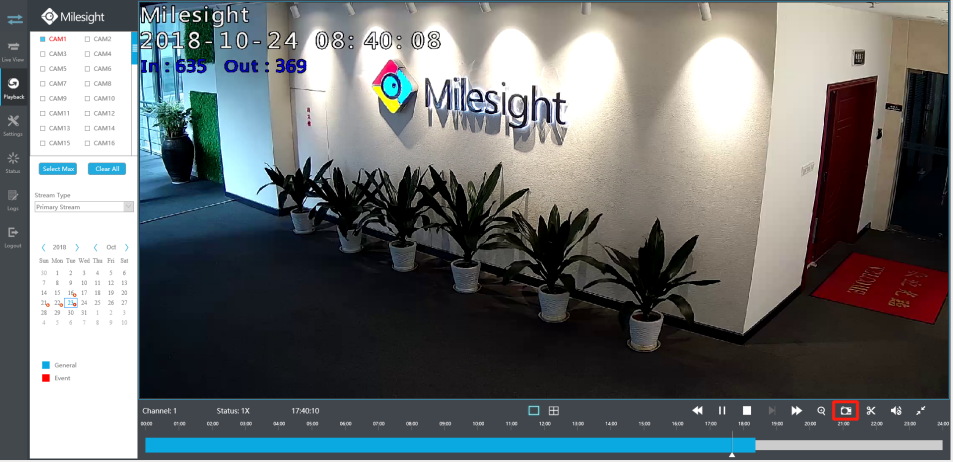
Step2. Click  to save the picture during video playback. Then the backup picture can be found in the files path you set before.
Note:
It is recommended to run browser as administrator before getting playback snapshot.
2.Backup files in Retrieve interface
In Retrieve interface, you can search for video files or picture files according to different
conditions, and backup to various devices, including USB flash drives (USB flash disk, USB HDD) and eSATA, etc.
In Common Backup interface, you can search for all types of video files set in record schedule interface.
It supports to search out record file according to different stream type, record type and file type you set.
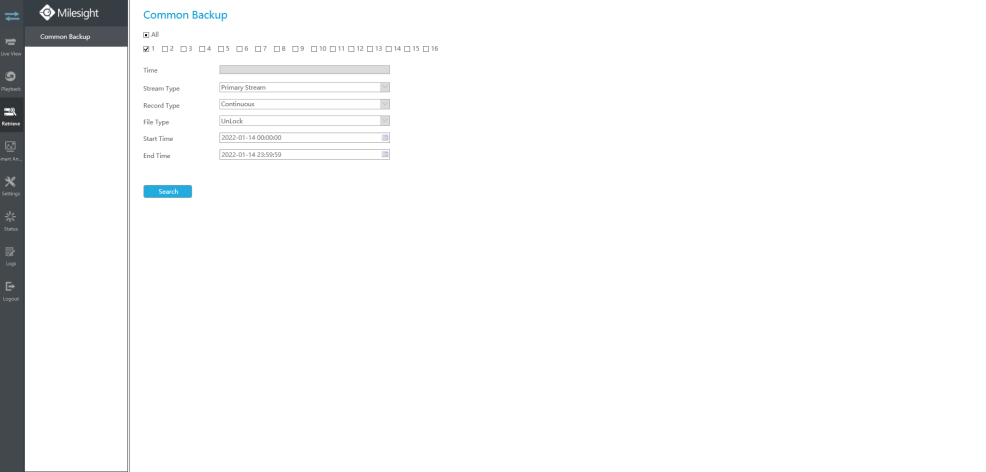
Step1: Set the search condition including Channel, Stream Type, Record Type, File Type, Start Time
and Stop Time, and click  to search video.
Step2: Select the file you want to backup and click Backup. Also, you can click Backup All to backup all recorded videos.
In Common Backup interface, play, lock and unlock video are supported. Click  to play and
  to lock. Once the video is locked, the whole file where the video located won’t be overwritten.
-END-