
NVR Version | 7X.9.0.1 or above | Update | 2019.6.4 |
1. What is New Firmware ?
The new firmware will be used from 7X.9.0.X, which makes the NVR experience faster, more responsive, more stable and more delightful. And lots of optimization are based on it.
2. Disk Settings
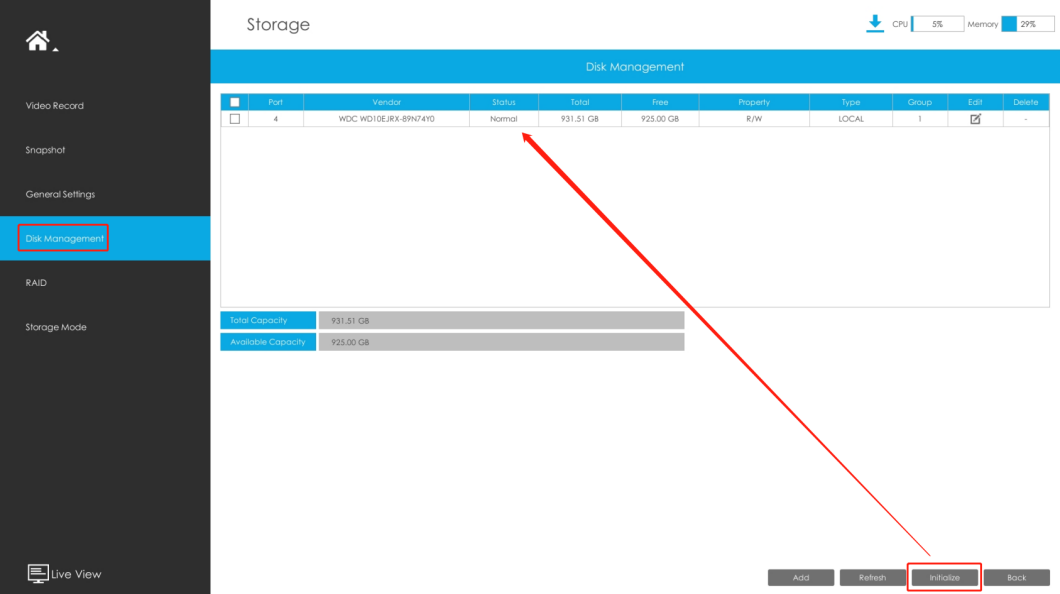
Ensure your NVR has been installed and the HDD has been initialized.
Please check it on ‘Storage’ -> ‘Disk Management’ interface. When the HDD is first installed on the NVR, you need to click ‘Initialize’ to initialize the HDD. When the status shows ‘Normal’, you can start recording settings.
2.1 Continuous Record Settings
If you want to configure continuous record, you just need to set the schedule in ‘Video Record’ interface, you can configure on the monitor or on the web.
Please refer to the following steps.
2.1.1Configure on monitor:
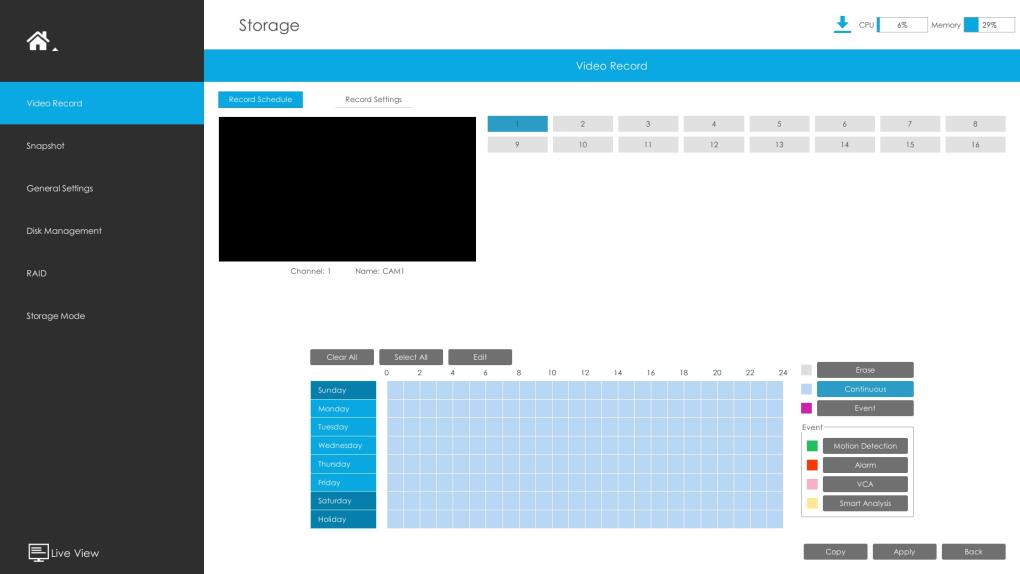
①Select ‘Storage’‘Video Record’.
②Select channel and click ‘Continuous’ button.
③Drag a square in the time table to set record effective time. It is convenient for you to set or clear all corresponding schedule by clicking “Select All” or “Clear All”.
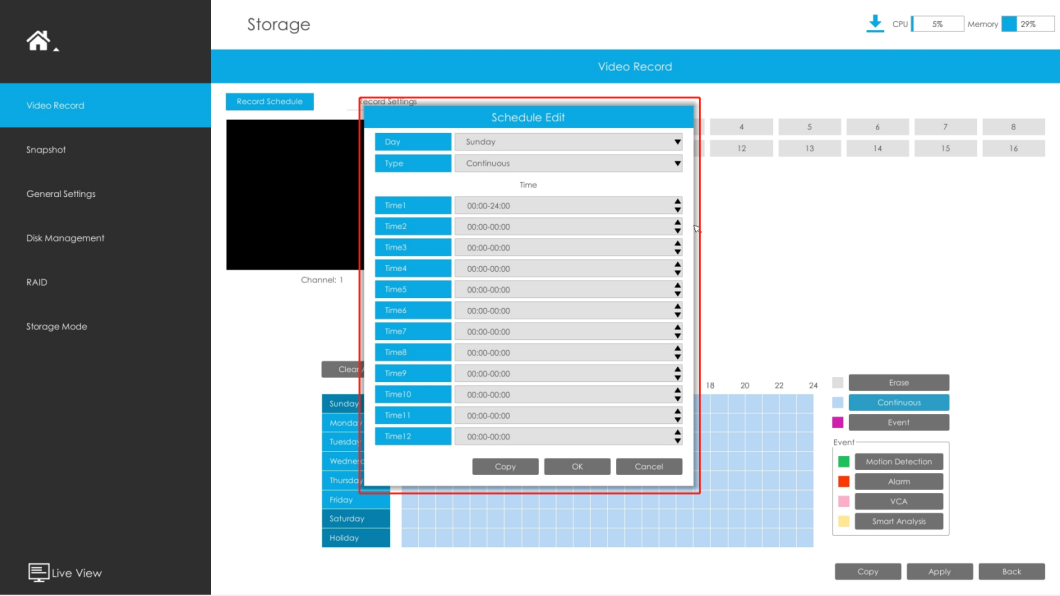
Or you can click Edit to edit schedule. Select Day, Record Type and Time to finish editing.
Note:
If you set continuous record here, there will be continuous recording by default. If the event is enabled at the
same time, the event recording will also be included in the continuous recording.
2.2.2 Configure on web:
①Select ‘Storage’‘Video Record’.
②Select channel and click ‘Continuous’ button.
③Set the record schedule. It is convenient for you to set or clear all schedule by clicking "Select All" or "Clear All".
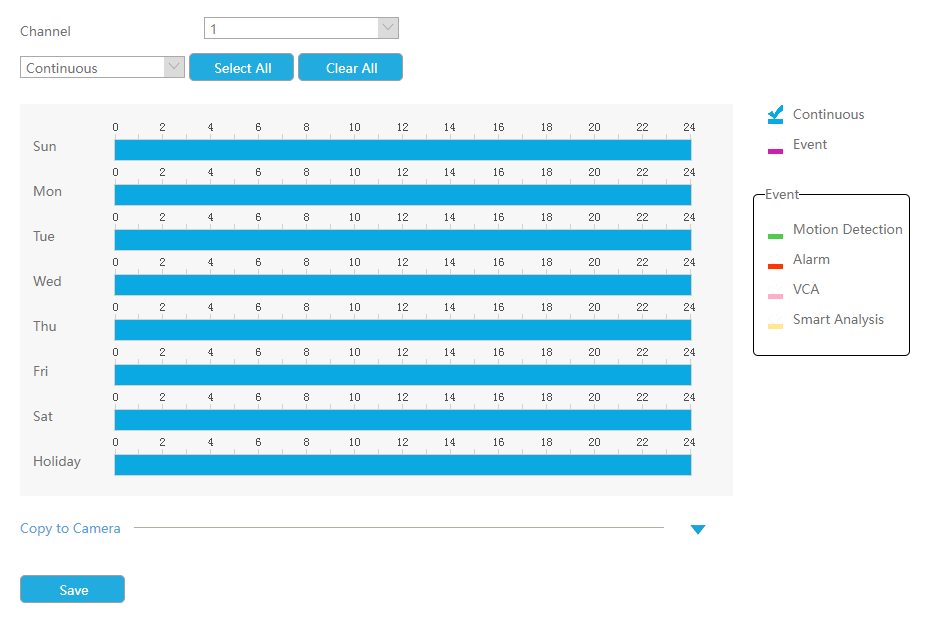
After the configuration is complete, the NVR will start recording. You can directly refer to the step 5 and steps 6 to check the recording status and recording files.
Note:
If you set continuous record here, there will be continuous recording by default. If the event is enabled at the
same time, the event recording will also be included in the continuous recording.
2.2Event Record Settings
If you want to configure event record, you just need to set the schedule in ‘Record schedule’ interface, then enable the event in ‘event’ interface.
Please refer to the following steps.
Step1. Record schedule settings
You can configure it on the monitor or on the web.
2.2.1 Configure on monitor:
①Select ‘Storage’‘Video Record’.
②Select channel and set the record schedule.
You can drag a square in the time table to set record effective time. It is convenient for you to set or clear all corresponding schedule by clicking Select All or Clear All.
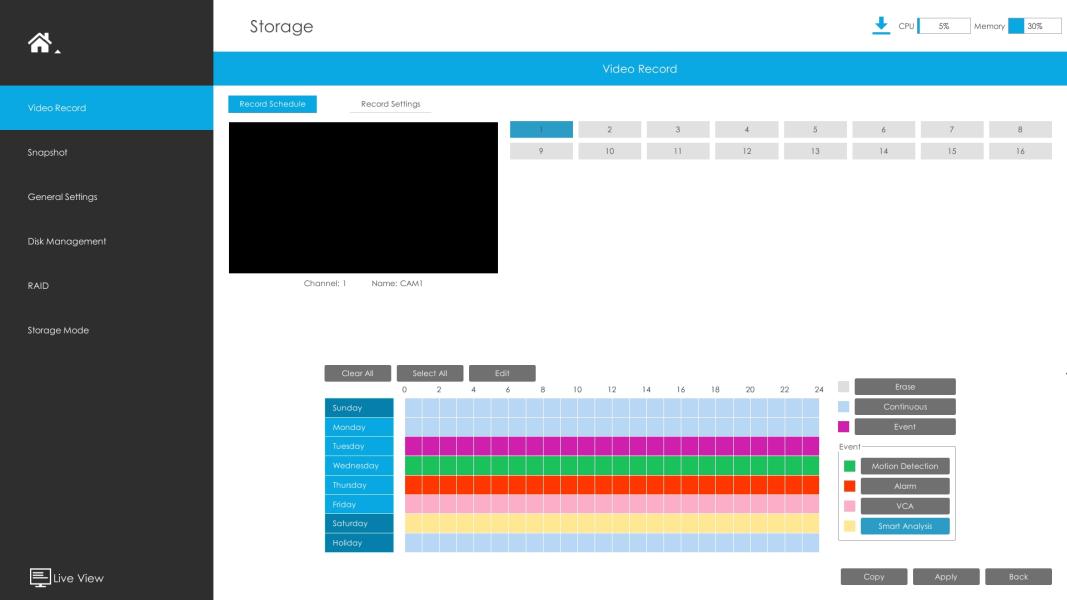
Or you can click Edit to edit schedule. Select Day, Record Type and Time to finish editing.
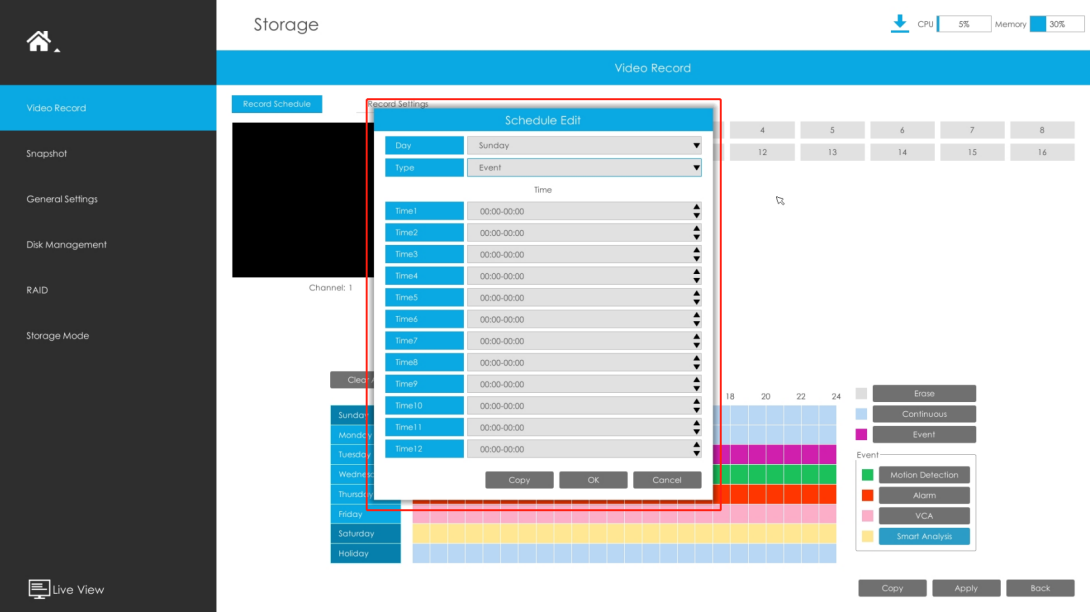
Note:
①If you set event record here, no matter which type of evnet(including Motion Detection, Alarm, VCA and Smart Analysis) you enable, there will be event recording without continuous recording during this time.
②If you set Motion Detection/Alarm/VCA/Smart Analysis record here, only when you enable the corresponding event, will there be a corresponding Motion Detection/Alarm/VCA/Smart Analysis recording without continuous recording during this time.
2.2.2 Configure on web:
①Select ‘Storage’‘Record schedule’.
②select channel and then set the record schedule. It is convenient for you to set or clear all schedule by clicking Select All or Clear All.
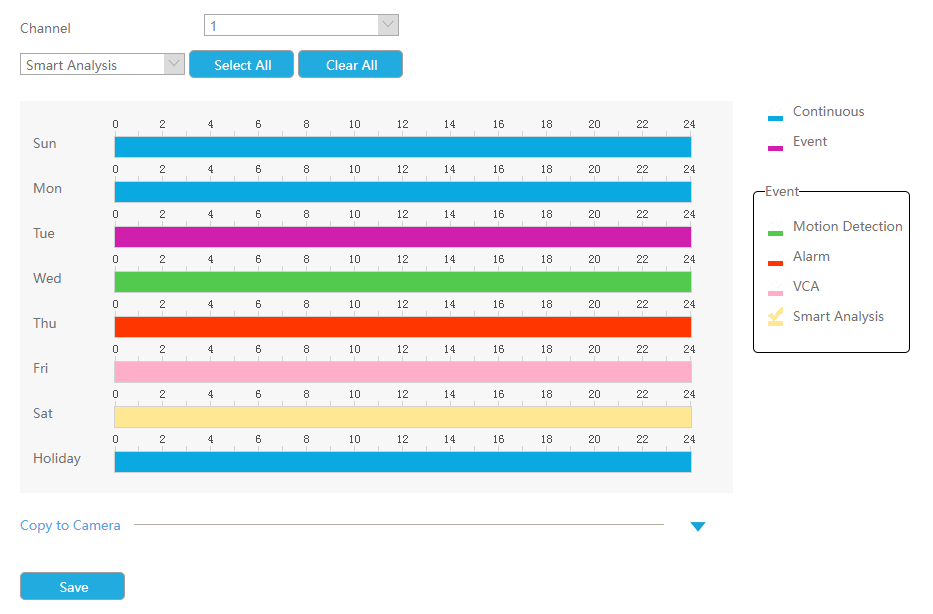
Note:
①If you set event record here, no matter which type of evnet(including Motion Detection, Alarm, VCA and Smart Analysis) you enable, there will be event recording without continuous recording during this time.
②If you set Motion Detection/Alarm/VCA/Smart Analysis record here, only when you enable the corresponding event, will there be a corresponding Motion Detection/Alarm/VCA/Smart Analysis recording without continuous recording during this time.
Step2. Alarm action settings
You can configure it on the monitor or on the web, the steps are the same, here is an example of configuring on the monitor.
Motion Detection:
①Select ‘Event’‘Motion Detection’.
②Select channel , Sensitivity and click  to enable Motion Detection. Set the area for triggering motion detection.
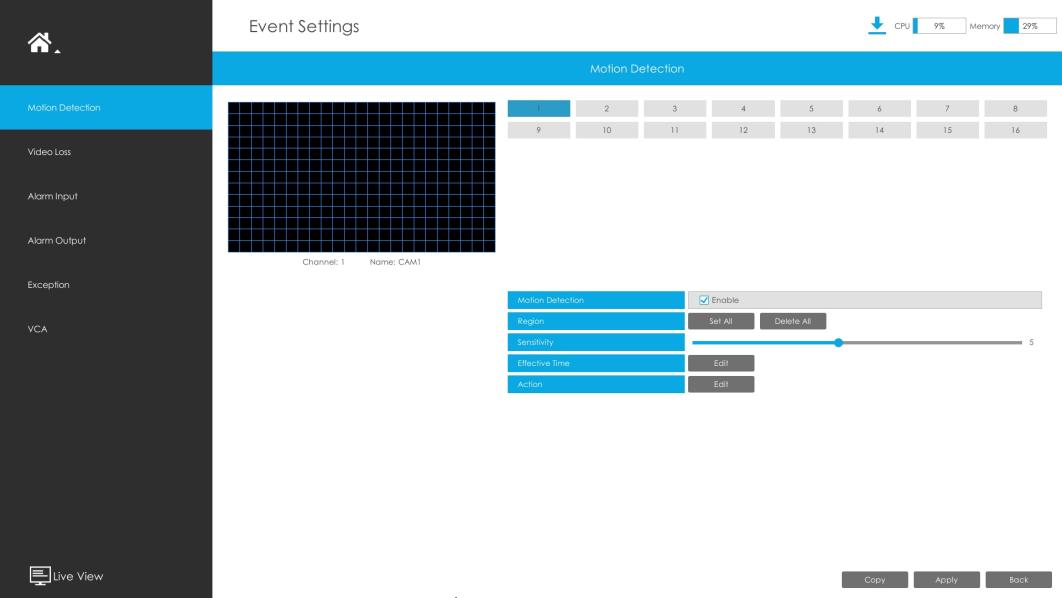
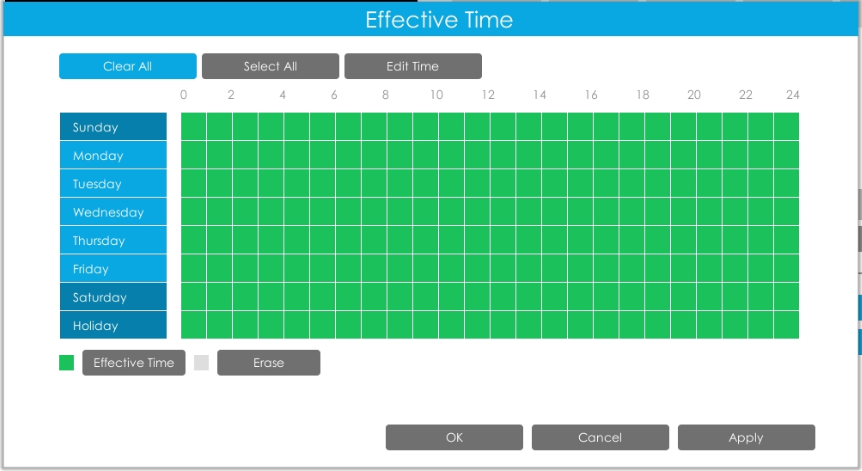
③Set Effective Time of motion detection by clicking.

As long as this schedule is enabled, the NVR can receive alarms from the camera side. If you want to customize the time that the NVR receives alarms from the camera side, you can manually edit Effective Time.
Note:
Effective Time is enabled by default. So usually in this step you just need to enable the event and set the area and sensitivity, no need to set additional effective time.
Smart Event(Take ‘Region Entrance’ as an example):
①Select ‘Event’‘Smart Event’‘Region Entrance’.
②Select channel and click  to enable Region Entrance. Set the area for triggering Region Entrance.
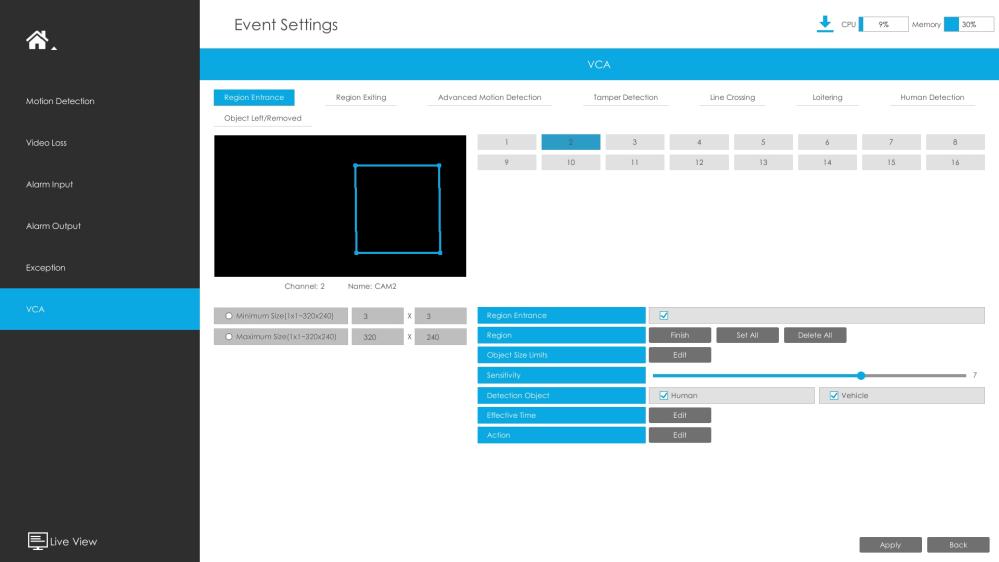
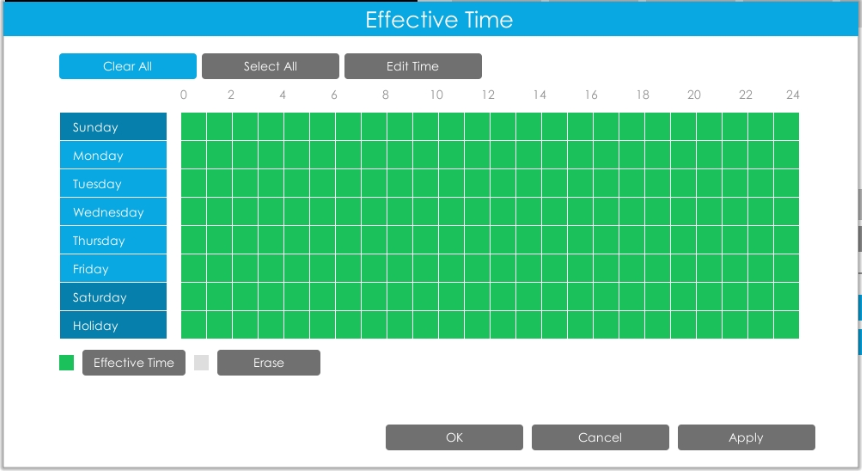
③Set Effective Time of Region Entrance by clicking.

As long as this schedule is enabled, the NVR can receive alarms from the camera side. If you want to customize the time that the NVR receives alarms from the camera side, you can manually edit Effective Time.
Note:
Effective Time is enabled by default. So usually in this step you just need to enable the event and set the area and sensitivity, no need to set additional effective time.
After the configuration is complete, the NVR will start recording. You can directly refer to the step 5 and steps 6 to check the recording status and recording files.
2.3Check the recording status
After the configuration is complete, you can check the recording status on Live View interface and Status interface.
2.3.1Check on monitor:
①Check on Live View interface
If there is a “  ” icon displayed in live view, it indicates that the current channel is recording.
If there is a “  ” icon displayed in live view, it indicates motion detection alarm.
If there is a “  ” icon displayed in live view, it indicates smart event alarm and alarm input.
②Check on Status interface
Go to ‘Status’ -> ‘Camera Status’ interface, if the current channel is recording, it will show “On” on record bar.
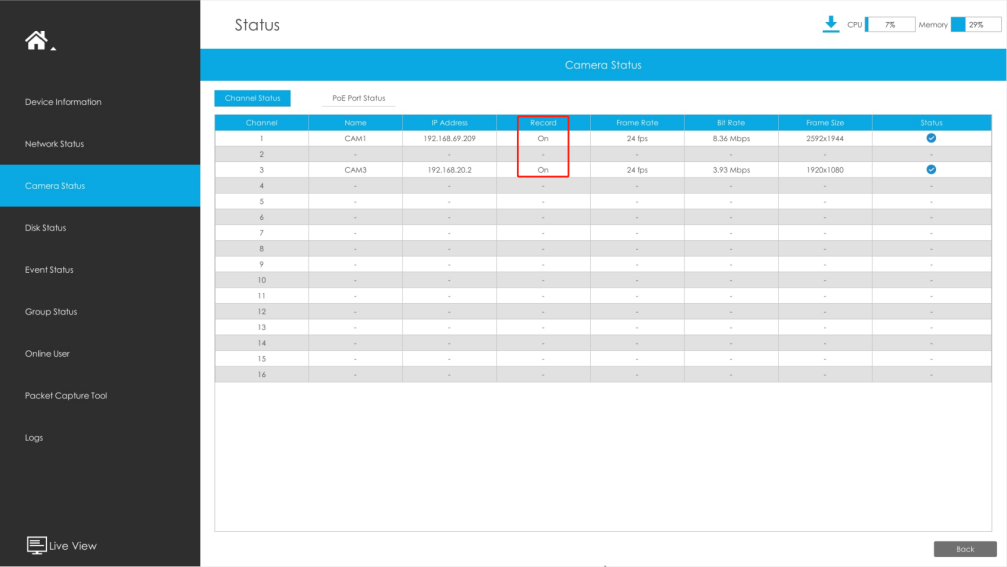
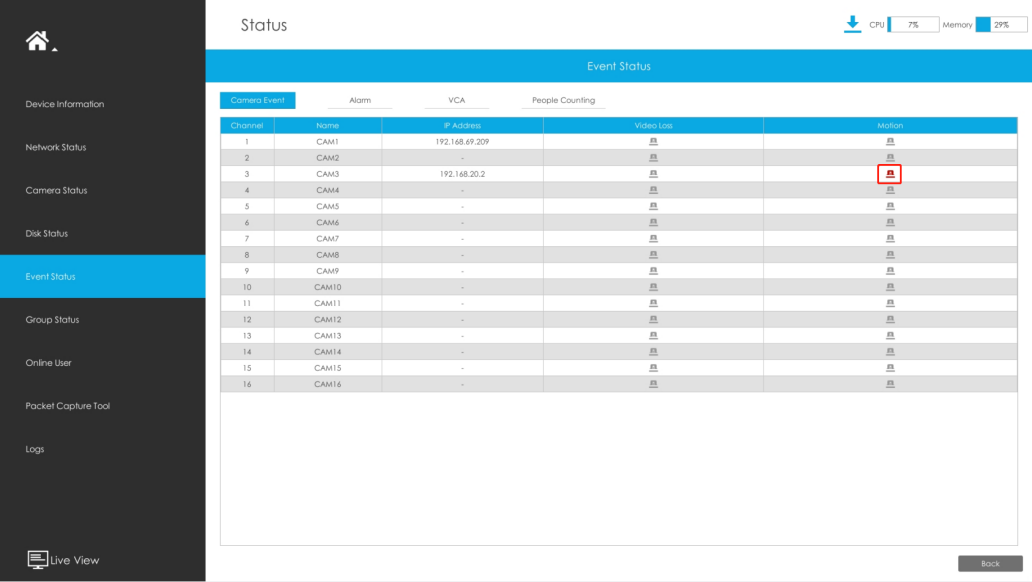
Go to ‘Status’ -> ‘Event Status’ -> ‘Camera Event’ / ‘Alarm’/ ‘Smart Event’ interface, you can check Camera Event here, including Motion Detection, Smart Event and Alarm Input.
 will turn into
  when the corresponding alarm is triggered.
2.3.2Check on web:
①Check on Live View interface
If there is a “  ” icon displayed in live view, it indicates motion detection alarm.
②Check on Status interface
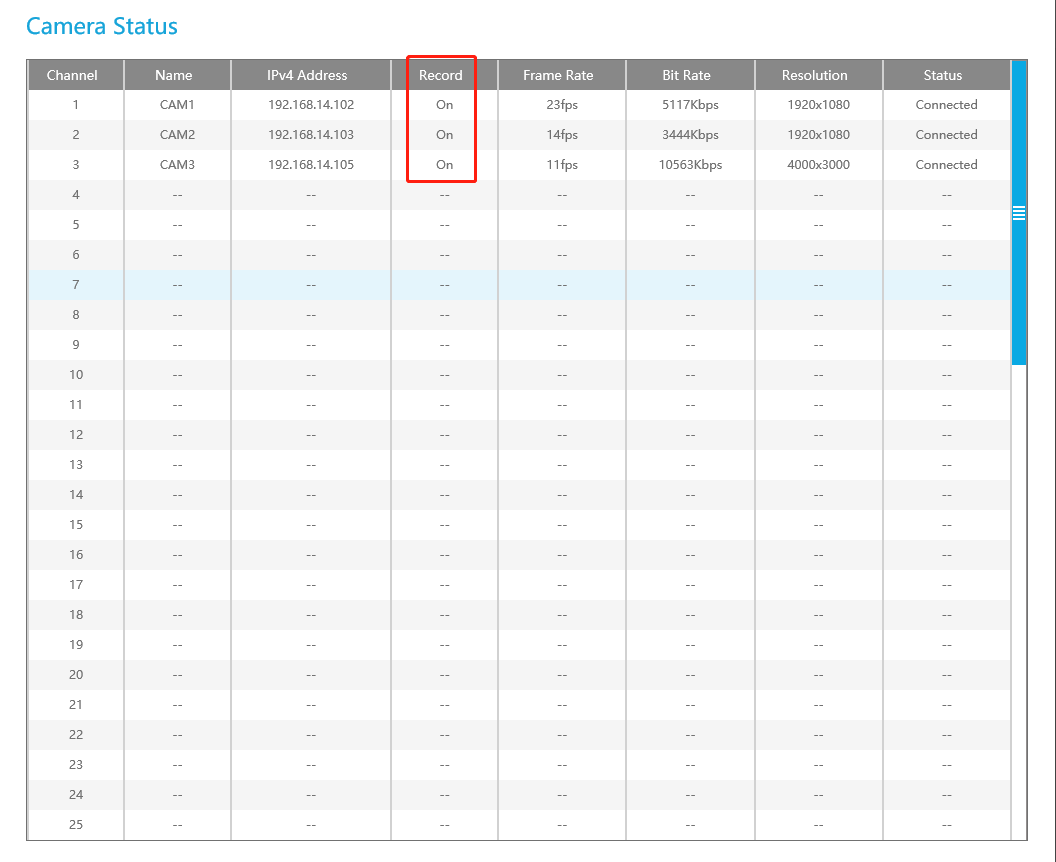
Go to ‘Status’ -> ‘Camera Status’ interface, if the current channel is recording, it will show “On” on record bar.
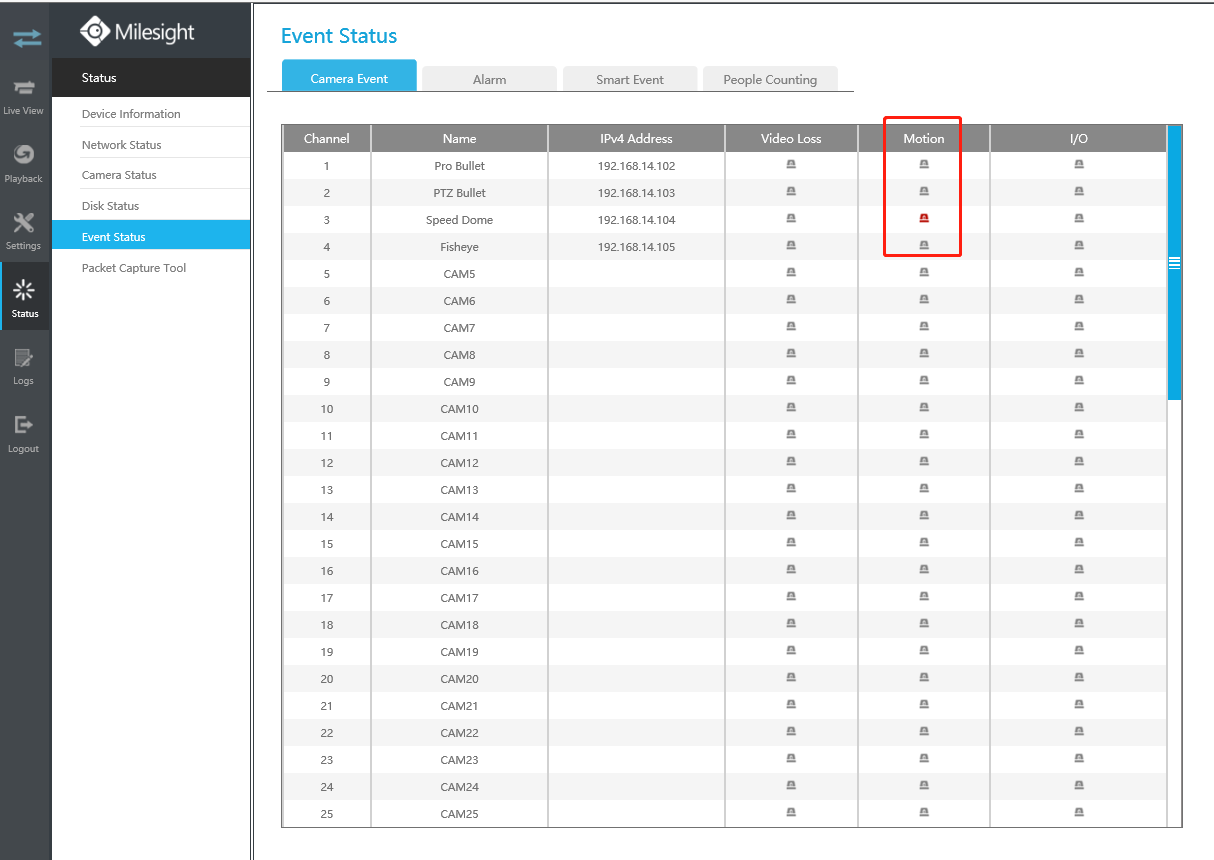
Go to ‘Status’ -> ‘Event Status’ -> ‘Camera Event’ / ‘Alarm’/ ‘Smart Event’ interface, you can check Camera Event here, including Motion Detection, Smart Event and Alarm Input.
 will turn into
  when the corresponding alarm is triggered.
2.3.3Check recording files on playback interface
Select ‘Menu’‘Playback’ interface, there are two ways to check recording files.
(1)Playback on monitor:
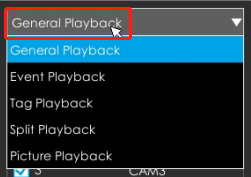
General Playback:
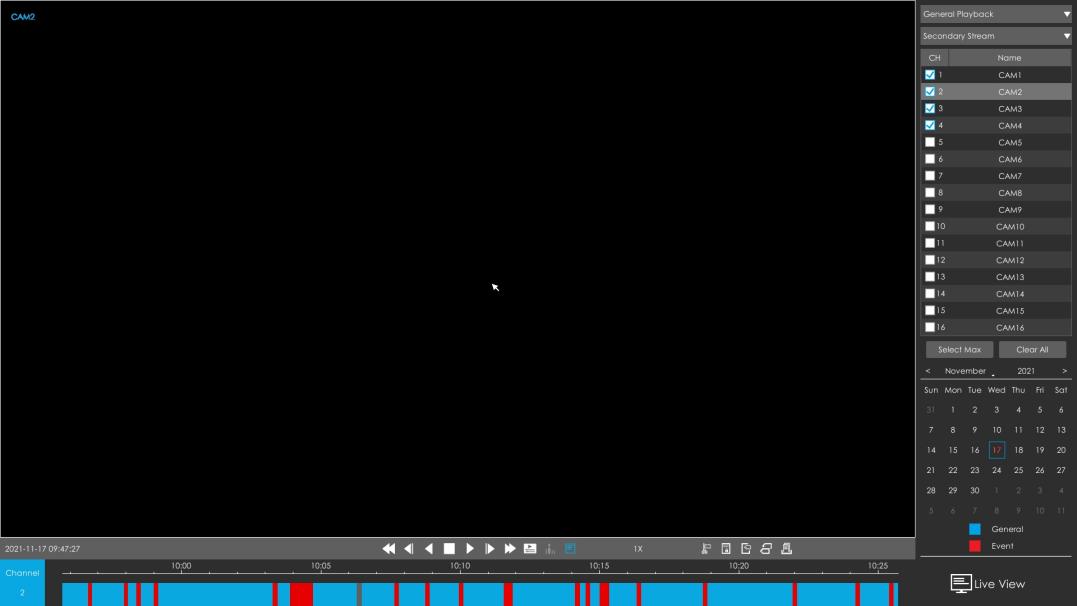
①Select General Playback as playback type.
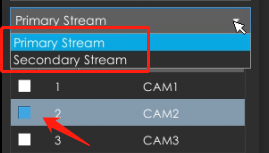
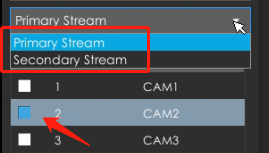
②Select Stream Type and channels you want to do playback.
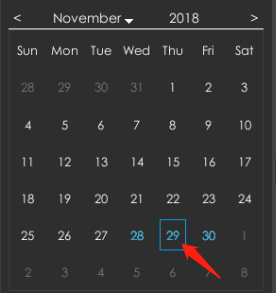
③Select date, the day with blue and red letters means that there are record files.
④Every channel will get their own file bar. It will display continuous recording with blue file bar and motion detection recording with red file bar, as shown below.

Note:
If you want to check event recording, please check [Event Playback] as shown below.
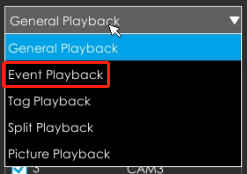
Event Playback:
①Select Event Playback as playback type.
②Select Stream Type and channels you want to do playback.
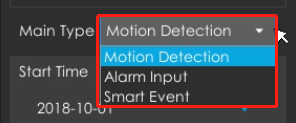
③Select Event Type.
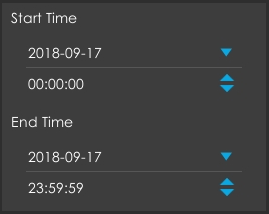
④Select Start Time and End Time, click Search to search the record
⑤Click Search , It would list all videos on the right side of the playback interface.
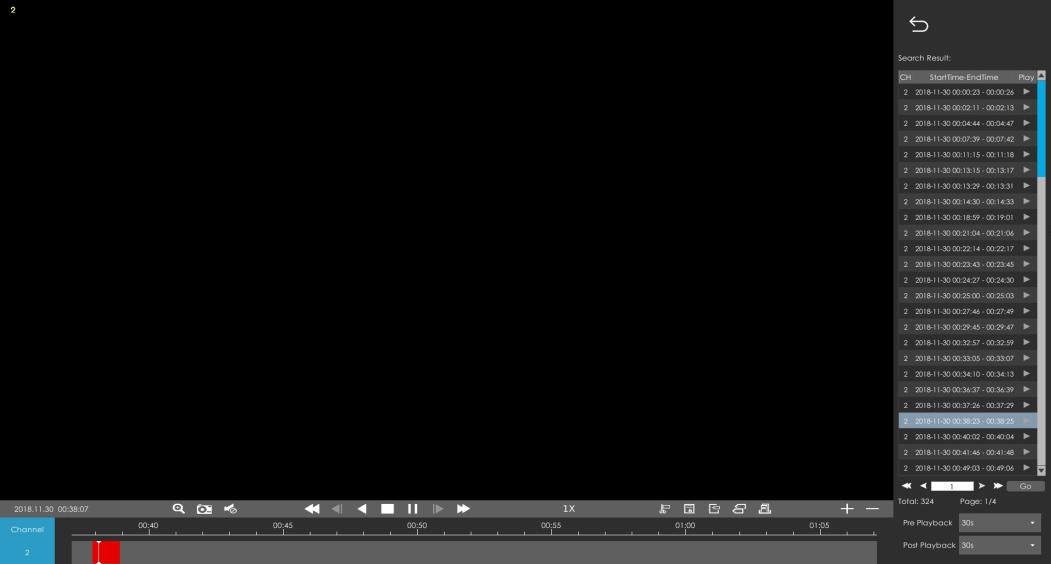
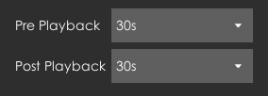
⑥Set pre playback and post playback time, then play the video by clicking  .
.
There will display event recording with red file bar on the event playback interface as shown below.

(2)Playback on web:
①Select Playback Type and Stream Type.
②Check the channel you want to playback.
③Select date, only the day with a red mark means that there are recorded files.
Click  to play.
③The tool bar can display continuous and multi-event record. It shows that in this record period what kind of event has happened. The symbolic meaning of each color is shown below:
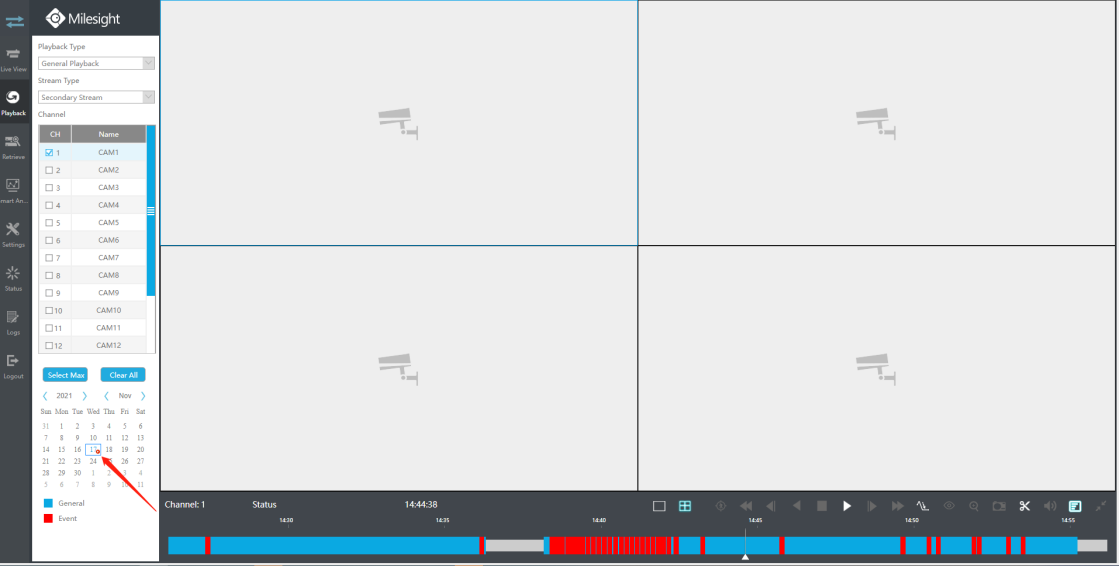
Blue ---Continuous
Red --- Event, including Motion Detection, VCA and Smart Analysis.

-END-