
Version | 1.0 | Update | 2021.12.29 |
1. Introduction
1.1 Milesight Smart Remote Management Solution
By deploying it in practical CCTV projects, Milesight CCTV Router UR32S can achieve a stable and secure connection between on-site surveillance devices and remote side professional installers or technicians. In this way, Milesight cameras and NVRs can be managed easily and remotely in a more secure and efficient way.
As it’s tailored for optimizing work efficiency, the key of Milesight Smart Remote Management Solution is simplicity. With its powerful product combination and simplified workflow, the solution enables speedy on-site problem solving remotely which greatly saves your cost and time while also enhances the quality of support service.
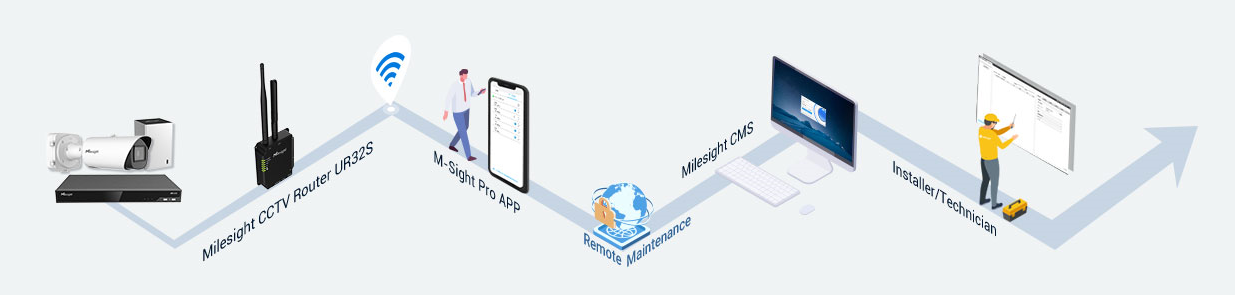
• For End Users: One-click Search & Easy Operation
• Automatically search for devices connected with router on one-click
• Configure device permissions for higher security and convenience
• For Installers or Technicians: Reduce On-site Visits & Solve Site Issues Efficiently
• Remote access to the router and bulk configuration of devices connected to router
• Reduce on-site visits, greatly saving time and cost
1.2 Related Products
Milesight CCTV Router UR32S
M-Sight Pro APP V3.1.0.6 or above---Download link: Google Store/Apple Store
Milesight CMS V2.4.0.13 or above ---Download link: https://www.milesight.com/support/resources/software-and-platform#cms
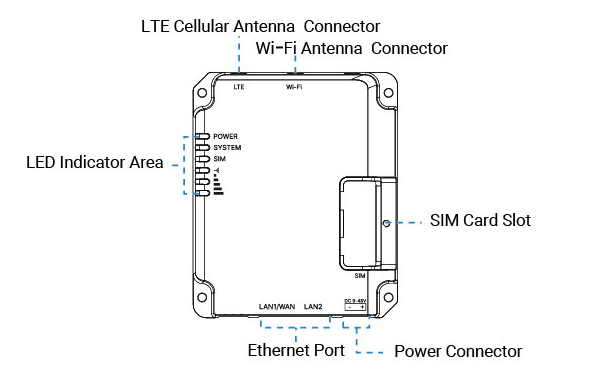
2.1 Hardware Introduction
You can check the router's interface in the picture below:
2.2 Router Installation
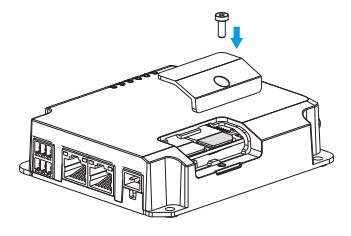
Step 1: Insert the SIM card into the device according to the arrow icon on the device.
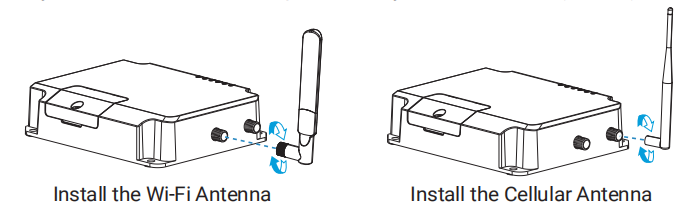
Step 2: Rotate antennas into the antenna connectors. Antennas should be installed vertically and the device should be placed always on a site with a good signal.
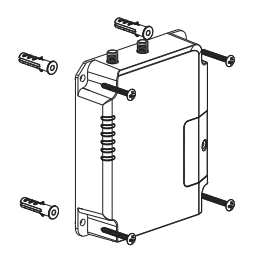
Note: If needed, you can install the router on the wall. Drill four holes on the wall by using your drill and insert four wall plugs into the holes respectively, and then use 4 pcs of M3 × 6 flat head Phillips screws to fix the router on the wall.
2.3 Router Deployment
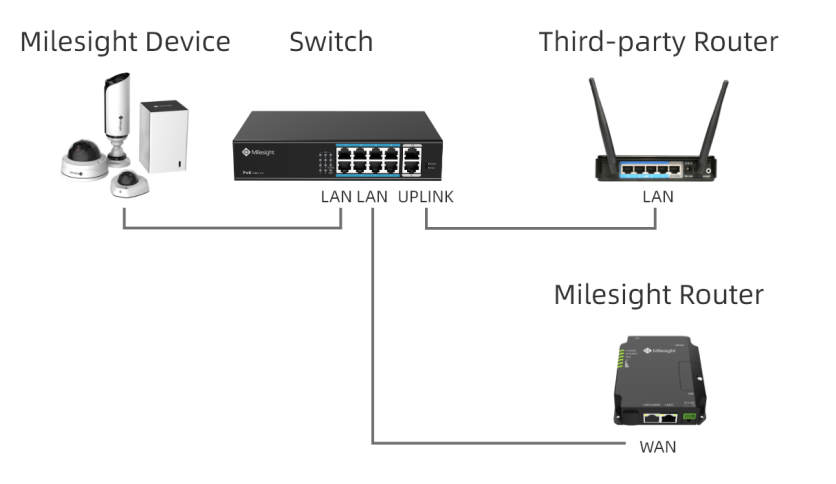
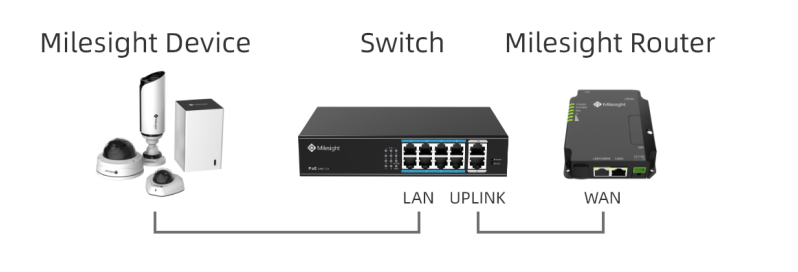
Connect the WAN port of the router to the same LAN as the devices (including cameras and NVRs) to deploy the router to your CCTV project.
• Here are two general deployment methods for your reference.
① If your project has been connected to the Internet, you can directly connect the router to the LAN port of the switch in the project, as shown below.
② If your project is not connected to the Internet, you can connect the router to the UPLINK port of the switch in the project, and insert a SIM card into the router to provide network services to the project, as shown below.
Note: If some of the devices in your project have been connected to the Internet, and the others are not connected to the Internet, it is recommended to follow method 2 to reconnect the devices that need to be configured with Milesight Router.
2.4 Web GUI Access
UR32S provides web-based configuration interface for management.
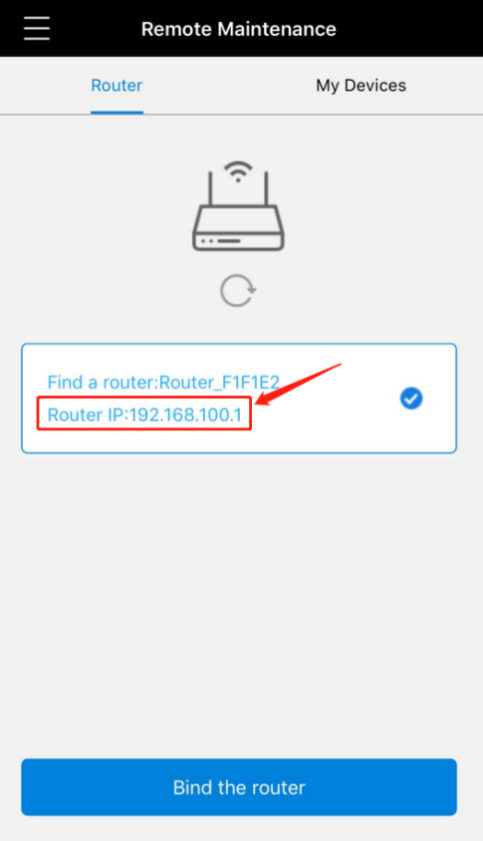
Step 1: Check the LAN IP address of the router on M-Sight Pro APP.
Step 2: Enable Wireless Network Connection on your computer and search for access point “Router_******”(last 6 bits of MAC address) to connect it. Or you can connect your computer
directly to the router's LAN port.
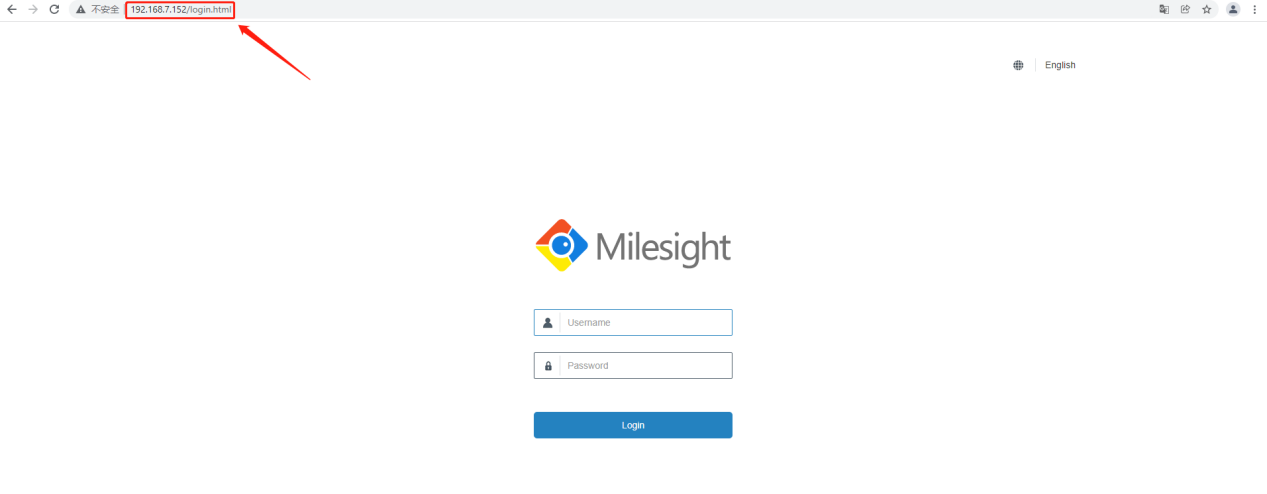
Step 3: After it is connected, type the LAN IP of the router to your Internet browser to log in the web GUI of routers.
If this is the first time you configure the router, please use the default settings below:
Username: admin
Password: password
Browser: Chrome (recommended)
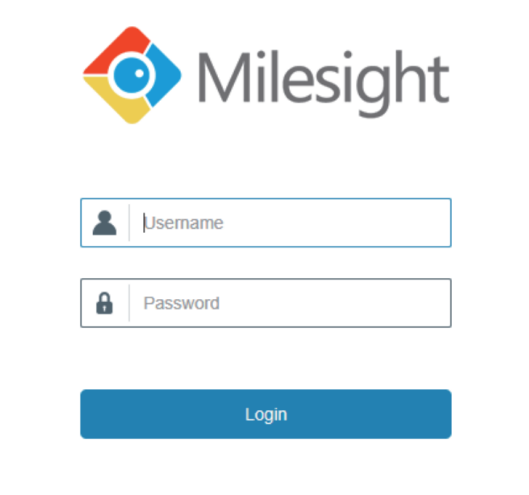
Note: After you login in, a window will pop up asking you to change the default password for better security.
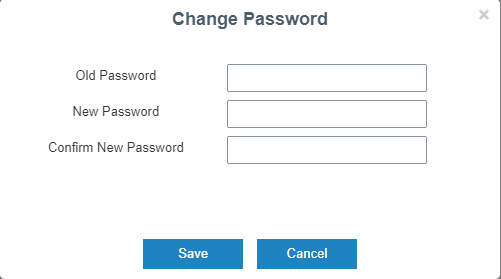
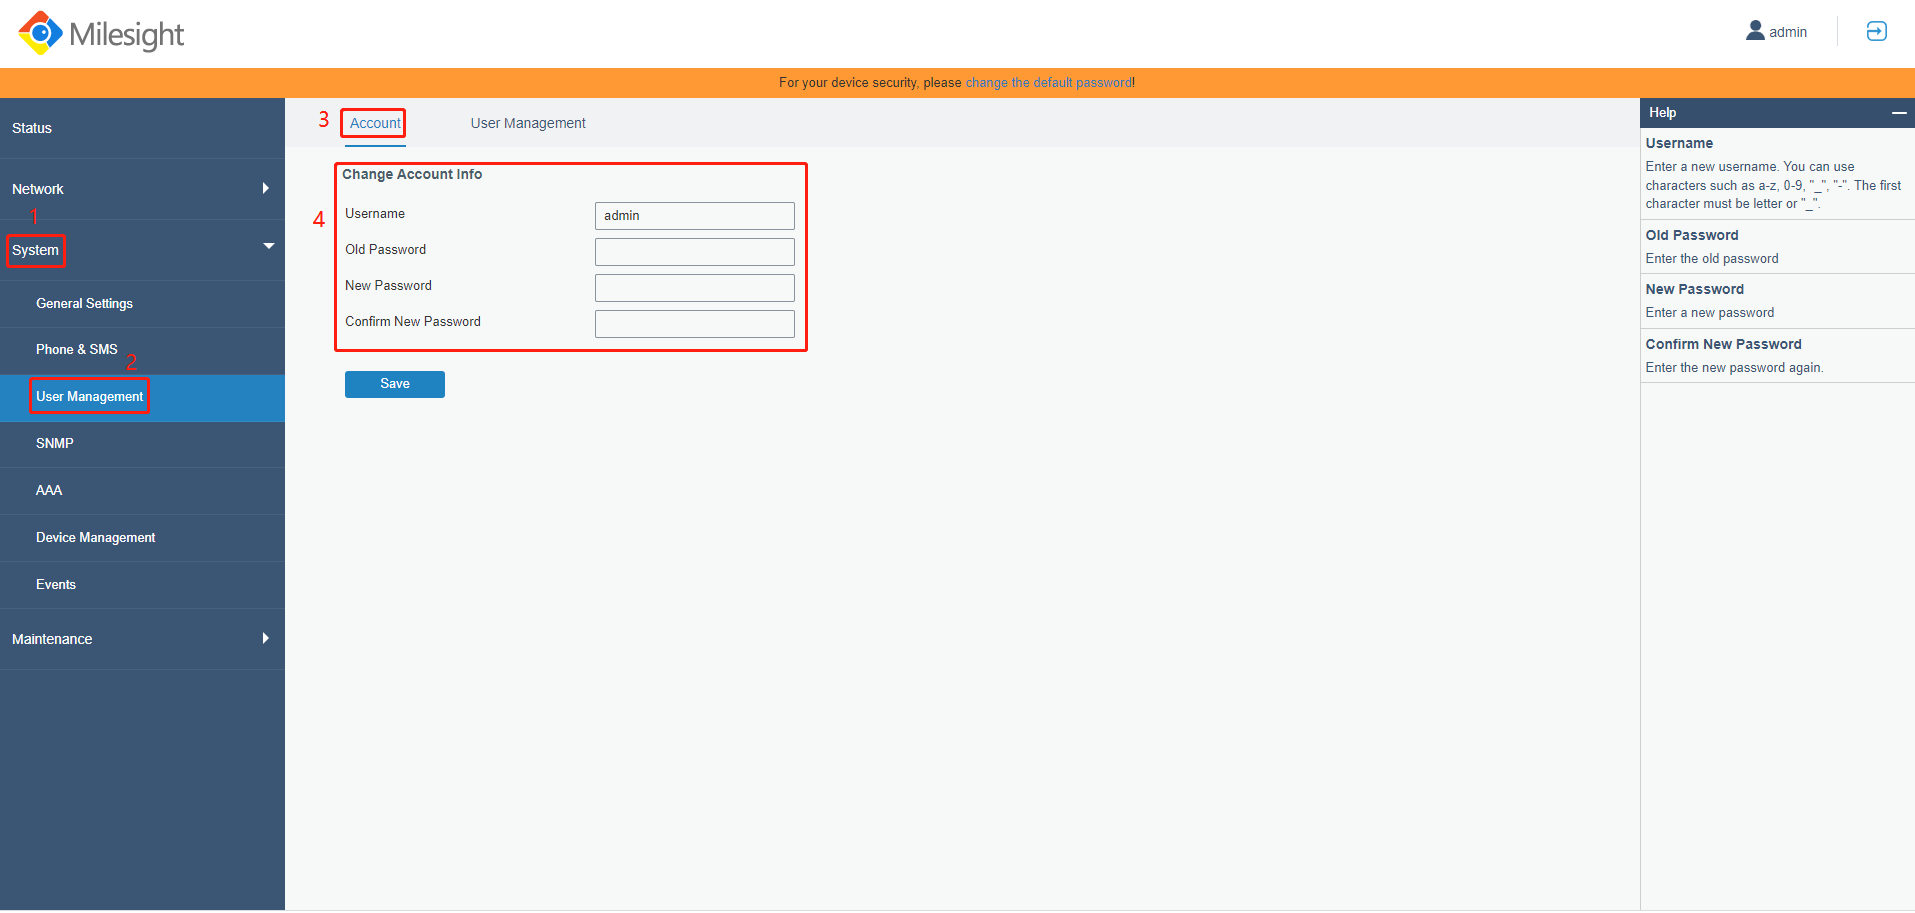
You can also go to System - User Management - Account interface to change the password.
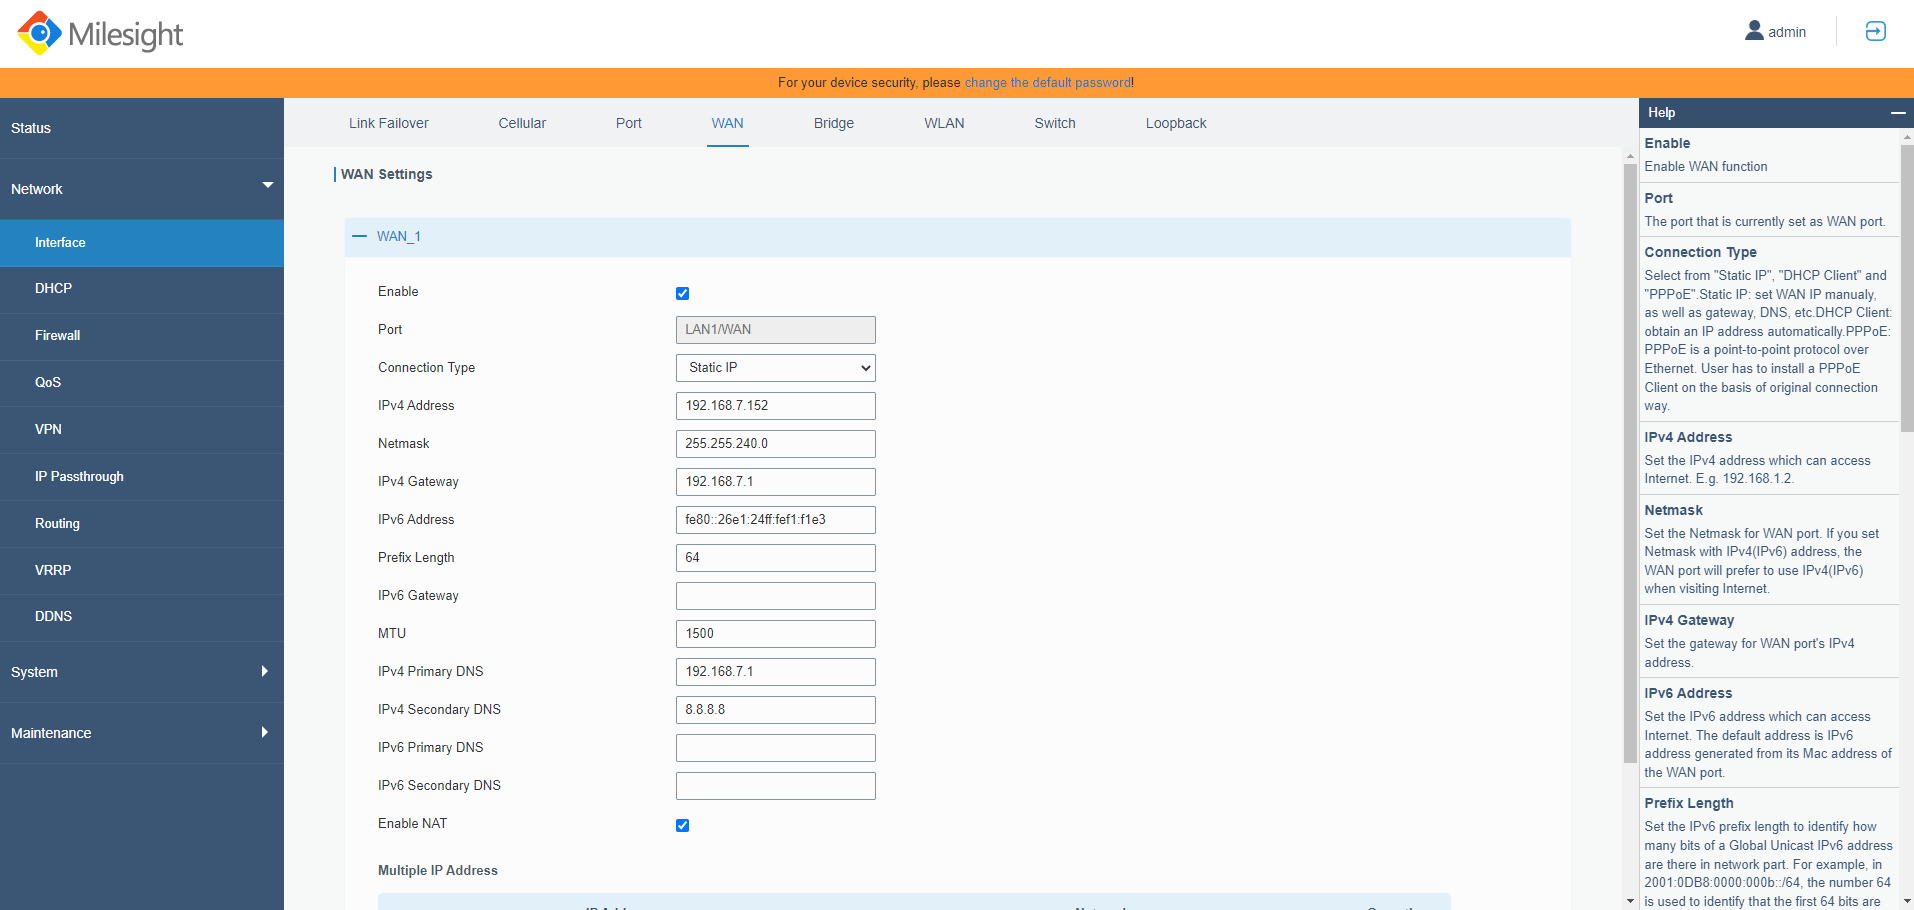
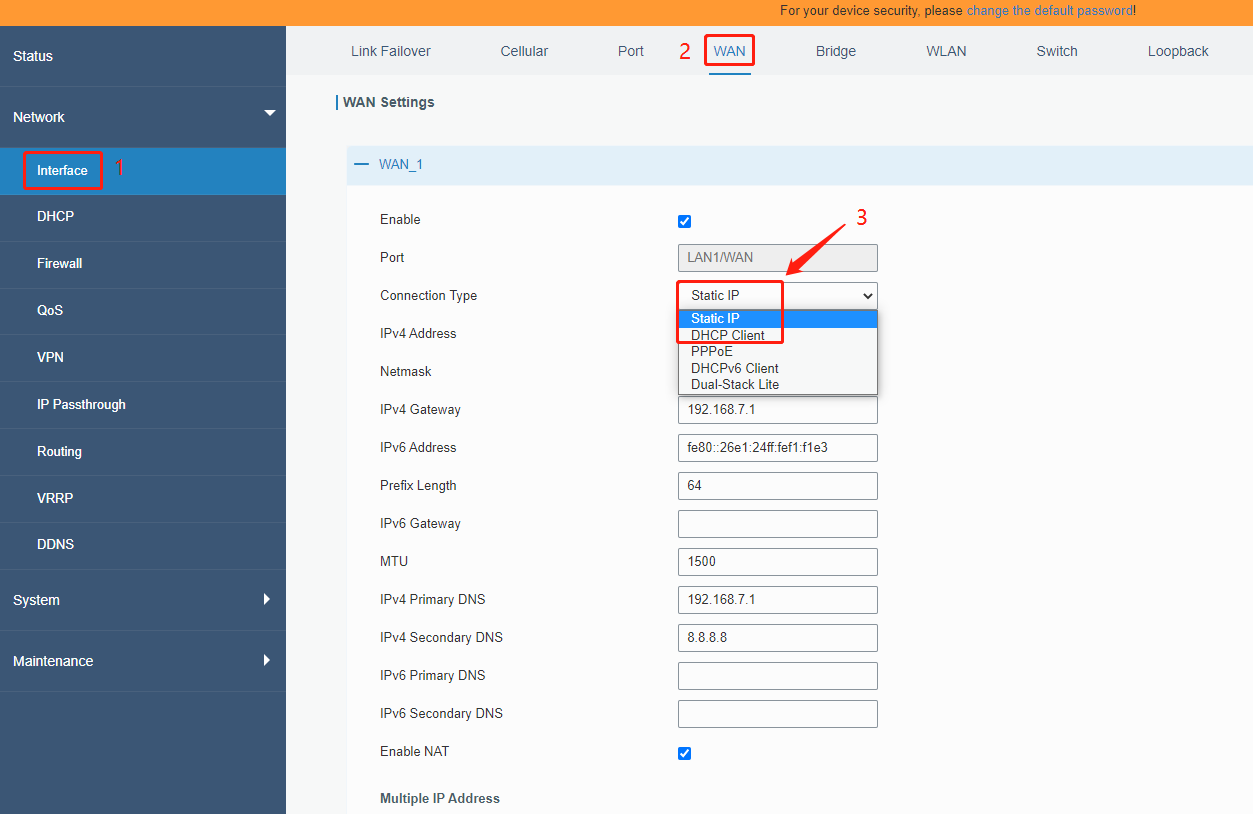
Step 4: go to Network - Interface - WAN interface, assign a static IP address for the router as shown below.
Then go to Network - Firewall - Security interface to enable remote access service of HTTP port.
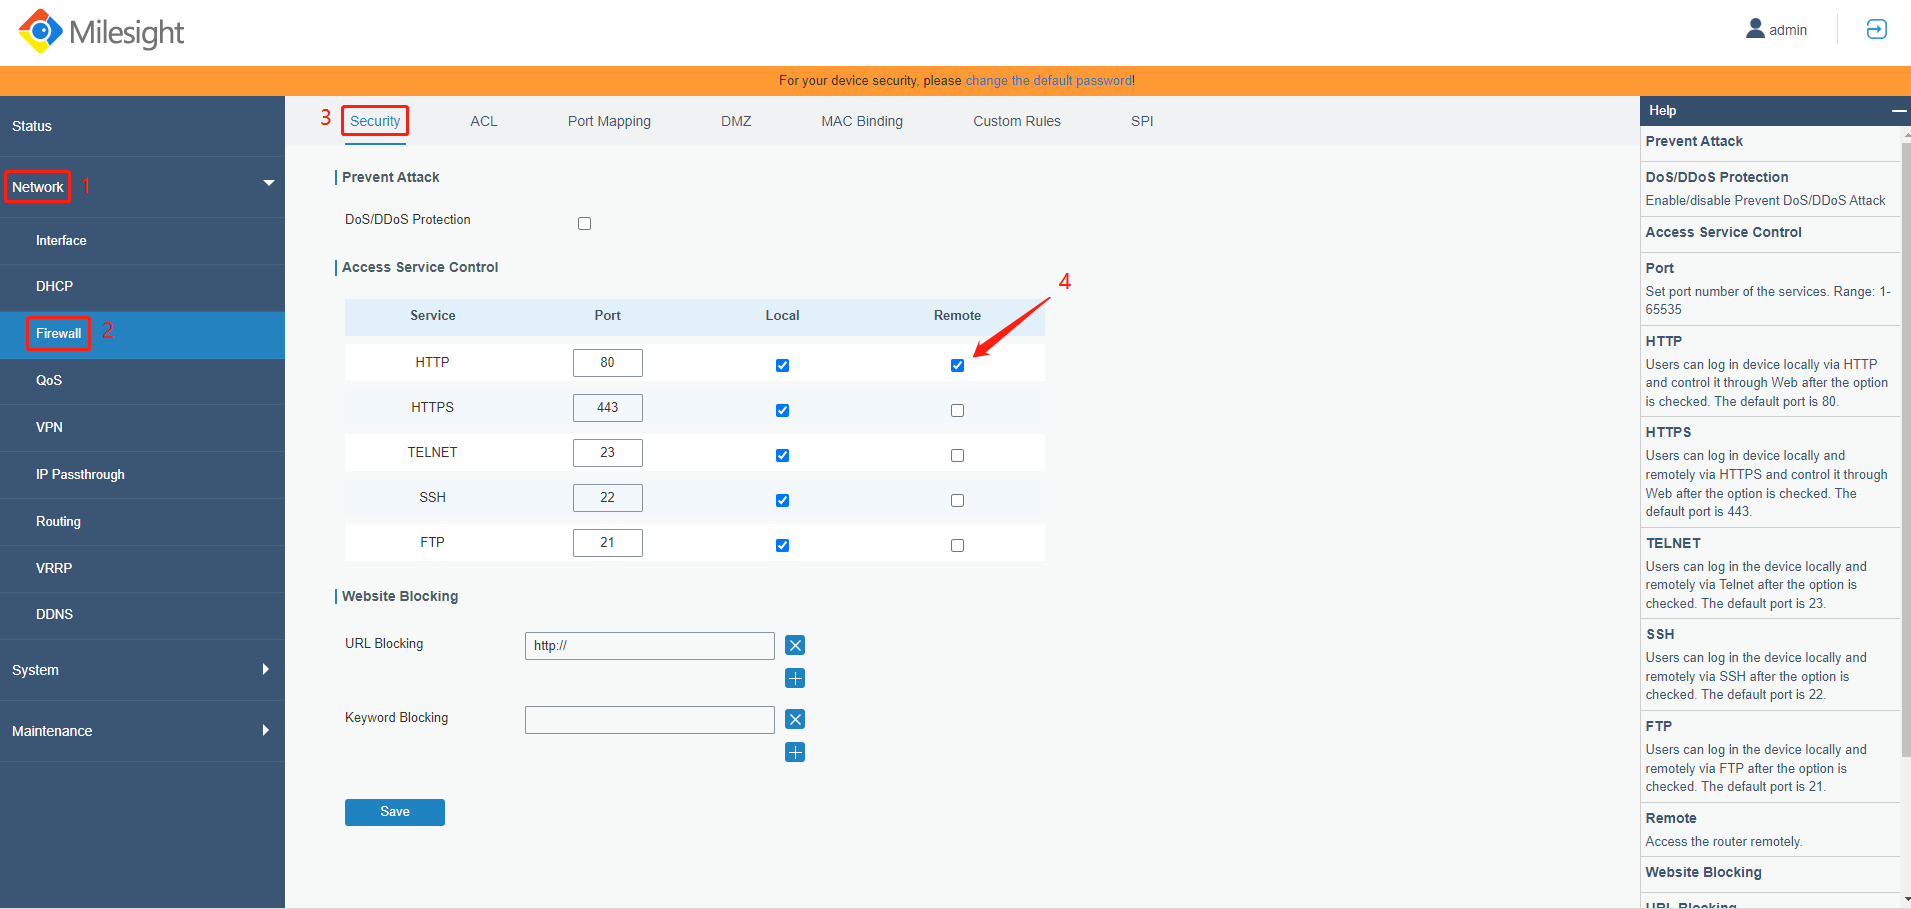
Then Configure the IP address of computer manually or automatically.
• Go to “Control Panel” → “Network and Sharing Center”, then click “Ethernet” (It may have different names).
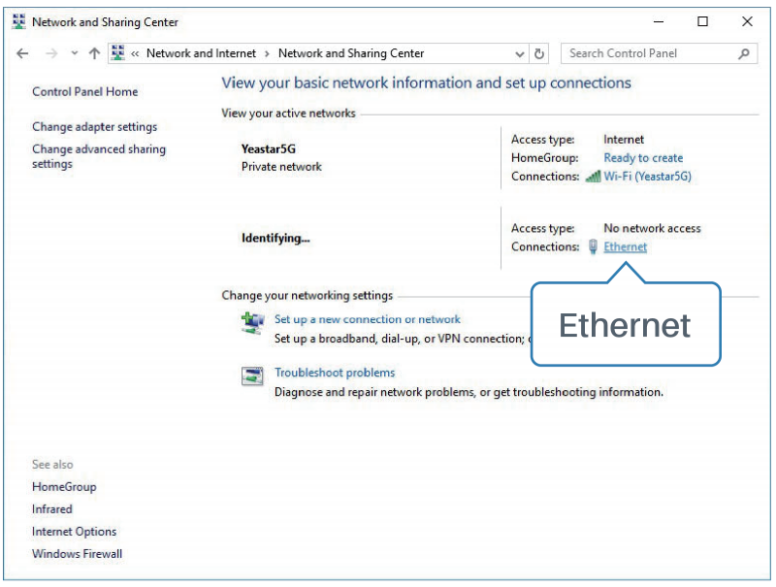
• Go to “Properties” → “Internet Protocol Version4 (TCP/IPv4) Properties”, select “Obtain IP address automatically” or “Use the following IP address” to assign a static IP manually within the same subnet of router.
|
|
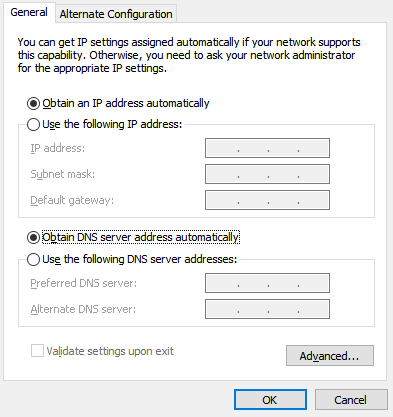
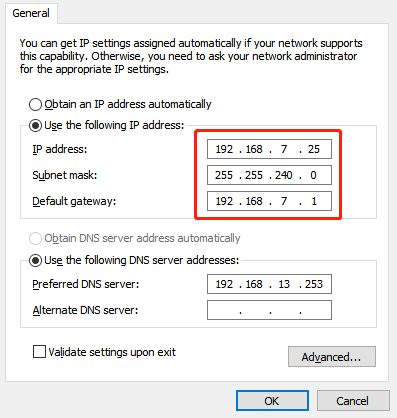
• You can access the router’s web GUI via this static IP address directly.
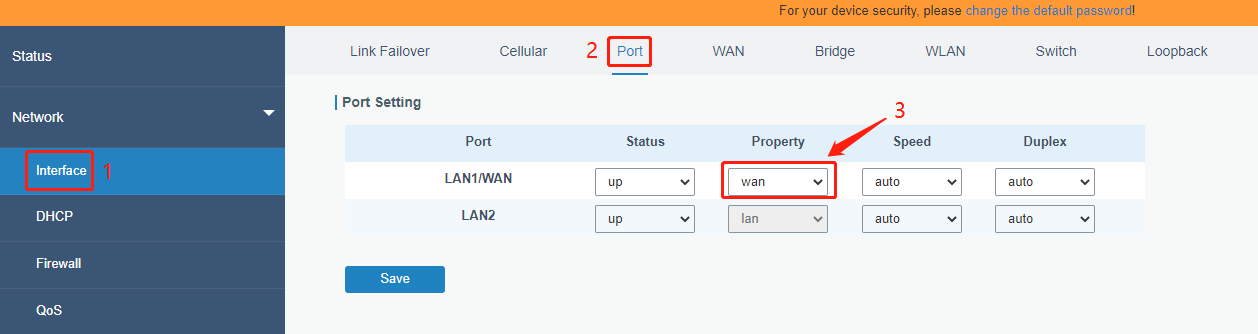
Note: If you need to remotely manage devices through this router, please make sure
that the property of LAN1/WAN port is set to ”wan” and the connection type of WAN
port is set to ”Static IP” or ”DHCP Client”.
2. Configure device permissions on APP
Step 1: Enable Wireless Network Connection on your mobile phone and search for access point “Router_******”(last 6 bits of MAC address) to connect it.
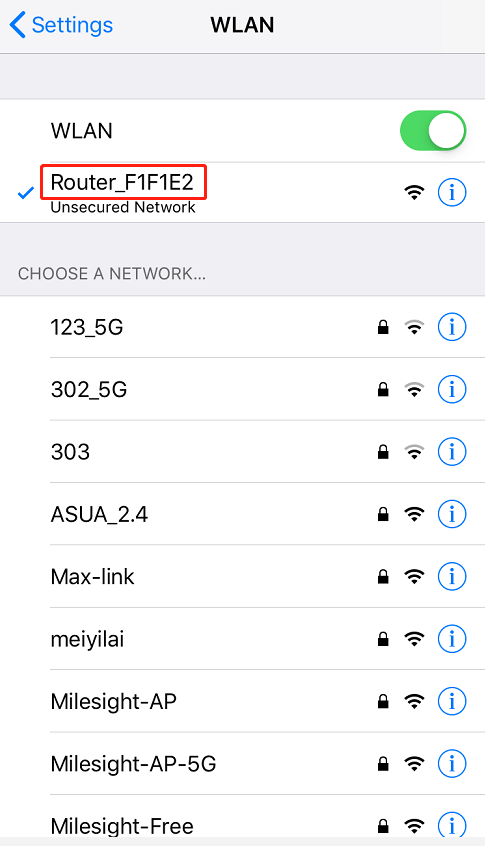
Note: The router’s Wi-Fi will be automatically turned on after you install the Wi-Fi antenna and power on the router.
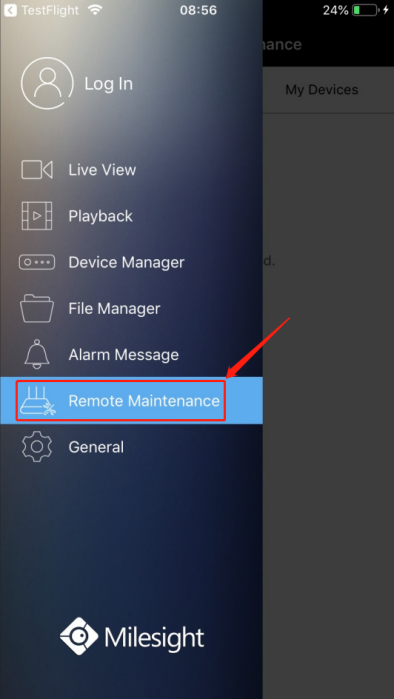
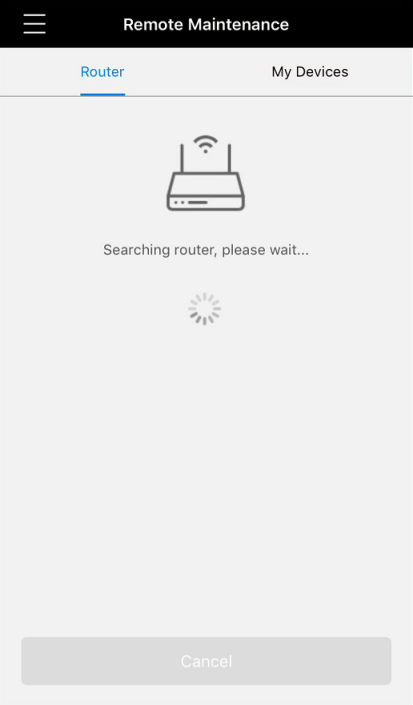
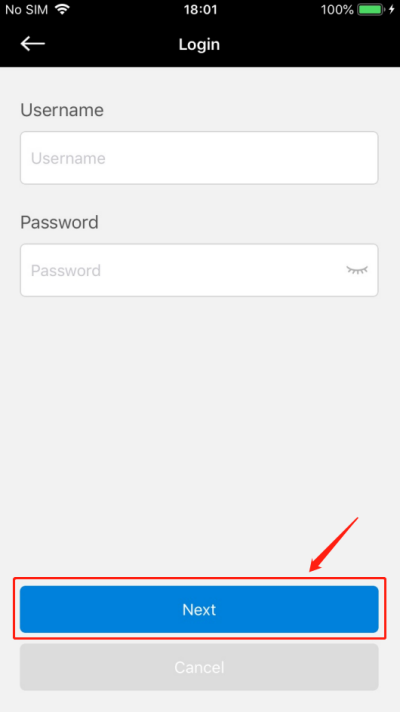
Step 2: Open the M-Sight Pro APP, search for and bind the router as shown below.
Username: admin
Password: password
|
|
|
|
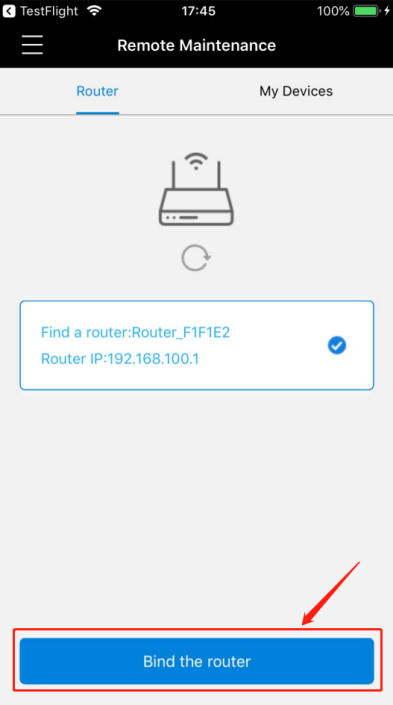
Note: If the router cannot be found, we recommend clicking the help button to solve the problem.
|
|
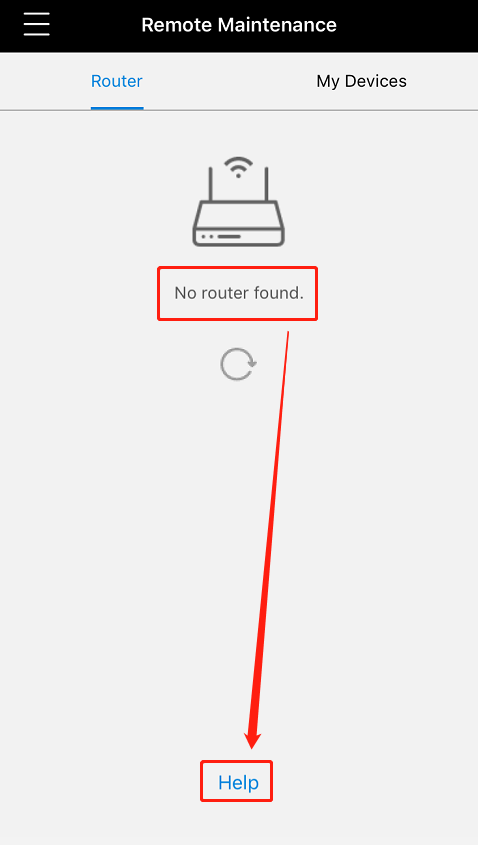
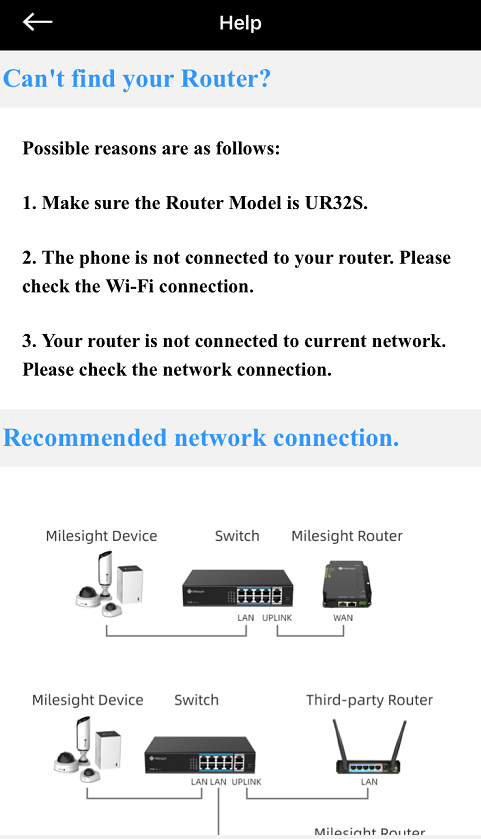
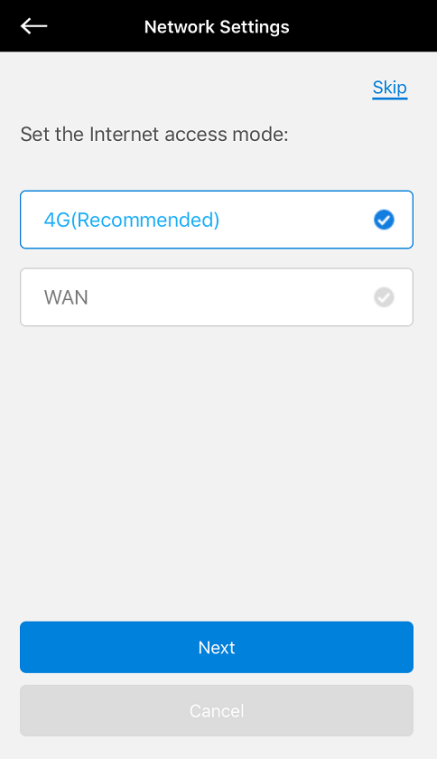
If your project is not connected to the Internet, after logging into the router, you need to select the network access mode to complete the network settings.
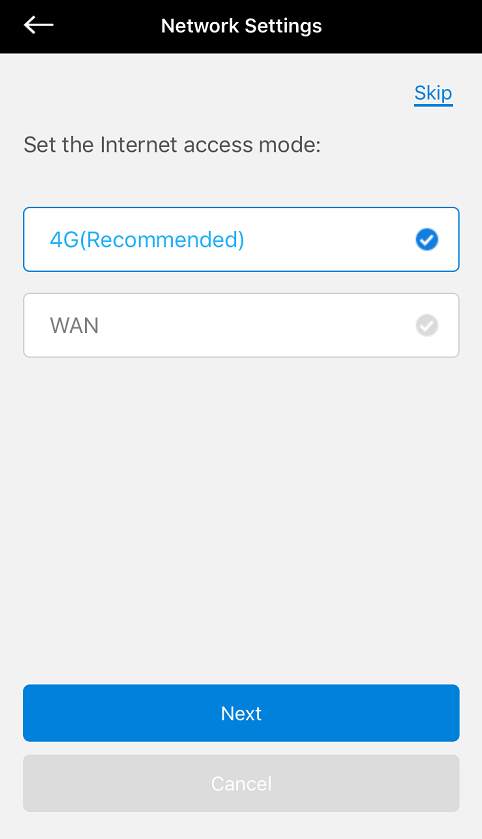
• There are two network access modes are available as shown below.
|
|
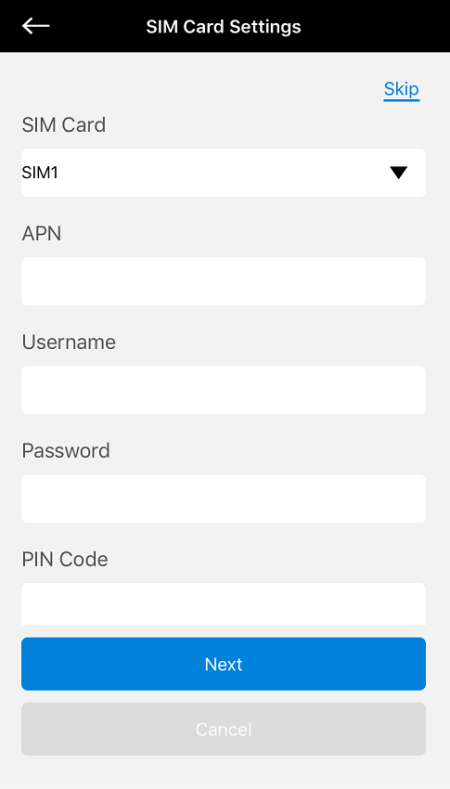
4G WAN
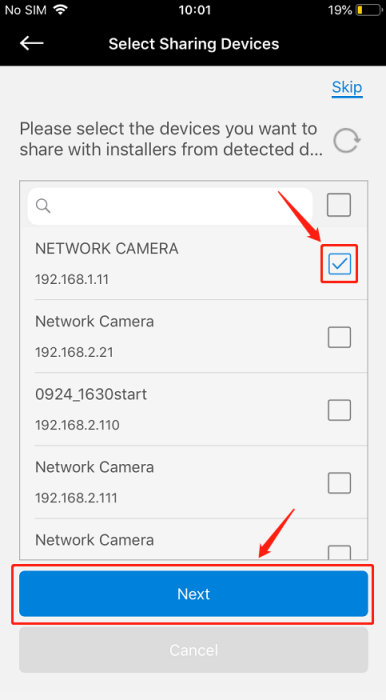
Step 3: Select the devices you want to share with installers or technicians from the list of detected devices.
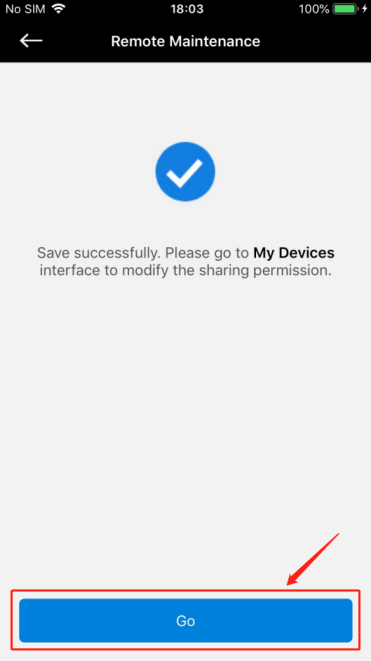
Step 4: Go to My Devices interface to modify sharing permissions and router configuration.
|
|
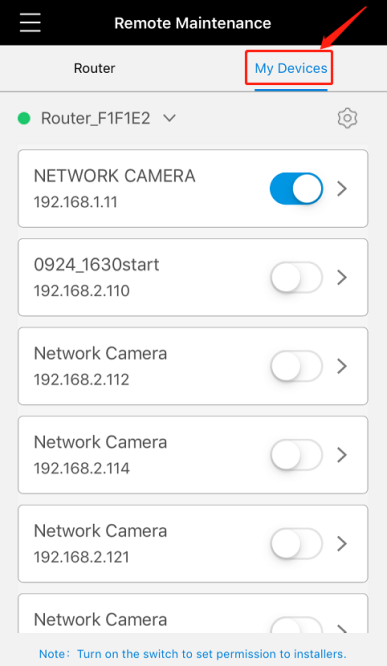
It supports to enable or disable device sharing with one click.
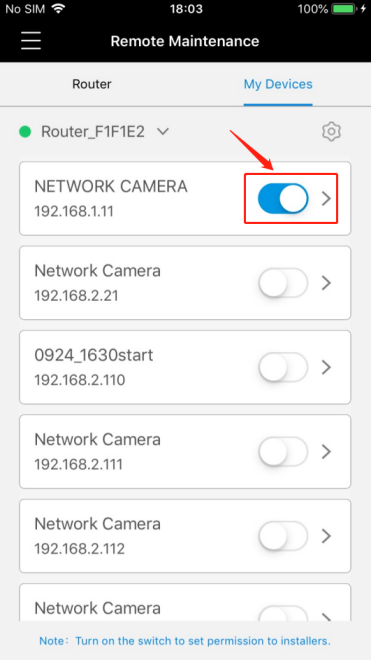
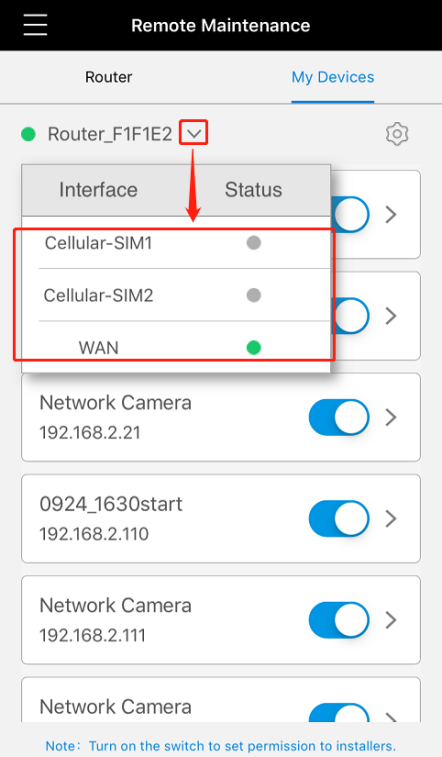
You can also click ‘ |
| ’ button to check the status of the WAN port or the SIM card interface as shown below. |

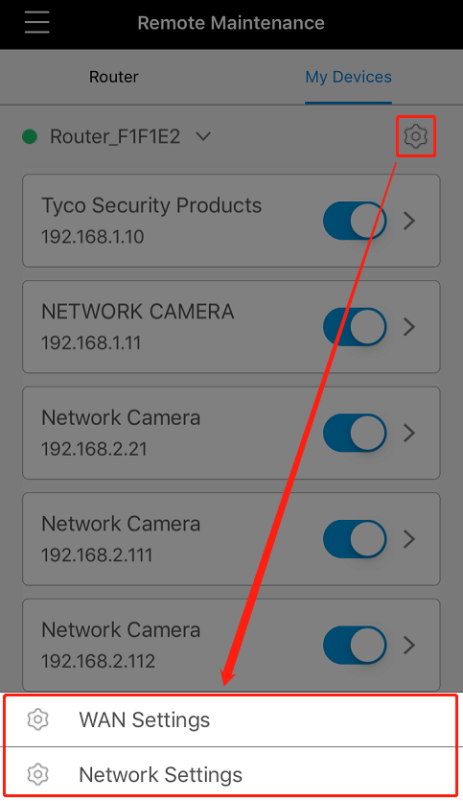
Or you can click ‘ |
| ’ button to modify the network configurations of the router. |

|
|
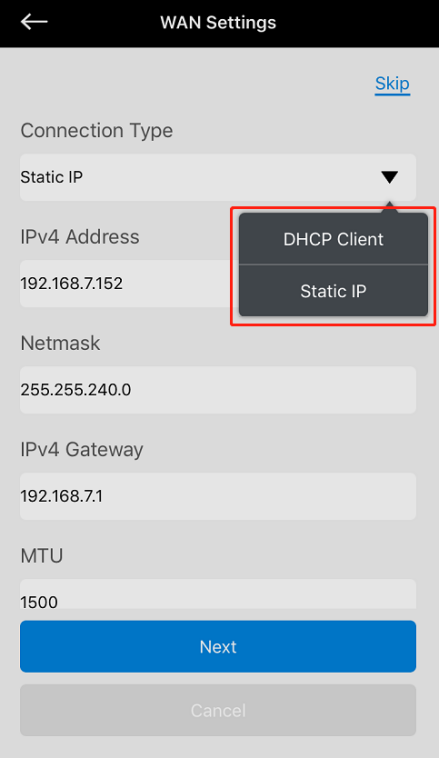
WAN Settings Network Settings
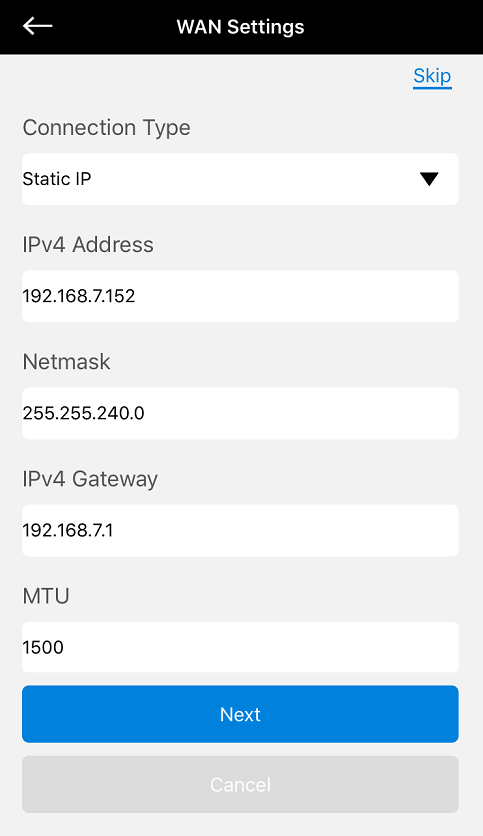
Note: The default connection type of the router's WAN port is DHCP Client. You can manually switch to the Static IP type on the WAN settings interface, and configure the router and the device to share the same network segment to manage these devices remotely from Milesight CMS side.
3. Remote management on Milesight CMS
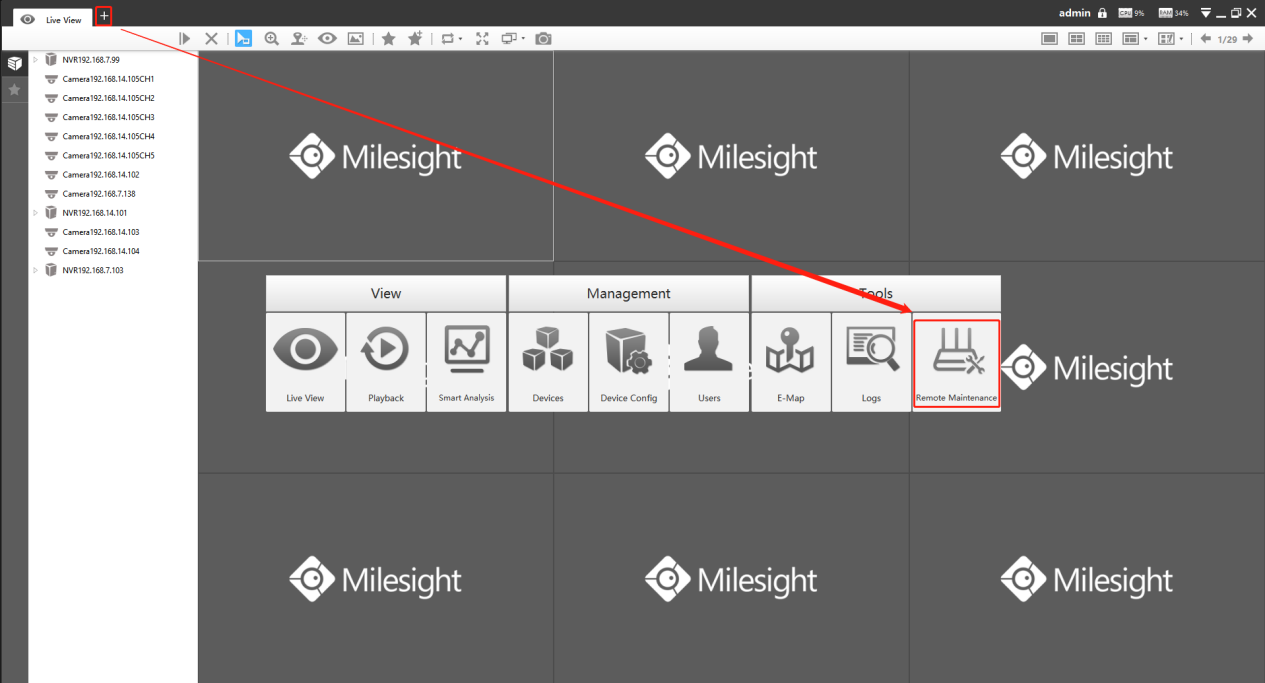
Step 1: Open Milesight CMS, go to Remote Maintenance interface.
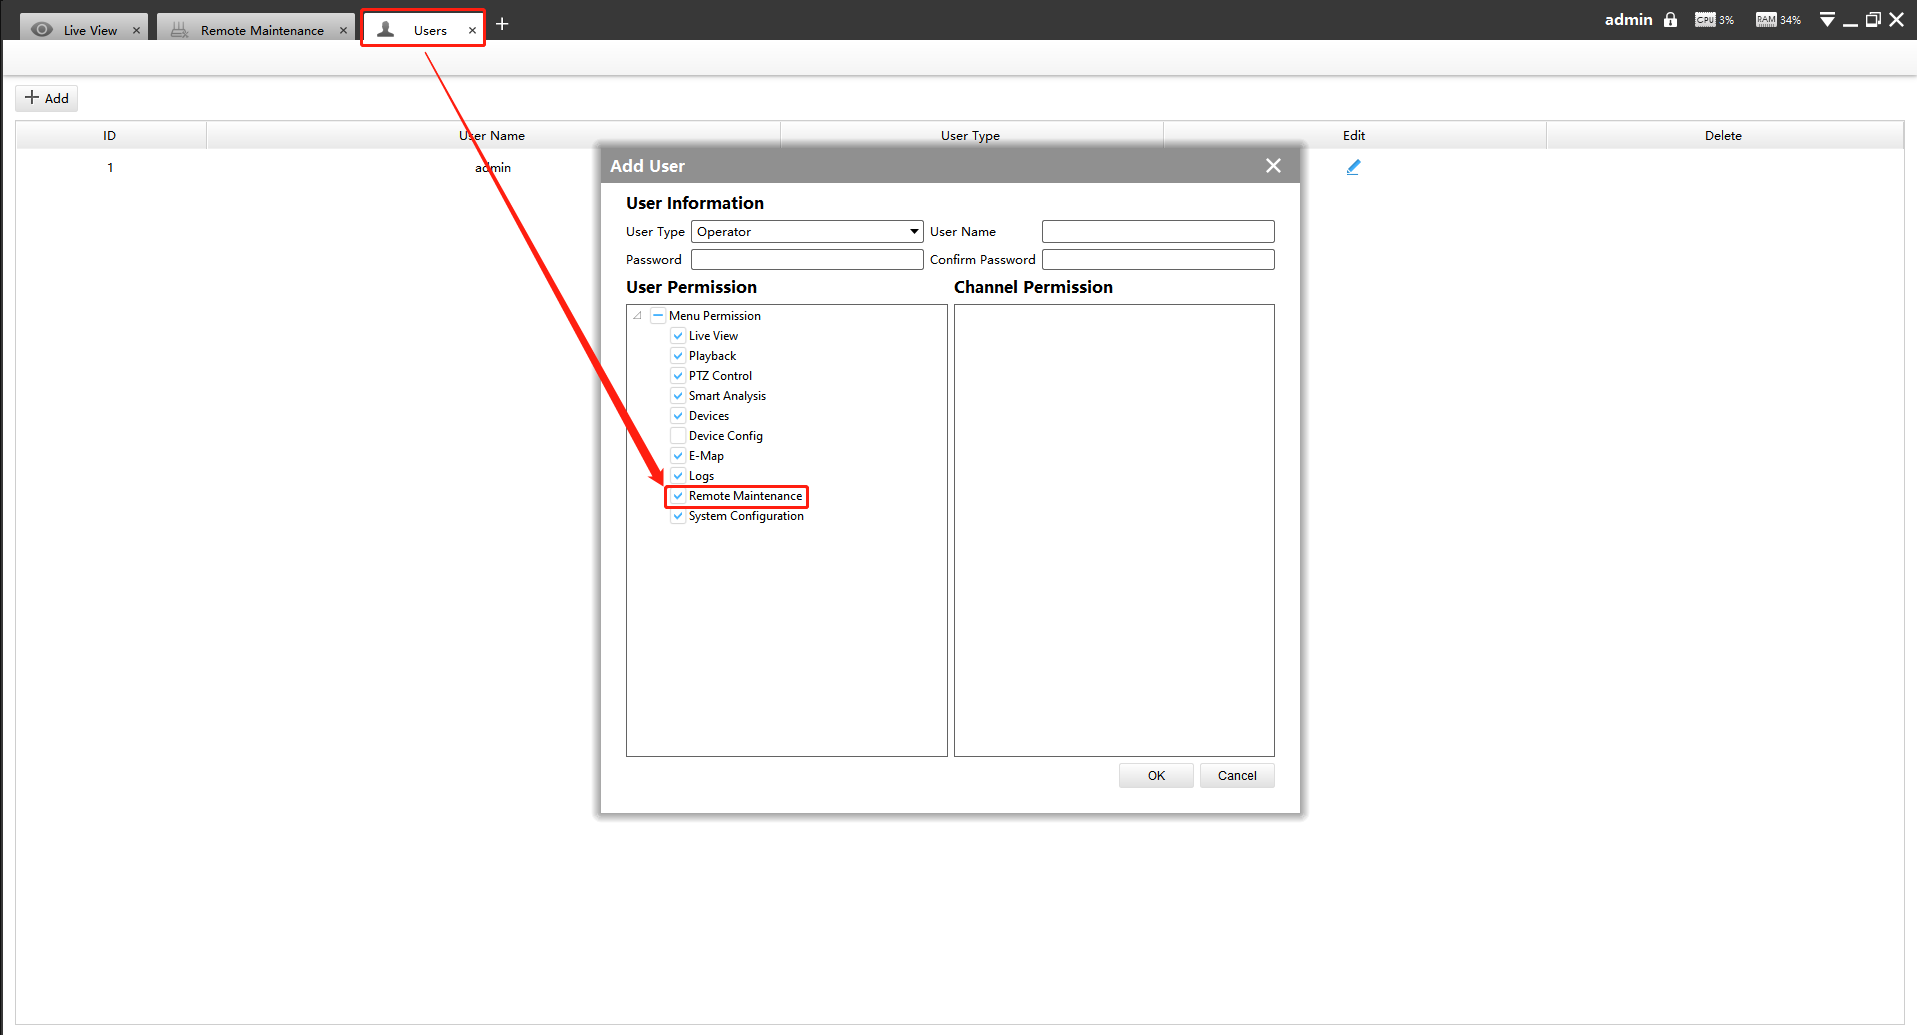
Note: In User interface, you can configure Remote Maintenance permission for the user as shown below.
Step 2: Click “Add Router” button, enter the SN code, Router Name, User Name and Password, and then click “Add” button to add the router.
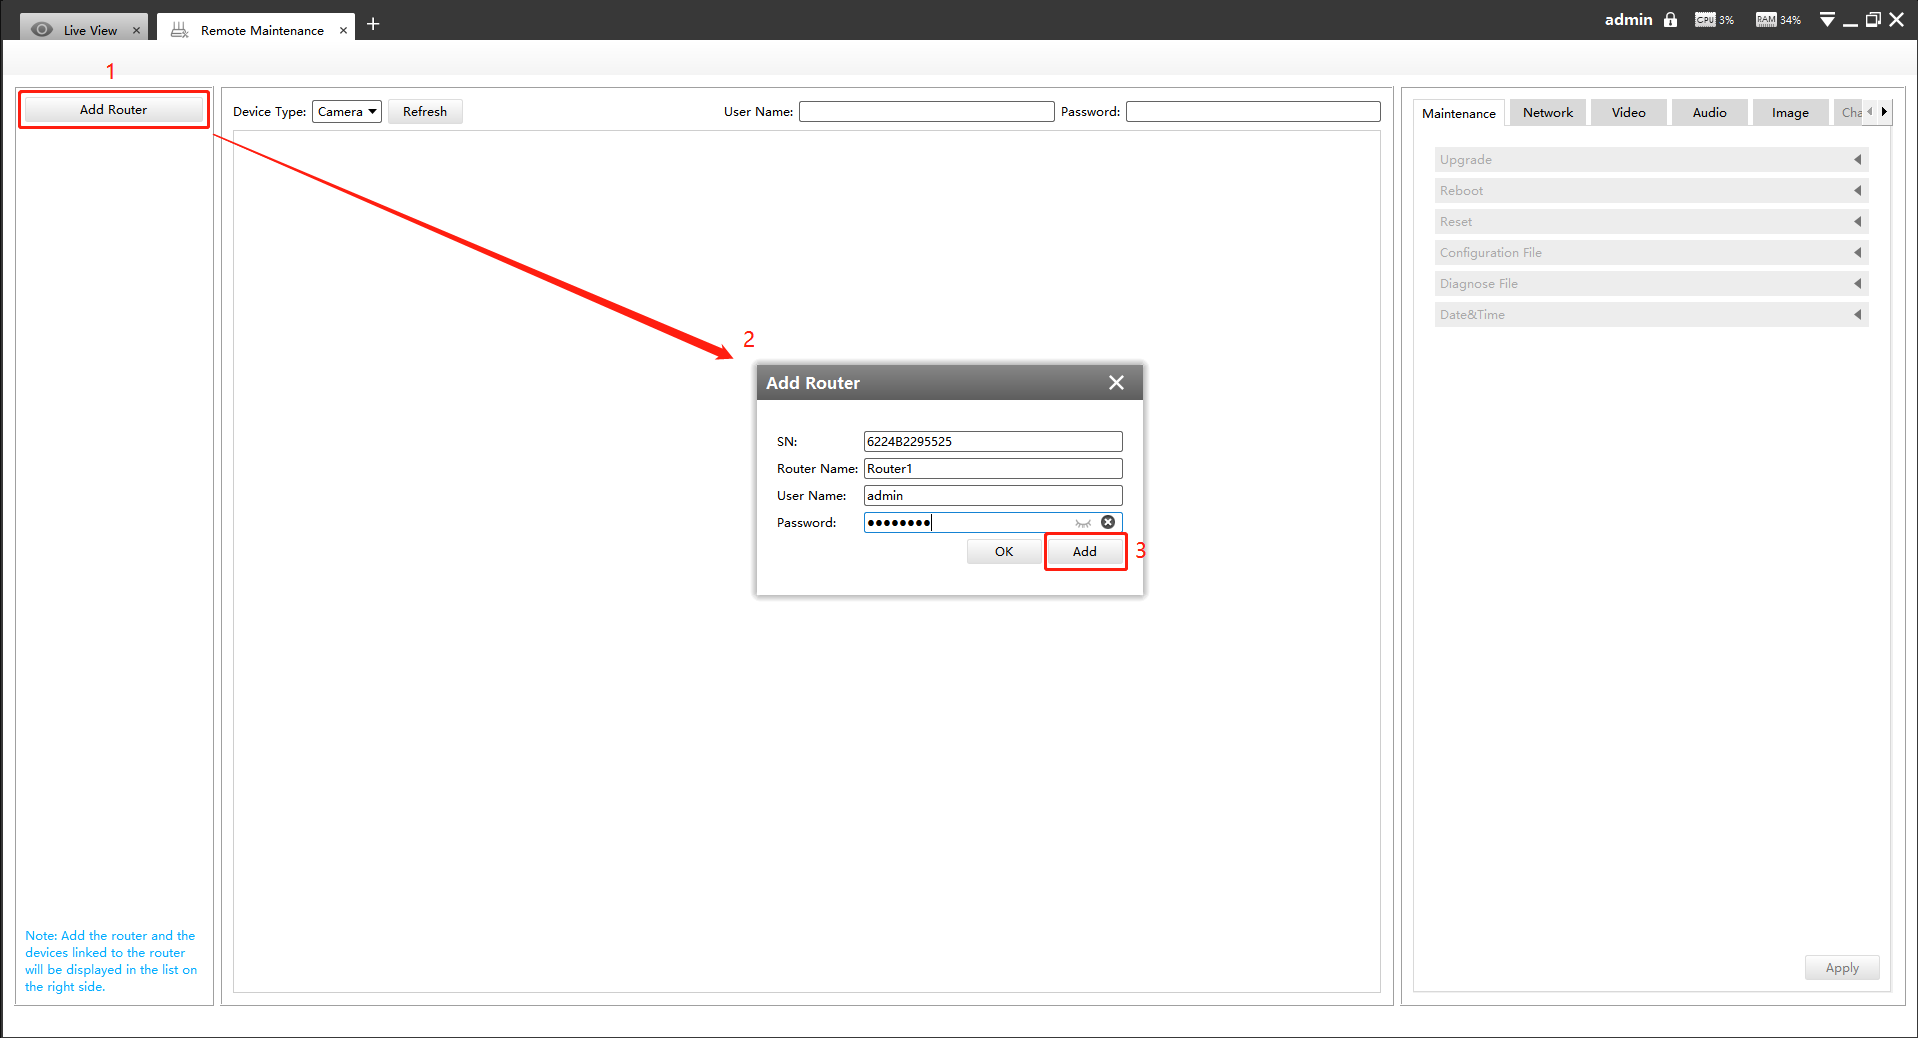
Note: You can check the SN code on the sticker or web GUI of the router.
After the router is successfully added, it will be displayed in the list on the left side, you can click the ‘

’ button to delete it, or you can click the ‘

’ button to configure the router.
|
|
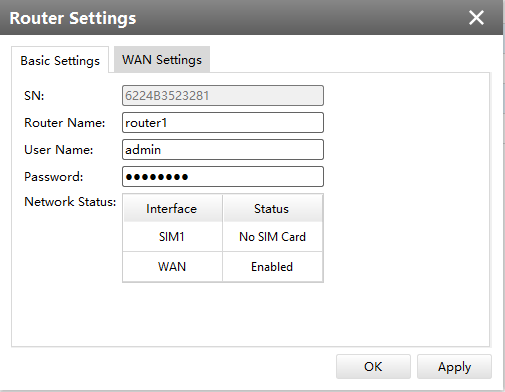
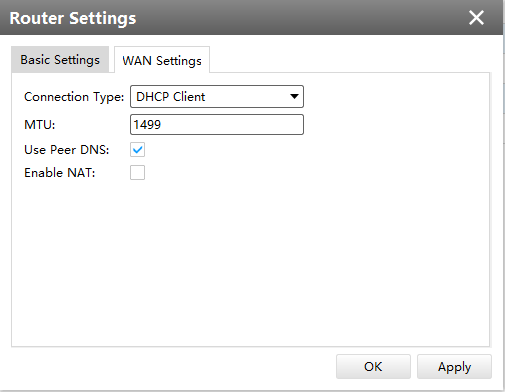
Basic Settings WAN Settings
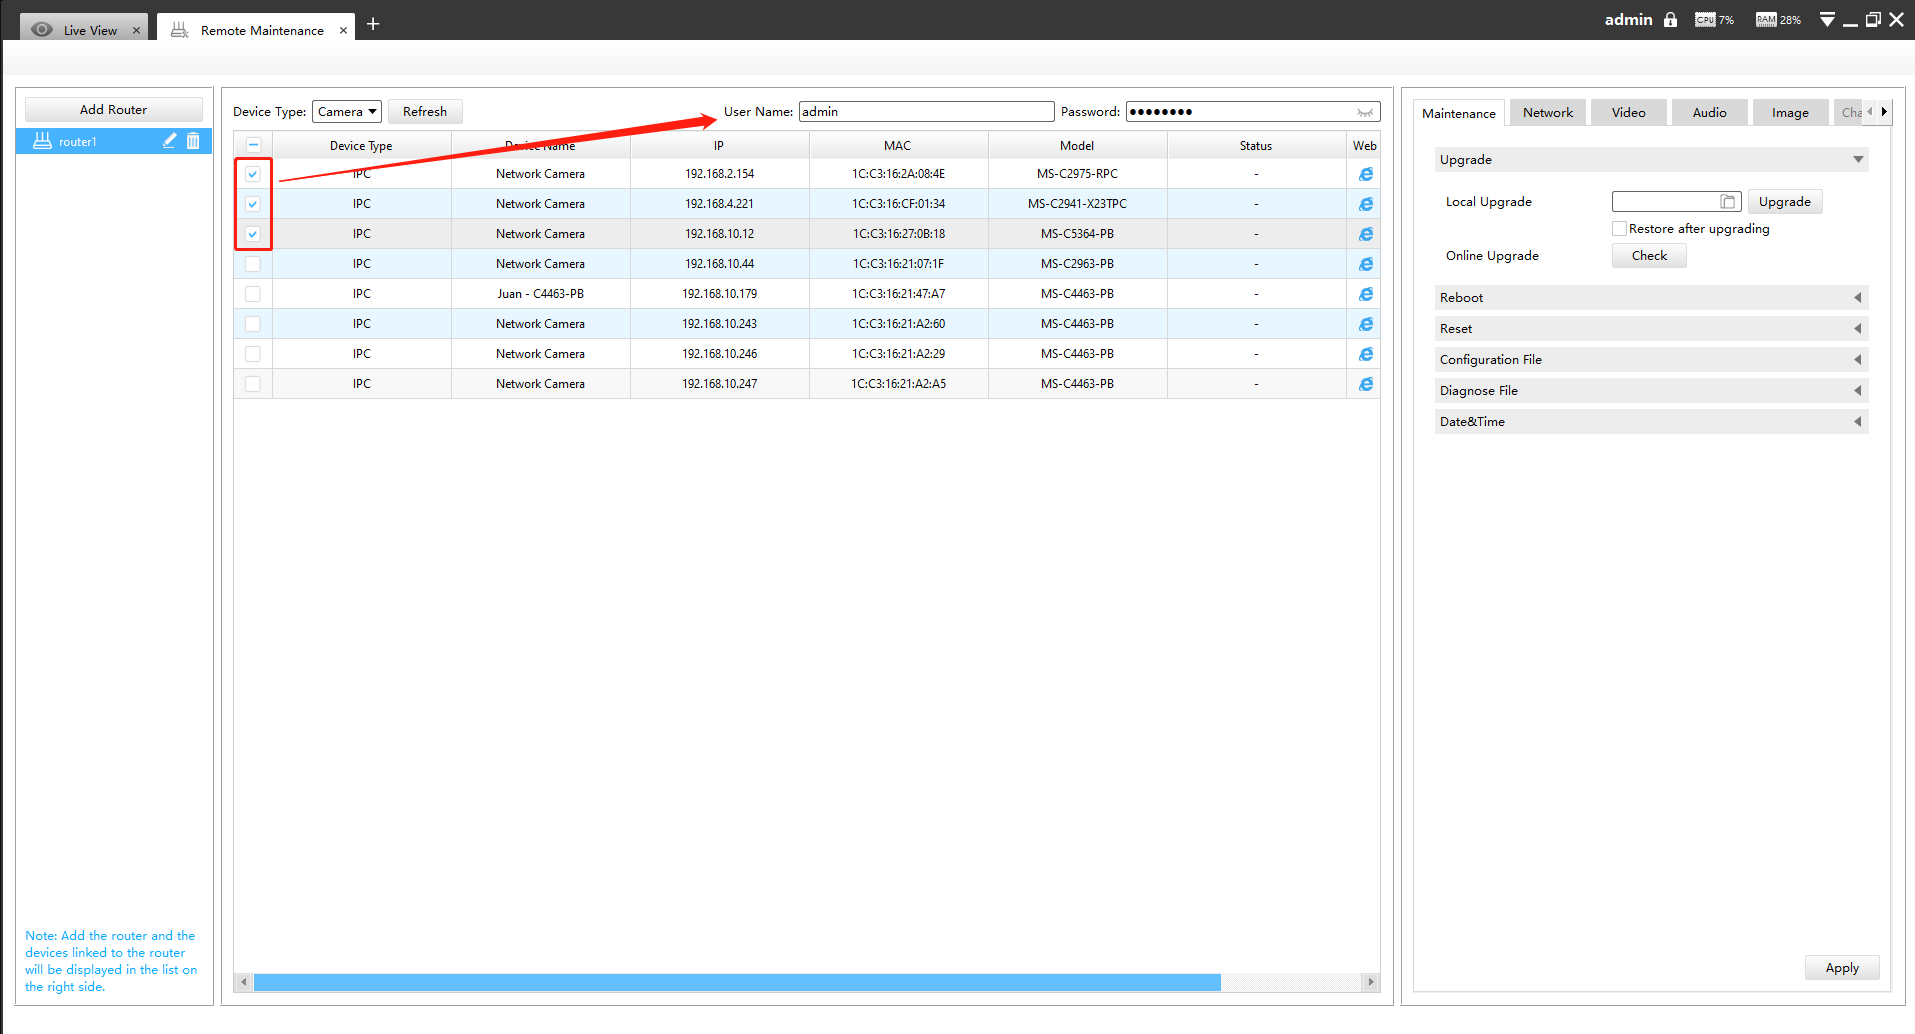
Step 3: The devices shared by the end user will be listed here. Select the device type, check the device you need to configure, then enter the user name and password, and you can modify the device parameters on the right side.
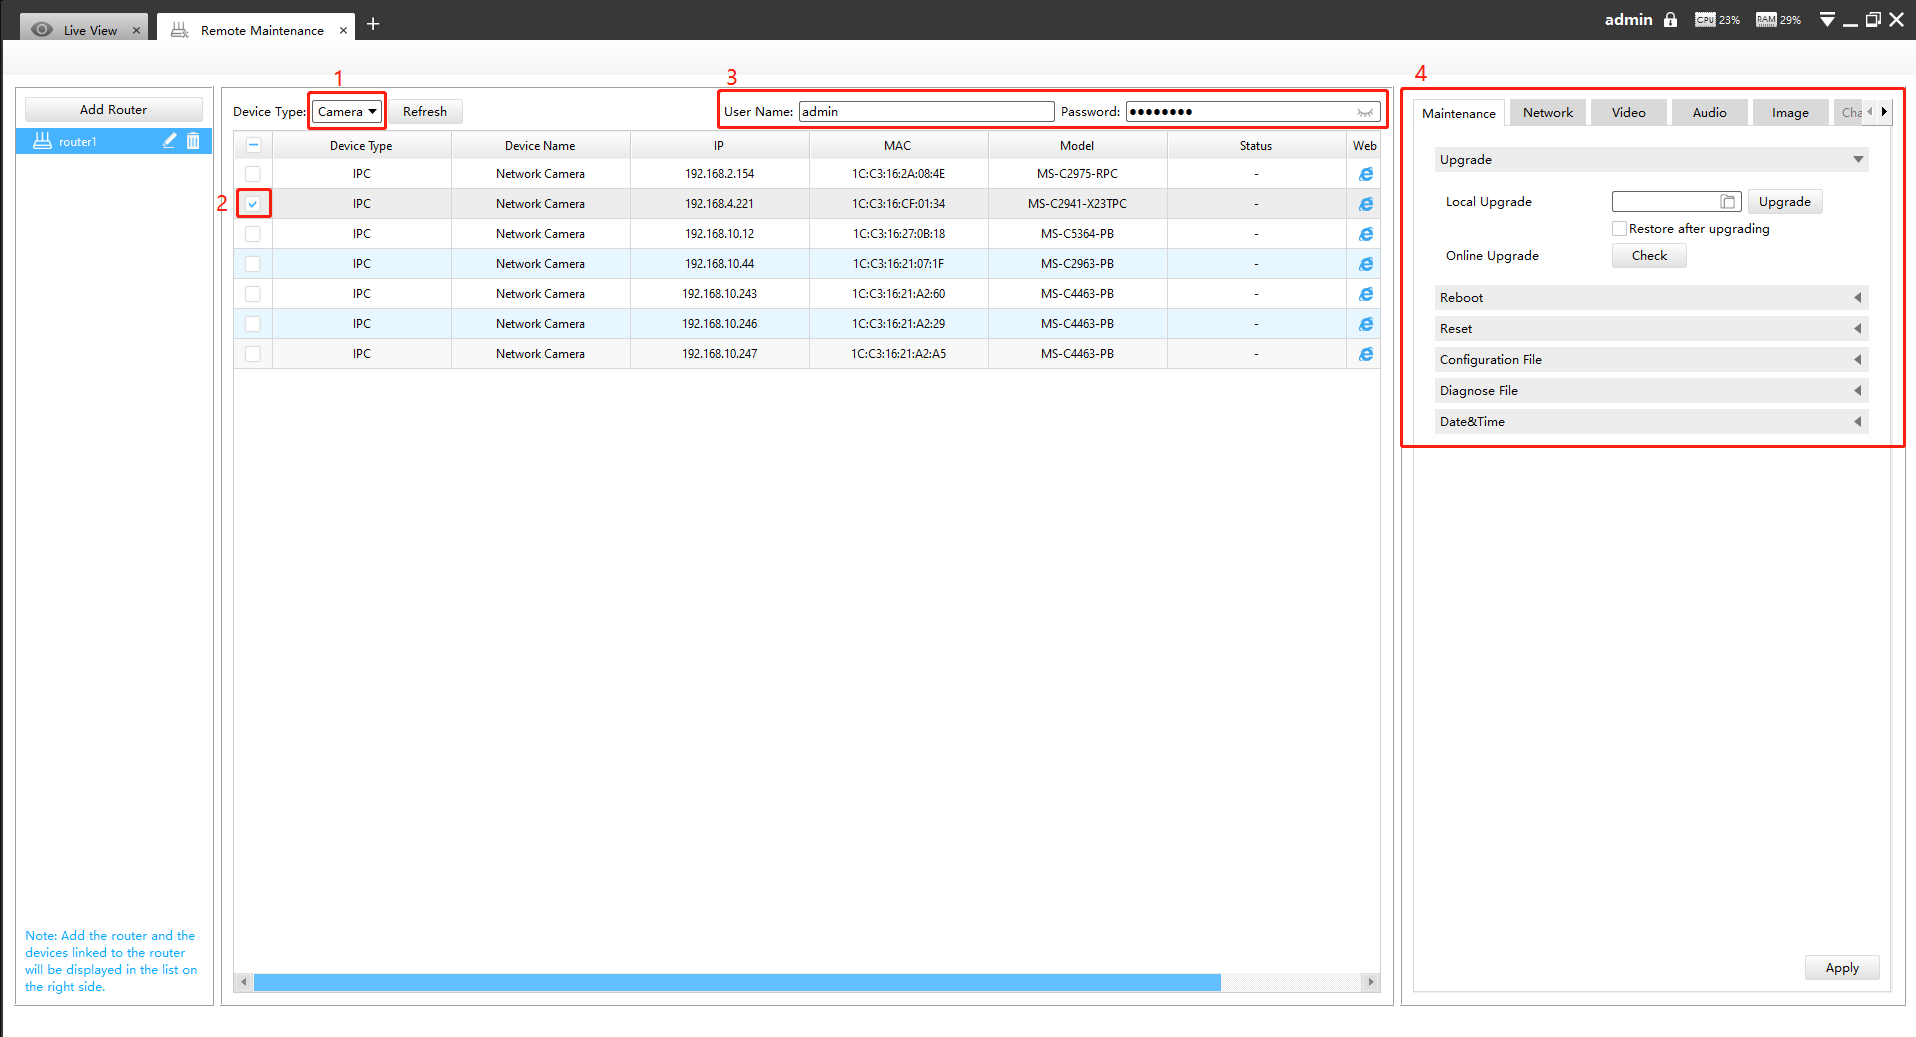
Currently the following configurations are supported:
• Maintenance: Device Upgrade/Reboot/Reset/Configuration File/Diagnose File/Time Syn
• Network: Device Activation/Network Settings/DDNS Setup/UPnP Setup
• Camera Configuration: Video/Audio/Image parameters in detail
• NVR Management: Channel Status
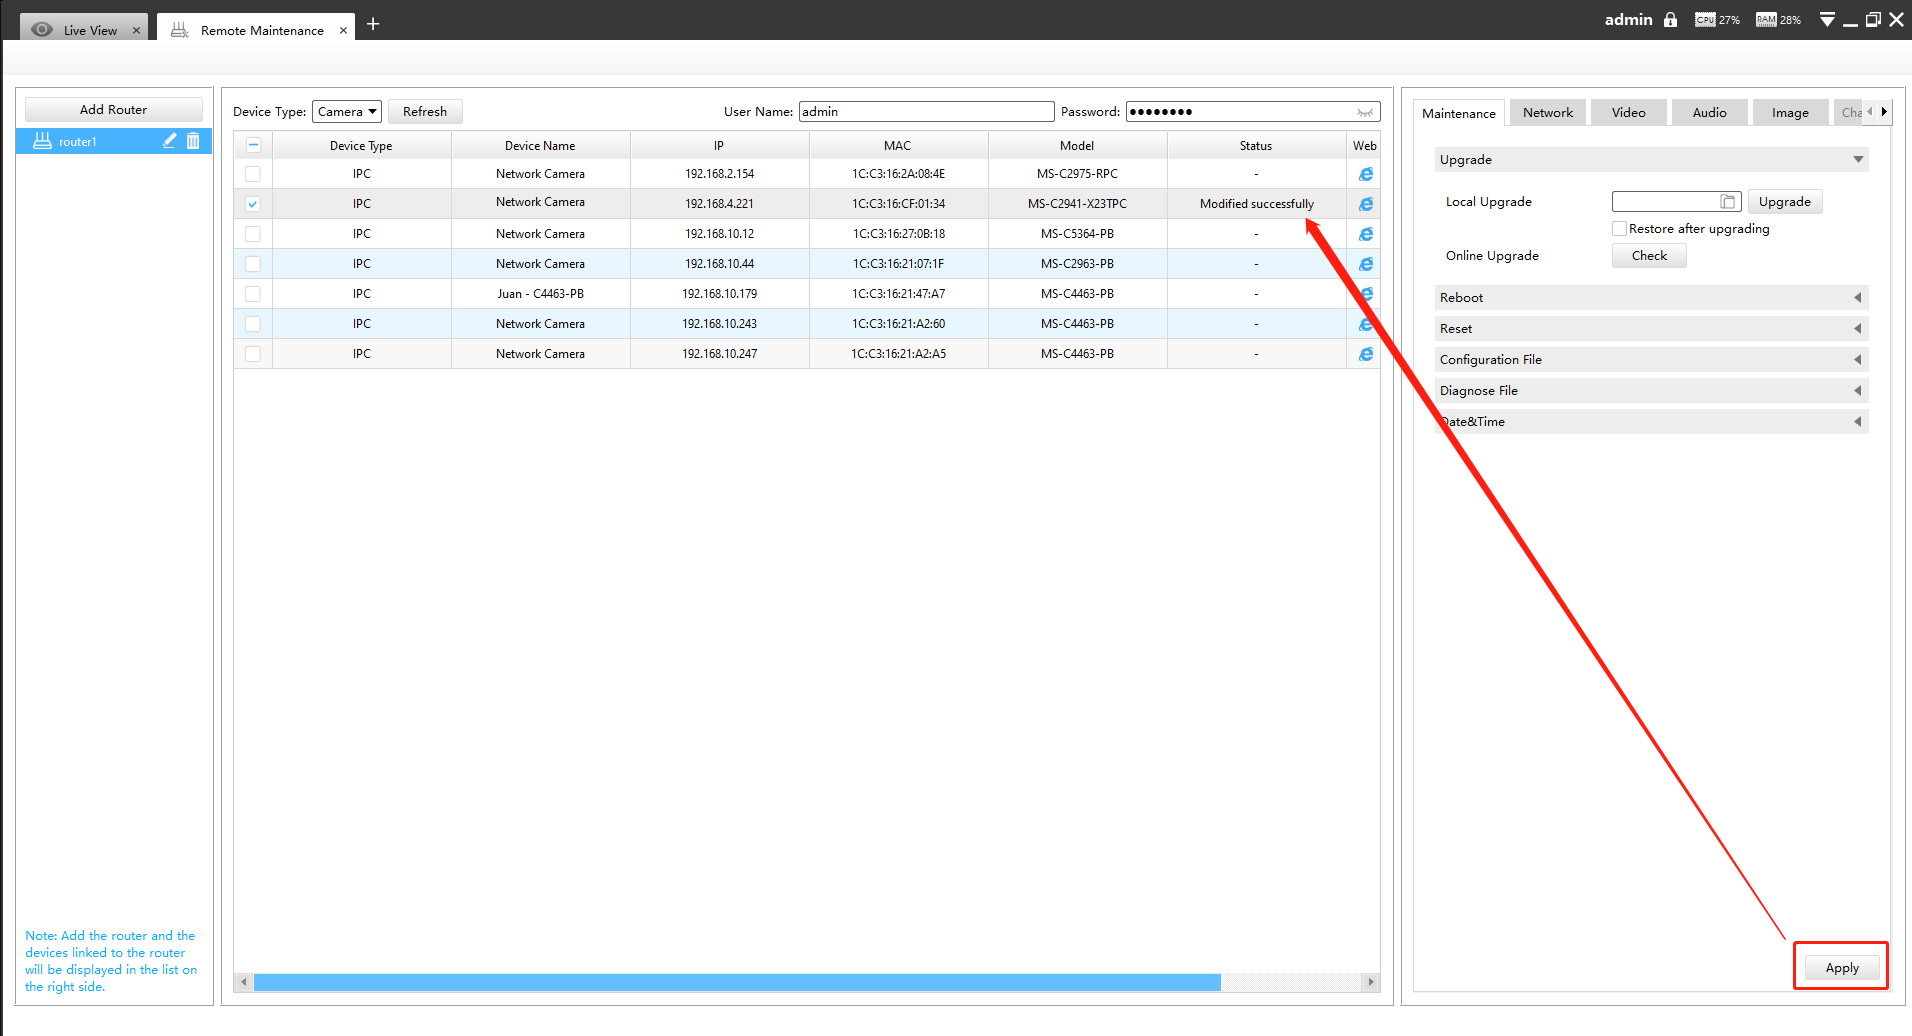
Click the apply button, it will display "Modified successfully" in the status column.
Note:
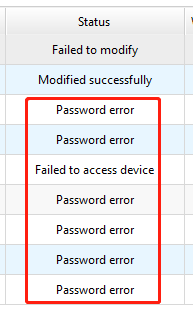
①If the configuration fails, you can also check the reason in the status column.
②It also supports batch configuration, just check multiple devices that need to be configured, and then enter the same username and password.
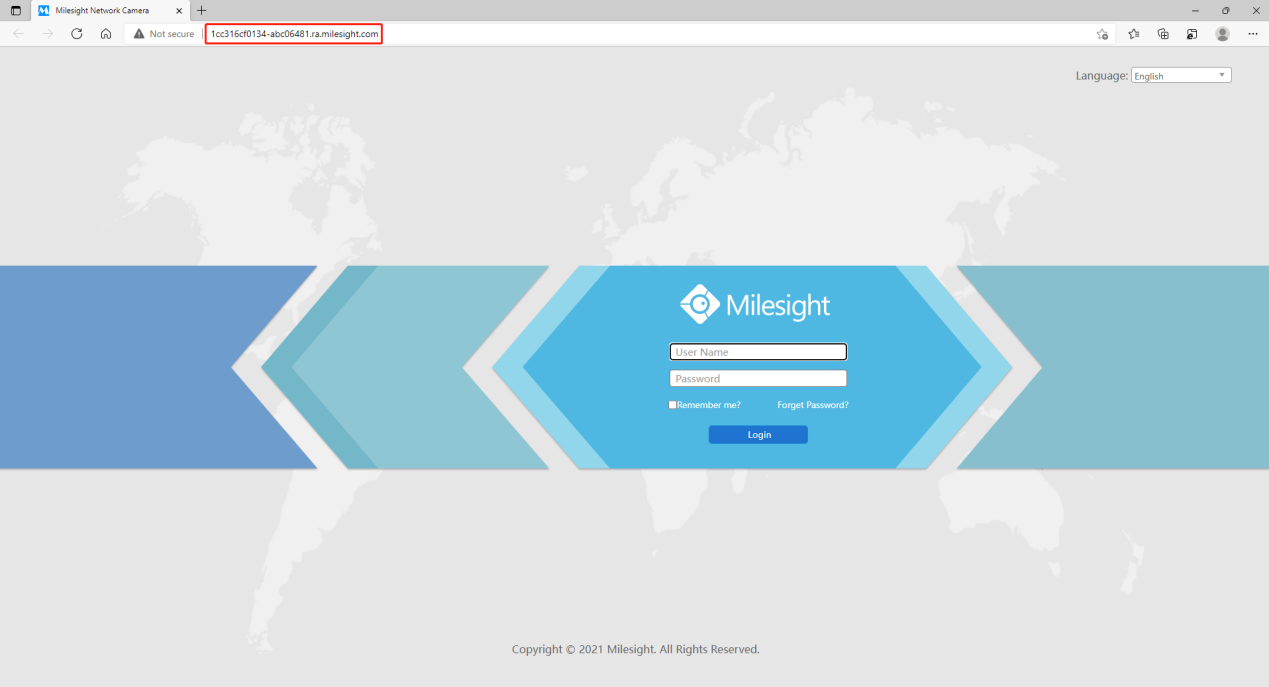
Step 4: Click the ‘ |
| ’ button to access the web GUI of the device for further configuration. |

—— END ——