
NVR Version | XX.9.0.9 or above | Update | 2021.3.15 |
1. Introduction
NVR Fisheye Dewarping converts the Fisheye view to a different display mode, that is, to expand a 360°panoramic view into a regular view of different angles, which is easier for human eyes to accept, so that more details can be displayed thoroughly.
NVR Fisheye Dewarping has no restrictions on models, that is, all devices including third-party devices can support Fisheye Dewarping function.
Note: Only -H series NVR support this feature now.
2. How to open Fisheye Dewarping on Local Monitor
Based on NVR CPU, NVR Local Monitor has two interfaces to enable this function:
2.1 Live View
Click the  button in the channel toolbar to enter Fisheye mode, and the selected channel will be displayed in full screen, with the Fisheye NVR Dewarping panel expanding by default. Users can choose to expand or close the panel by clicking the
  icon in the toolbar. For more information about the Dewarping Panel, see Part 4 of this article.
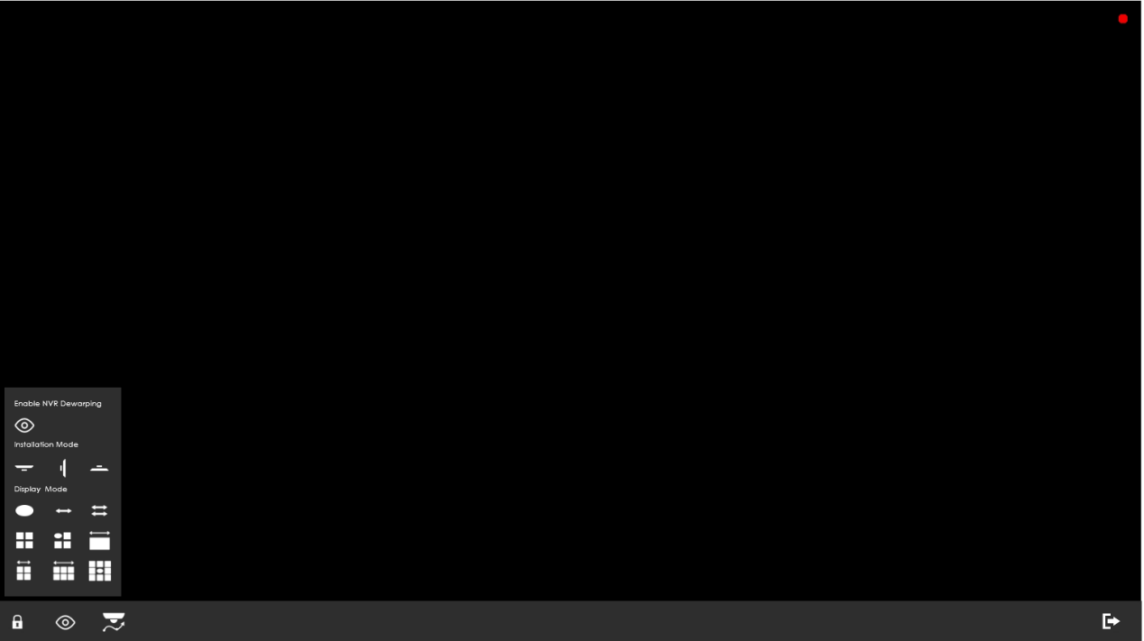
Note:
①Fisheye NVR Dewarping only supports one channel and takes effect on the selected channel.
②Fisheye NVR Dewarping function doesn't influence Fisheye Auto Tracking function, but remember that Fisheye Auto Tracking only works when on-board Dewarping mode is with R and on-board installation mode is celling.
2.2 Playback
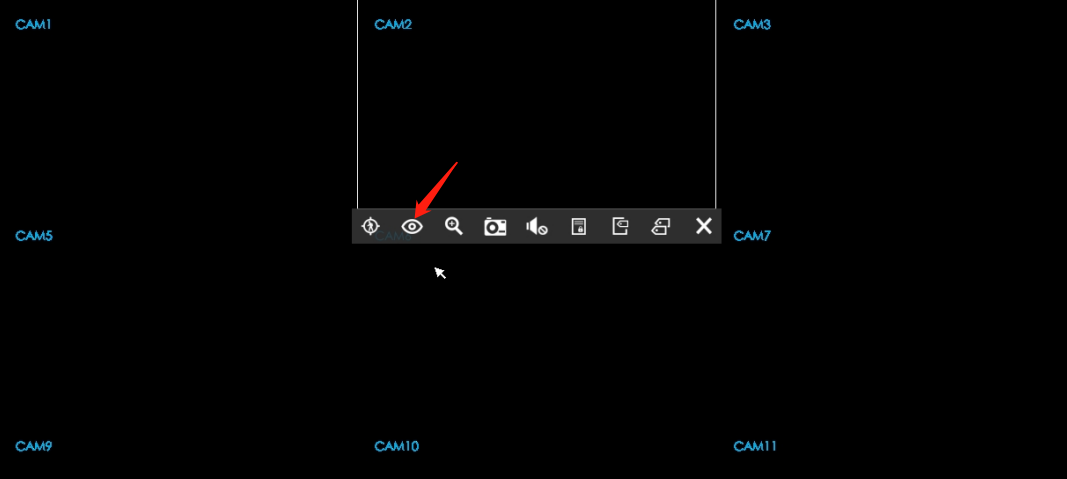
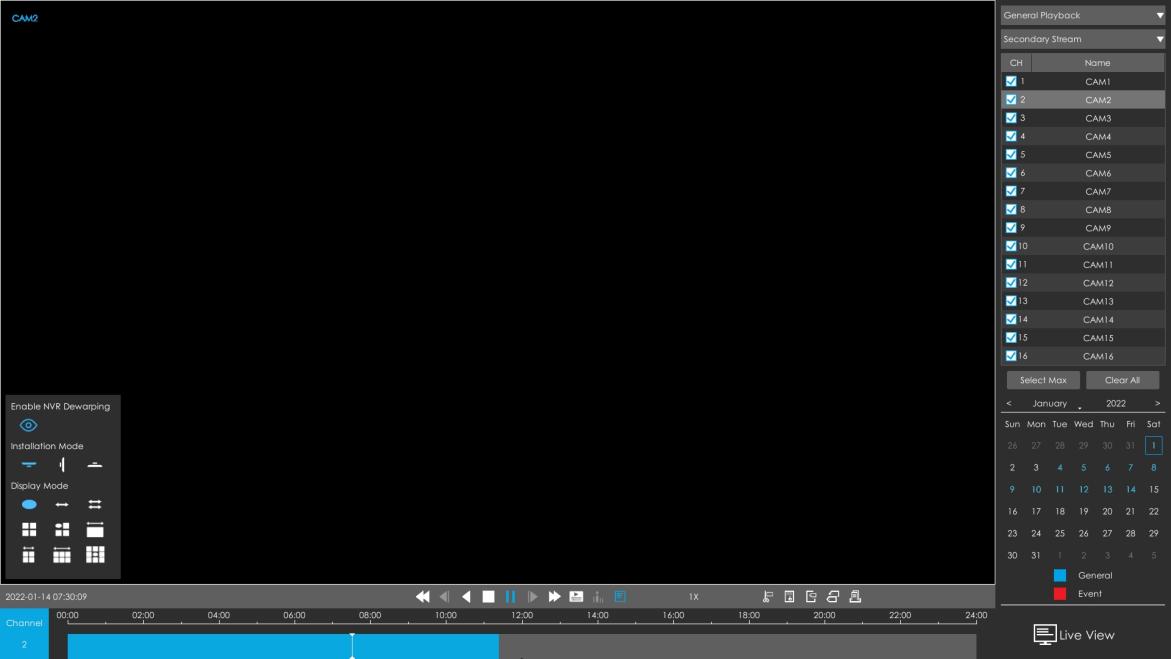
The Fisheye NVR Dewarping icon  can be found in the Playback toolbar.
2.3 Playback
The Fisheye NVR Dewarping icon  can be found in the Playback toolbar.
Users can choose to expand or close the panel by clicking the  icon in the toolbar after selecting a channel. For more information about the Dewarping Panel, see Part 4 of this article.
|
|
Note:
① Fisheye NVR Dewarping only supports one channel and takes effect on the selected channel.
② Fisheye NVR Dewarping function doesn’t affect other functions of Playback page.
③ General Playback,Event Playback,Tag Playback and Split Playback all support Fisheye NVR Dewarping.
3. How to open Fisheye Dewarping on web page
Starting with NVR version 7X.9.0.11, we have added Client-side Dewarping to the NVR web page.
Based on computer CPU, NVR web page has two interfaces to enable this function:
3.1 Live View
Path: “Live View” -> Toolbar “Fisheye Client-side Dewarping”
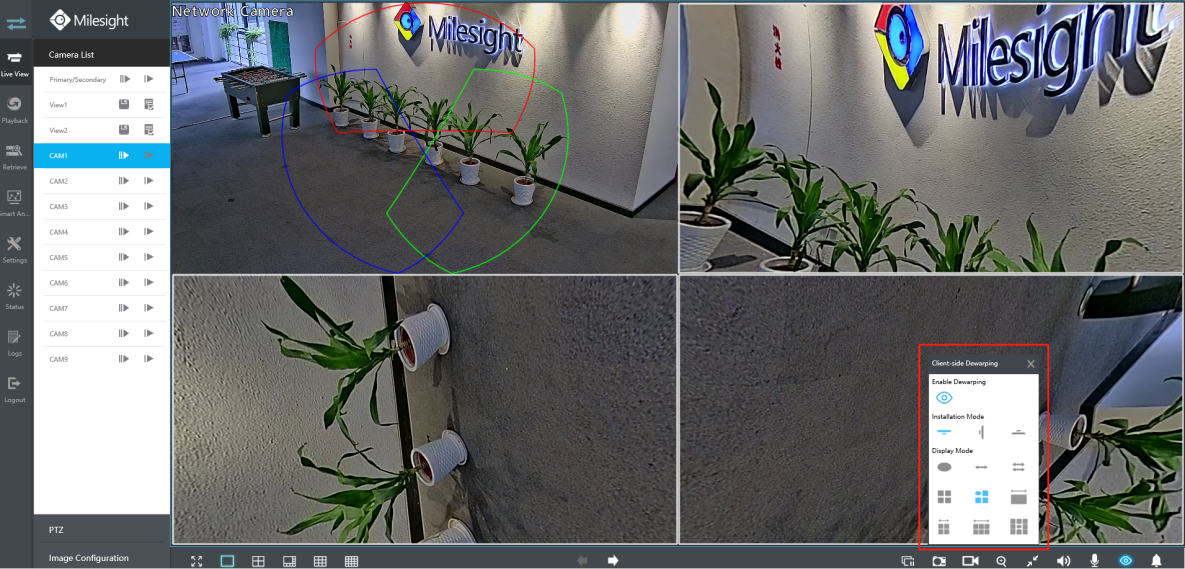
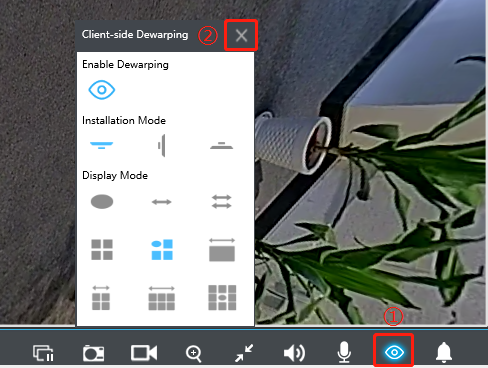
Click icon “Fisheye Client-side Dewarping” to pop up the “Client-side Dewarping” panel. You can set the Installation Mode and Display Mode according to your own needs. For instance, in 1O3R mode, the viewing angle of R1 image can be adjusted according to the corresponding color border (red) . For more information about the Dewarping Panel, see Part 4 of this article.
This panel can be closed in the following ways:
a. Click icon “Fisheye Client-side Dewarping” in the toolbar.
b. Click icon “Close” in the upper right corner.
Note:
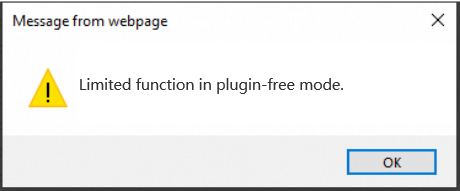
① It should be used in IE and plugin-free browsers are NOT supported.
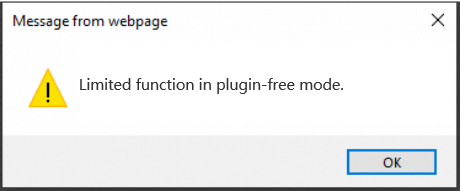
② Available only when the channel is playing.
③ Each channel has an independent Client-side Dewarping mode.
3.2 Playback
Path: “Playback” -> Toolbar “Fisheye Client-side Dewarping”
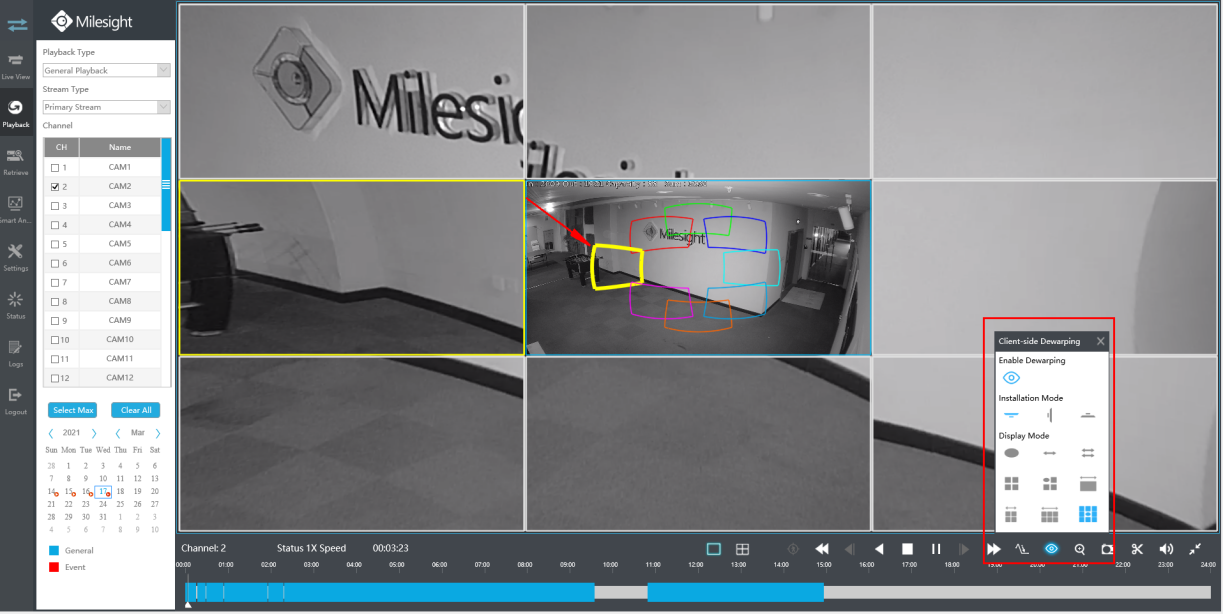
Click icon “Fisheye Client-side Dewarping” to pop up the “Client-side Dewarping” panel. You can set the Installation Mode and Display Mode according to your own needs. For instance, in 1O8R mode, the viewing angle of R4 image can be adjusted according to the corresponding color border (yellow) . For more information about the Dewarping Panel, see Part 4 of this article.
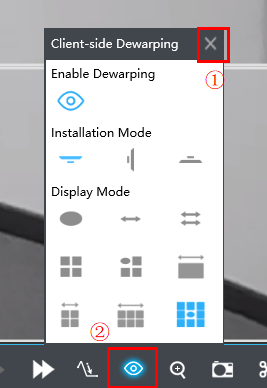
This panel can be closed in the following ways:
a. Click icon “Fisheye Client-side Dewarping” in the toolbar.
b. Click icon “Close” in the upper right corner.
Note:
① It should be used in IE and plugin-free browsers are NOT supported.
② Available only when the channel is playing.
③ Each channel has an independent Client-side Dewarping mode.
④ General Playback,Event Playback,Tag Playback and Split Playback all support Client-side Dewarping.
4. Fisheye Dewarping Panel
The Fisheye Dewarping panel consists of 2 parts, pictures are shown below:
|
|
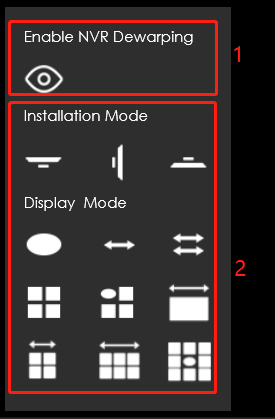
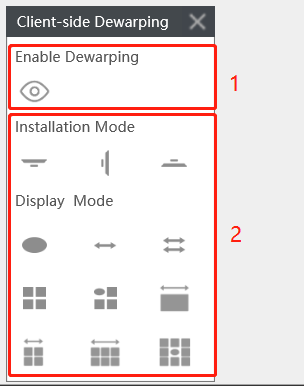
Part 1: Dewarping Open and Close.
The default status is close. After enabling Fisheye Dewarping, select the Installation Mode and Display Mode, and observe the screen to adjust a preferred view.
Part2: Installation Mode and Display Mode
The form below shows some details of different Installation Mode and Display Mode.
Installation Mode Display Mode |
Ceiling |
Wall |
Flat | Only works when enter Fisheye mode and enable Fisheye Dewarping |
1O | √ | √ | √ | 3D operations are not supported |
1P | √ | √ | √ | Ceiling and Flat mode support drag and drop operations( left and right) Wall mode does not support |
2P | √ | —— | √ | Only support drag and drop operations( left and right) |
4R | √ | √ | √ | Support 3D operations |
1O3R | √ | √ | √ | O does not support 3D operations; R supports 3D operations; the corresponding area of R can be supported to display on O,and dragged. |
1P1R | √ | √ | √ | P only supports drag and drop operations( left and right) (Ceiling and Flat mode,not including Wall mode) R support 3D operations |
1P4R | √ | √ | √ | P only supports drag and drop operations( left and right) (Ceiling and Flat mode,not including Wall mode) R supports 3D operations. The corresponding area of R can be supported to display on P,and dragged. |
1P6R | √ | —— | √ | P only supports drag and drop operations( left and right) R supports 3D operations. The corresponding area of R can be supported to display on P,and dragged. |
1O8R | √ | —— | √ | O does not support 3D operations; R supports 3D operations; the corresponding area of R can be supported to display on O,and dragged. |


