
NVR Firmware | XX.9.0.13 or above | Update | 2021.1.27 |
1. Introduction
To better enrich user’s product experience, Milesight NVR realize a POS function which combines POS and security system, so that the POS message and Live view can be watched by NVR together.
Note: Only available for NVR’s firmware version XX.9.0.13 or above.
2. How to Set POS ?
Totally, NVR has two interfaces to enable this function.
2.1 Enable POS function on monitor side and web side
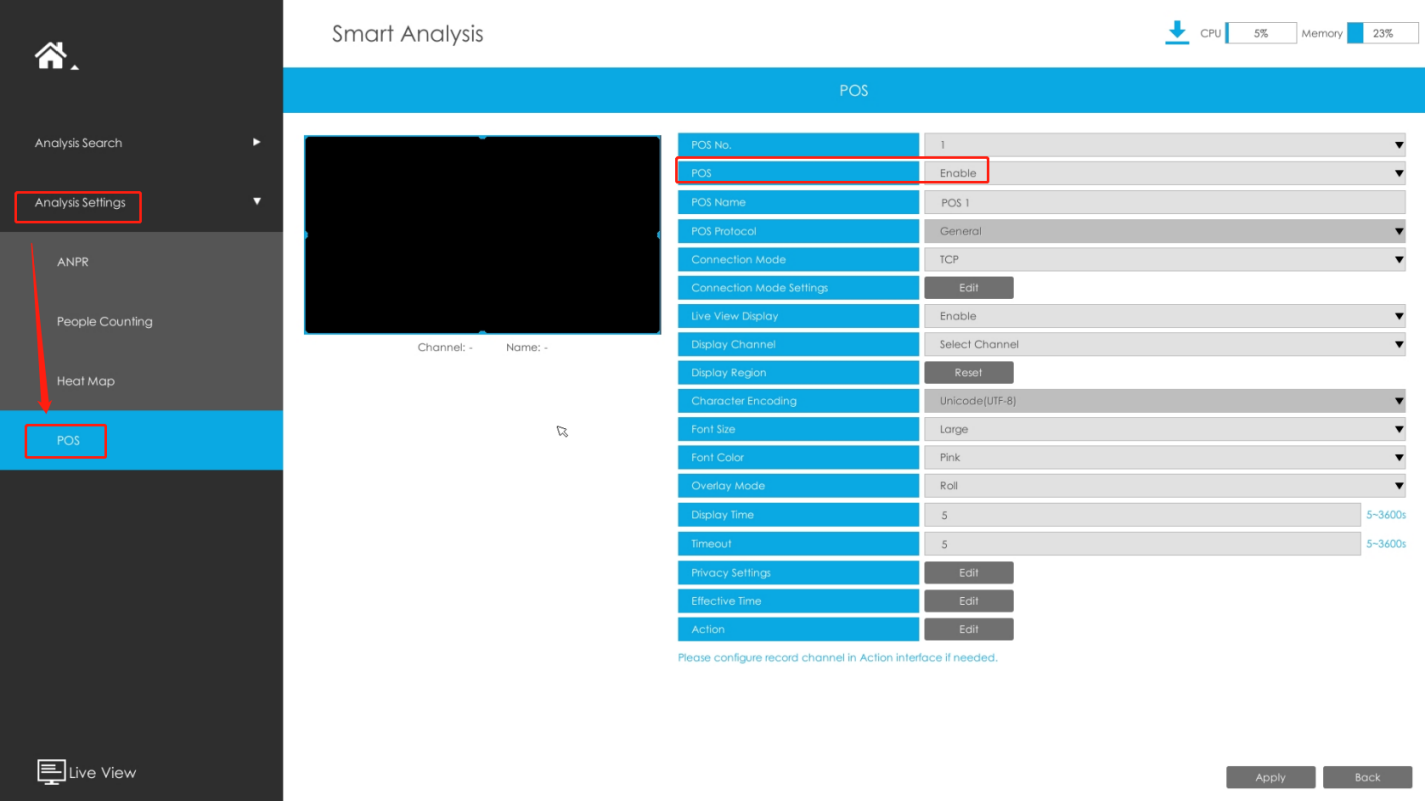
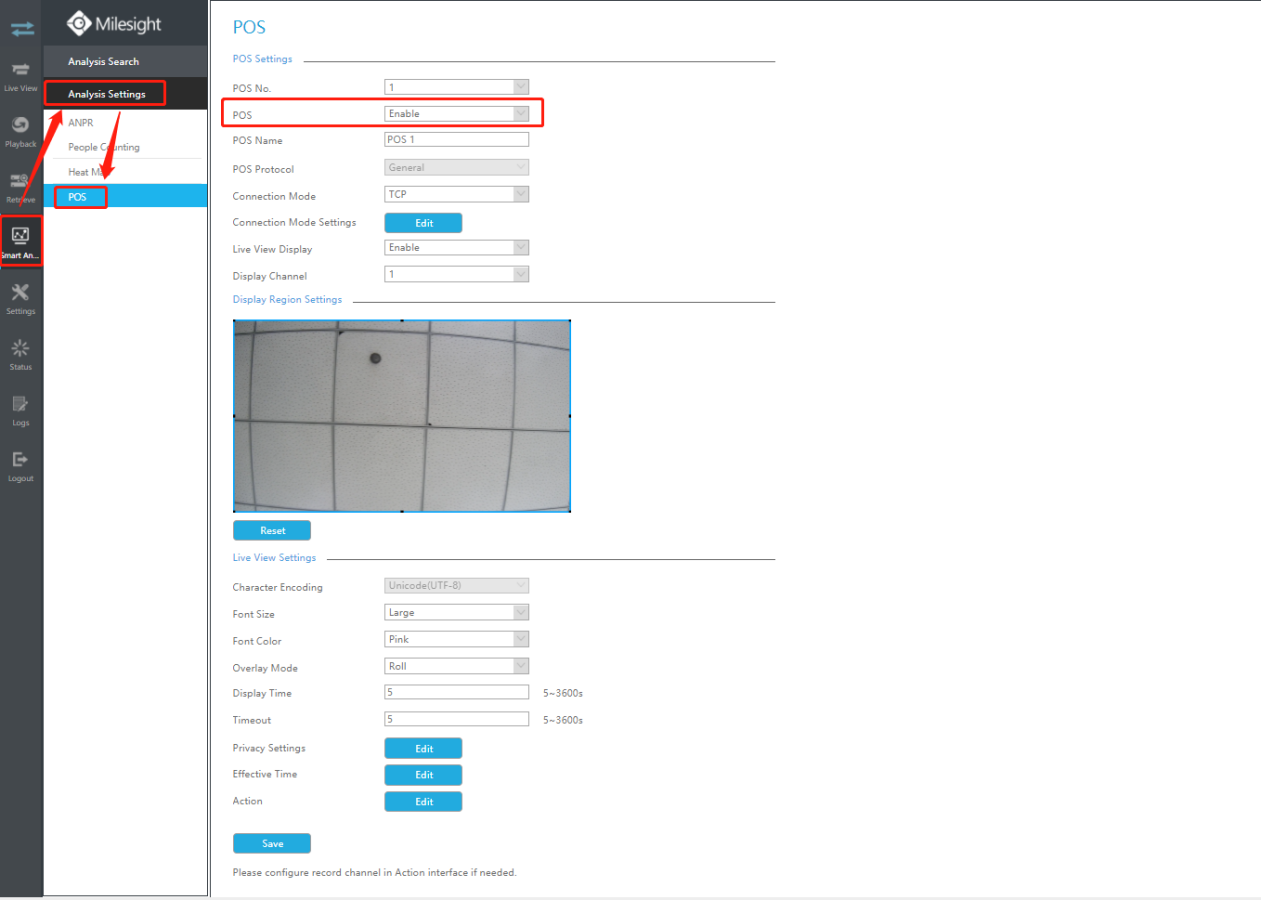
Path : Select“Smart Analysis” -> Click“Analysis Settings” -> Choose“POS”
Monitor side:
Web side:
Description of the buttons:
Parameters | Function Introduction | ||
POS No. | Choose POS number. Note: The number of POS is depend on the NVR’s model difference. MS--N1004-UPC/UC and MS-N5008-UPC/UC:1~4 MS-N1009-UPT/UT, MS-N5008-UPT/UT, MS-N5016-UPT/UT:1~8 MS-N7016-UPH/UH, MS-N7032-UPH/UH, MS-N8032-UPH/UH, MS-N8064-UPH/UH:1~16 | ||
POS | Choose “enable” or “disable” the POS function. | ||
POS Name | Users can customize and modify the POS name. Note: The max character are 32, can not be empty. | ||
Connection Mode | Select the communication mode with the POS machine, choose “TCP” or “UDP”. | ||
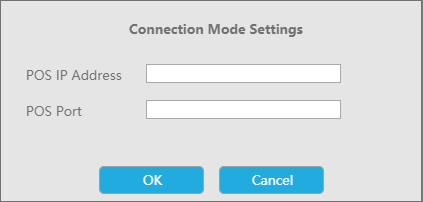
Connection Mode Settings | Click “Edit”, the “Connection Mode Settings” will pop-up, then enter the POS IP address and port number.
| ||
Live View Display | Choose “Enable” or “Disable” the POS information of the Live View. | ||
Display Channel | Select which channel will display the POS information. | ||
Display Region | The display region can be customized. | ||
Character Encoding | Encoding format Unicode(UTF-8) of information returned by POS machine, can not be edited. | ||
Font Size | Choose “small, medium or large” size of the POS information. | ||
Font Color | Choose the color of POS message. “White, Red, Pink, Purple, Dark Blue, Cyan, Dark Cyan, Dark Green and Yellow” | ||
Overlay Mode | Page: After the POS message is displayed in full page, the message will move to another page to display. Roll: After the POS message is displayed in full page, the message will display in a scrolling replacement mode in this page bottom. | ||
Display Time | Duration of displaying single POS information in Live View. Valid range: 5-3600s. | ||
Timeout | Multiple messages will be the same message during a period time. | ||
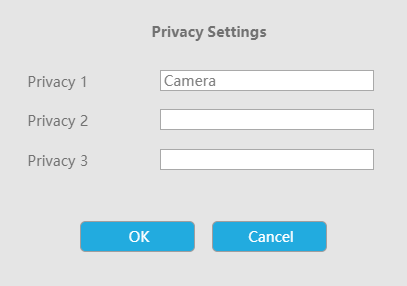
Privacy Settings | The configured information is private information will displayed as * Note: The max character are 32 and no limit of special symbol and language.
| ||
Effective Time | Set the schedule of the POS function. | ||
Action | Set the action for receive the POS message. | ||
Save/Apply | Click to activate the configuration of POS. |
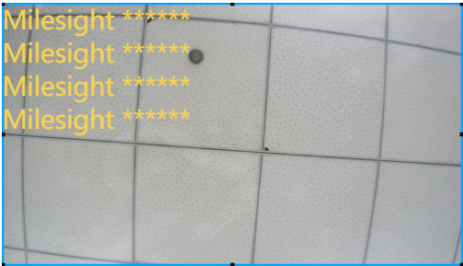
Note:
1. If the length of POS information displayed in Live View exceeds the width of display area, it will be wrap displayed automatically.
2. When the corresponding video record is overwritten, the corresponding POS information will be deleted or overwritten synchronously.
3. There is no related POS information in snapshots/video export/picture export.
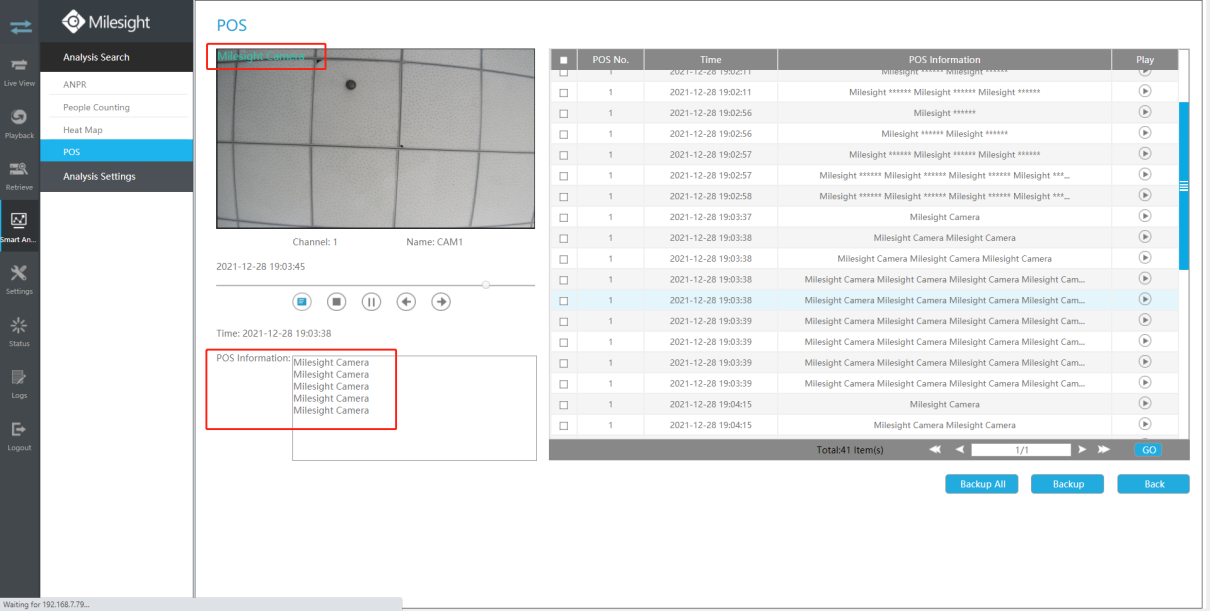
2.2 How to search POS information on monitor side and web side
Steps 1: Click “Smart Analysis” -> Choose “Analysis Search” -> Select “POS”
Monitor side:
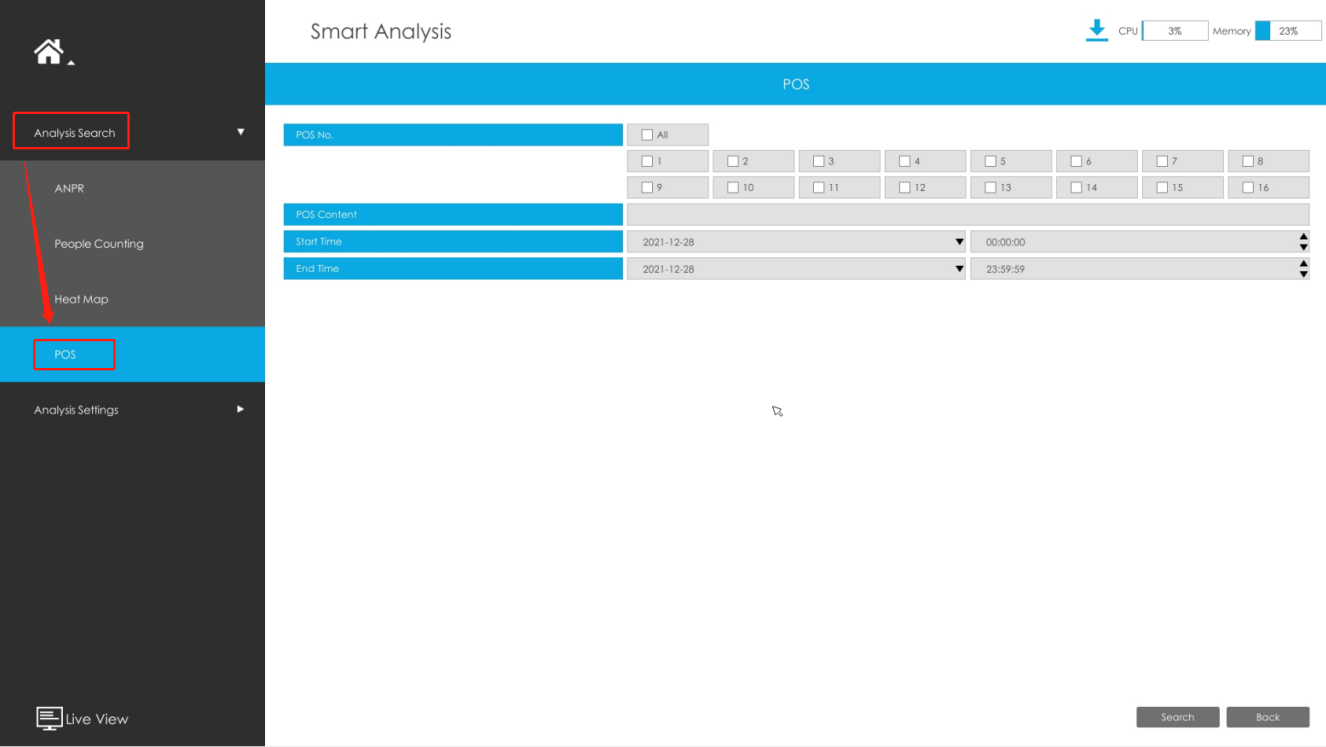
Web side:
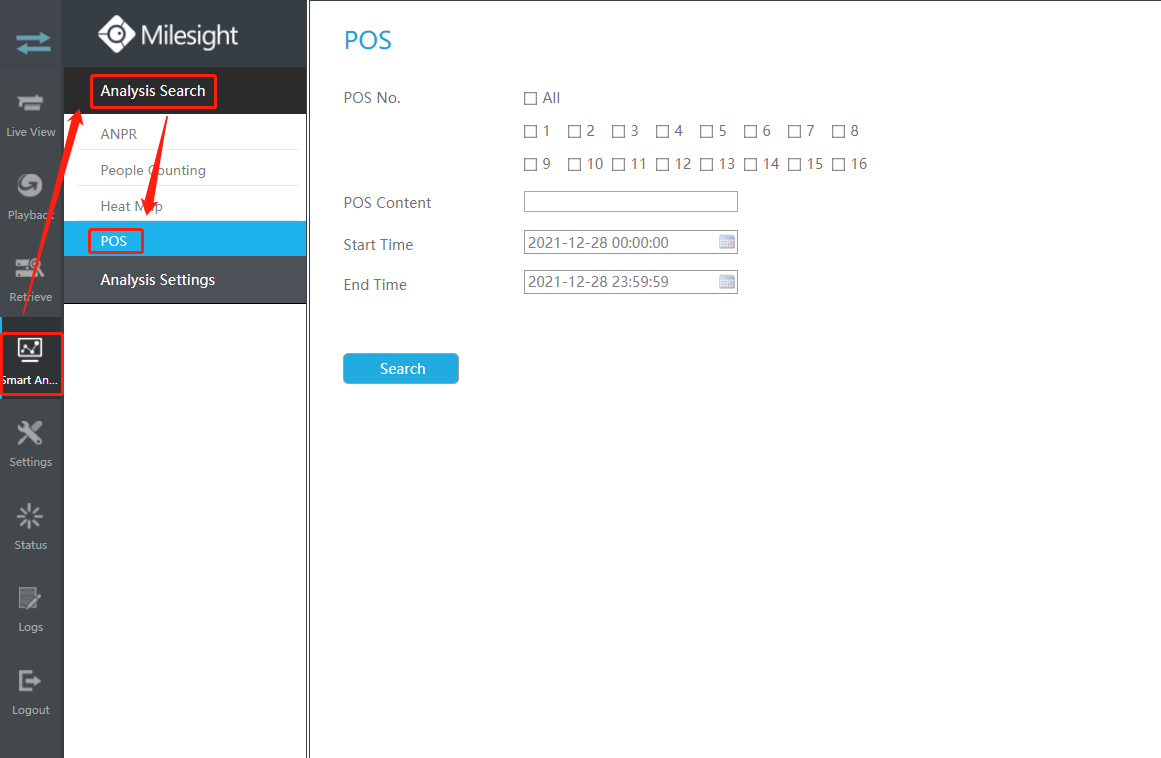
Description of the buttons:
Parameters | Function Introduction |
POS No. | Search POS information. Note: The number of POS is depend on the NVR’s model difference. MS--N1004-UPC/UC and MS-N5008-UPC/UC:1~4 MS-N1009-UPT/UT, MS-N5008-UPT/UT, MS-N5016-UPT/UT:1~8 MS-N7016-UPH/UH, MS-N7032-UPH/UH, MS-N8032-UPH/UH, MS-N8064-UPH/UH:1~16 |
POS Content | Type POS information. |
Start Time | Set the Start time of the POS. |
End Time | Set the End time of the POS. Note: End time must be later than start time. |
Search | Click “search button” to search the POS information based the configuration above. |
Note: After search successfully, the POS result will directly shows up.
Monitor side:
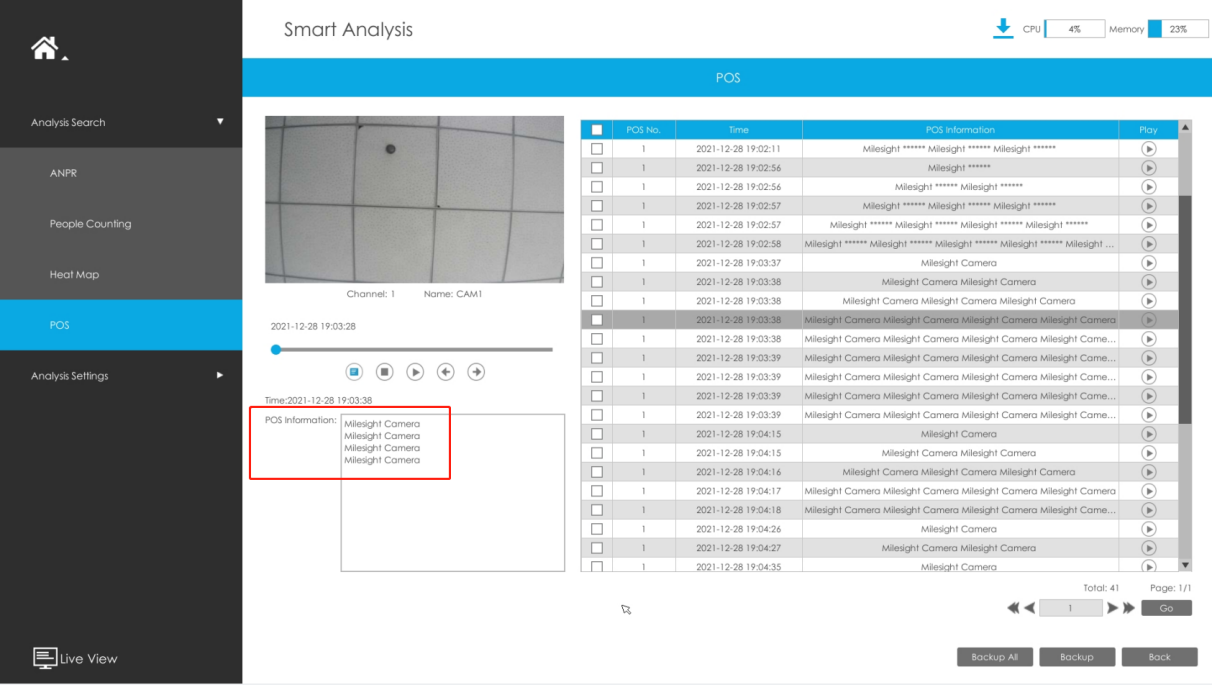
Web side:
1. If this |
| button is blue, it means the video will shows the POS information. |

2. If this |
| button is white, it means the video will hide the POS information. |

1. Click Backup All or Backup to backup the POS List or video.
Monitor side :
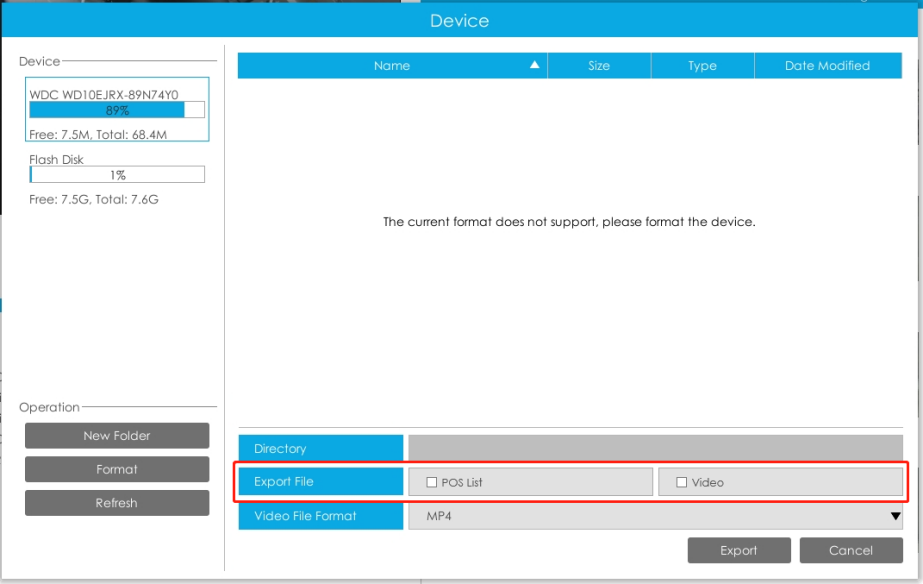
Note: Need a USB driver for backup.
Web side:
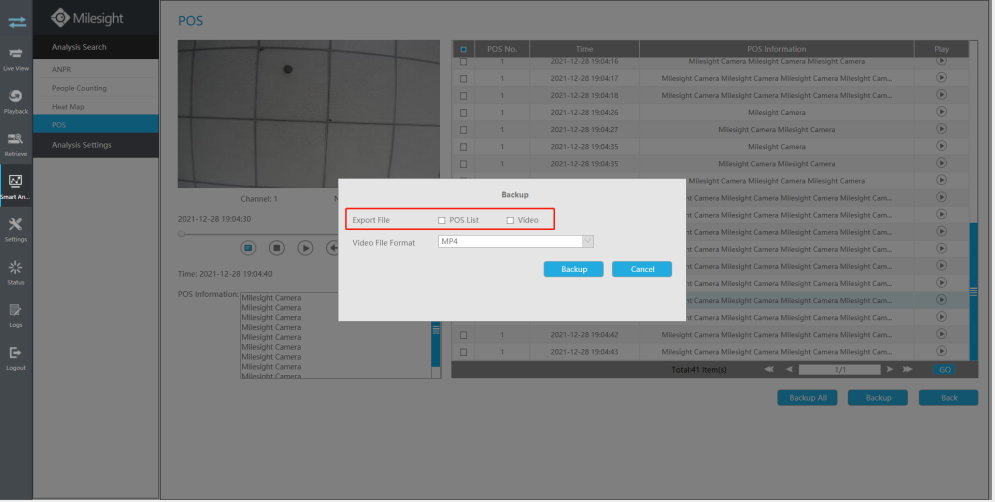
Note:
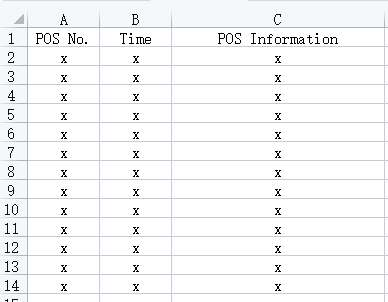
POS List: Excel file (CSV format).
The name of the file: NVR NAME _POS List_ YY/MM/DD/HOUR/MINUTE/SECOND.

3. How to test POS function?
“NetAssist” is a Network tool which can help users to test POS function.
Here is the download link:
https://drive.google.com/file/d/1IfumV8LSMz_h7WvDgaTN8-sXZhReMxBr/view?usp=sharing
Step 1: Configure the POS setting on NVR
Path : Select“Smart Analysis”-> Click“Analysis Settings”-> Choose“POS”
Note: Follow the steps in 1-3 pages in this document.
1. Connection Mode: Choose “UDP” or “TCP”, “NetAssist” should be the same with NVR side.
2. Connection Mode Settings: Type the back-end IP address, if download the “NetAssist” in PC, then write down the PC’s IP address.
3. Must configure a effective display channel.
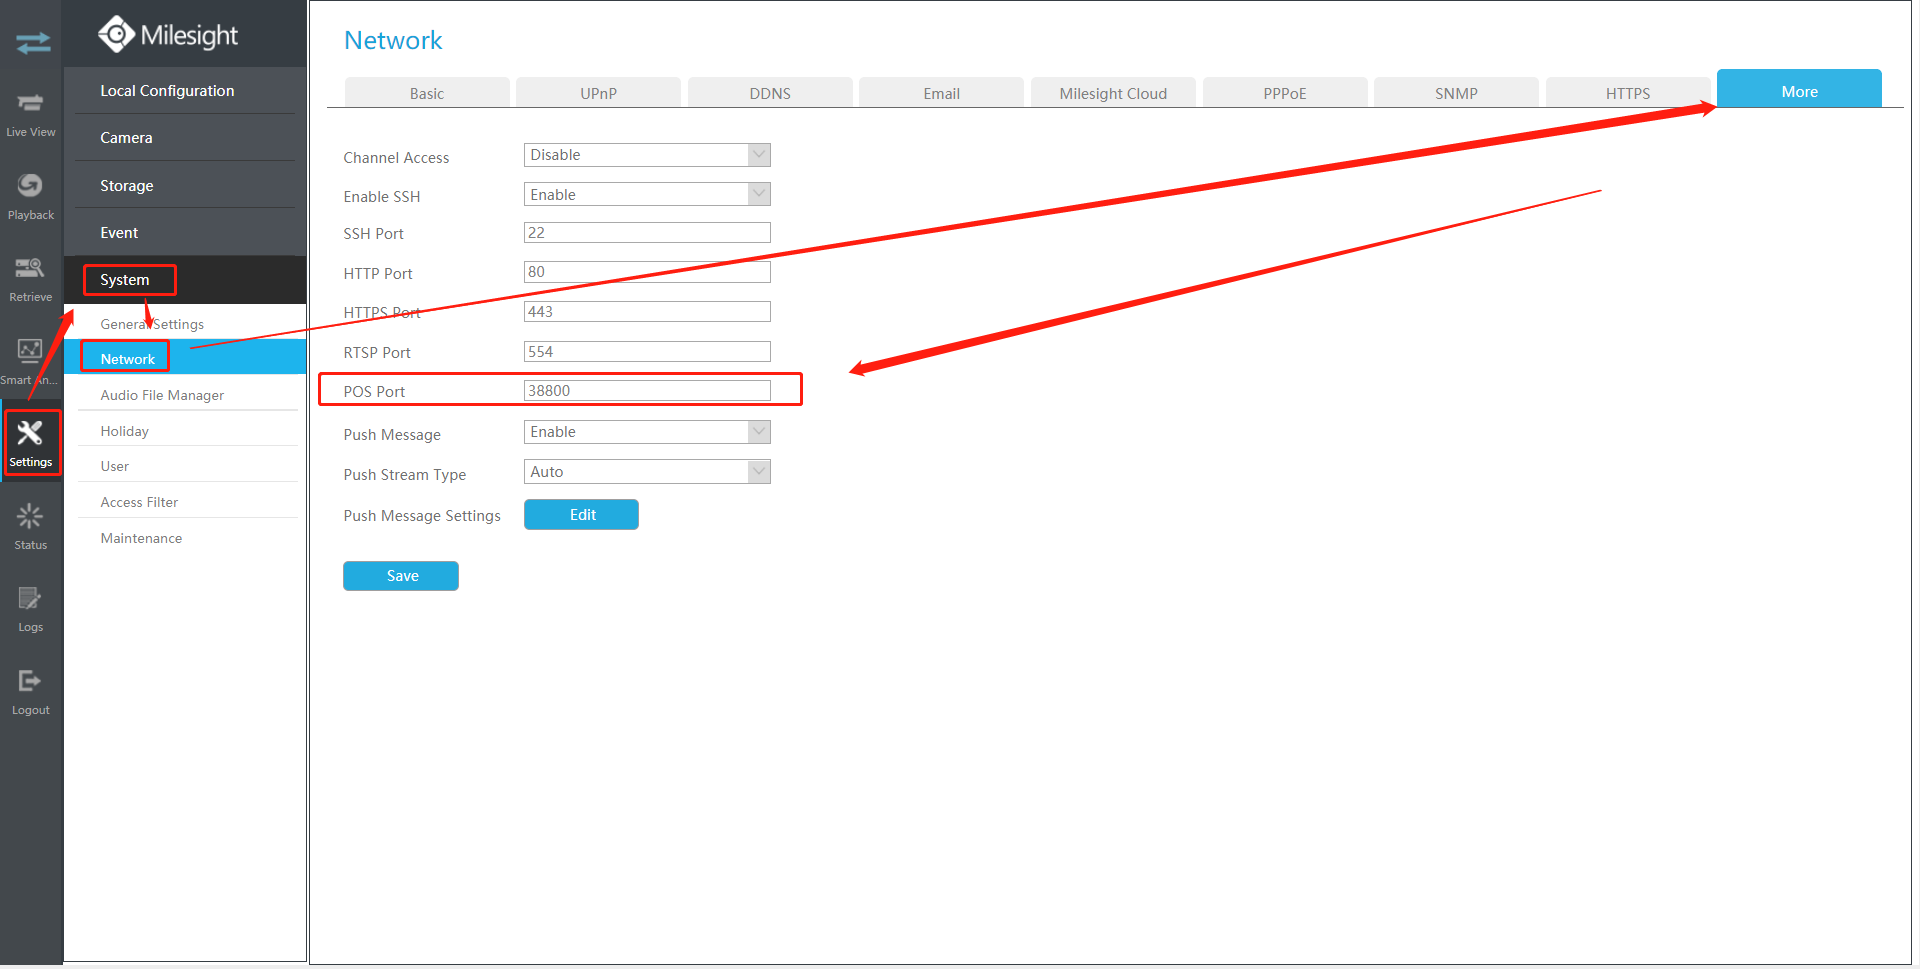
4. You can change the“POS port”in NVR’s setting --> System --> Network --> More --> POS port
Step 2: Configure the test server (NetAssist).
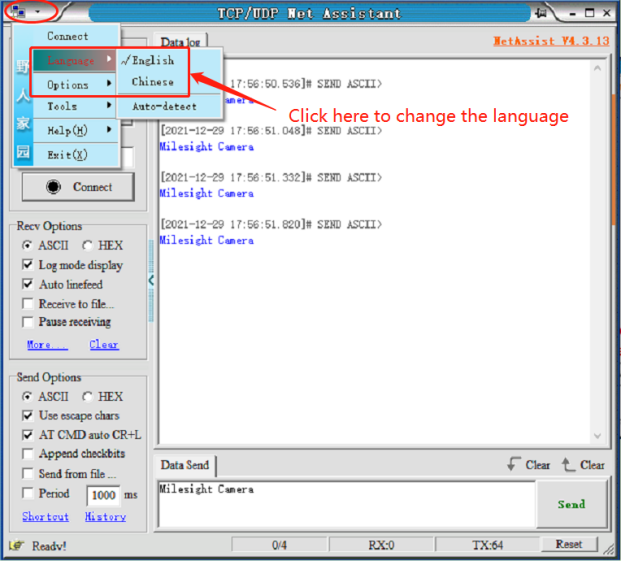
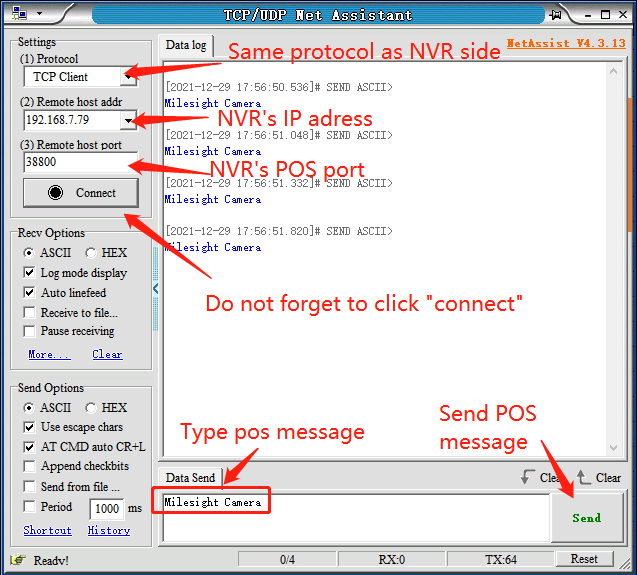
Double click to open the “NetAssist”.
1. If the connection mode of NVR is TCP, then choose NetAssist as “TCP client”.
2. Enter NVR’s IP address into “Remote host addr”.
3. Must keep the “Remote host port” as same as the NVR’s POS port.
|
|
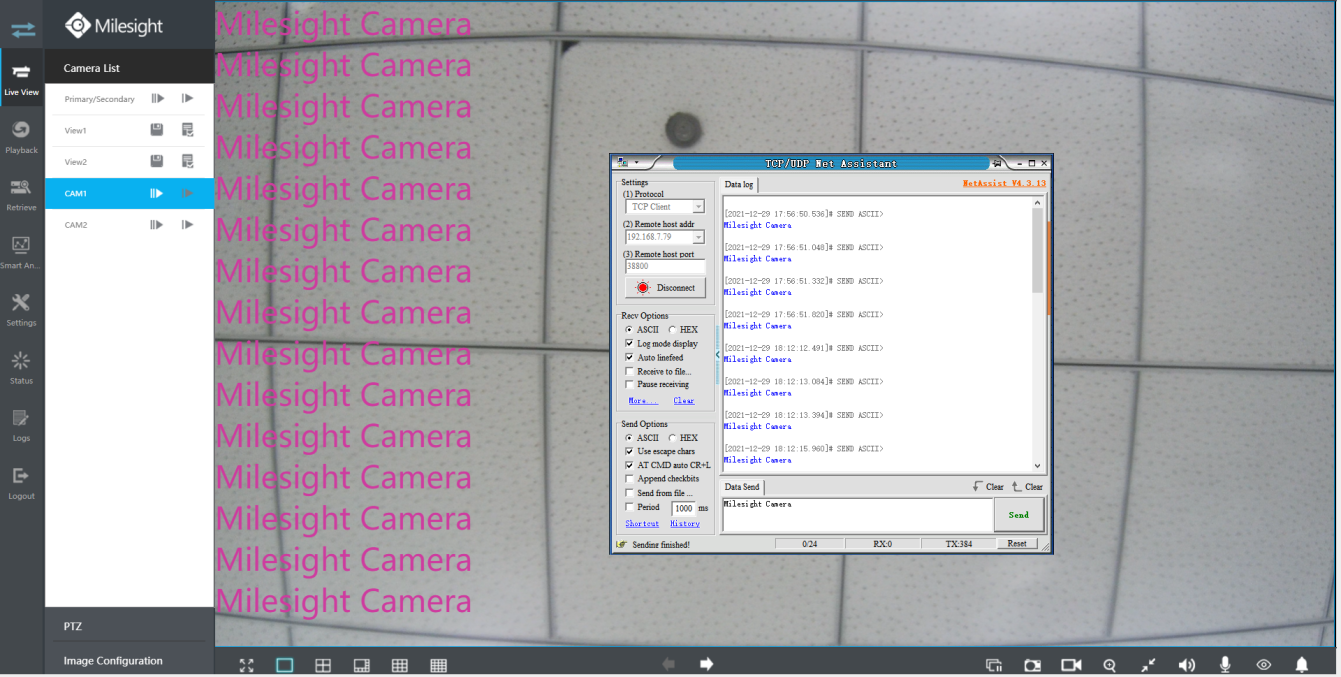
Step 3: After POS message send successfully, the message will display in the Live view.
——————END—————