
This document explains how to set ANPR with Milesight Network Camera. It covers LPR General Settings (including General and Advanced configuration ),LPR Event (containing List Event, Attributes Event, Evidence, Violation Management, and Traffic Flow Analysis), Live View and Smart Search, and Data Transmission.
The following introduction is based on the latest version of T_61.8.0.5. Before setting it up, you can update your device to the latest version. The latest firmware can be downloaded from the link below:http://www.milesight.com/support/download
1. LPR General Setting
1.1 General
Step 1: After logging in to the web interface, select "Traffic" → "LPR" ,check the “Enable LPR” checkbox.
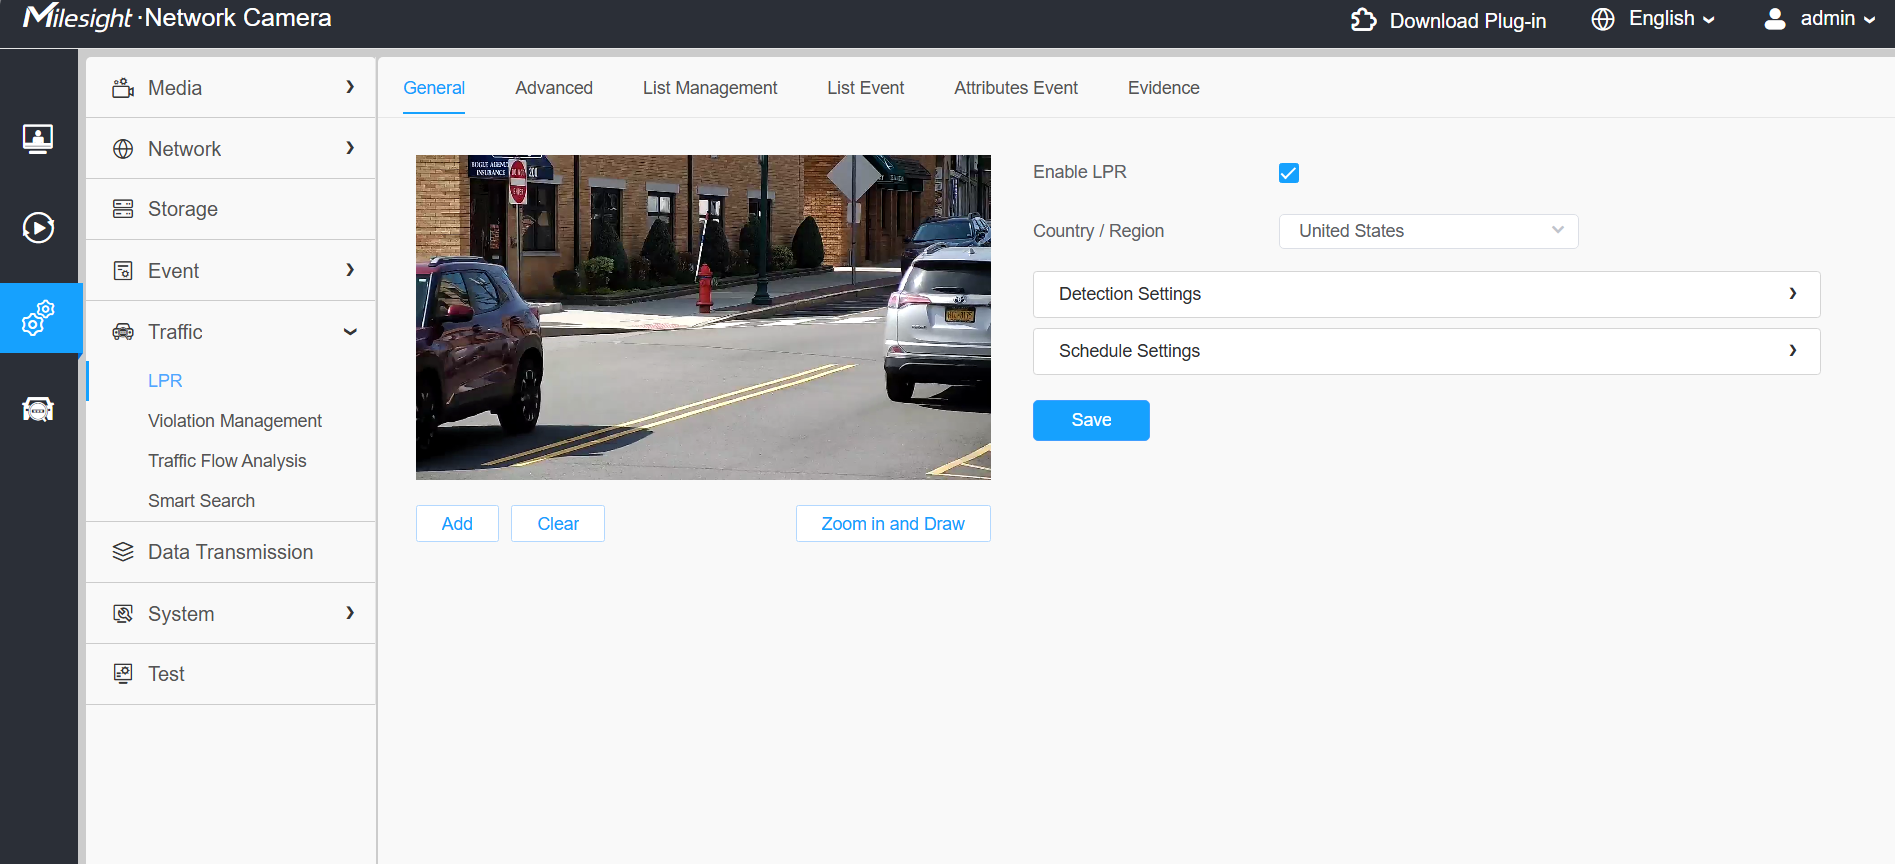
[Country / Region]: Select a country within the appropriate region.

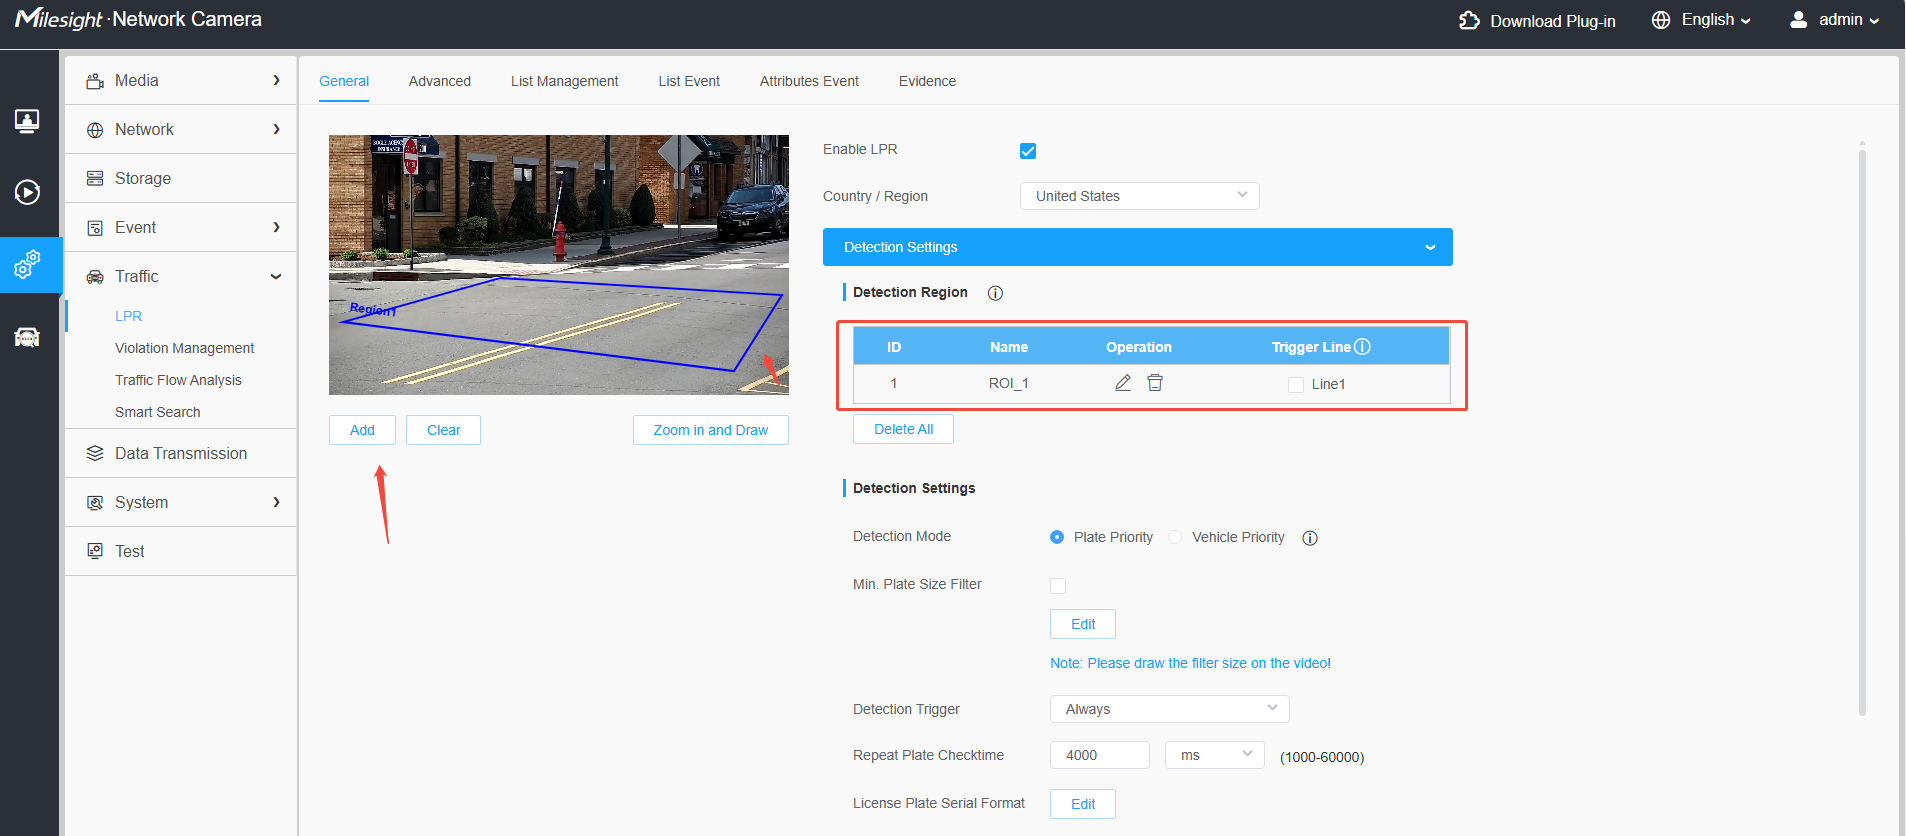
Step 2: Detection Region
[Set LPR Detection Region]: You can set up to 4 ROI areas by drawing the screen. It is recommended to position the ROI detection area at the center of the screen so that the vehicle is recognized after it fully enters the field of view, and the integrity of the vehicle snapshot is preserved.
Notes
• For better performance, the lens can be zoomed in appropriately so that the vehicle is positioned at the center of the camera's field of view, ensuring clear recognition of the license plate.
Step 3: Detection Settings
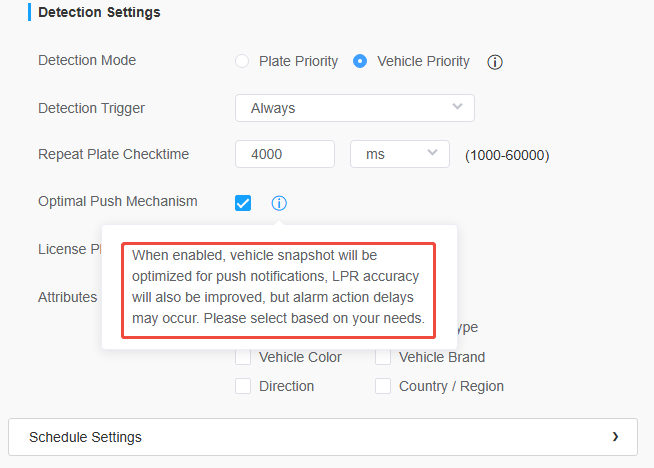
[Detection Mode]: If “Plate Priority” is selected, the camera will first capture the license plate information of the vehicle entering the screen. If “Vehicle Priority” is selected, the camera will first locate the target vehicle and then recognize the license plate to reduce false detections.
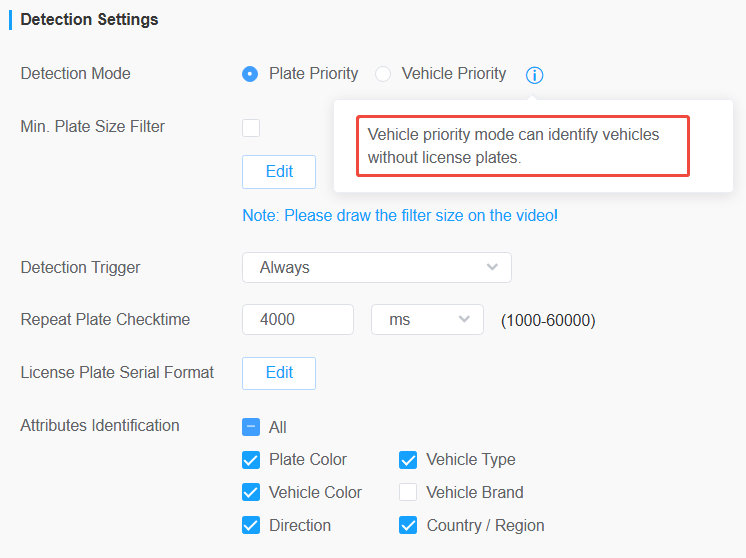
Note:
1. Plate Priority: This method performs automatic identification primarily based on the license plate information of the vehicle, resulting in higher license plate recognition accuracy.
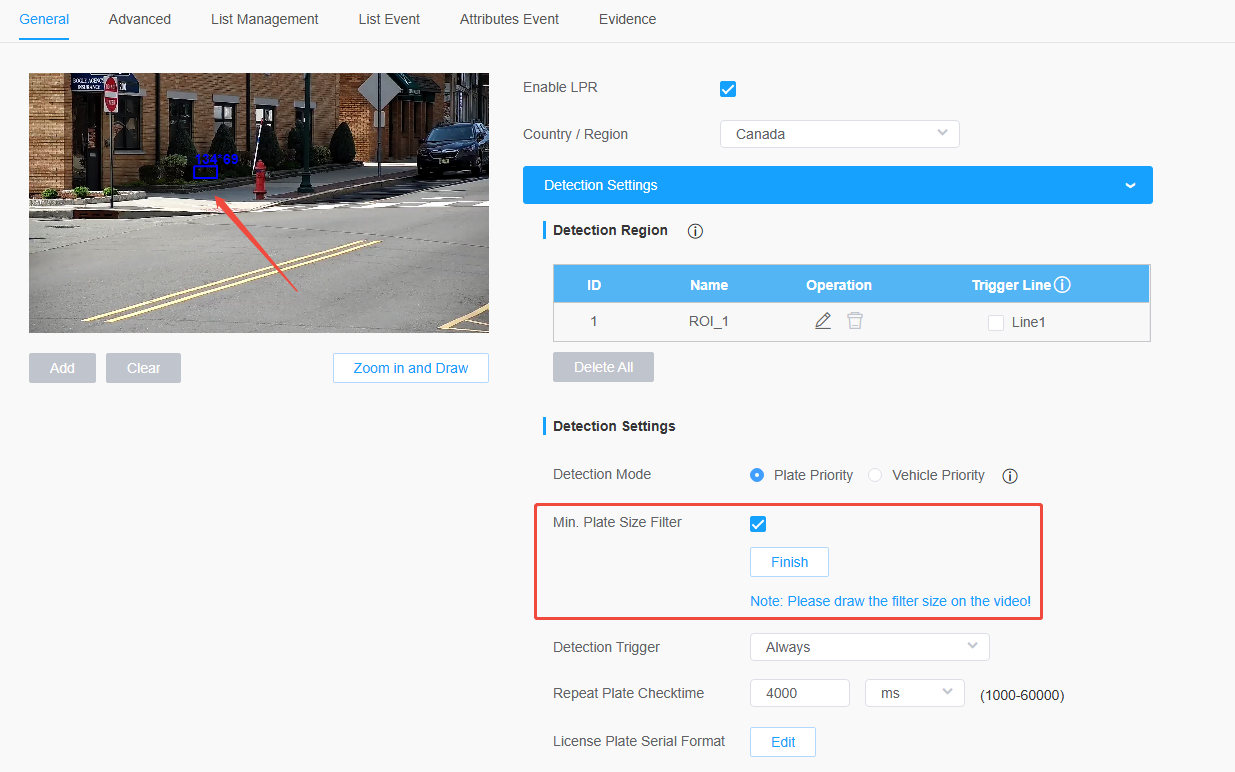
[Min. Plate Size Filter]:When using Plate Priority Mode, the "Min. Plate Size Filter" is supported. You can limit the minimum license plate size to filter out smaller license plates and only recognize larger license plates. This prevents the IPC from identifying license plates at a distance and triggering an alarm. This function is more commonly used at entrances and exits, only for identifying vehicles entering the gate.
2. Vehicle Priority: This method performs automatic identification primarily based on the appearance characteristics of the vehicle (such as model, body color, and vehicle logo) and can be applied to various types of vehicles.
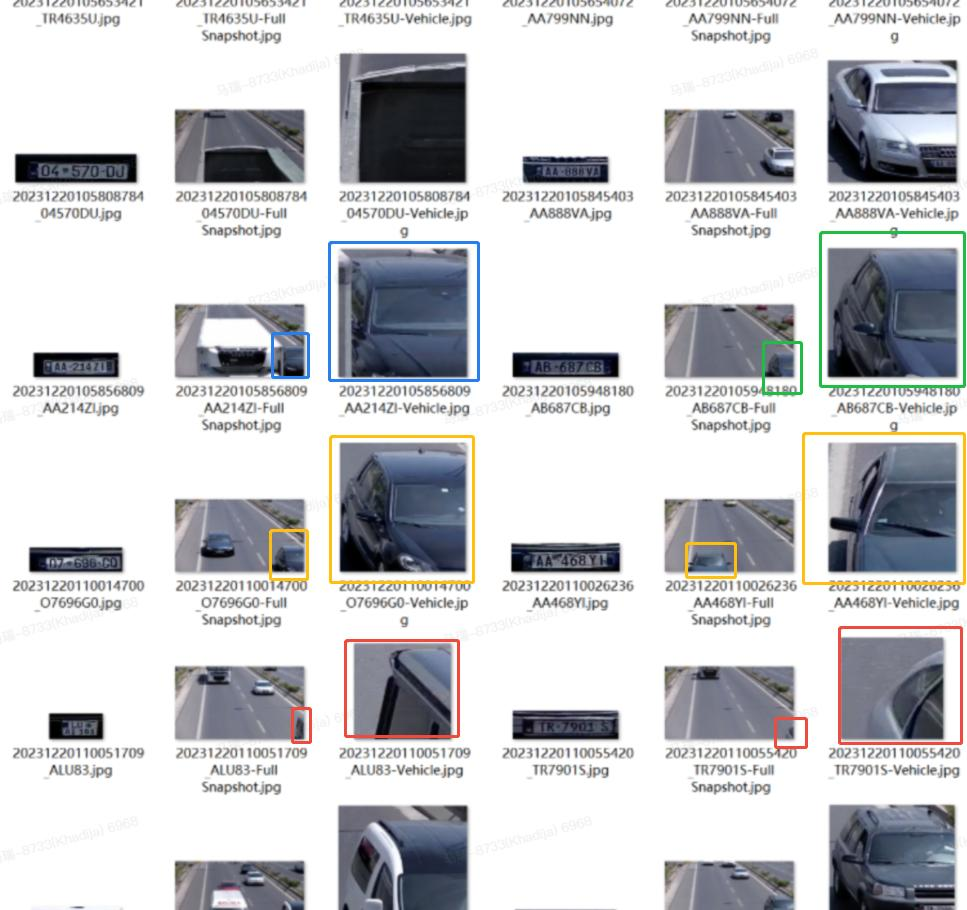
[Optimal Push Mechanism]: The optimal push mechanism can be configured only in Vehicle Priority mode. This mechanism is suitable for scenarios where a balance between push image quality, LPR recognition accuracy, and the timeliness of alarm actions is required. When enabled, the mechanism ensures push image integrity and improves license plate recognition accuracy, at the expense of the timeliness of other alarm actions. When disabled, alarm actions remain timely, but push images may be incomplete.
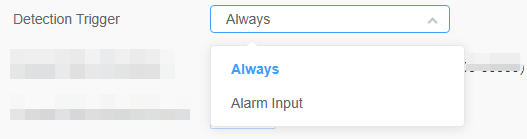
[Detection Trigger]: If “Always” is selected, the camera will continuously detect the license plate. If “Alarm Input” is selected, the camera will only detect the license plate when the Alarm Input is triggered.
[Repeat Plate Checktime]: Set the time interval for reading the same license plate to effectively prevent duplicate identification of parked vehicles.

[License Plate Serial Format]: The License Plate Serial Format function supports the formulation of identification rules and enables further automatic processing, filtering out license plates in non-compliant formats to enhance the accuracy of license plate recognition.
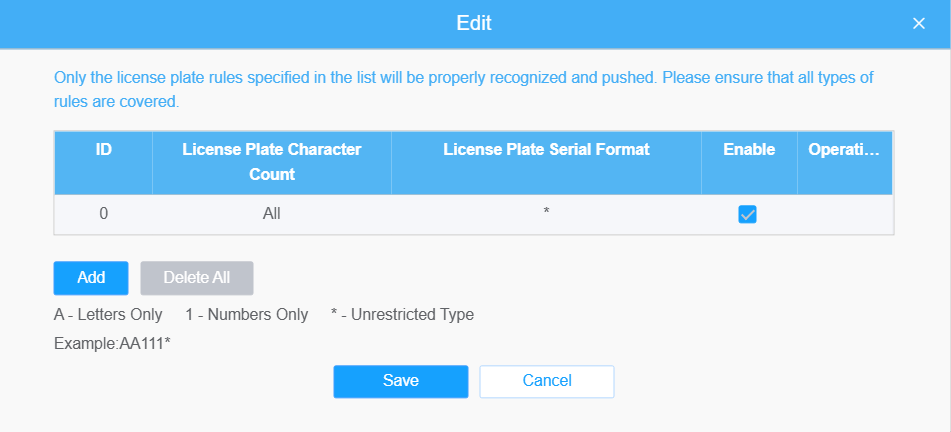
Through the License Plate Serial Format, special rules can be configured to filter out specific license plates, so that only the license plates that meet the rules are automatically displayed on the live view interface.
For example, the number of license plate characters can be set to 6 with the format “A*****”. When “Filter number of characters” is enabled, only license plates consisting of 6 characters and starting with a letter will be pushed and displayed.
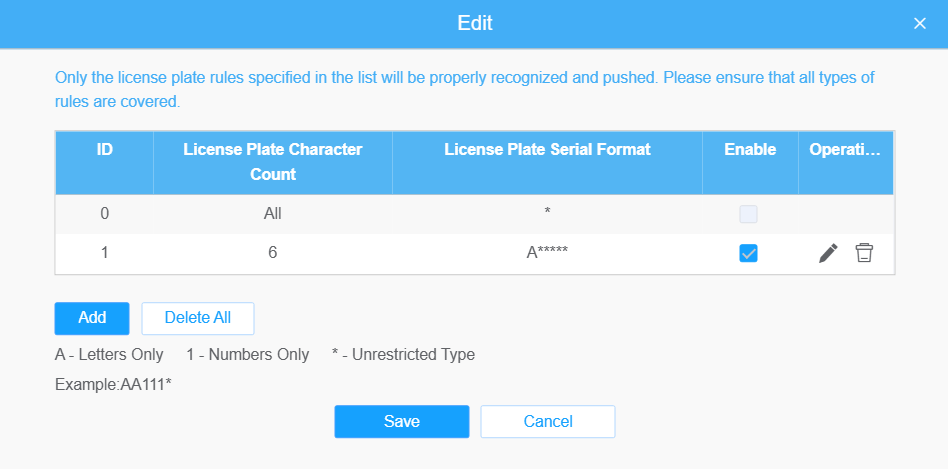
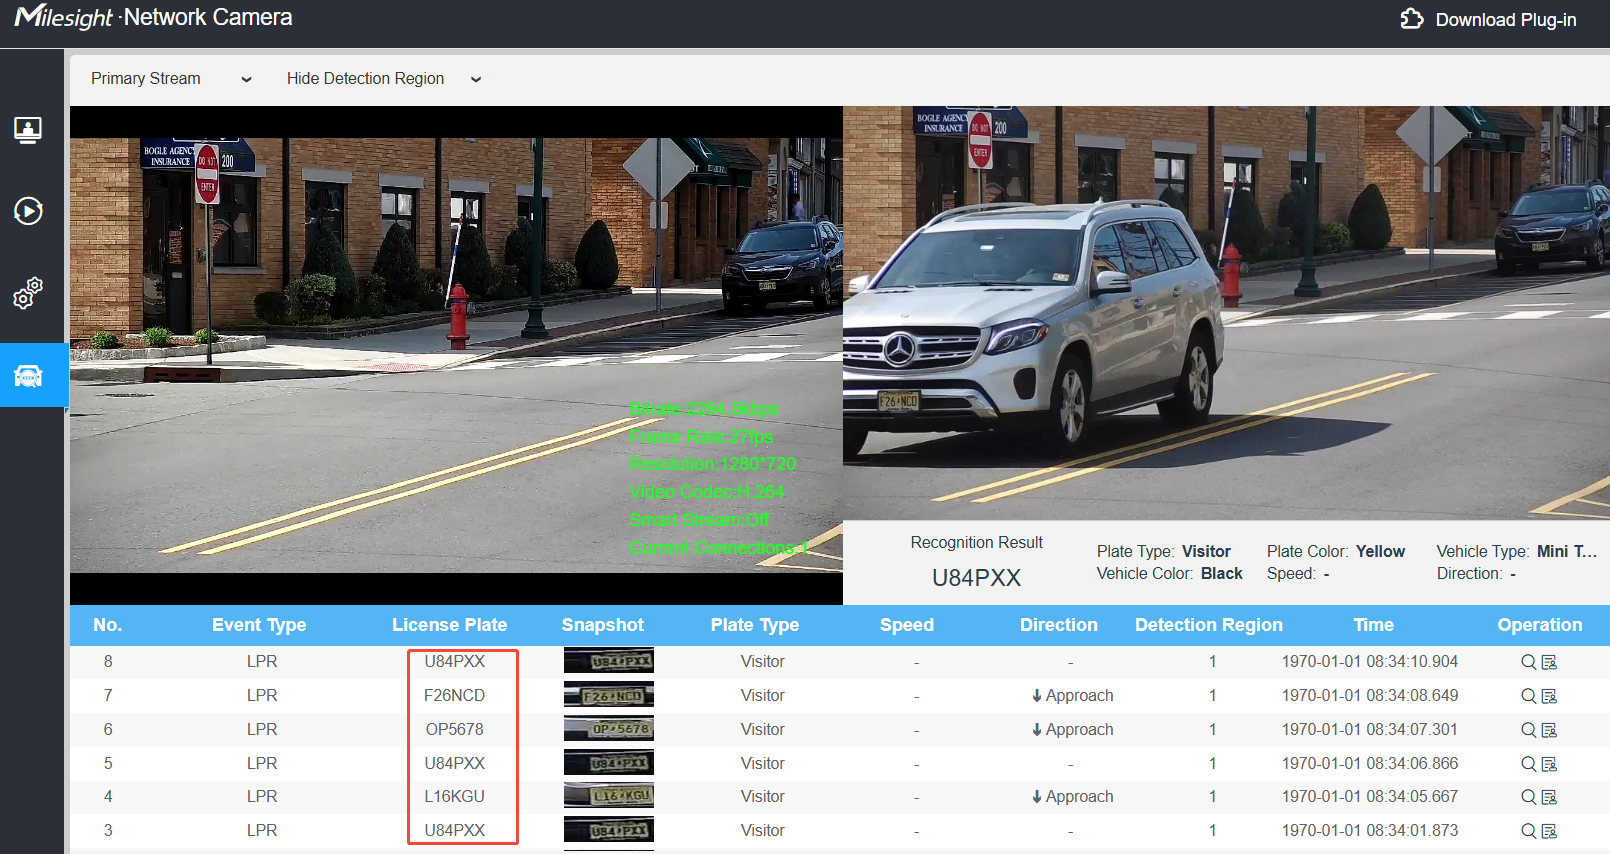
Note: PE&PG1 platform models support 30 license plate rules .
[Attributes Identification]: Check Plate Color, Vehicle Type, Vehicle Color, Vehicle Brand, Detection Region, Direction, Country, Region, or All to enable Attributes Identification.The selected information will be included in the pushed data and displayed on the Smart Search and Live View interfaces.
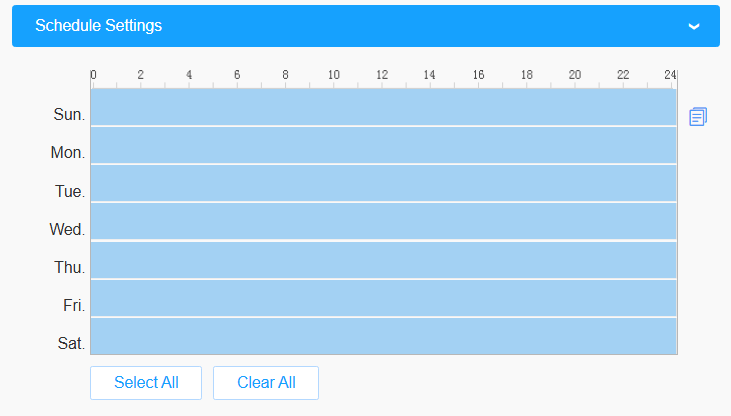
Step 4: Schedule settings
Set the effective time of license plate recognition.
Step 5: Click “Save” to apply the settings.
1.2 Advanced
In the interface, you can set snapshot resolution and quality, configure display information for license plate recognition snapshots, and customize snapshots filenames.
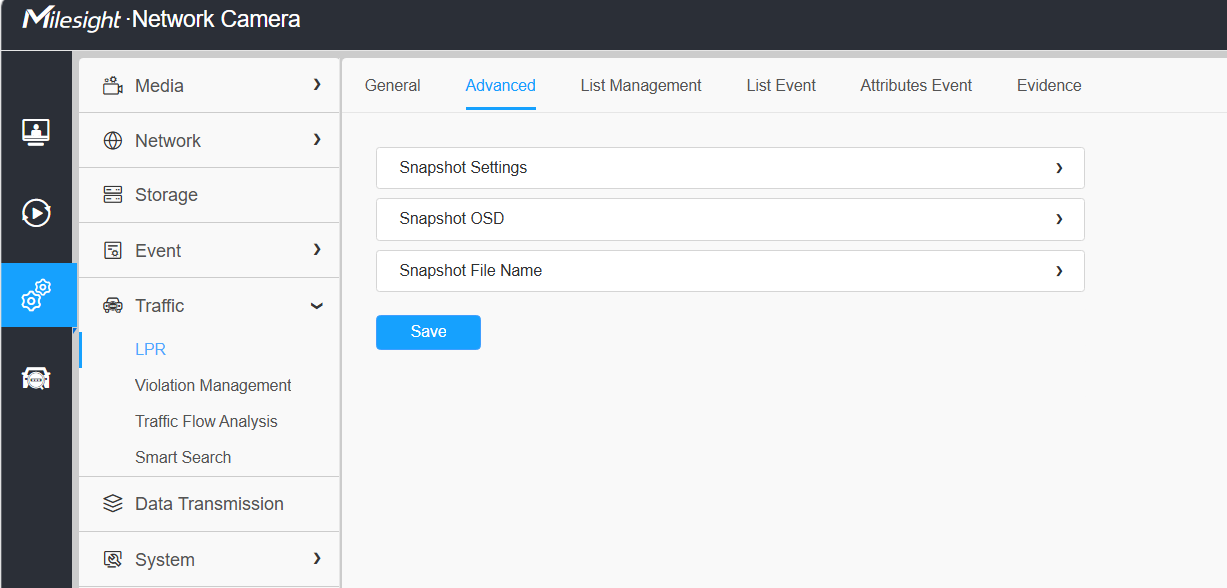
[Snapshot Settings]:
In the interface, you can set snapshot resolution and quality of the snapshot.
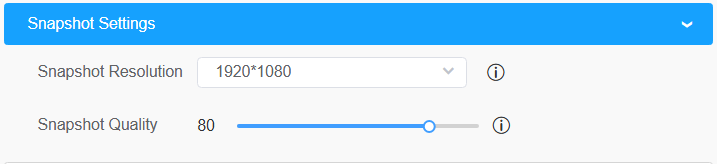
Note: The Snapshot Resolution setting defines the resolution of the full snapshot. The Snapshot Quality setting only applies to the full snapshot.
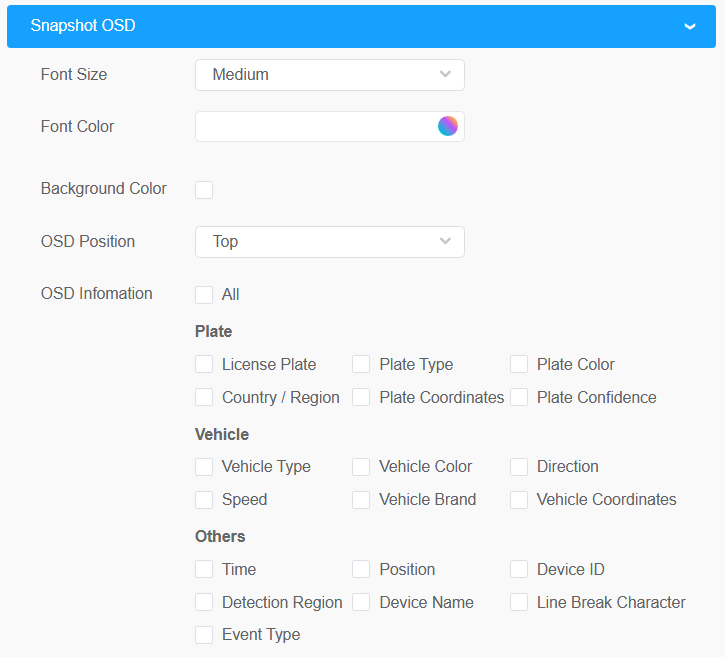
[Snapshot OSD]: Set the snapshot OSD options.
Each time an item is checked, the list adds the corresponding item row, including the item name and the sorting operation. Additionally, the content of the Position and Device ID items can be customized. When all items are checked, the function interface is displayed as shown below.
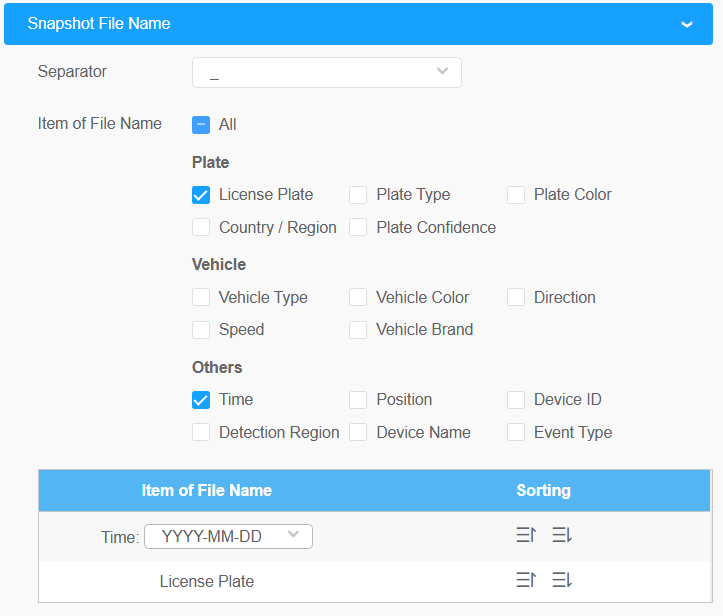
[Snapshot File Name]: Configure the snapshot file name.
Once the license plate is recognized, the snapshot will be uploaded via FTP or Email, or stored in the local LPR Picture File Path. You can customize the filenames of the snapshots here:
2. LPR Event
2.1 List Management
Add license plates to this interface as Black List or White List entries, and then configure the alarm action for these license plates on list event page. When these license plates are detected, the camera will respond according to your settings.
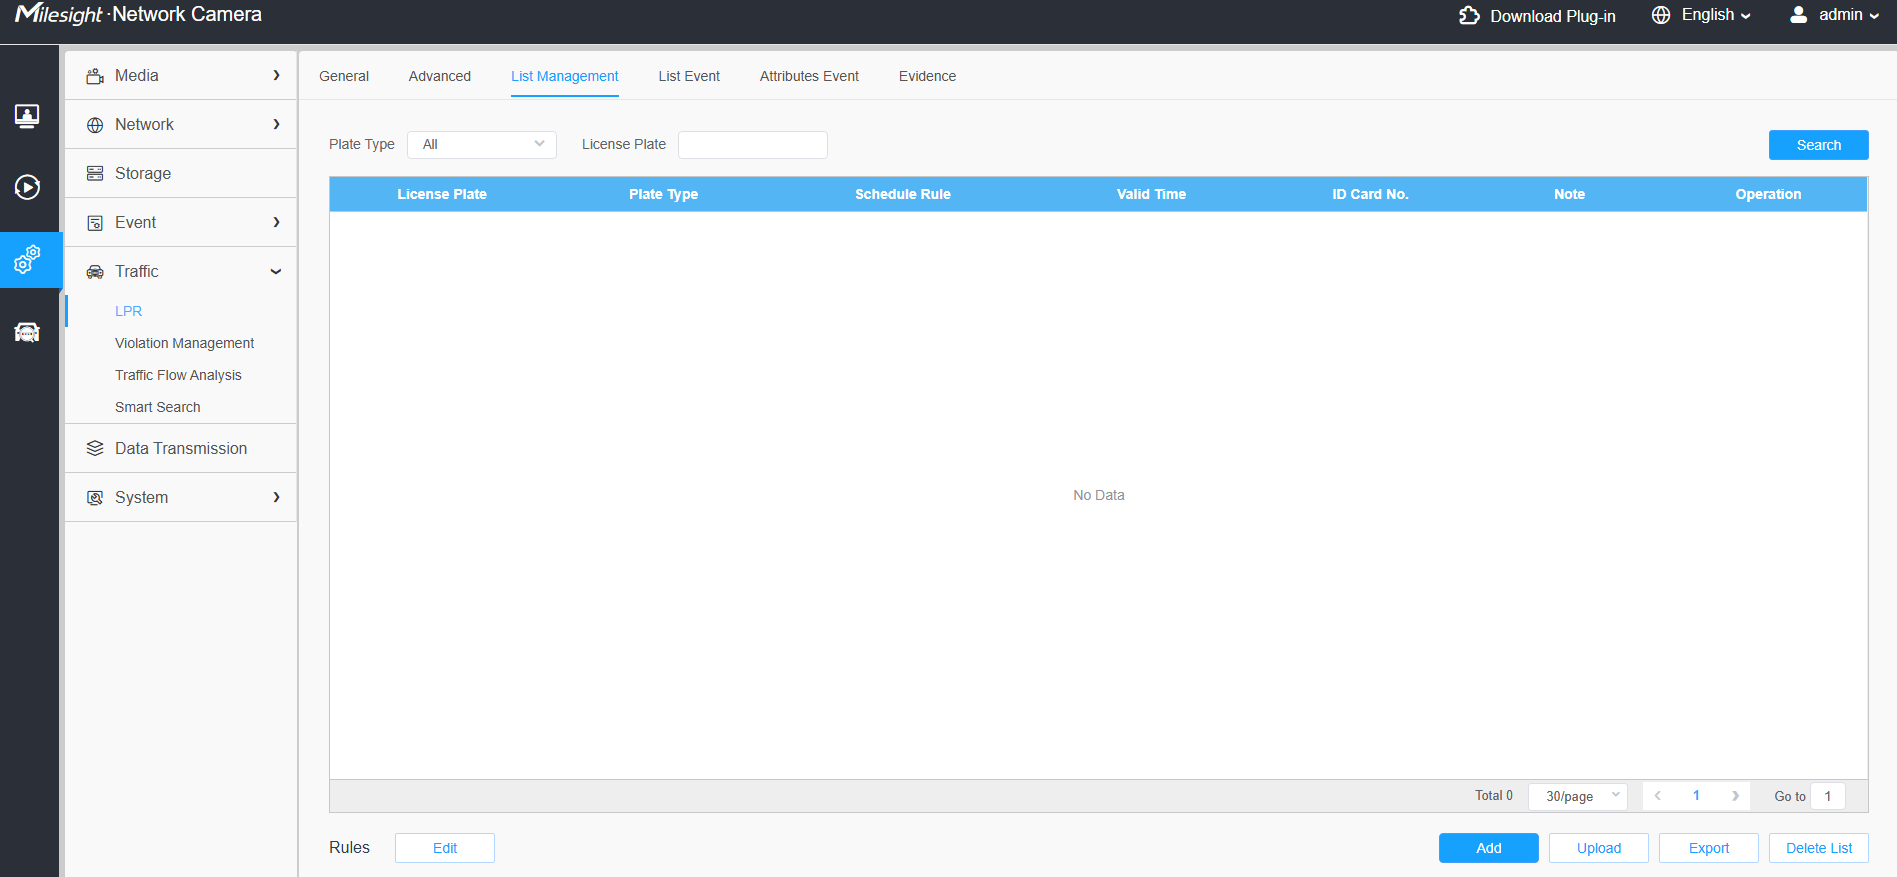
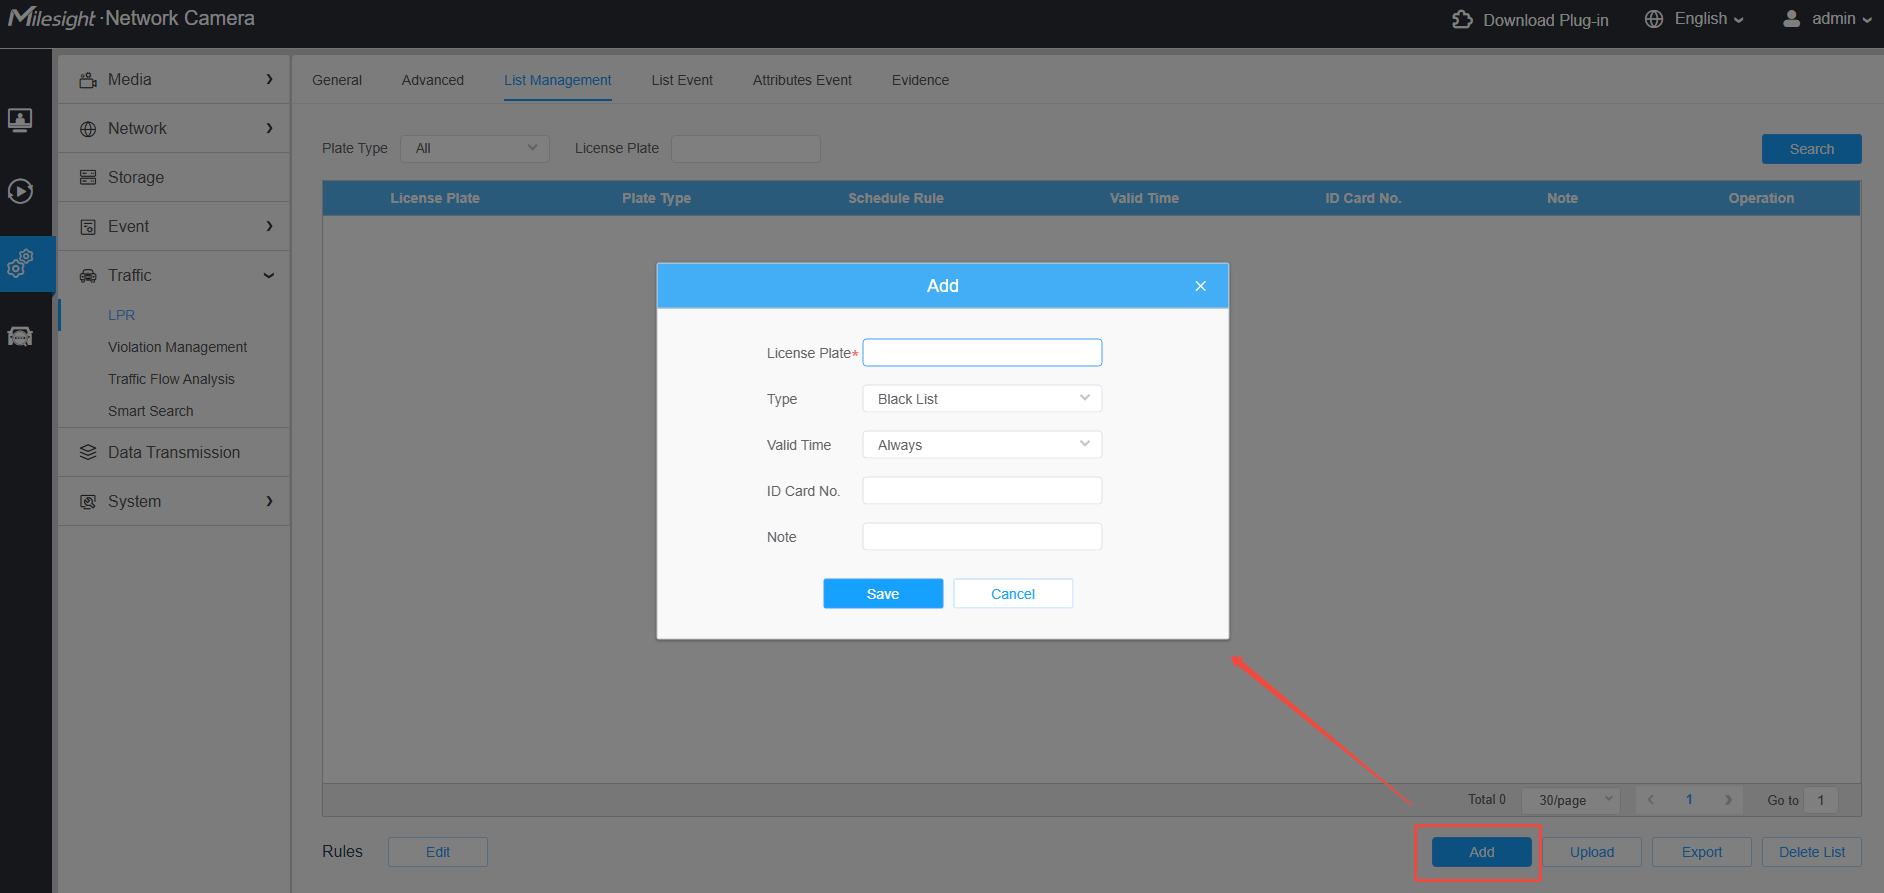
[Add License Plate]: Click the “Add” button, select the license plate type (Black List or White List), enter the license plate number, specify the validity period, and enter the remark information. The license plate will then be added successfully.
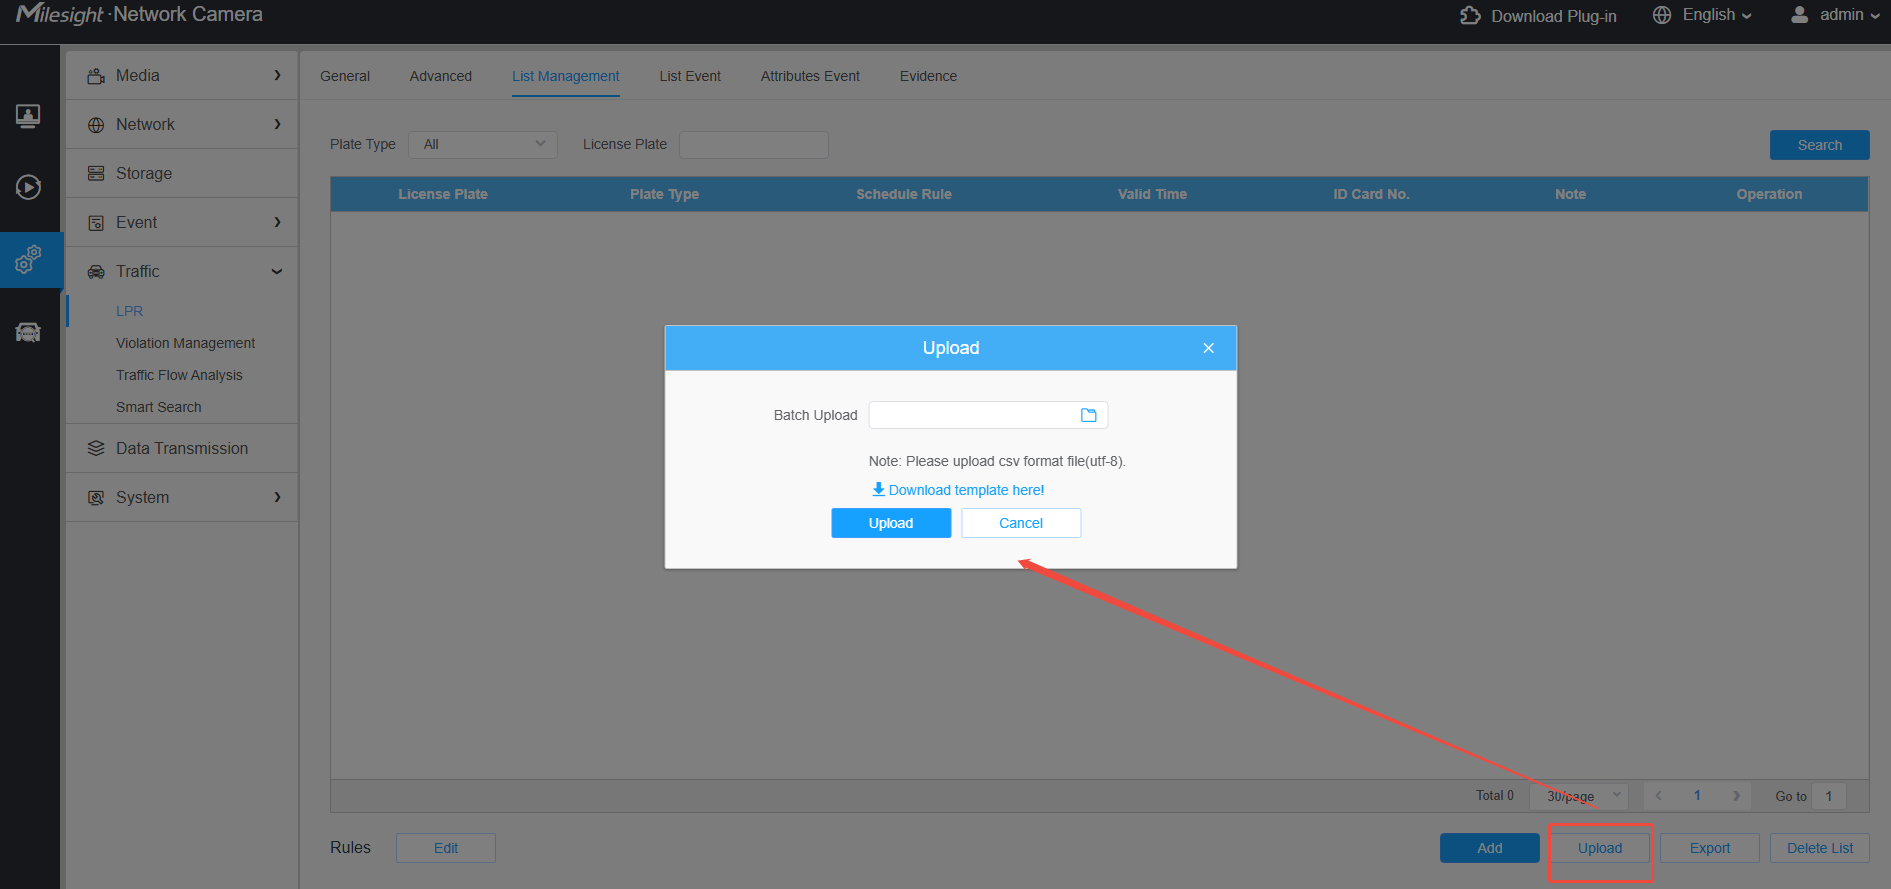
[Batch Upload]: Prepare a .csv file containing the license plates to be added, click the “Browse” button to import the file to this interface, and then click the “Upload” button. The license plates will be added successfully.
[List Search]: Select a Plate Type or directly enter the license plate number, and click the “Search” button. The matching license plates will be displayed in the list as shown below.

[Export List]: Click the “Export List” button to export the license plates in the current list as a csv file locally.
[Delete List]: Click the “Delete List” button to delete all the license plates in the current list.
Notes
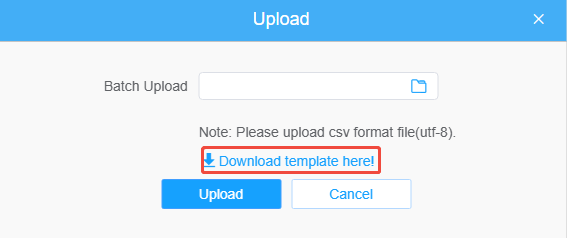
• A template can be downloaded from this interface for reference.
• Up to 20,000 license plates can be added to the Black and White List.
2.2 List Event
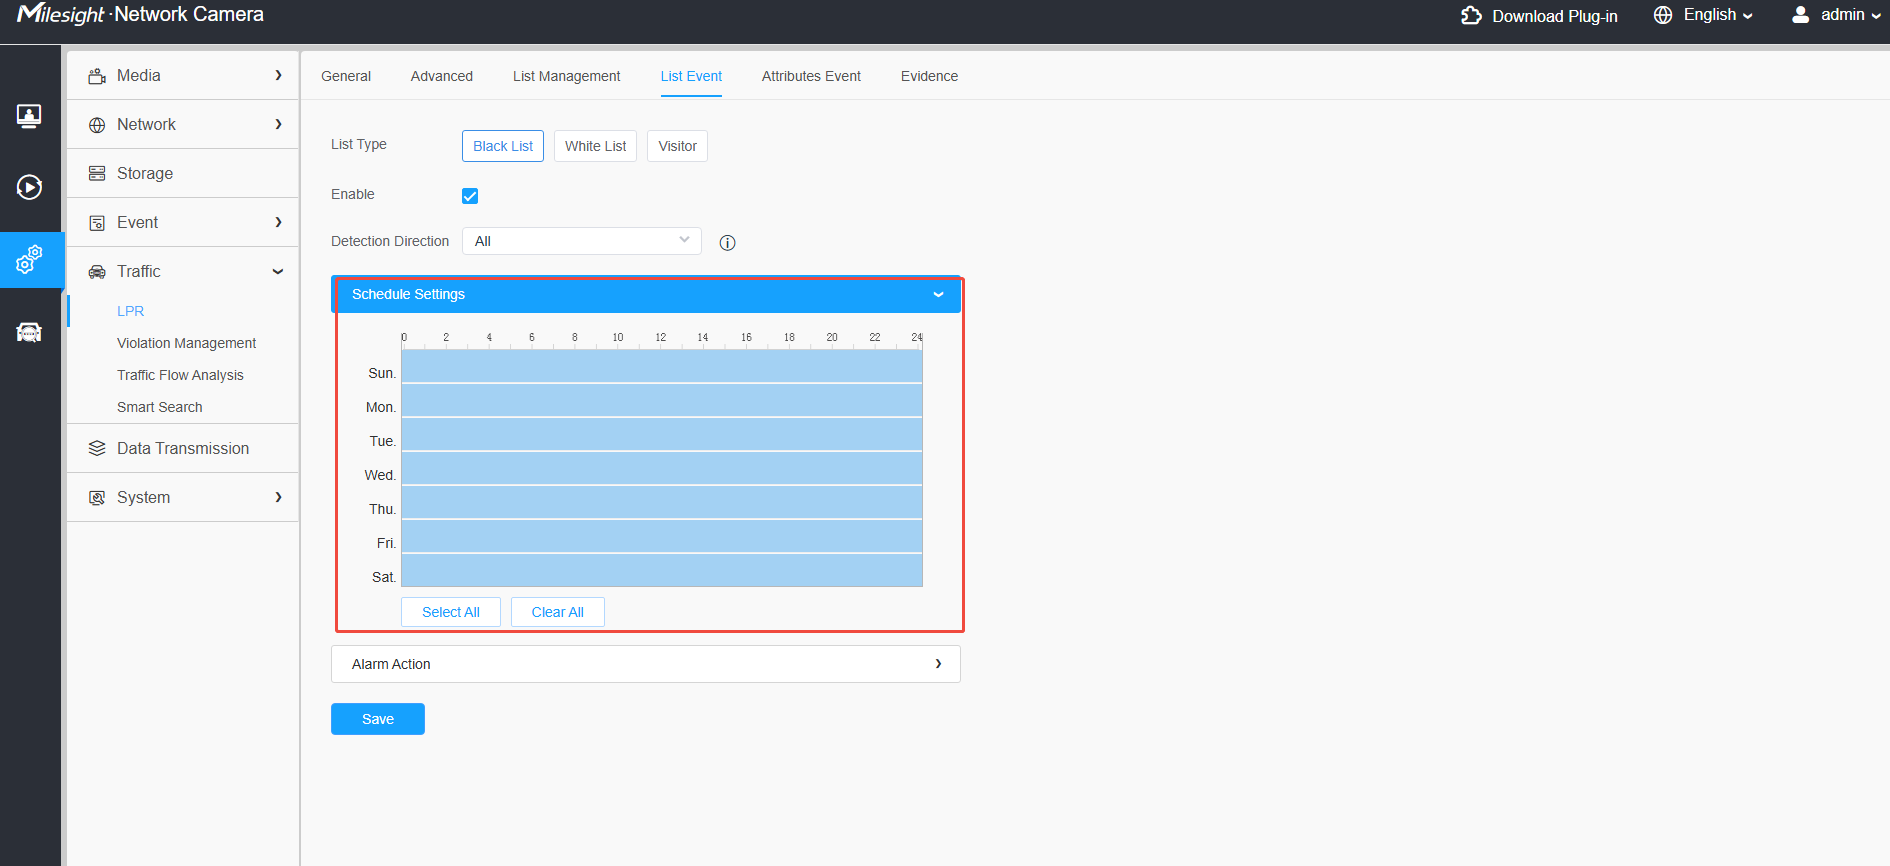
List event can optionally trigger an alarm for vehicles in the corresponding driving direction. It supports configuring respective alarm actions for white list vehicles, black list vehicles, and visitor vehicles that are neither on the Whitelist nor Blacklist.
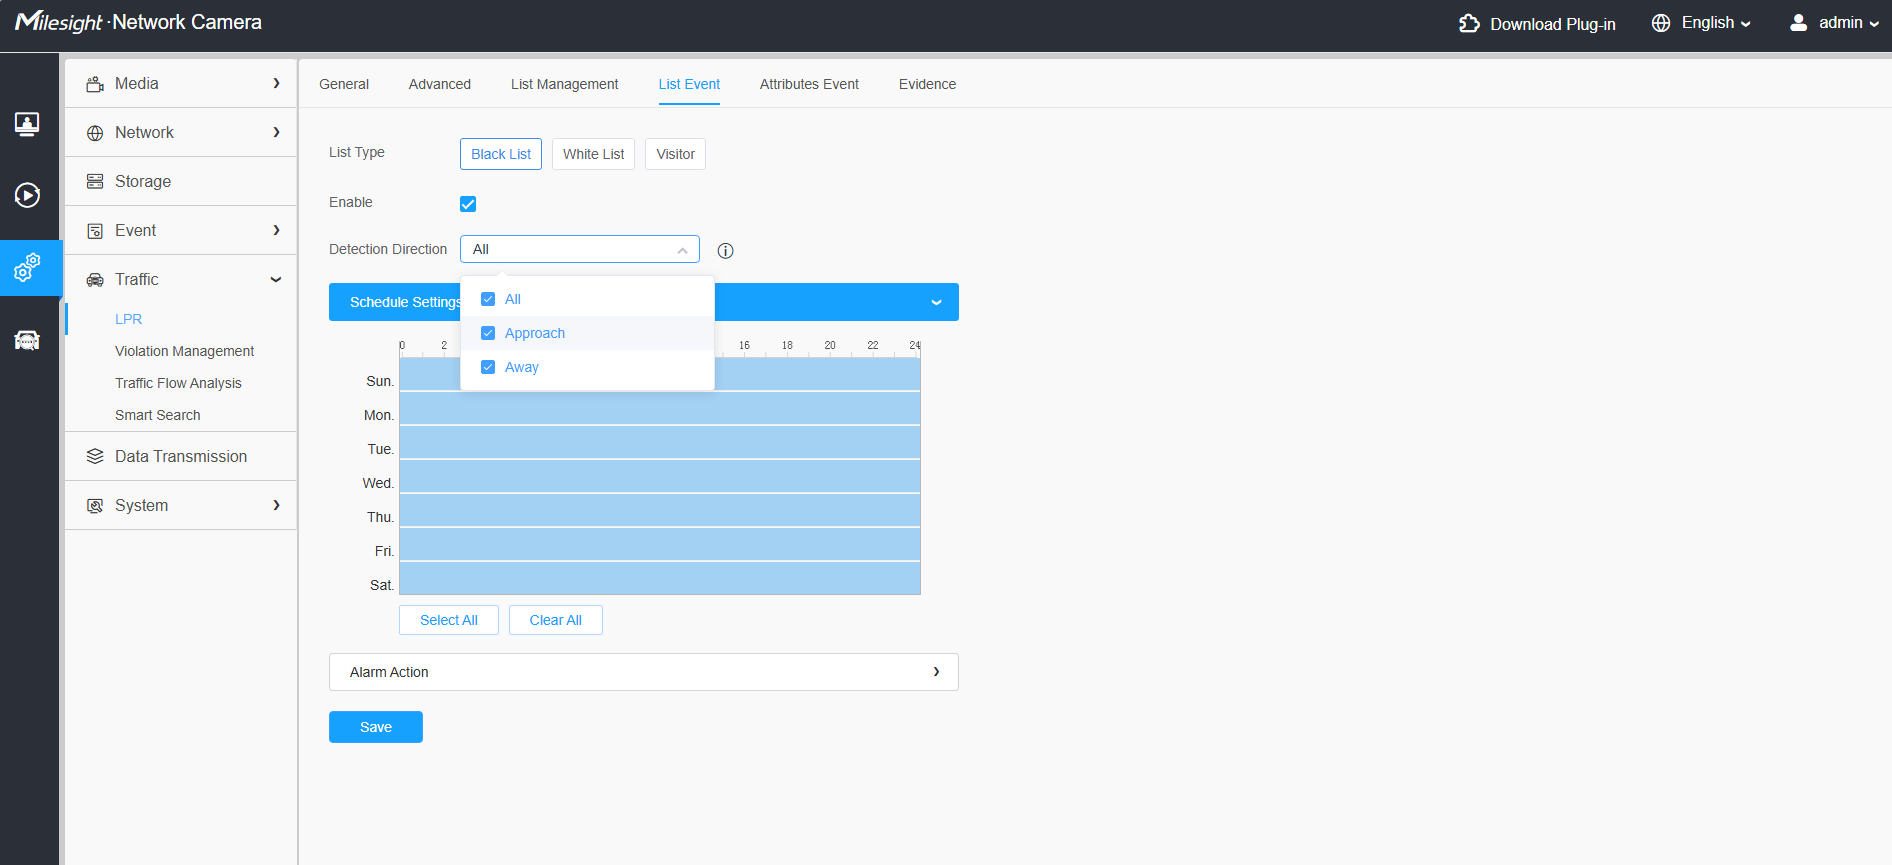
Step 1: Select the List Type (Black List, White List or Visitor) and the direction detection (All, Approach or Away). Once Detection Direction is configured, only vehicles moving in the specified direction will trigger list events.
Step 2: Schedule Settings. Click the “Edit” button to draw the schedule.
Step 3: Configure Alarm Settings.
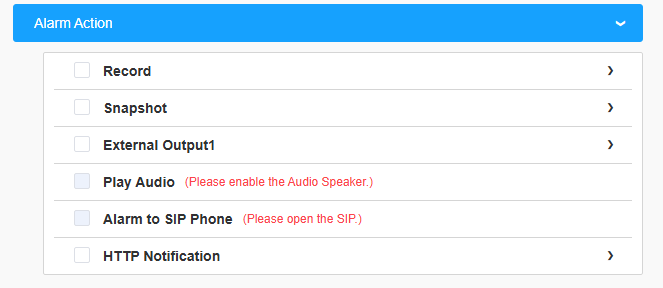
After this is configured, when a license plate marked as “Black”, “White”, or “Visitor” is detected, the camera will respond according to your settings.
2.3 Attributes Event
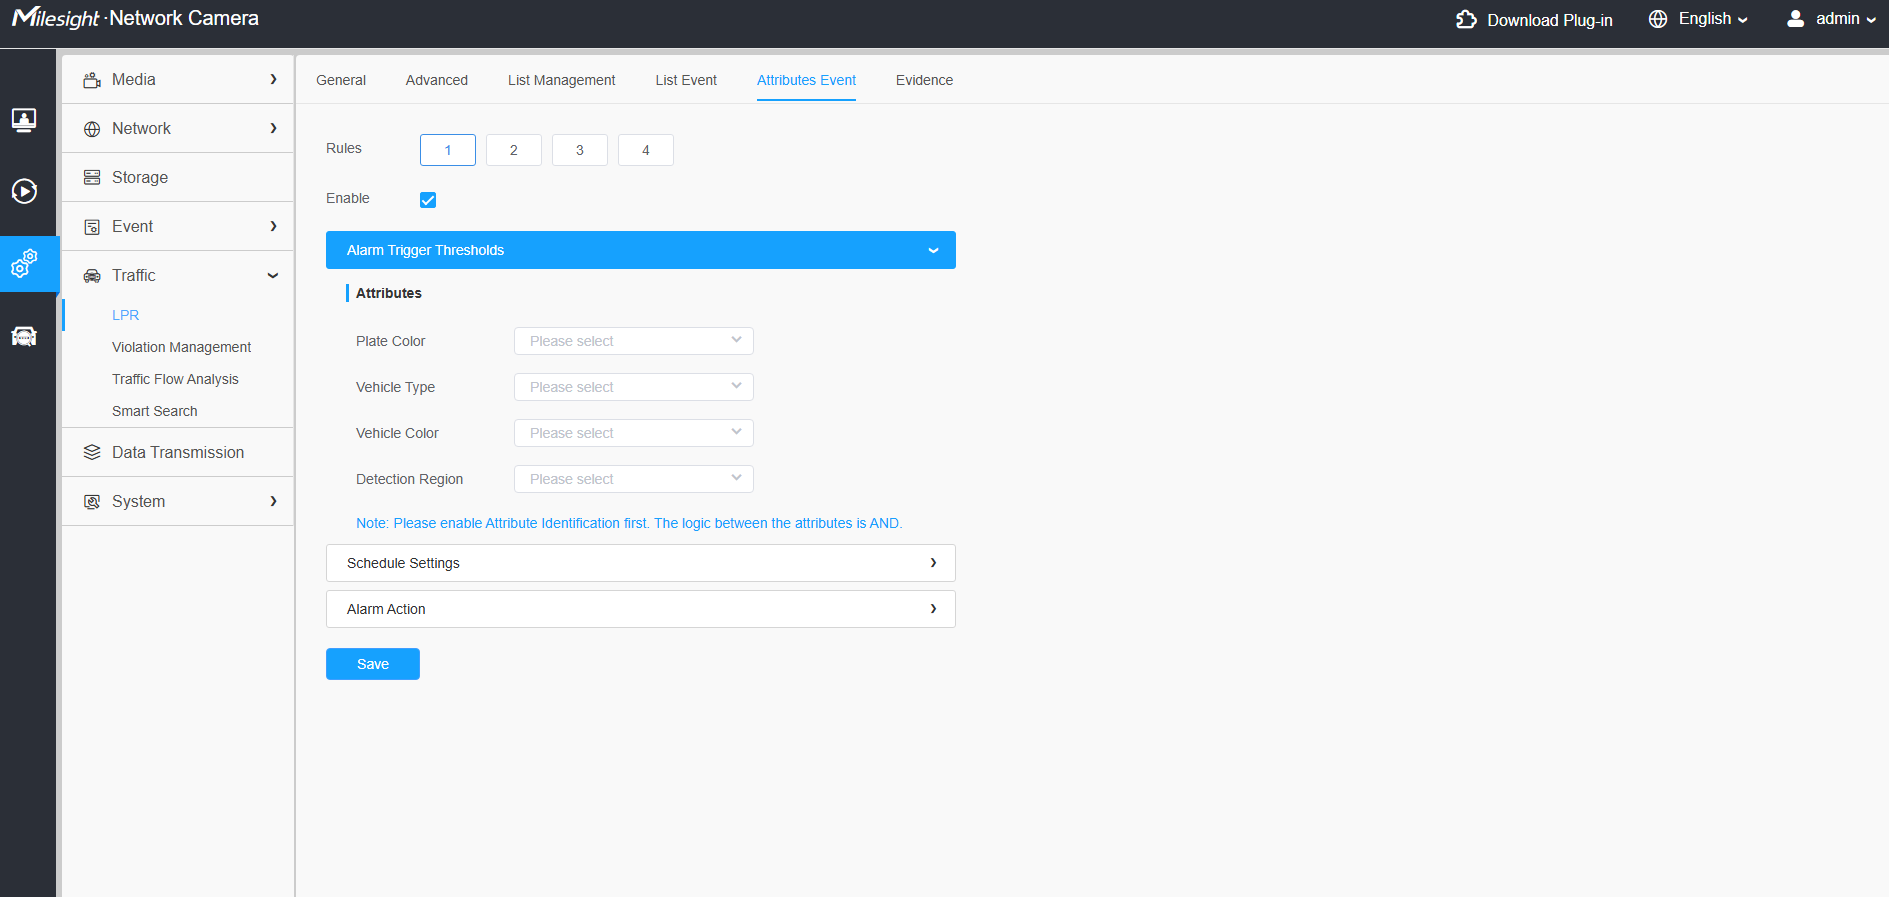
Different rules can be configured to trigger corresponding alarms based on vehicle attributes (license plate color, vehicle type, vehicle color) or detection zones.
Attribute alarms can be configured for up to 4 rules, which can be switched between using the tab control. Each rule has its own configurations for activation, triggering conditions, and scheduling. Alarm actions for each rule are configured using the same set of options.
Note:
1. Attributes within the same rule are linked by an AND relationship, while the results of each attribute are linked by an OR relationship. For example, if Yellow and Red are selected for Vehicle Color and Truck is selected for Vehicle Type, enabling this rule will trigger an alarm only when a yellow or red truck appears.
2. After enabling attribute recognition, a “-” may be displayed in the logs, indicating that no recognition result is available. If no recognition result is obtained for an attribute, no alarm trigger conditions will be met.
2.4 Evidence
The Evidence function is often used at traffic intersections or parking lot entrances. With this feature, LPR cameras can be linked with other cameras to take full-view snapshots to help substantiate violations.
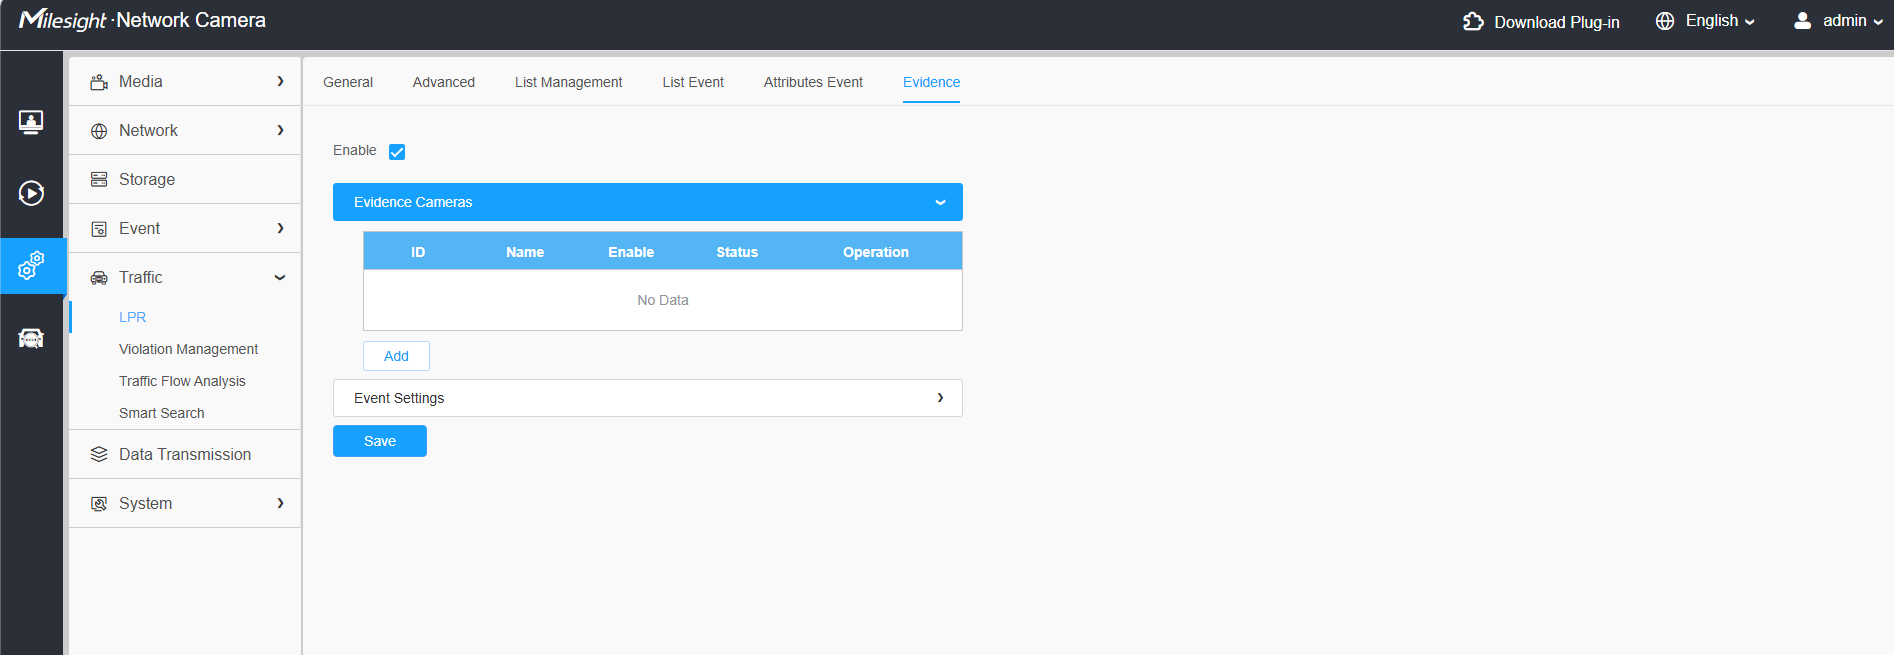
For example, when a vehicle is driving in an illegal lane, the LPR camera captures only the license plate or the vehicle, while the evidence camera captures background photos, enabling verification of the violation.
Add an evidence camera to trigger the capture. Whenever license plate recognition is triggered, the evidence camera can capture scenes from different perspectives.
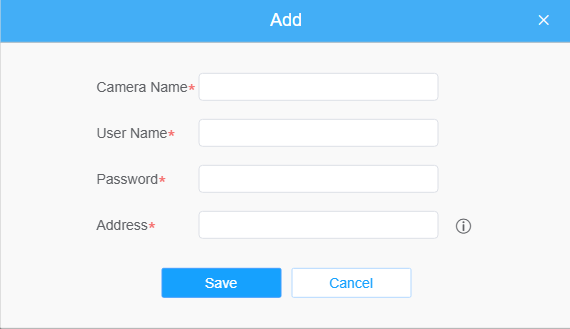
[Evidence Camera]: Enter the username, password, and address of the evidence camera to add it.
Note:
• Up to 2 evidence cameras can be added.
• The evidence camera captures the primary stream picture by default.
• For the Address, enter the IP address of the evidence camera directly for a Milesight camera, or enter the snapshot URL for a third-party camera.
2.5 Violation Management
Step 1: Detection Region
Draw the region to be detected.The configuration here is the same as the "Detection Region" under "General".
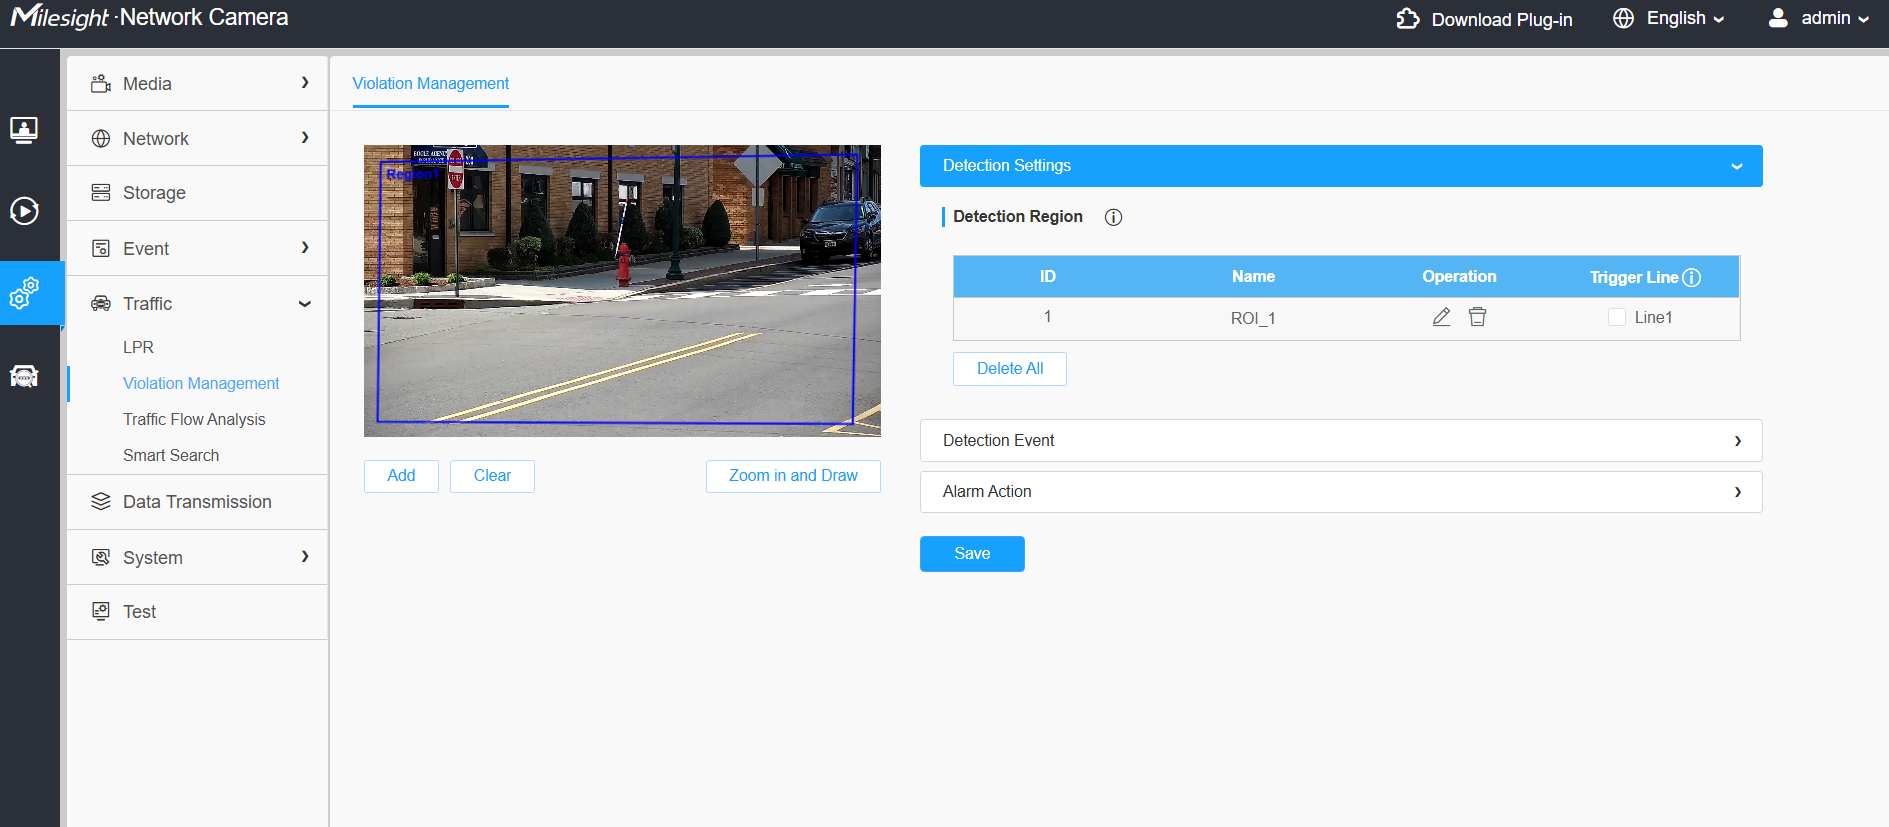
Step 2: Detection Event
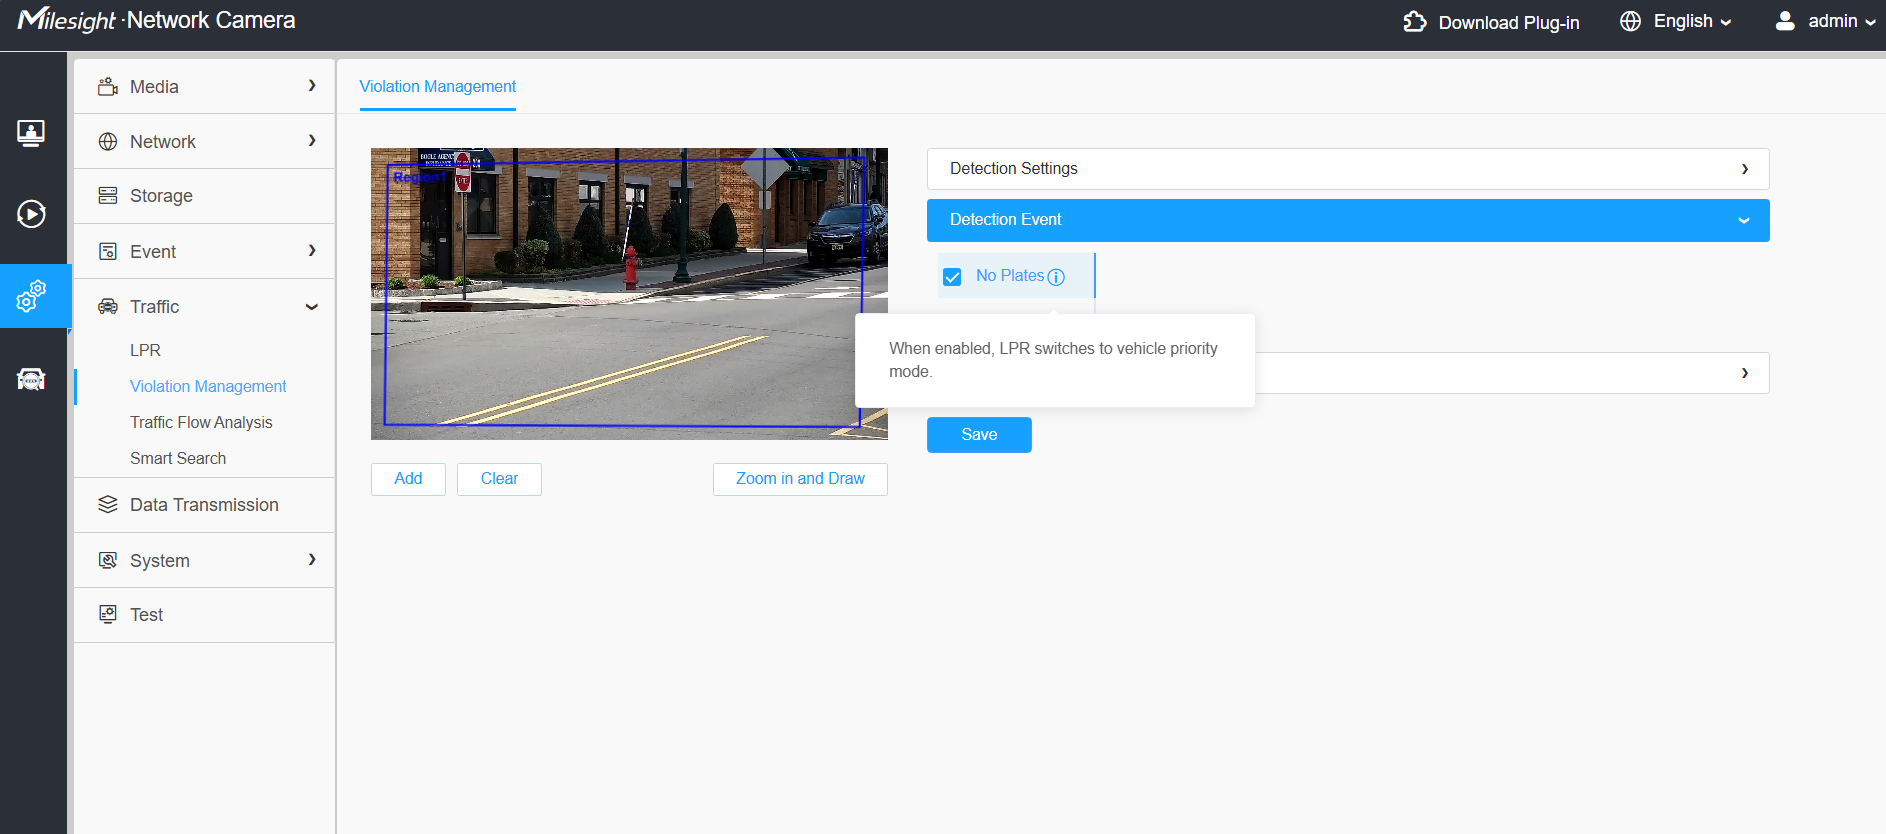
Select the violation events to be detected.
[No Plates]: This event is used to detect vehicles without license plates. When enabled, LPR switches to Vehicle Priority mode.
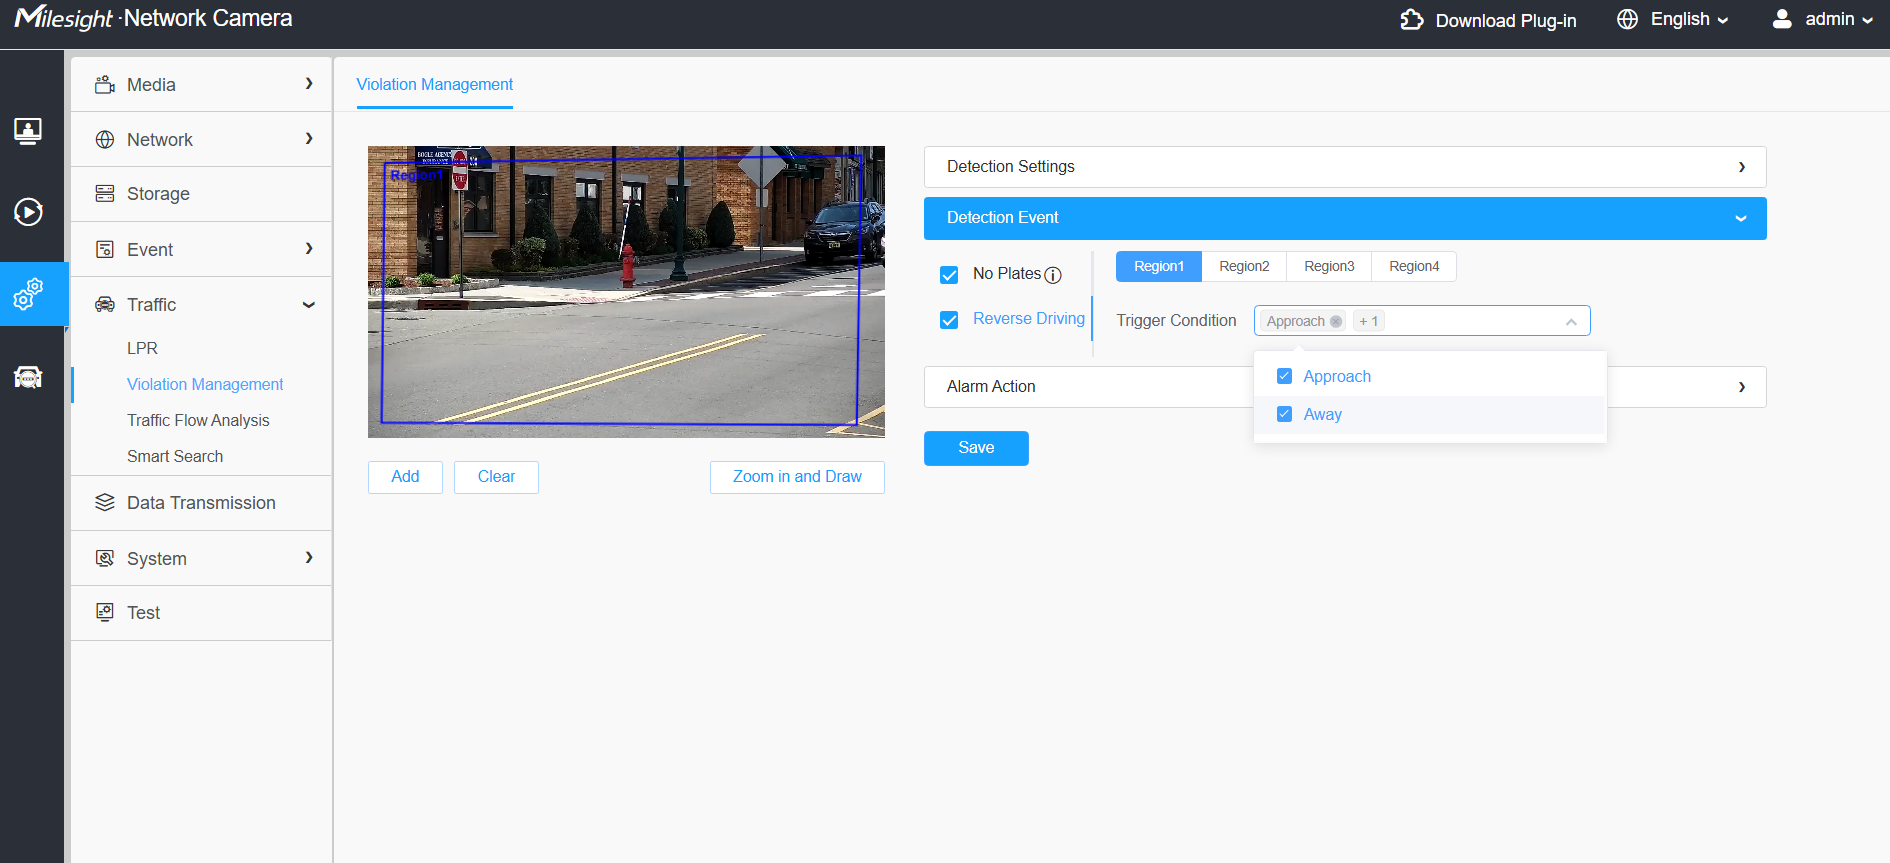
[Reverse Driving]: This event is used to detect vehicles driving in the reverse direction. Different rules can be configured for each detection area. “Trigger Condition” contains two parameters: “Approach” and “Away”.
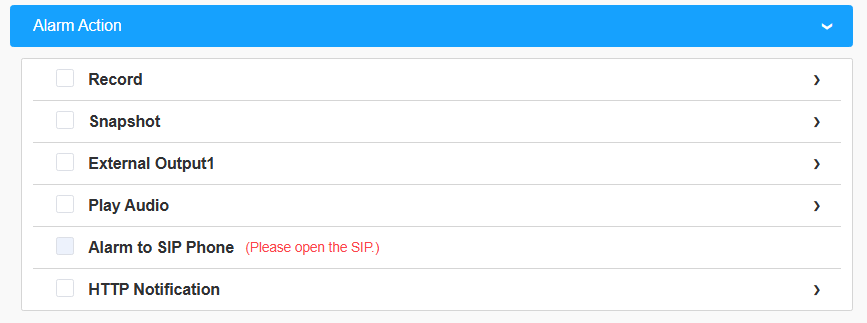
Step 3: Configure Alarm Actions.
2.6 Traffic Flow Analysis(Vehicle Counting)
This feature supports vehicle counting in multiple detection zones, allowing users to filter out vehicles crossing different zones and prevent duplicate counts. When enabled, LPR switches to vehicle priority mode.
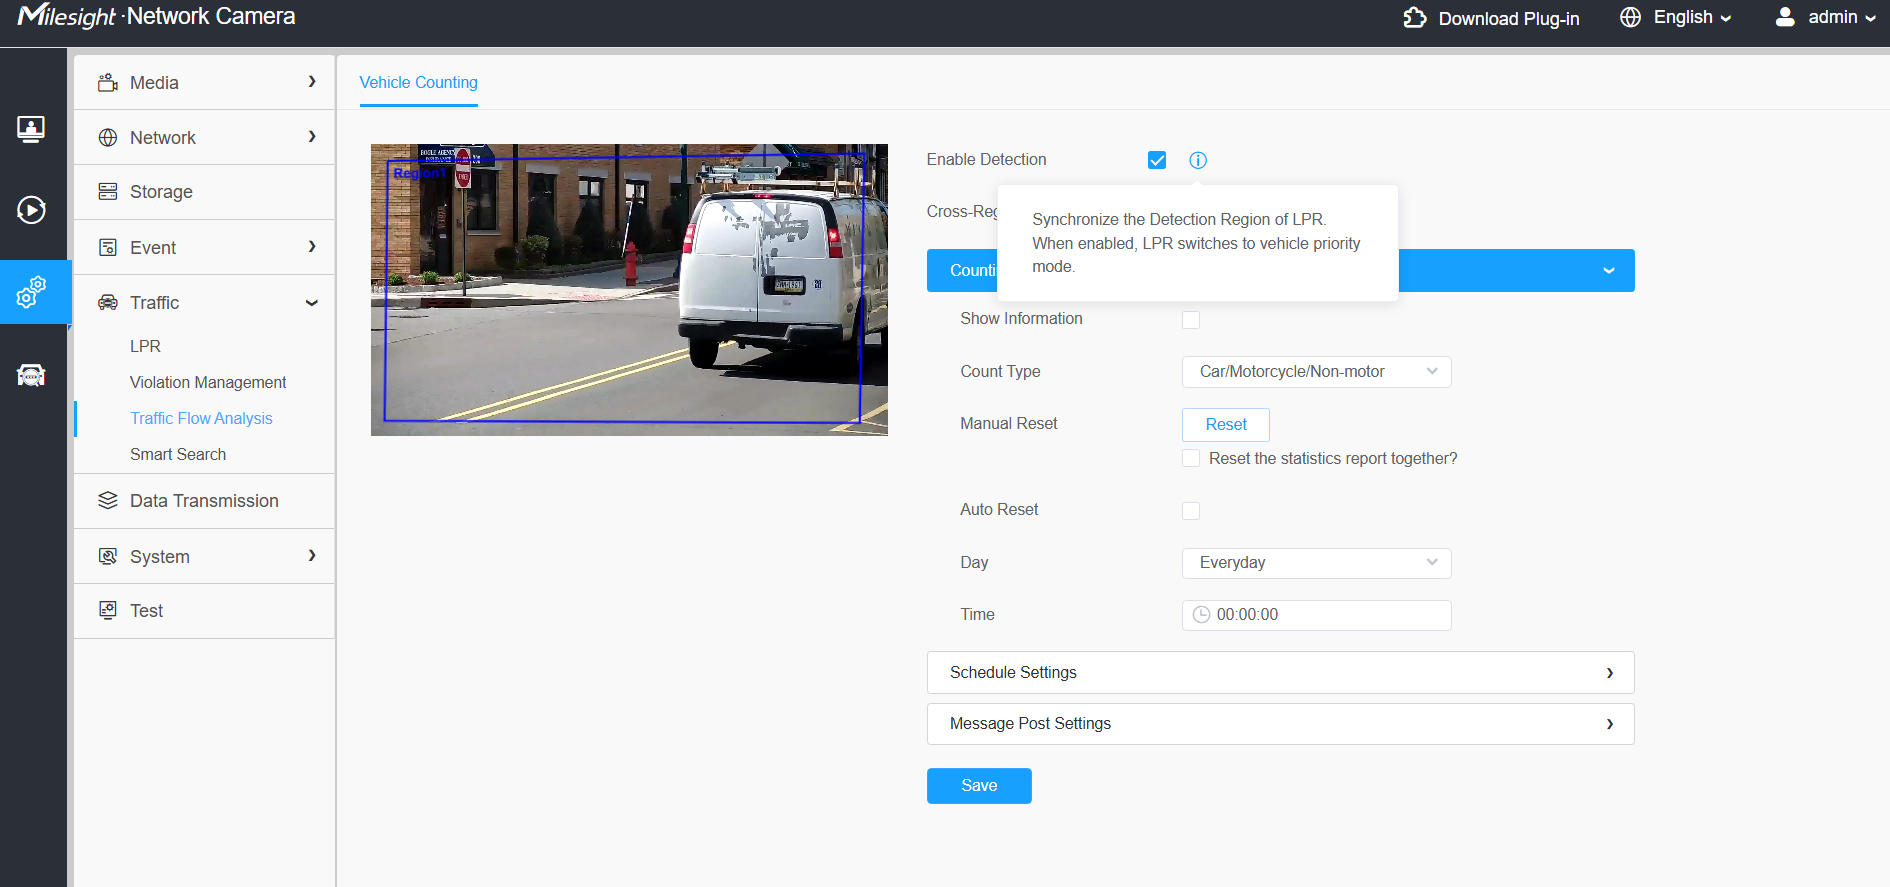
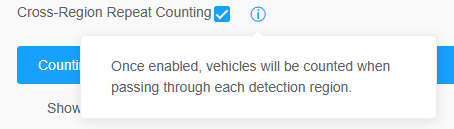
[Cross-Region Repeat Counting]: Cross-Region Repeat Counting means that each region passed through will be counted once.
Step 1: Counting Information
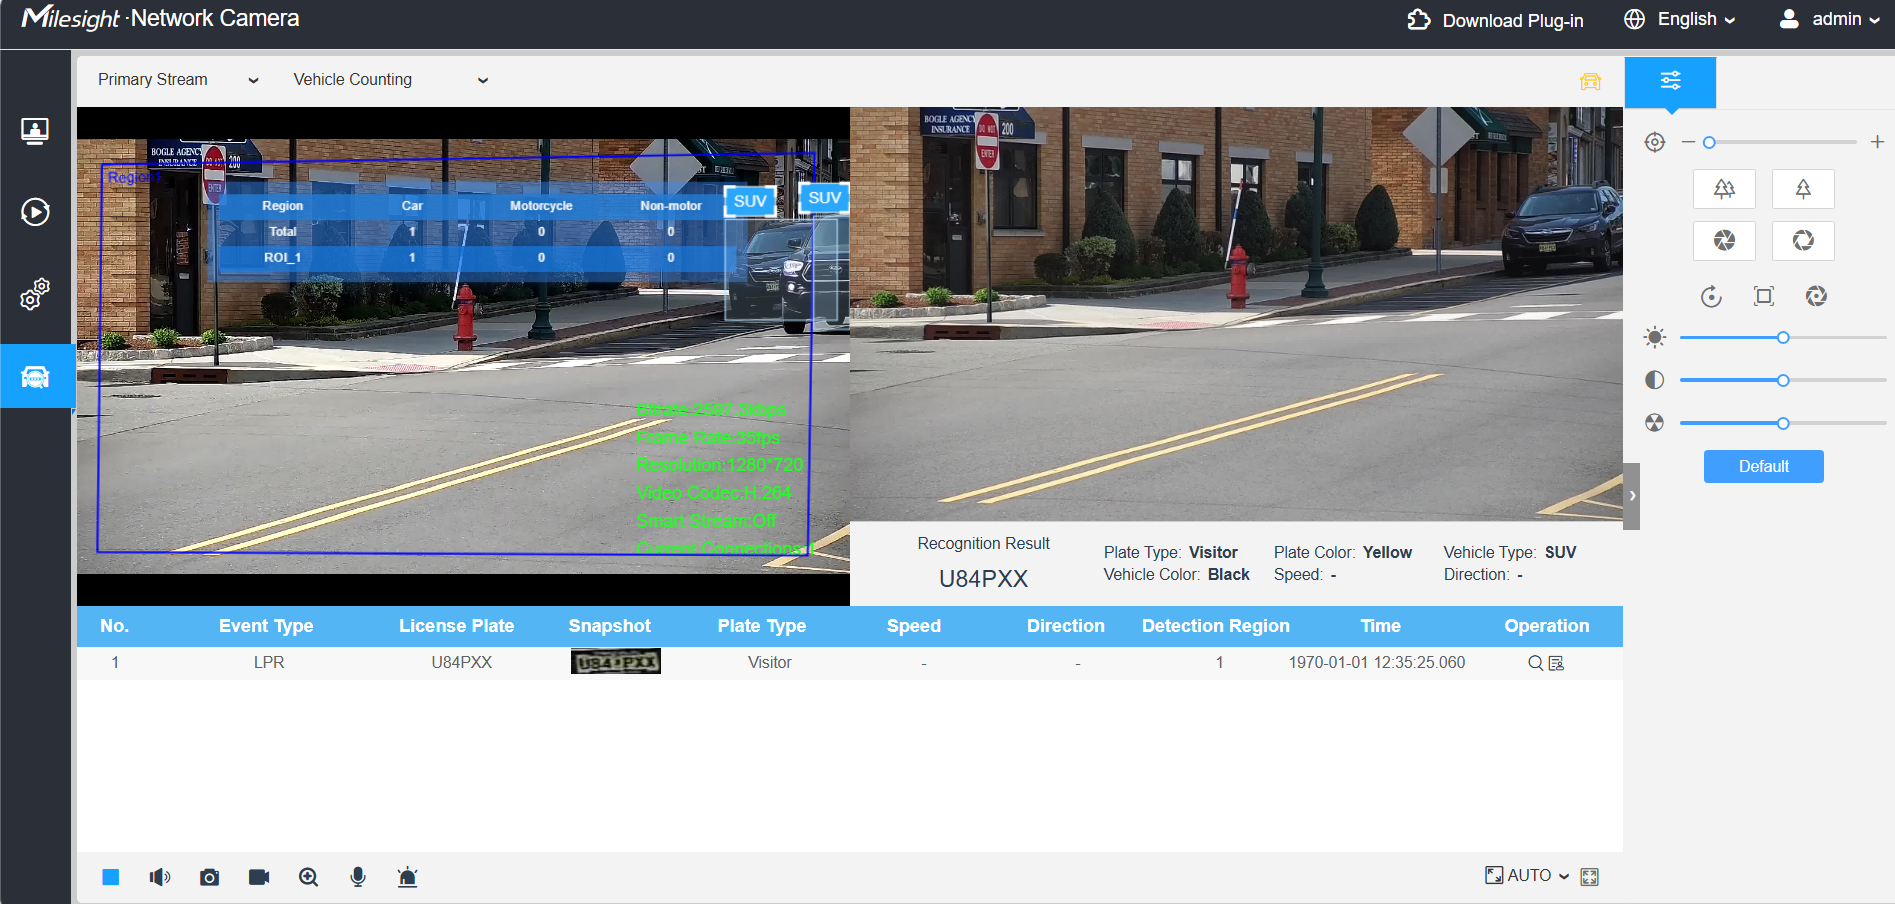
[Show Information]: When enabled, vehicle statistics will be displayed in the live view, as shown below:
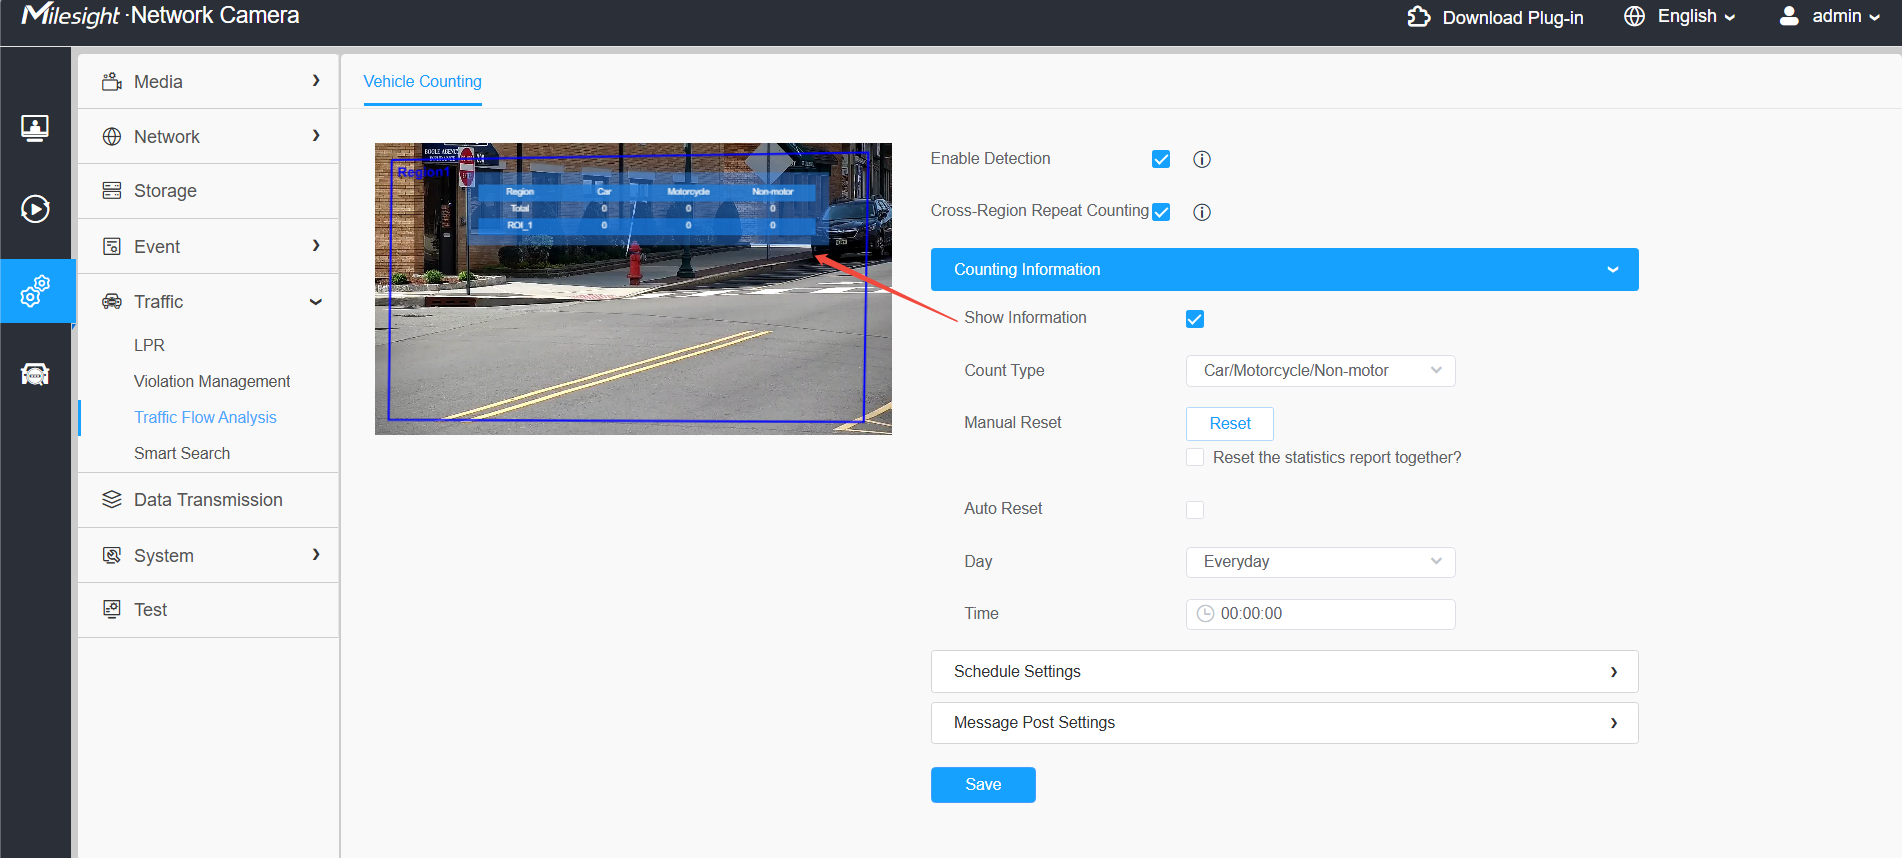
[Count Type]: Vehicles can be counted by type or size.
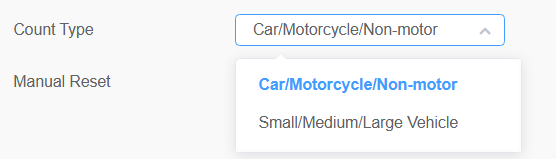
[Reset]: Manual or automatic zeroing can be selected. The frequency of automatic zeroing is configurable.
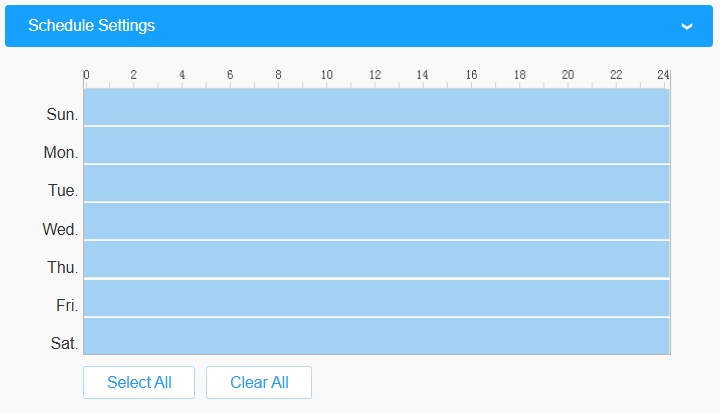
Step 2: Configure Schedule Settings
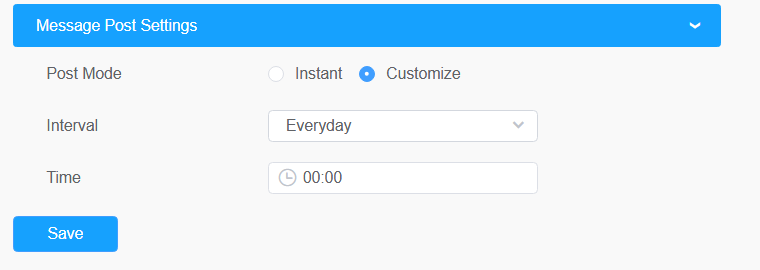
Step 3: Message Post Settings
After vehicles are counted, you can choose instant push or customize push. The frequency of custom push can be configured to push data at a specified time every day or every hour.
3.Live view&Smart search
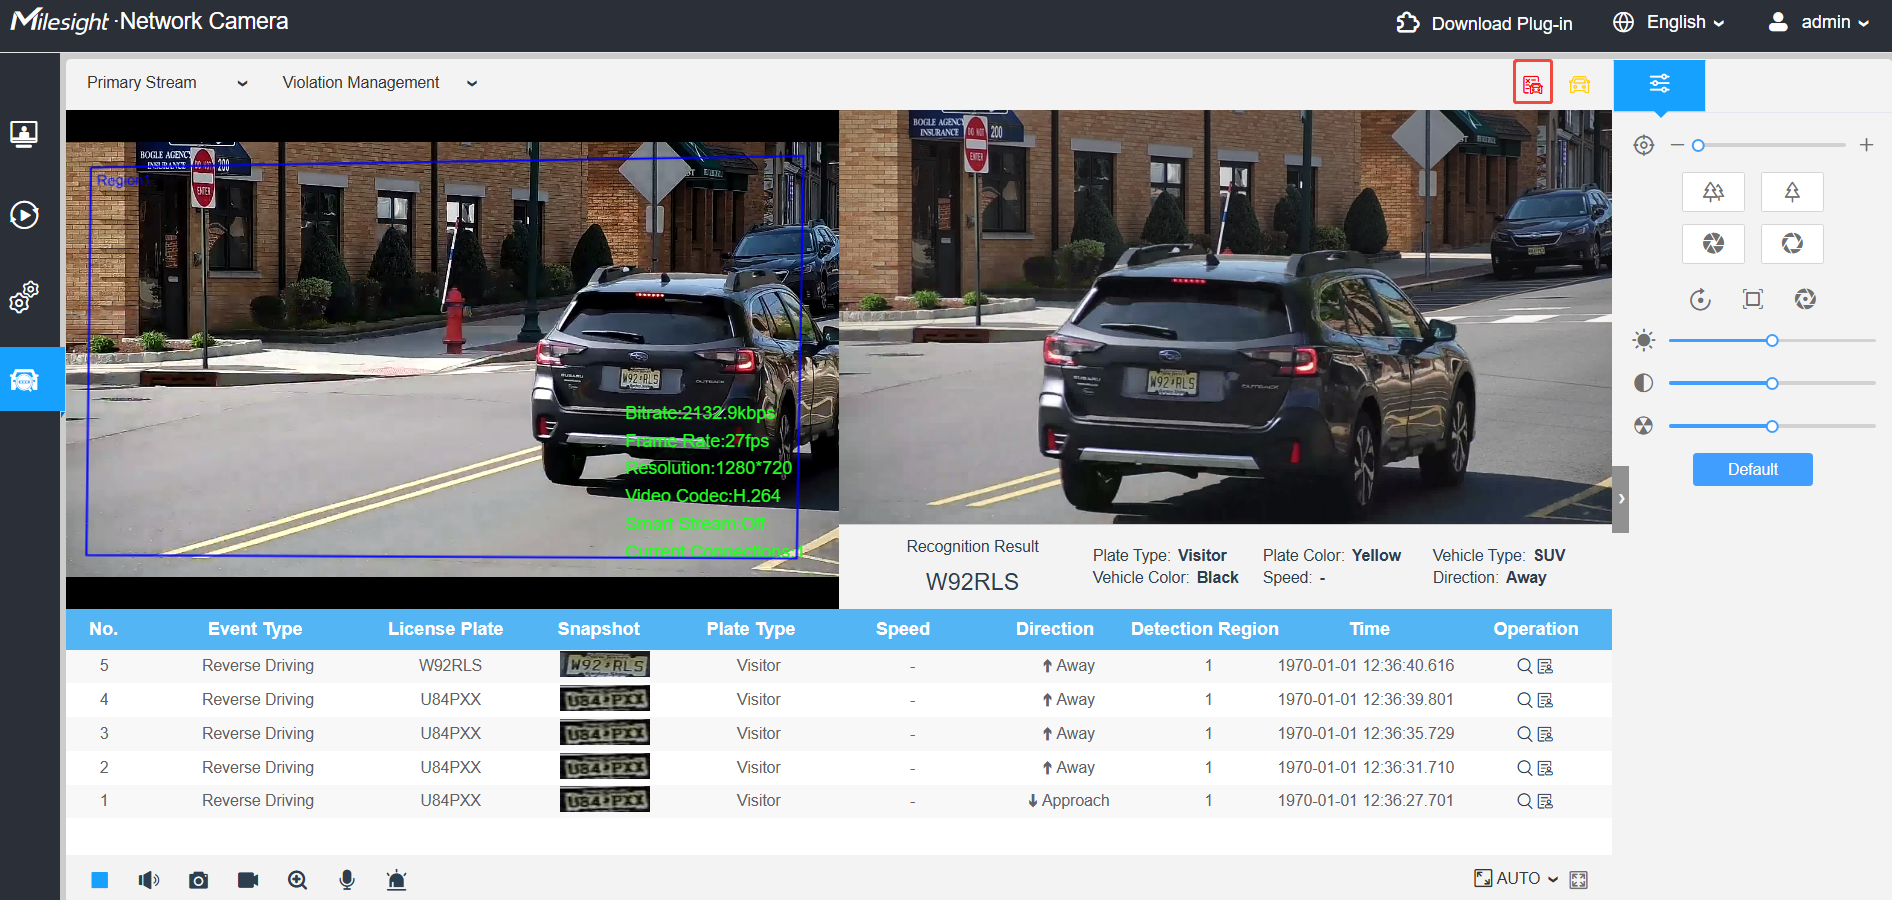
3.1 Professional LPR Live View Interface
Milesight LPR camera supports professional LPR Live View interface. You can see the real-time license plate recognition results.
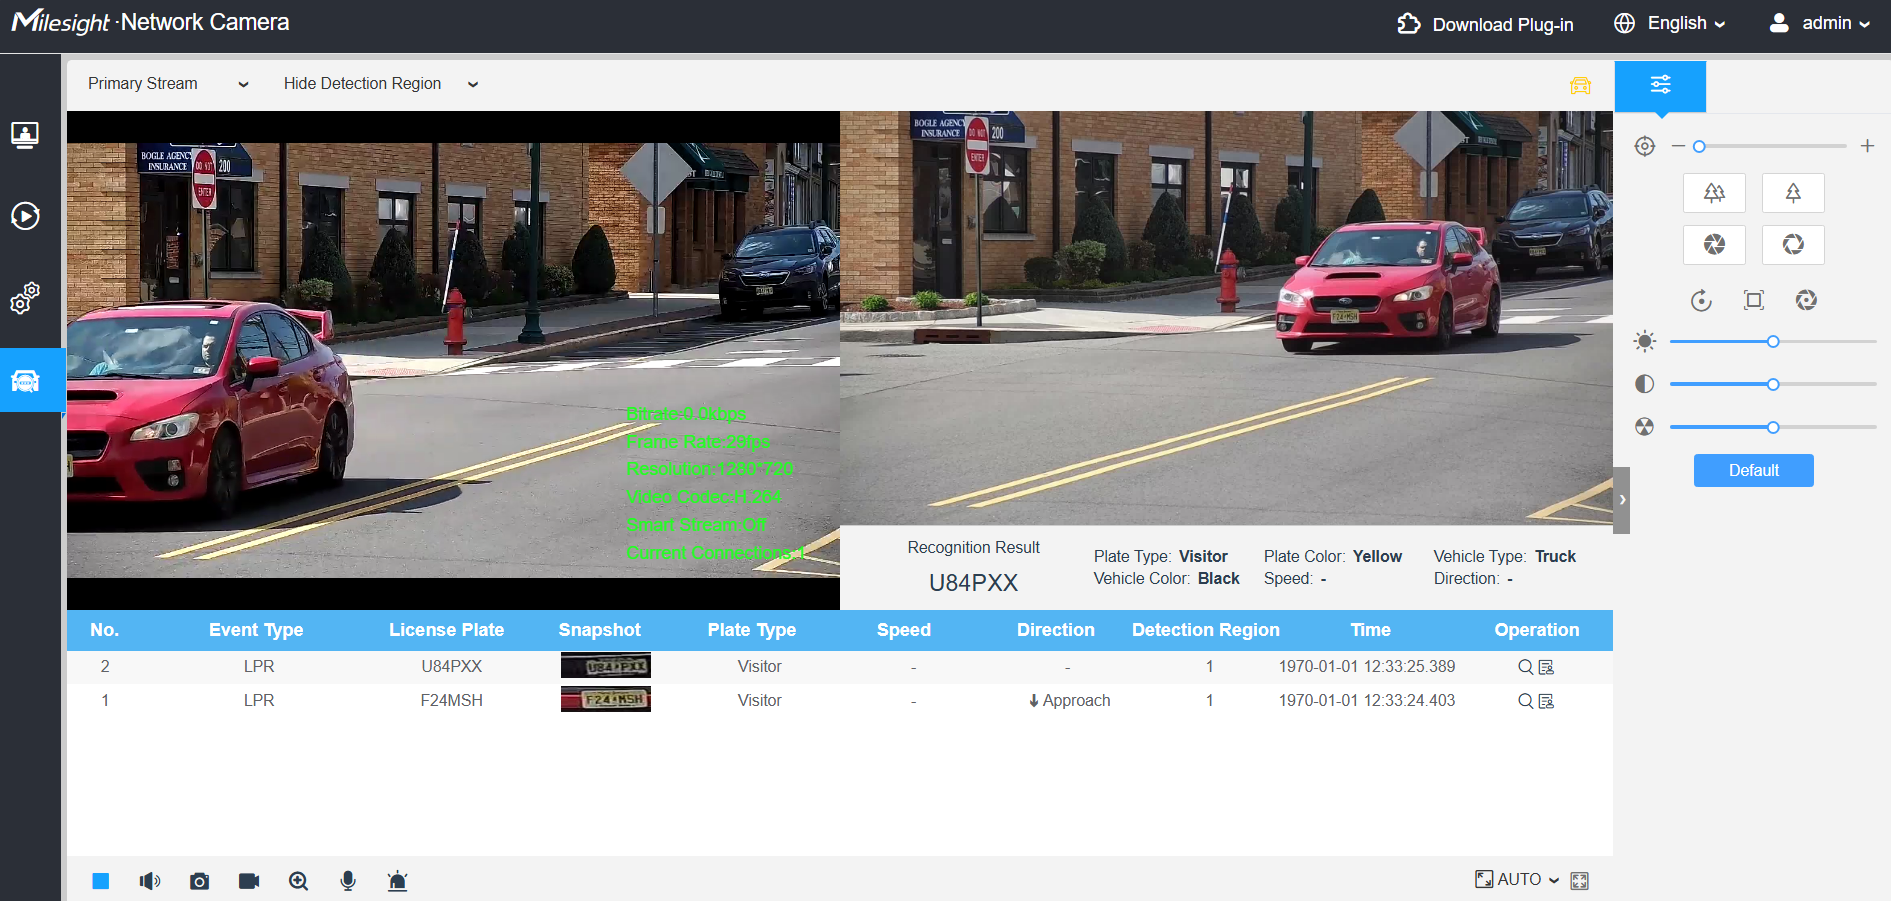
The PE&PG1 platform adds Vehicle Counting and Violation Management interfaces.
Note:
• If no SD card or NAS is used as storage, the license plate snapshots will be temporarily stored locally on the PC and cleared after logging out.
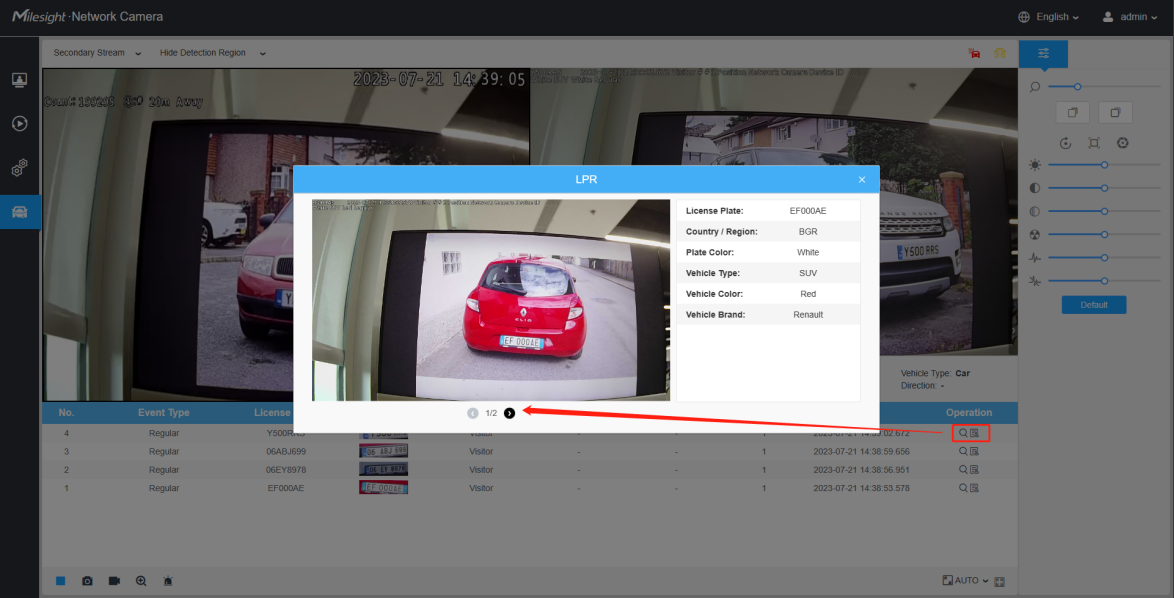
• If an Evidence camera is added, once the license plate information is recognized, click the Search button to view the vehicle identification information and the pictures captured by the Evidence camera. The second picture shows the image captured by the evidence camera.
3.2 Smart search
The Smart Search function supports conditional filtering to select qualified vehicle identification information from the identification data, aiming to help users efficiently extract the required information from a large number of identification records and improve management and decision-making efficiency.
Step 1: Select a Plate Type or directly enter the license plate number.
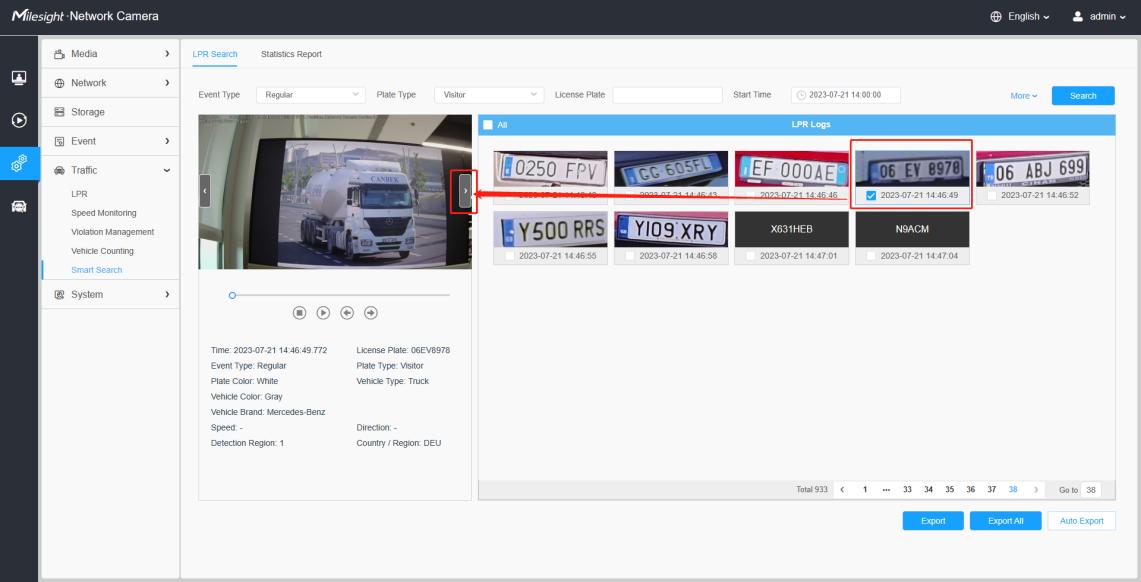
Step 2: Select the corresponding recognition attributes, as well as the start time and end time, and click the “Search” button to perform a license plate search that meets all conditions. The matching license plate, or the license plate containing the search keywords, will be displayed in the log, and the corresponding video and license plate snapshot will be shown on the left side of the interface.
Note:
Smart Search requires storage media [SD card or NAS] to mount and store license plate recognition images. If there is no SD card or storage snapshot configuration, the searched records will only display the recognized 1000 license plate characters. If an IPC is connected to both an SD card and a NAS, the NAS will take priority over the SD card.

Step 3: If an evidence camera has been added, the relevant license plate information can be retrieved by searching.
Click the button indicated by the red box in the picture to view the image captured by the evidence camera.
There are two methods to back up LPR logs.
• Back up specific license plates.
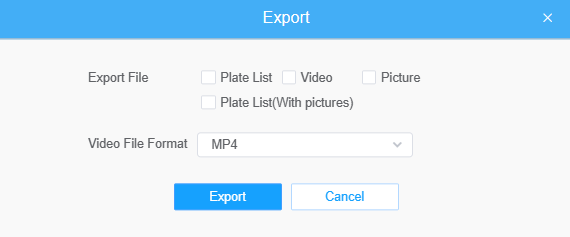
Export the currently selected search history.
• Back up all records.
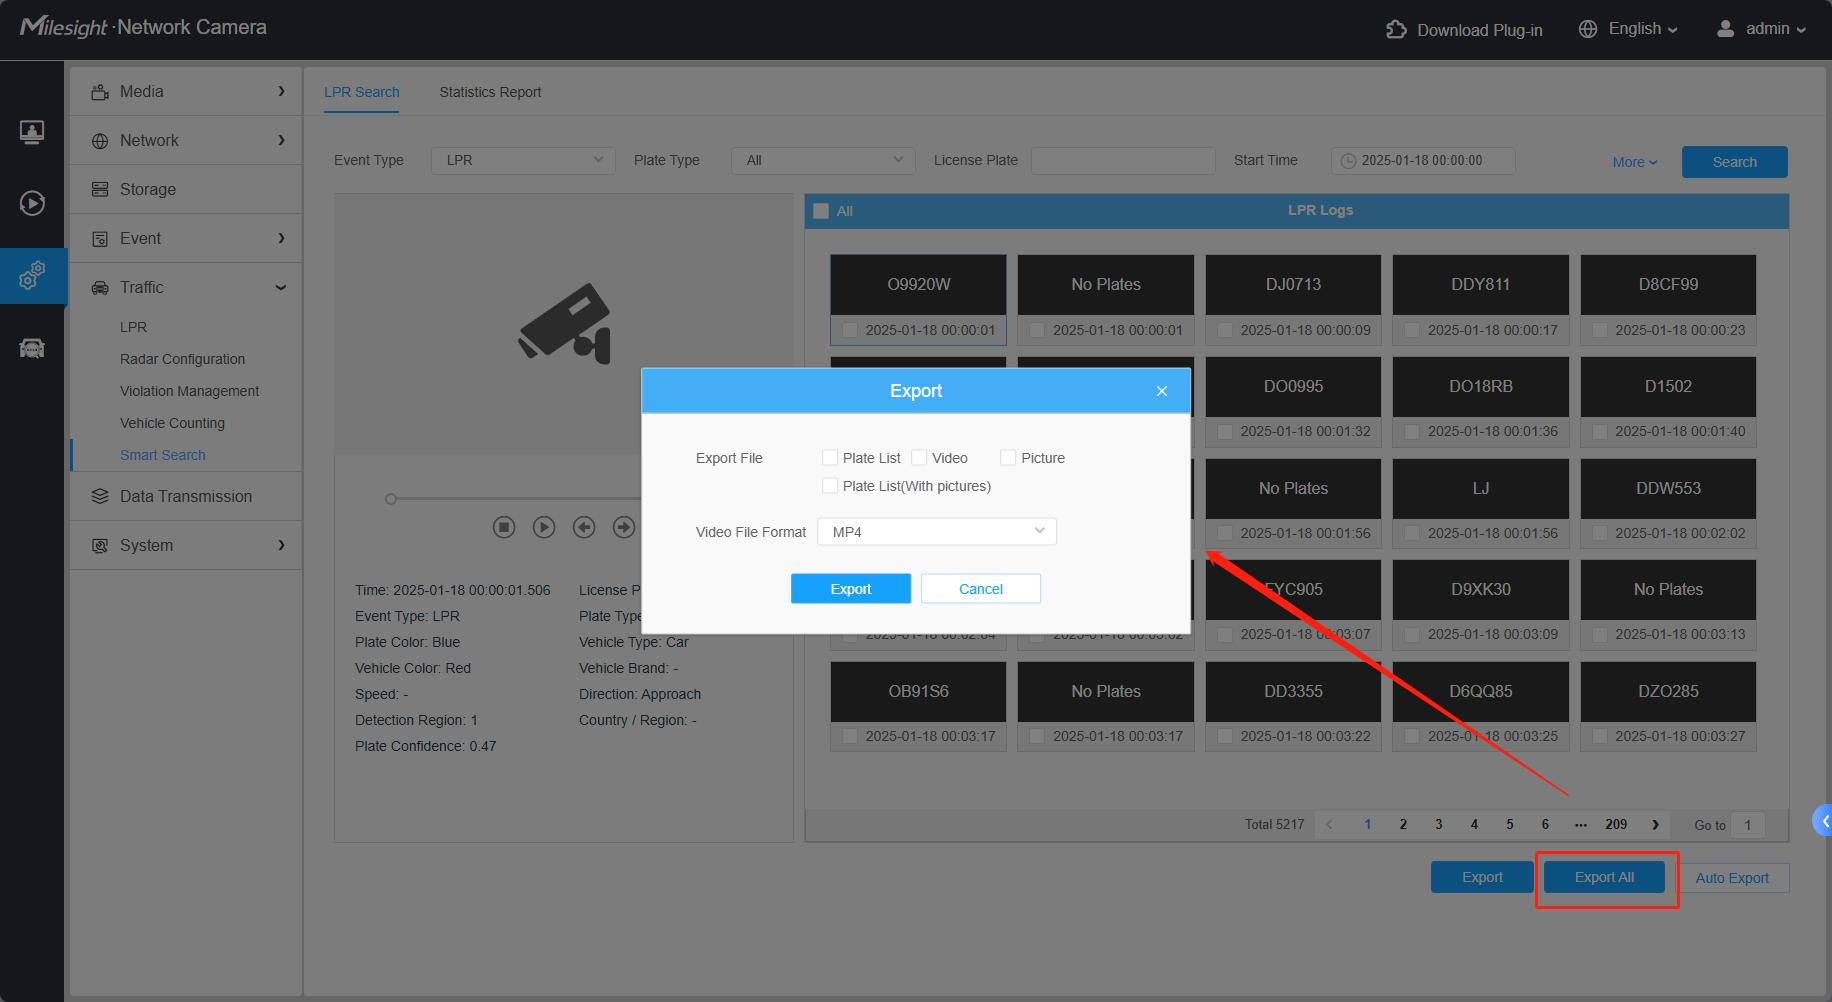
Step 1: Click the “Export All” button;
Step 2: Select the export file type, video stream type, and video file format, and then click the “Export” button.
You can also click the "Auto Export" button to automatically export the logs to FTP, SMTP or Storage.
Note: Automatically exported data does not include images.
4.Data Transmission
Milesight LPR cameras support JSON‑ and XML‑formatted data transmission over HTTP, TCP, MQTT and Metadata protocols.
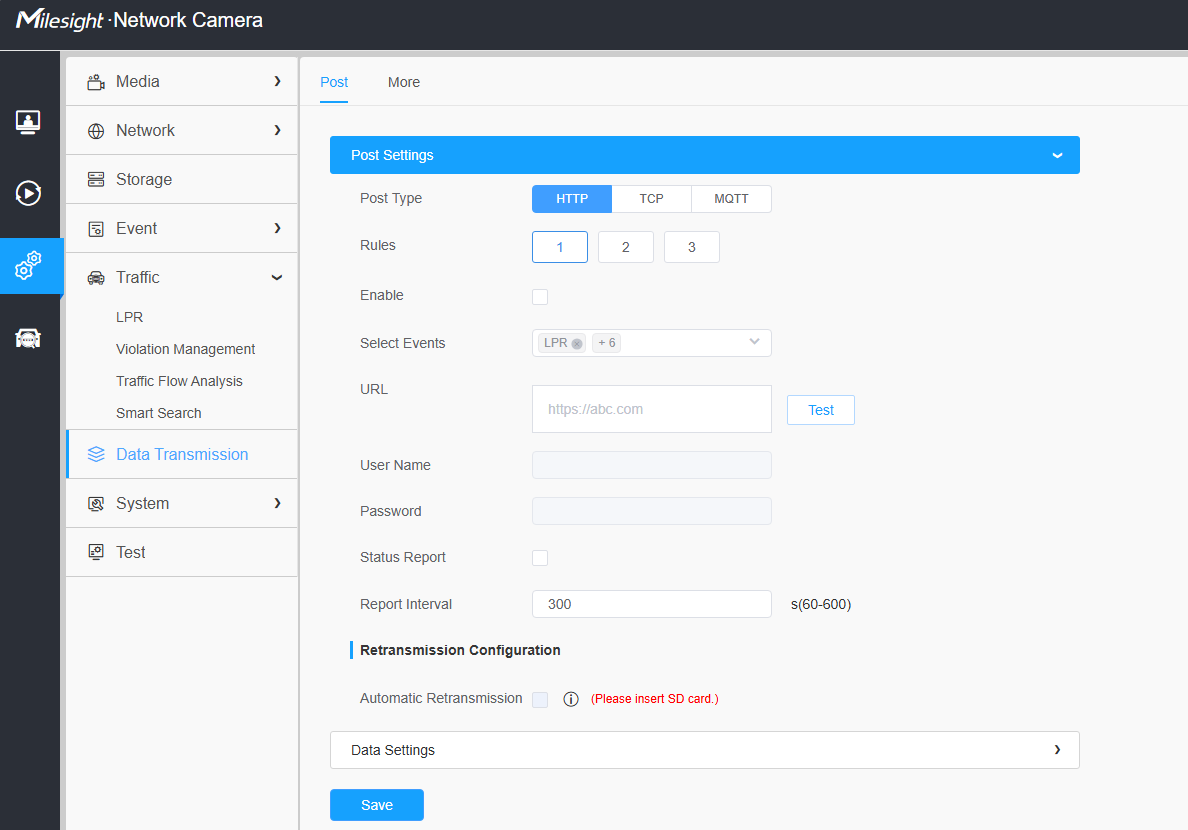
• HTTP: The camera, acting as a client, actively sends LPR recognition data to the server via POST requests, making the overall connection relatively simple. This protocol is typically used in scenarios where real-time performance is less critical. If the customer has their own third-party platform, HTTP is preferred.
• TCP: The camera establishes a persistent connection with the server to send raw data. This protocol offers high real-time performance, high reliability, and support for persistent connections, making it suitable for frequent data transmission. If the customer has their own server and real-time performance is a concern, TCP is recommended.
• MQTT: A lightweight protocol based on the publish/subscribe model, suitable for low-bandwidth, low-power devices. The camera publishes data to a topic, and the backend subscribes to receive the data. This protocol is particularly suitable for compatible scenarios with complex system architectures, such as distributed or IoT platforms.
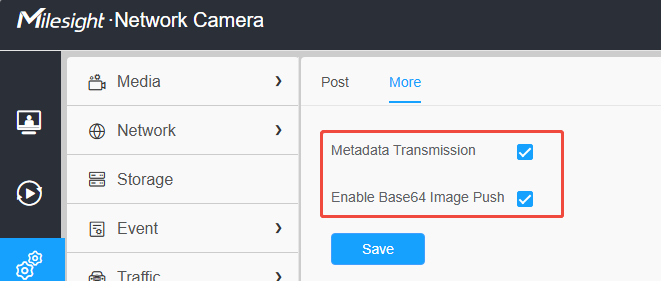
Traffic metadata helps the backend or management party obtain key information in real time. LPR supports the transmission of metadata (such as license plate recognition and alarm events) to a third-party platform (Onvif) via real-time streaming (RTSP).
Currently, MS's own backend software (such as NVR and VMS) is only compatible via TCP.
If the MS LPR camera needs to be integrated with an MS own backend software, the IPC data mode must be configured as “Original” so that the MS backend can properly receive the LPR data from the camera (the default mode is “Import File”). At the same time, the Data Editor also supports custom data formats and content.
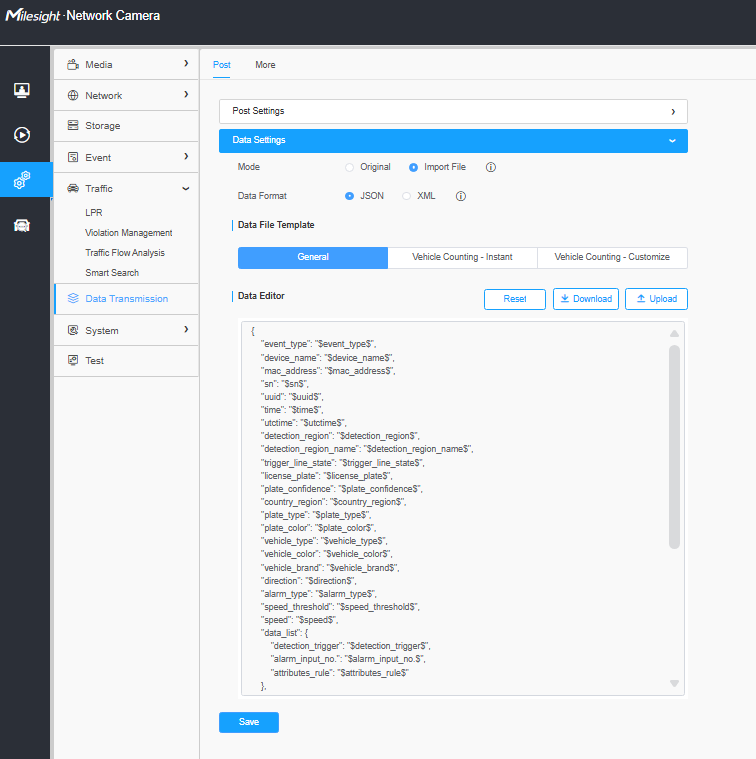
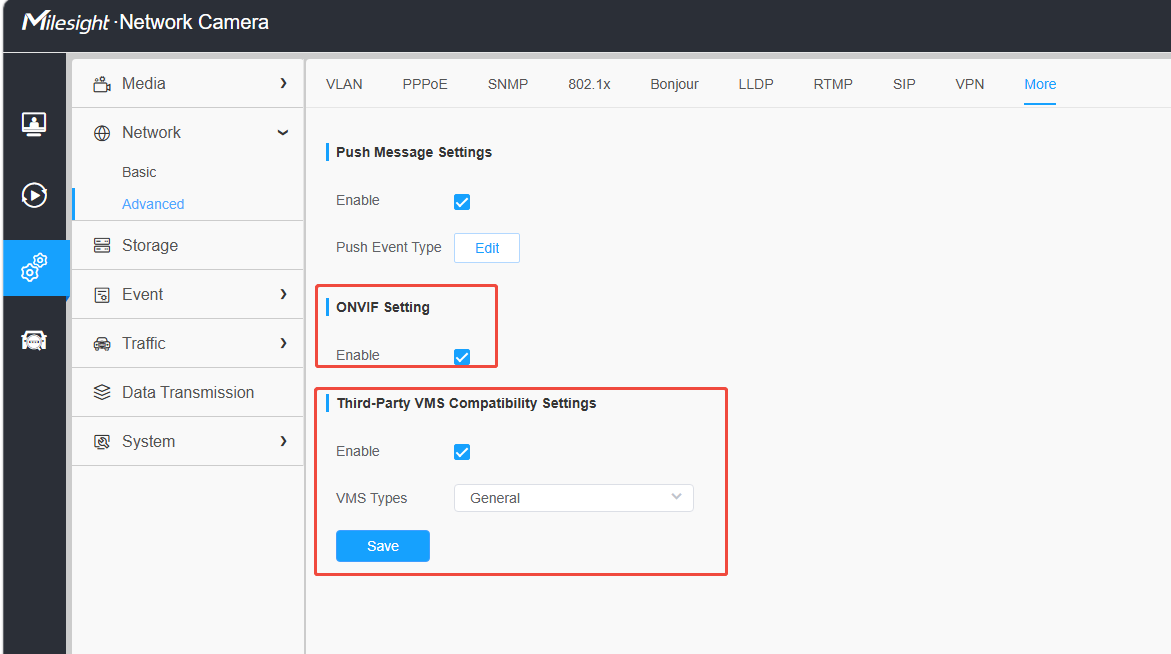
If you want to add the LPR camera to other third-party VMS platforms (such as NX, Milestone, etc.), you need to enable metadata transmission and activate the relevant network functions.
If you still have any issue about how to set ANPR with Milesight Network Camera, please email support@milesight.com with the MAC address of the camera, or you could create a ticket to get help from the Milesight Support Team: https://support.milesight.com/support/tickets