
1.Applicable Scenarios:
• Forward-facing installation: 1–4 lanes
• Side-facing installation: 1–2 lanes (lateral deflection angle ≤ 20°)
|
|
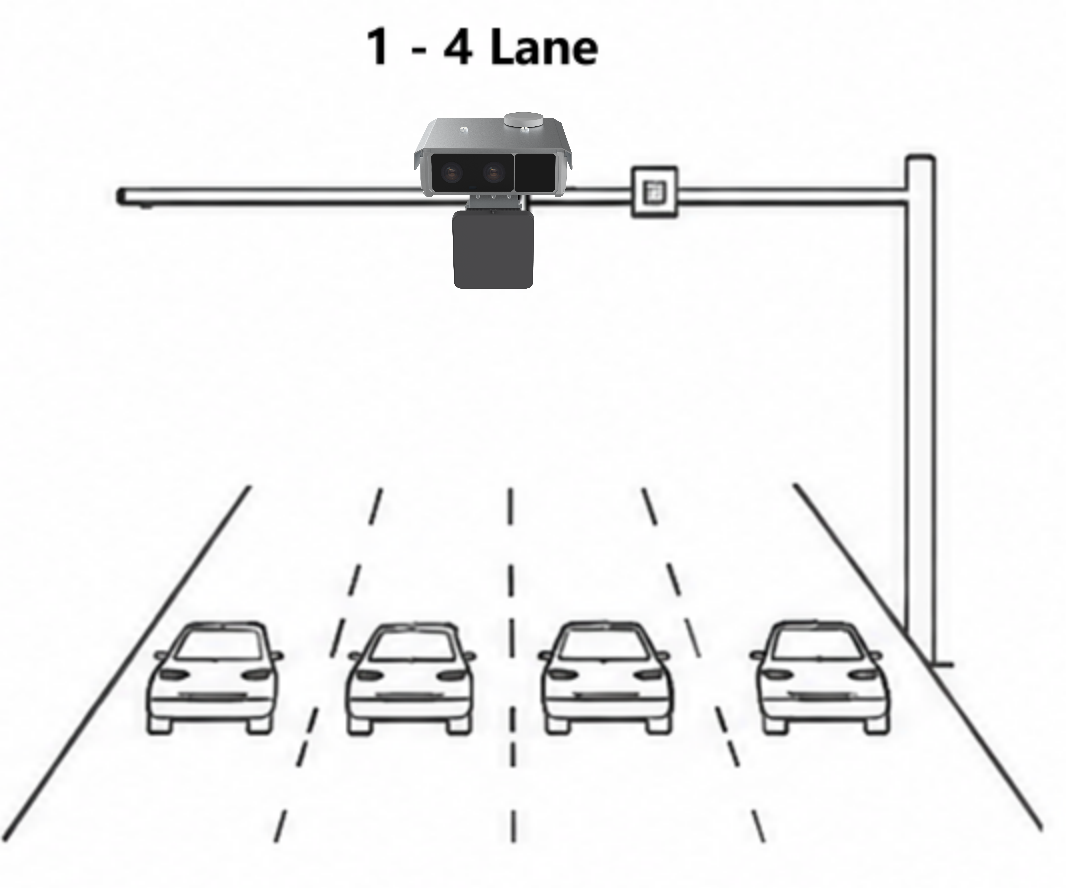
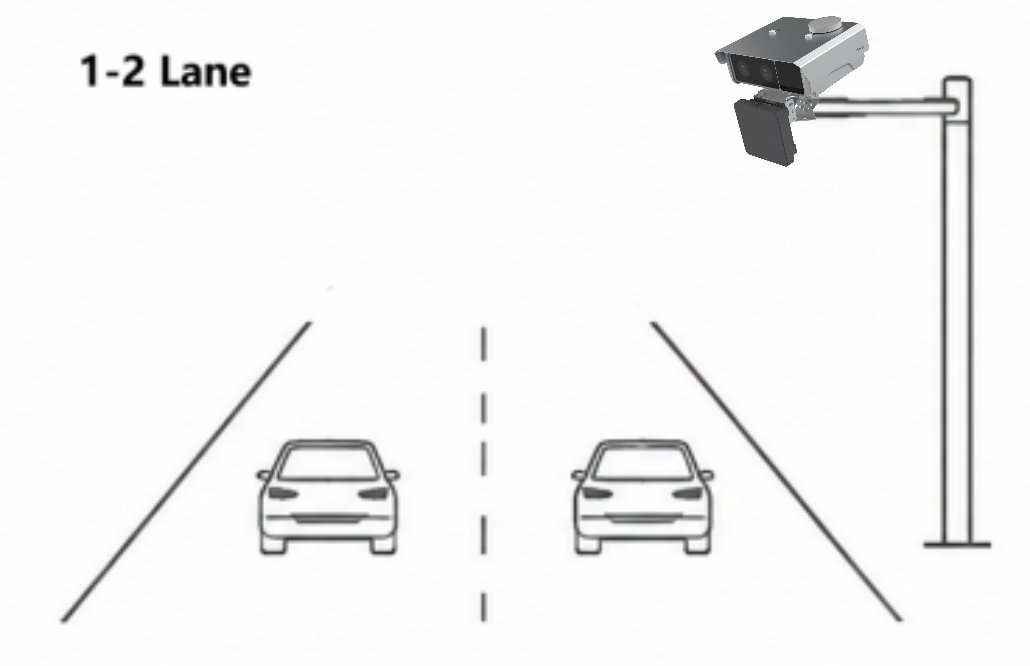
Forward-facing installation Side-facing installation
2.Radar Parameter Configuration
Step 1: Configure Lane Parameters
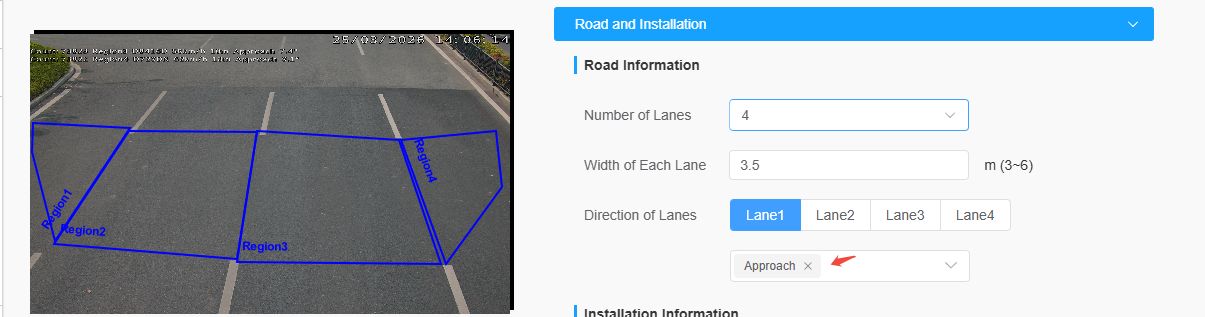
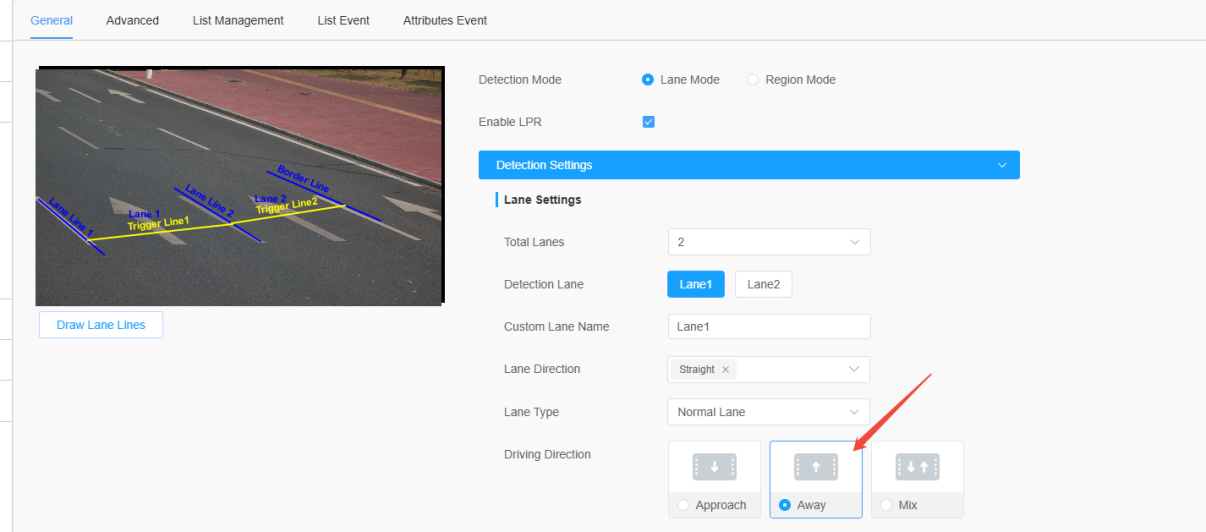
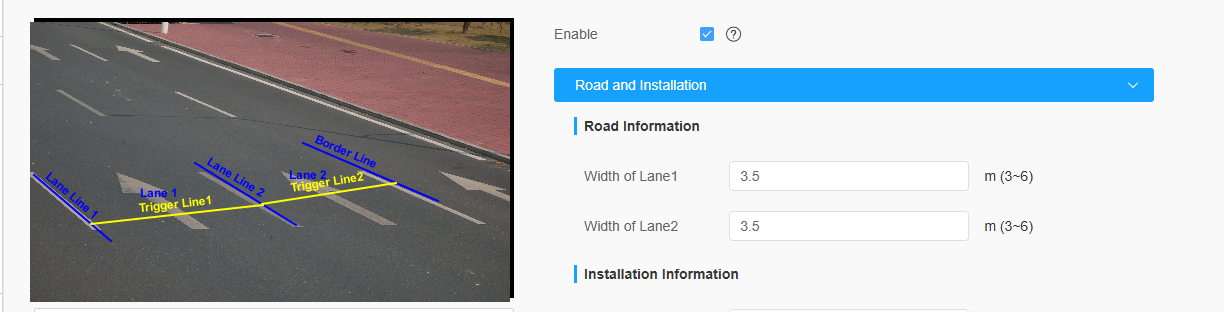
Set the parameters according to the actual on-site lane conditions, including traffic direction, lane width, and number of lanes.
• Region Mode: Configure the relevant parameters based on the actual lane layout in the interface.
• Lane Mode: Set the traffic direction for each lane in the lane configuration section.
Step 2: Angle Calibration
1. Go to the Installation Information page and click Auto Correction under Camera Direction to start automatic angle calibration. The system will adjust the angle so that the traffic flow is fully aligned to the forward direction.
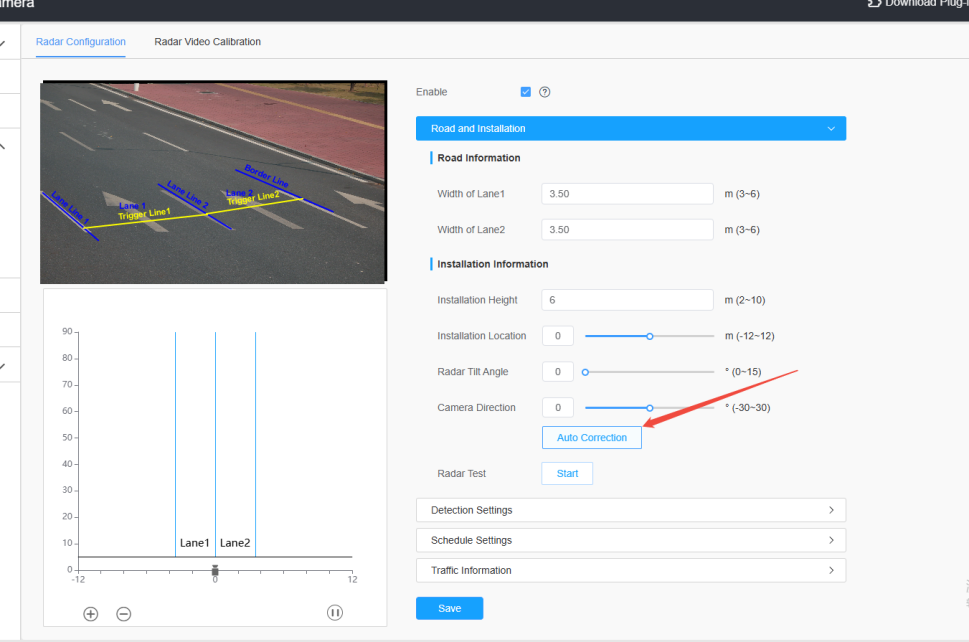
2. Once calibration is successful, a success notification will appear at the top of the interface, and the calibrated values will be automatically populated in the web fields.
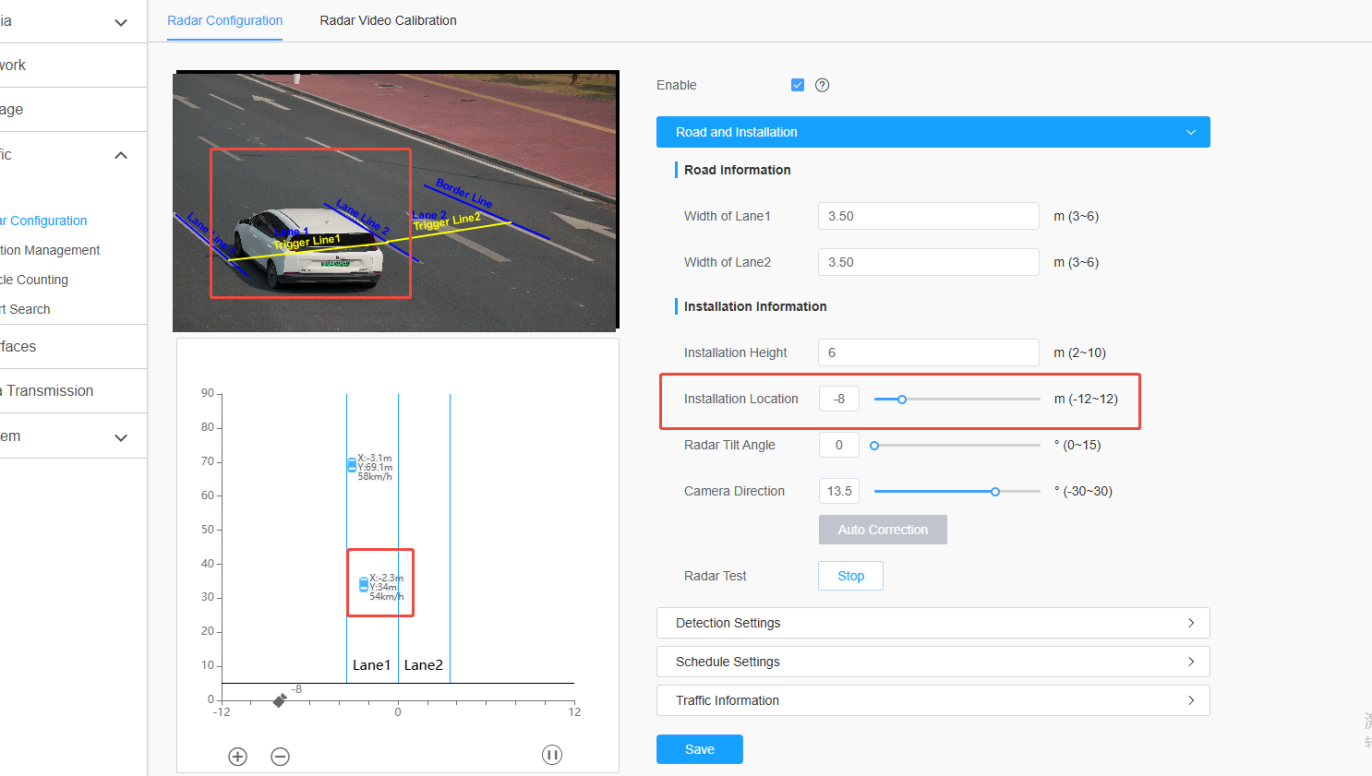
a. Click Radar Test to enter debug mode. Adjust the lane installation position to ensure that all traffic targets are fully visible within the radar trajectory view.
b. Once all parameters are configured, click Stop to exit debug mode.
Note: During automatic calibration, the system writes new parameters to the radar configuration at the firmware level. A brief freeze of the trajectory view (several hundred milliseconds) may occur — this is expected behavior.
3.Radar-Video Calibration
1. Open the Calibration Interface
Go to the Radar Video Calibration page and select a calibration mode:
Mode | Description |
Uncalibrated Auto Match | Legacy matching mode. Matches radar data to video frames by lane. This is the factory default setting. |
Manual | Manual calculation-based calibration. Suitable for forward-facing installations. |
Auto | Automatic calibration based on radar data and video stream. Suitable for both forward-facing and side-facing installations. |
Recommendation: For all installation scenarios, it is recommended to use Auto calibration mode.
2. Run Auto Calibration
a. Set Calibration Mode to Auto and click Calibration.
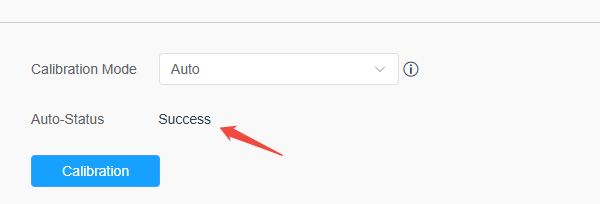
b. Wait for the progress bar to complete. When Auto-Status shows Success, the calibration is complete.
3. Enable Radar Target Display and verify that the radar data points accurately overlay on the vehicles in the video.
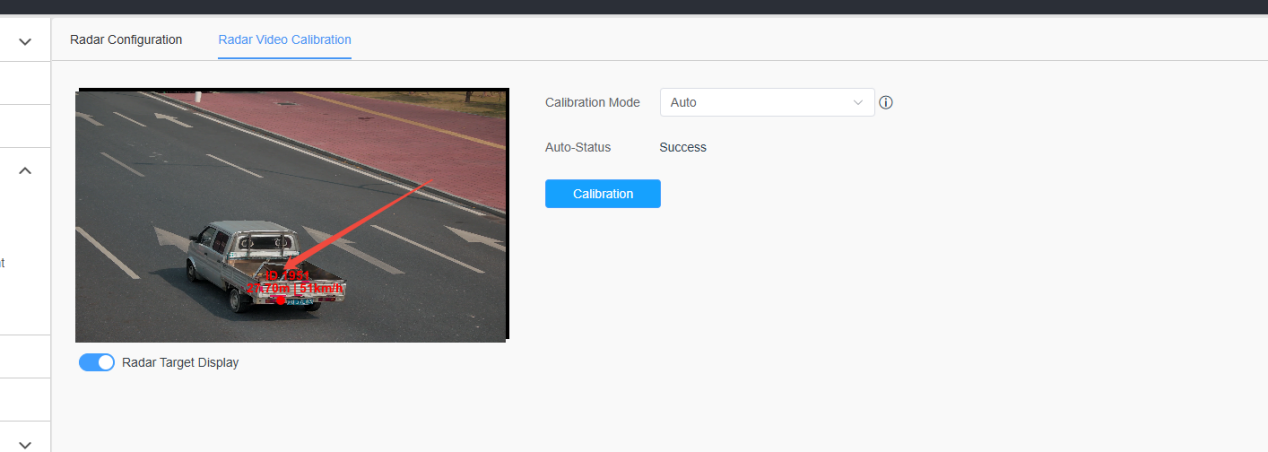
4. If the alignment is not accurate, repeat the calibration until the radar data points consistently match the vehicle positions.