
Camera Version | V4x.8.0.1 or above | Update | 2022.4.25 |
NVR Version | V7x.9.0.15 or above | ||
Smart tools Version | V2.4.0.4 or above | ||
CMS Version | V2.4.0.15 or above |
1. Introduction
In order to improve the security of Milesight devices, we have upgraded Cameras, NVRs and supporting software.
It removes the default password and allows to set a password when logging in for the first time, which improve the security.
It also supports to set the security questions for the devices. Users can reset the password by answering the correct security questions in case of forgetting the password, which is more convenient for users.
Note:
① If you have Smart Tools and CMS, you need to upgrade Smart Tools to version V2.4.0.1 or above and CMS to version V2.4.0.3 or above.
② When using the device(Camera or NVR) for the first time, if the software version of the cameras and NVRs are V4x.7.0.69 or above and V7x.9.0.3 or above respectively, you need to set a password to activate it, and it allows to set the security question for your device.
③ When using the device(Camera or NVR) for the first time, if the software version of cameras and NVRs are lower than V4x.7.0.69 and V4x.7.0.69 respectively, you can use it directly with the default username(admin) and password(ms1234) without activation.
2. How to activate Milesight device
If you didn’t download Smart Tools and CMS, you can directly activate on camera or NVR.
2.1 Activate on web
If the network segment of the computer and that of the camera/ NVR are different, please follow the steps to change the IP address when using it for the first time:
Step1: Change the IP address of the computer to 192.168.5.XX segment, here are two ways as below:
Start → Control Panel → Network and Internet Connection → Network Connection → Local Area Connection, and double click it.
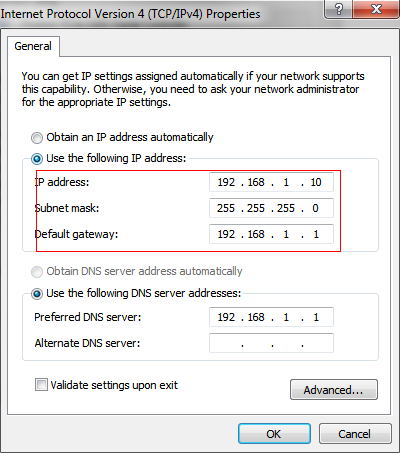
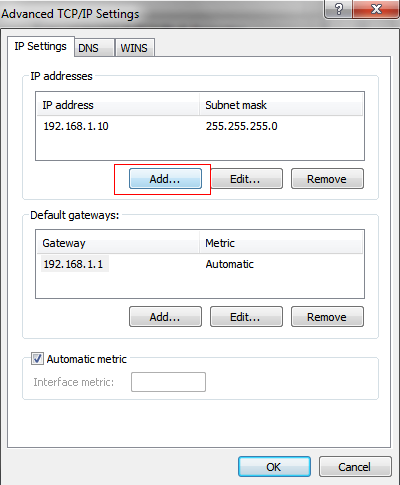
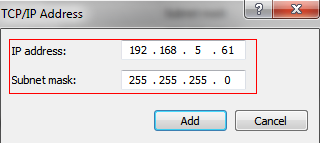
Click “Advanced”, and then click “IP settings” → “IP address” → “Add”. In the pop-up window, enter an IP address that in the same segment with Milesight Camera and NVR(e.g. 192.168.5.61, please note that this IP address shall not conflict with the IP address on the existing network);
Step2: Start the browser. In the address bar, enter the default IP address of the camera or NVR: http://192.168.5.190 (For camera);
http://192.168.5.200 (For NVR);
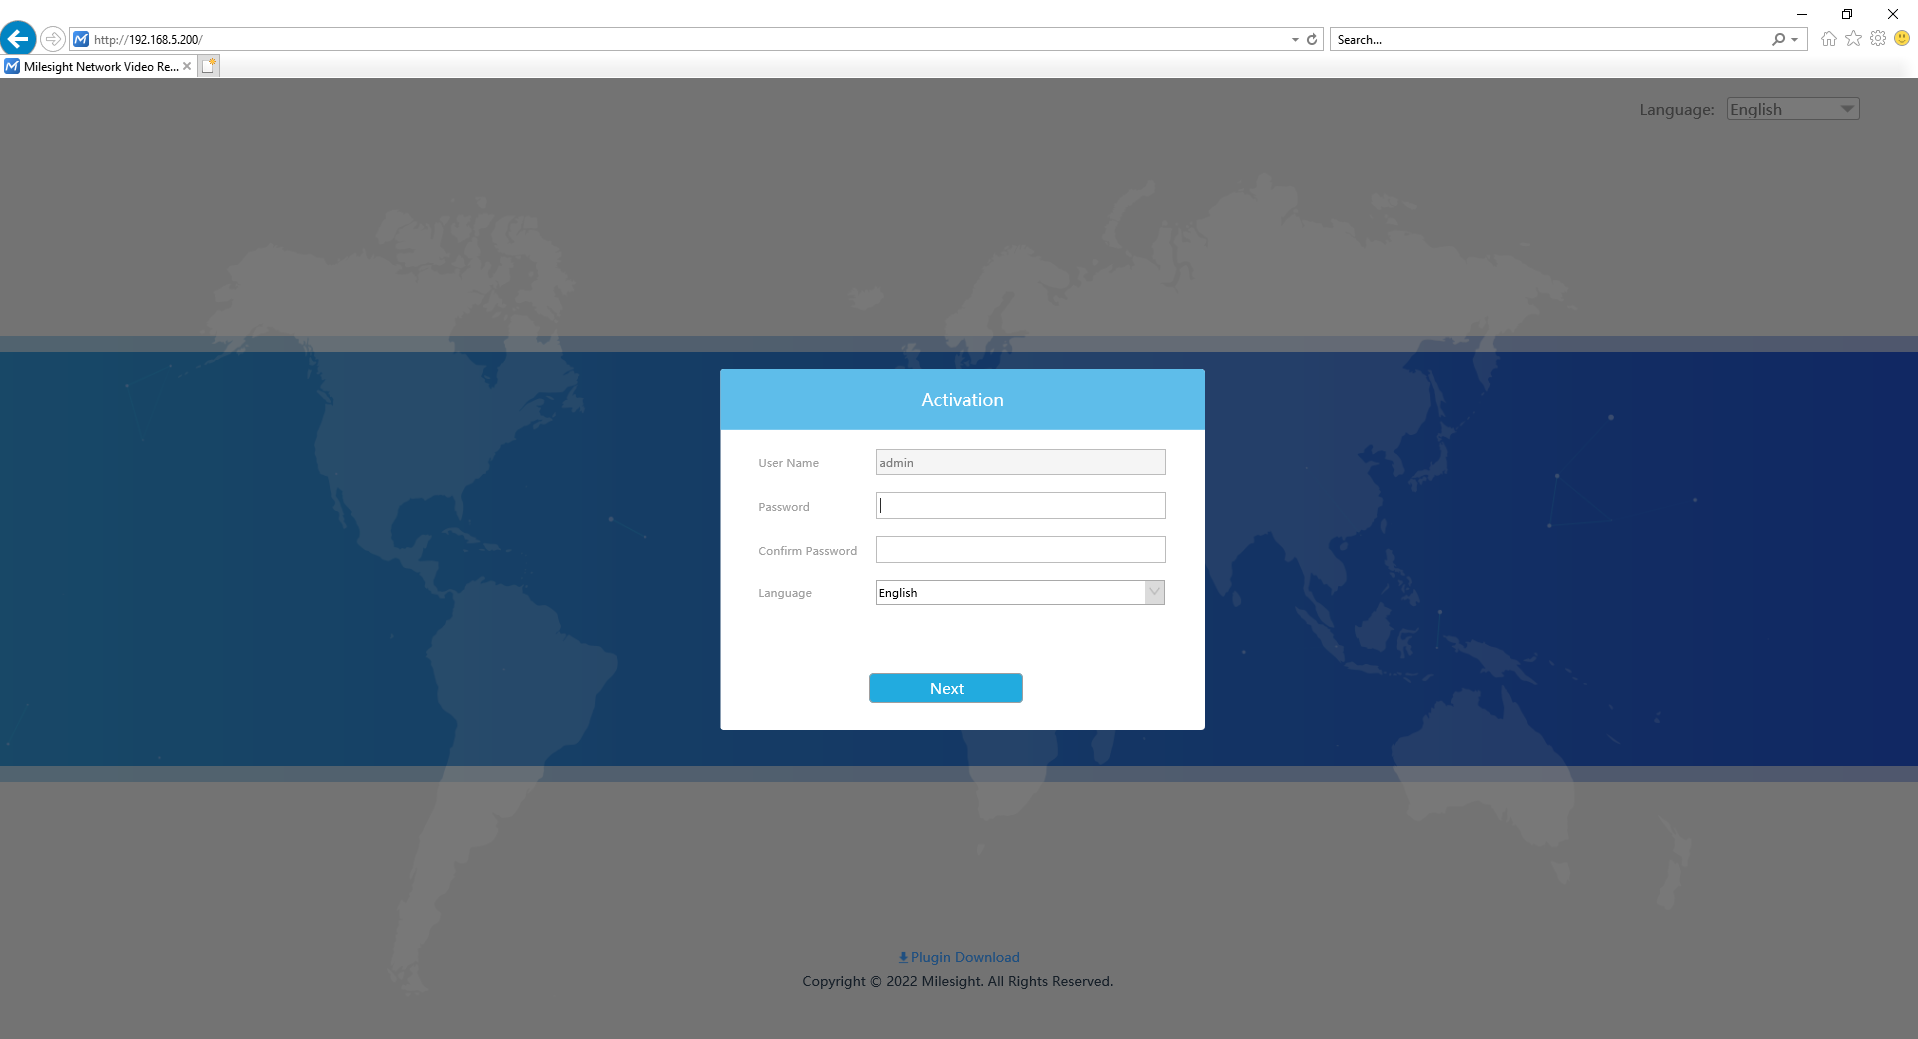
Enter the login interface, set the password when using it for the first time. Then, you can log in the device through web browser.
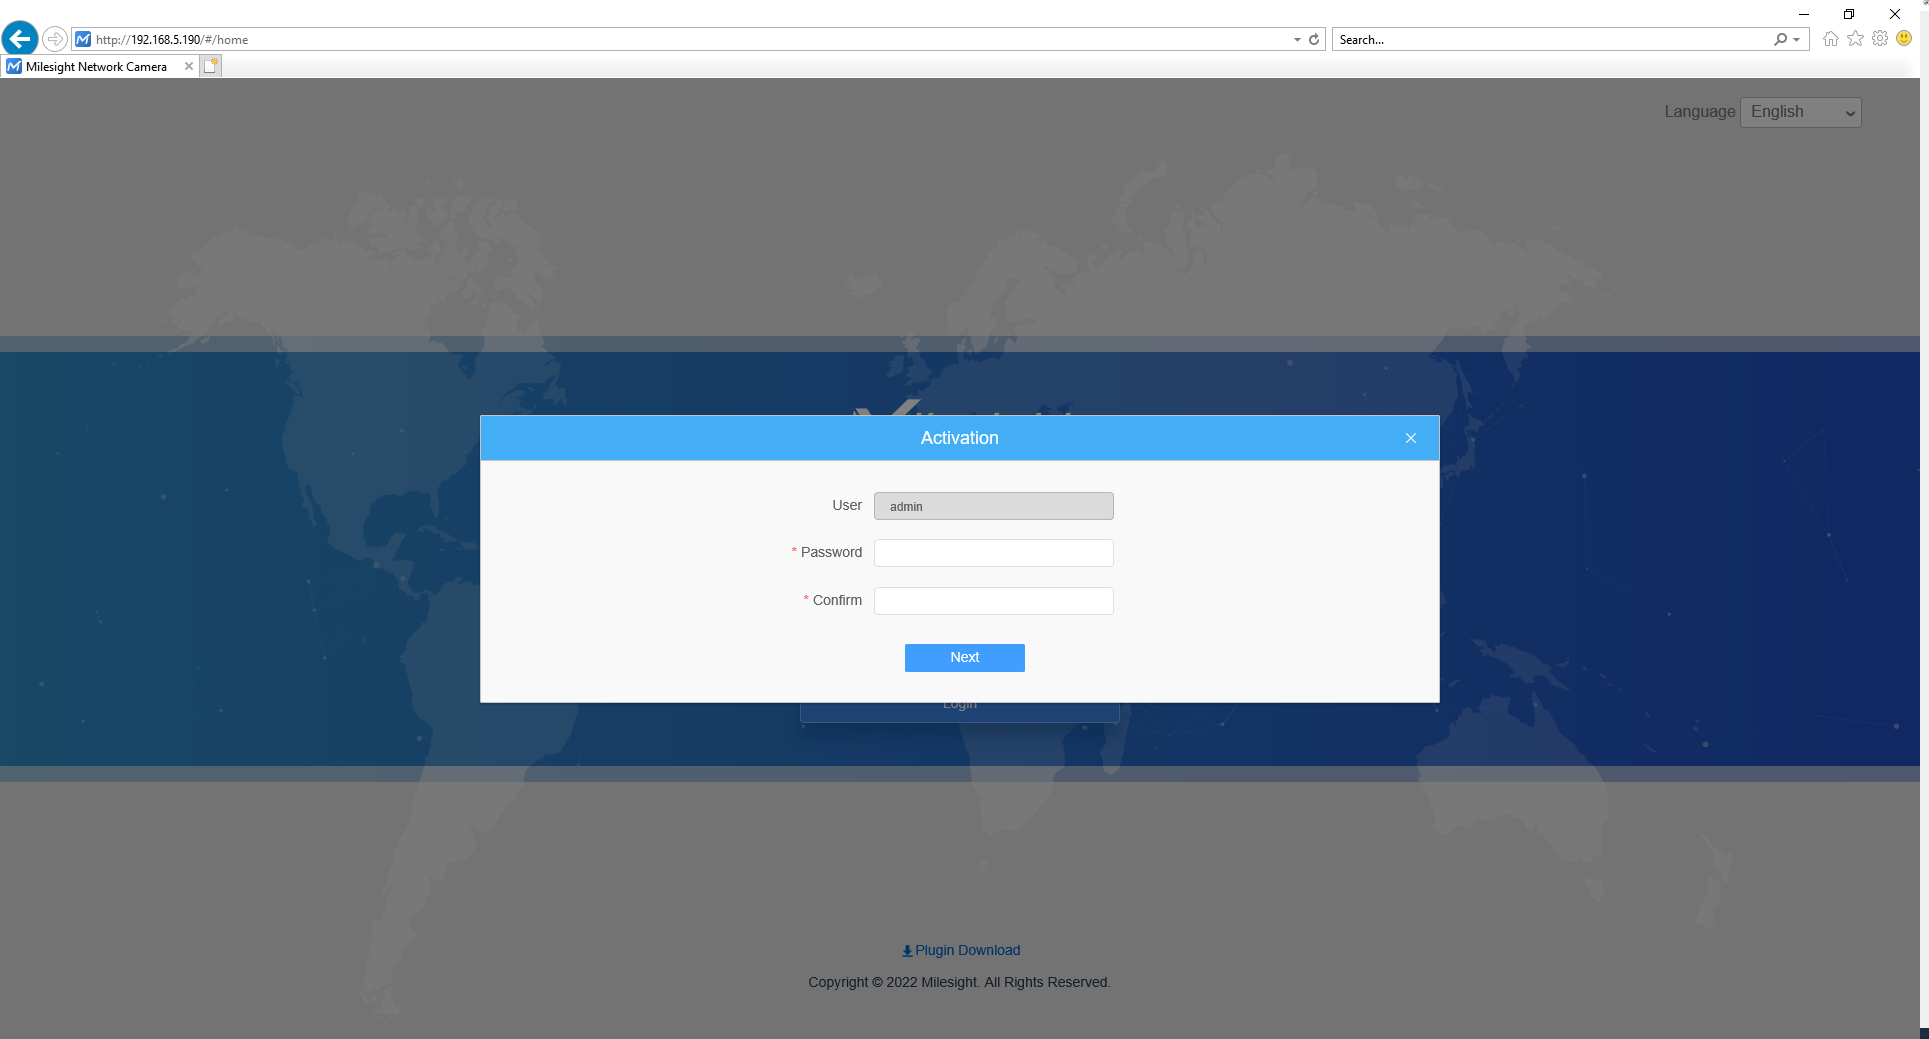
Activate on camera’s web
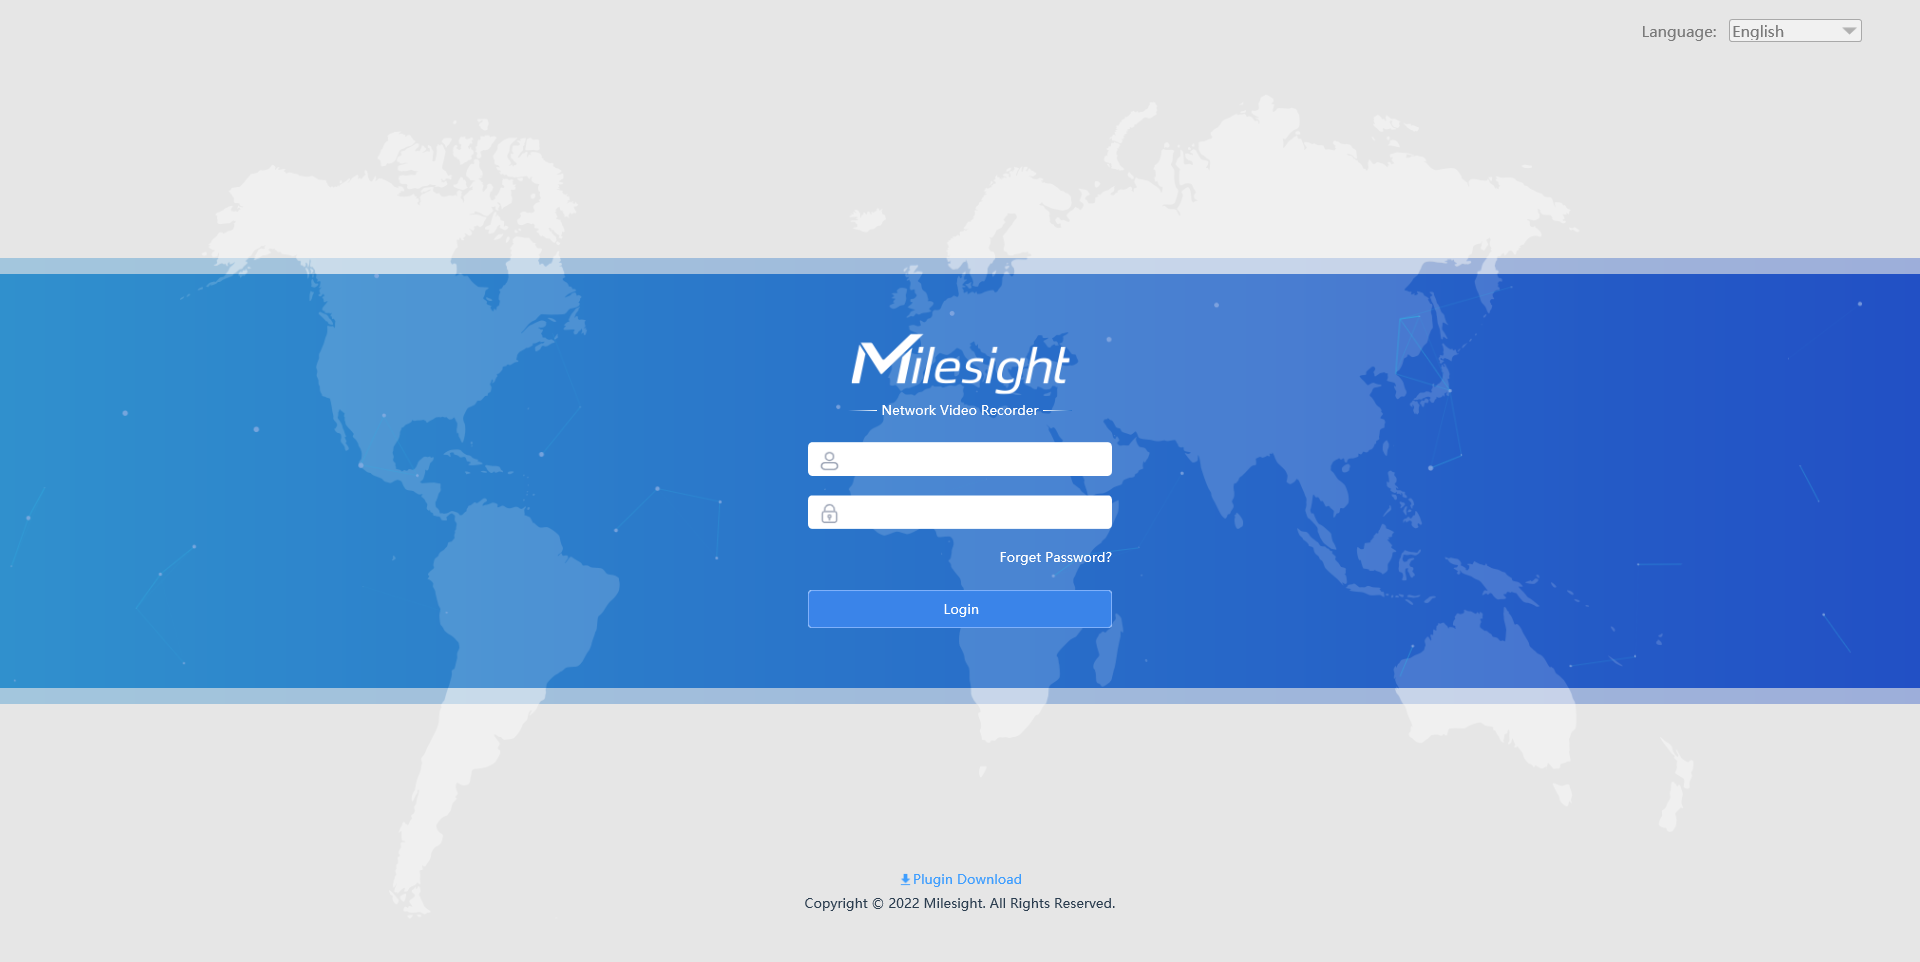
Activate on NVR’s web
2.2 Activate on monitor
For NVR, you can also activate on monitor directly.
Connect a monitor to the NVR to enter the login interface, and set the password when using it for first time. Then, you can log in the NVR through monitor.
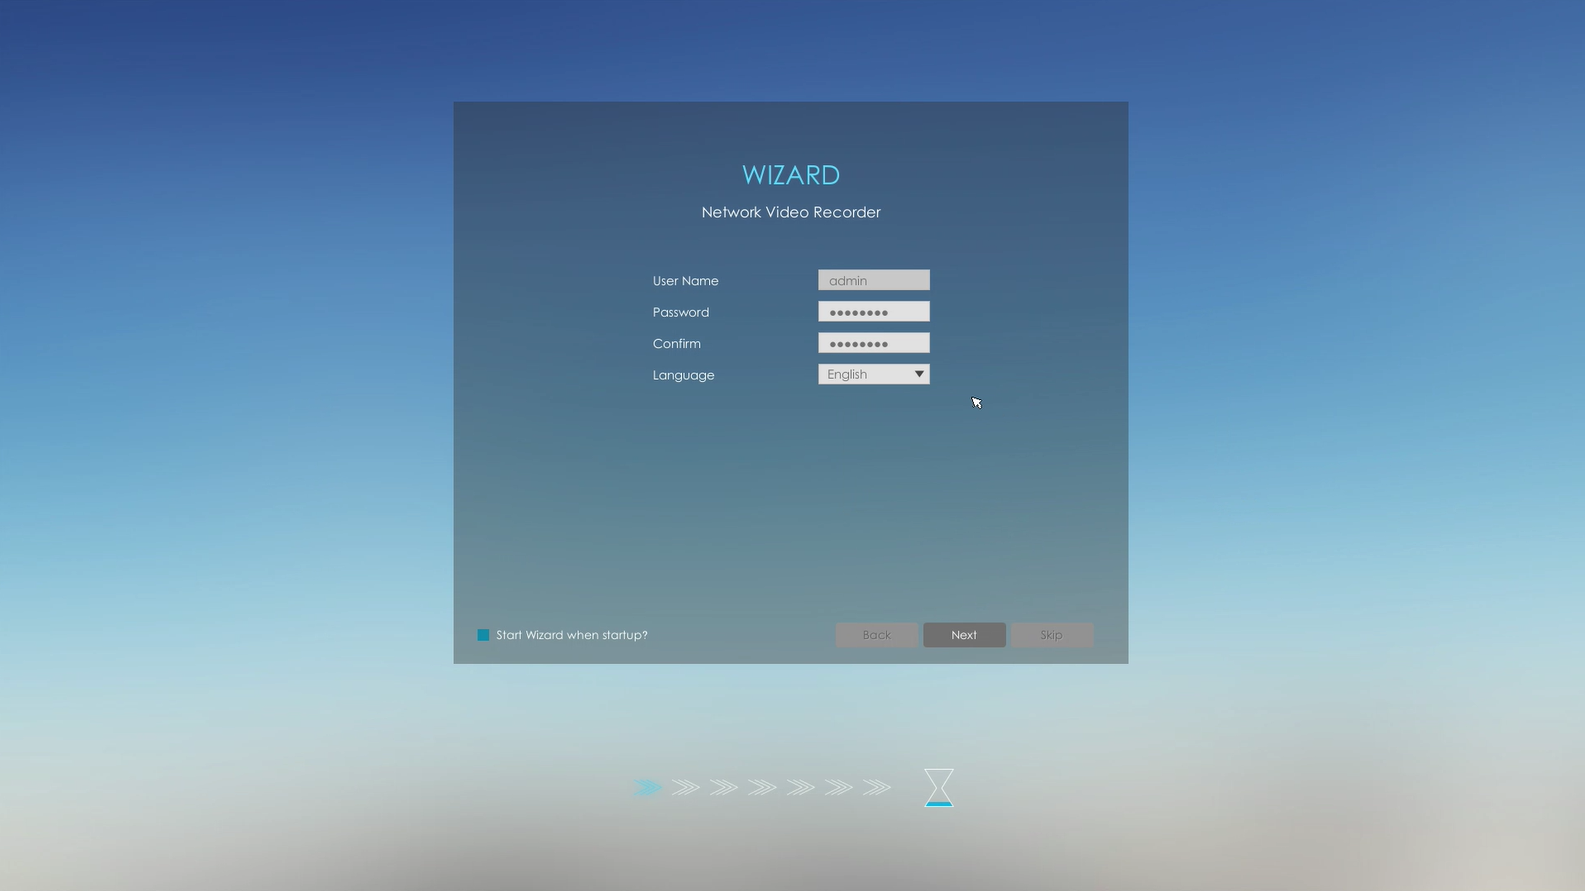
Activate on NVR’s monitor
Note:
① Password must be 8 to 32 characters long.
② If you directly upgrade your device from lower version to V4x.7.0.69 or above(For camera)/V7x.9.0.3 or above(For NVR), it will still show ‘Active’, unless you disable the ’Keep the User Information’ option when resetting it, it will erase the user information and reset the device to ‘Inactive’ status.
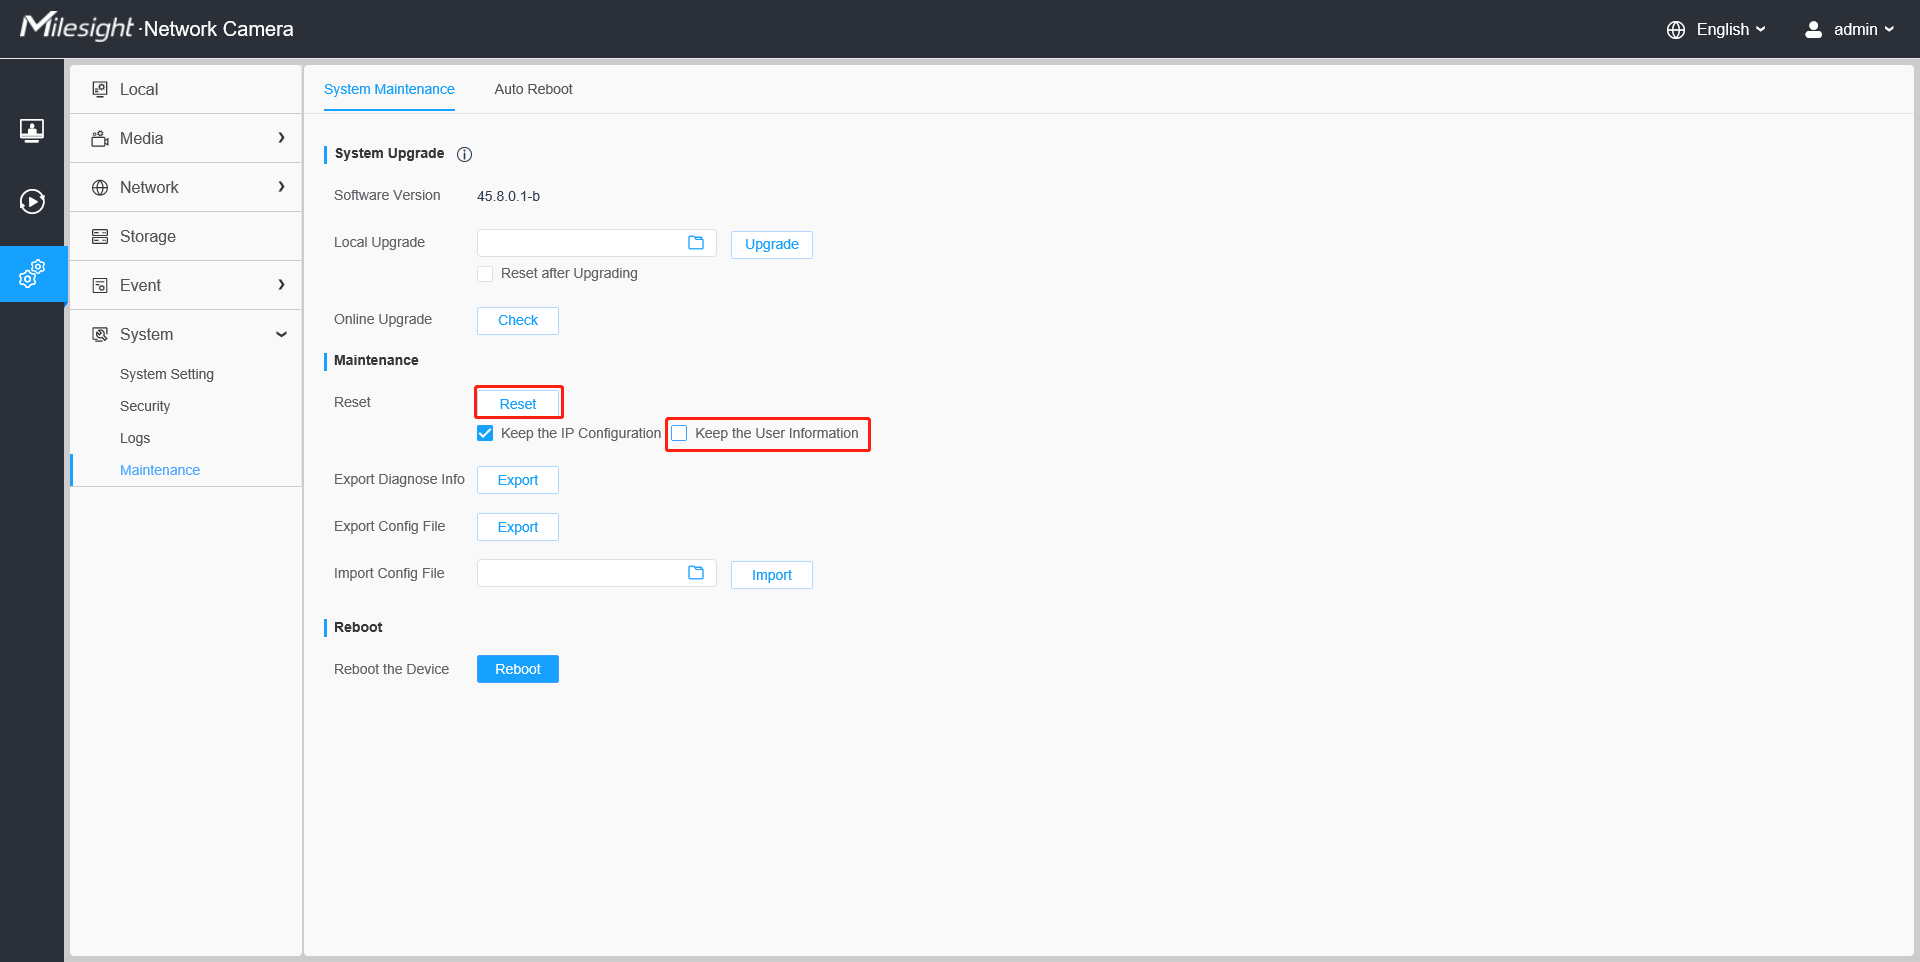
On camera’s web
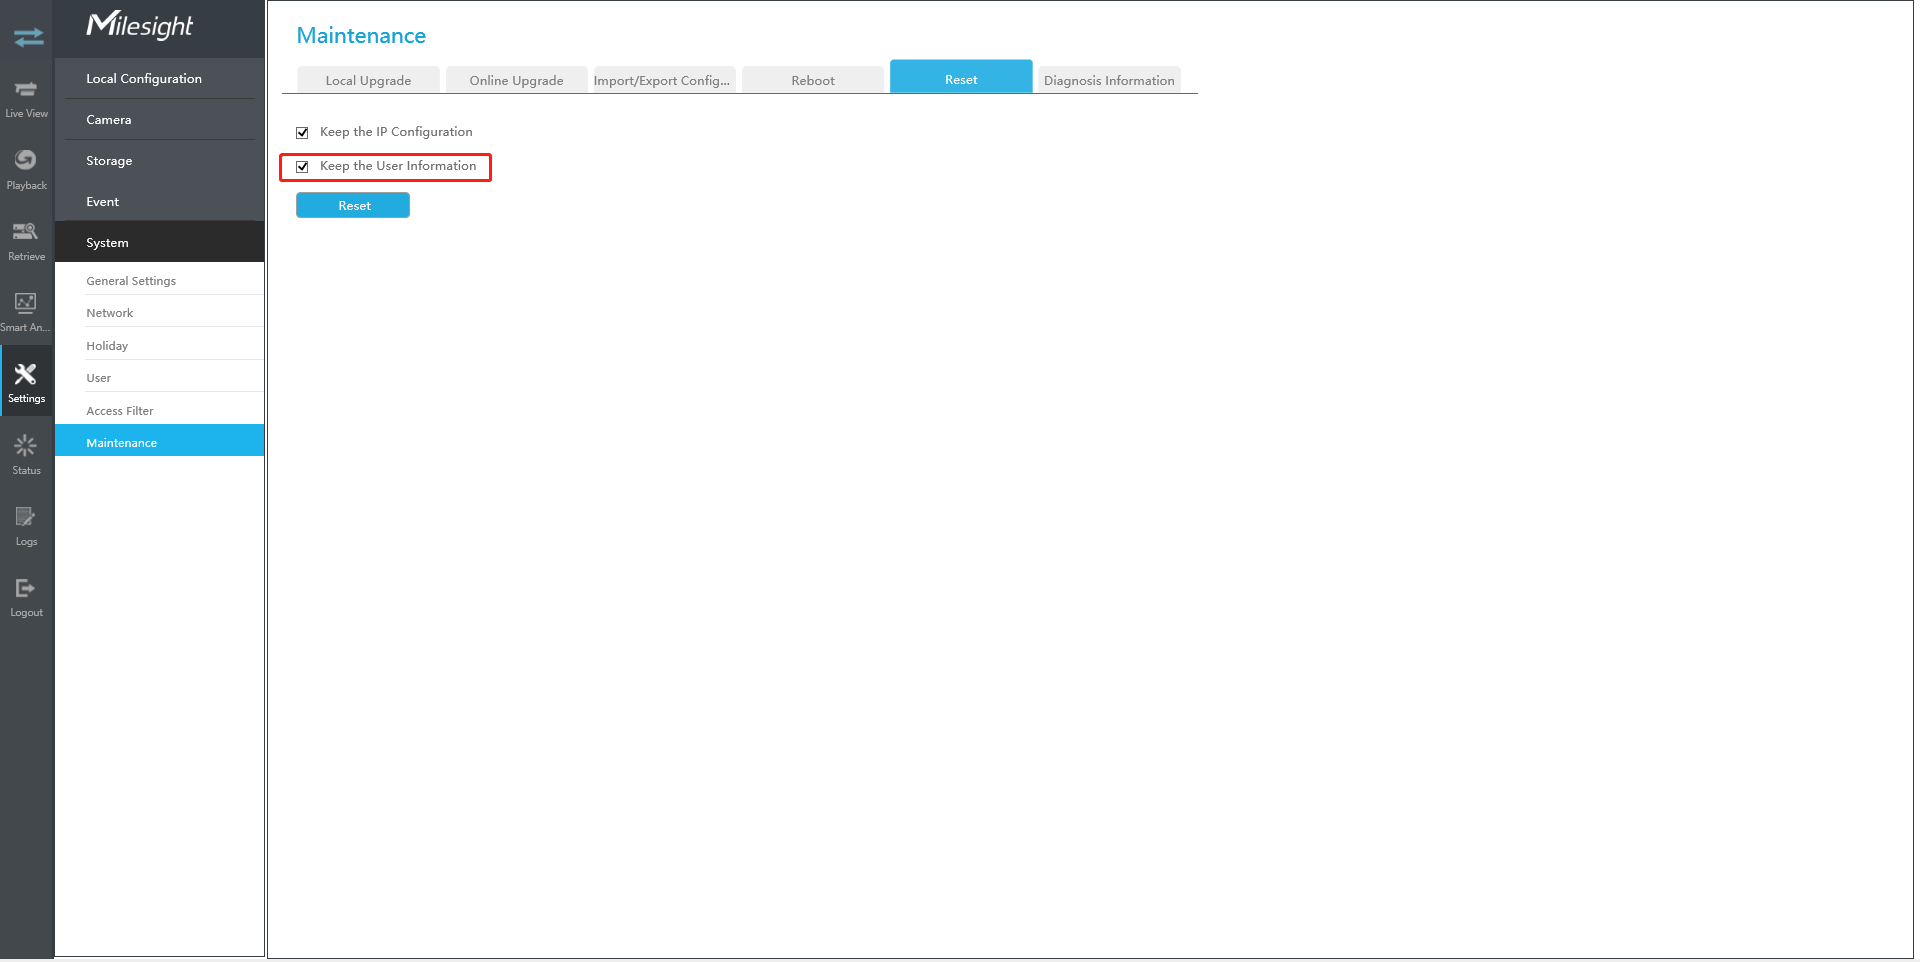
On NVR’s web
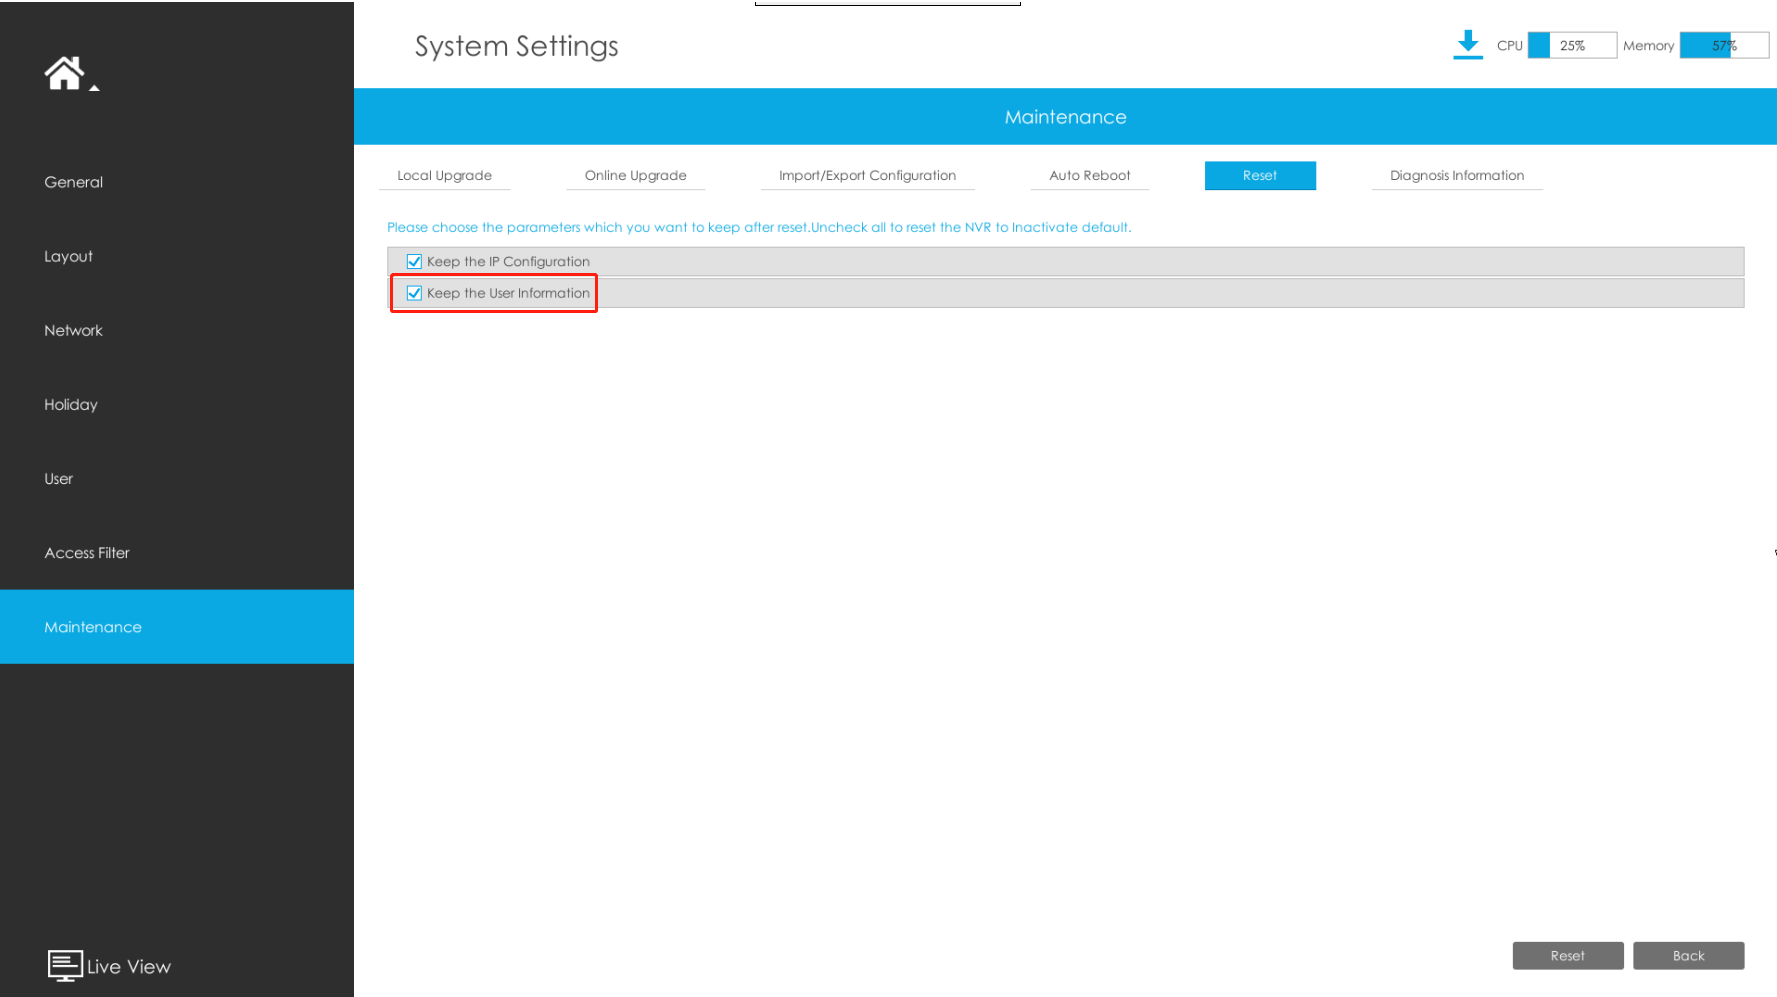
On NVR’s monitor
2.3 Activate on smart tools
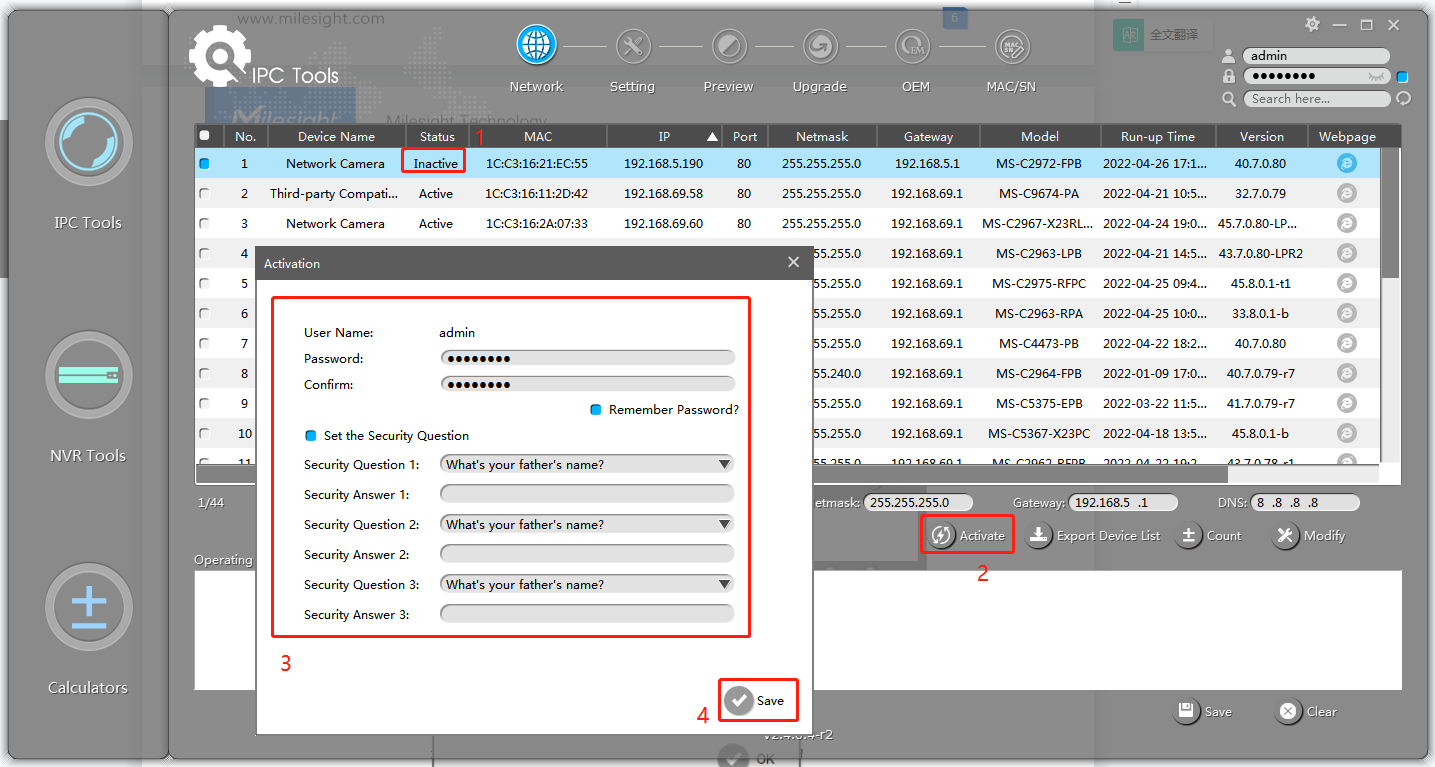
Open Smart Tools and click the IPC Tools/NVR Tools button. Then you will enter the IPC Tools/NVR Tools part:
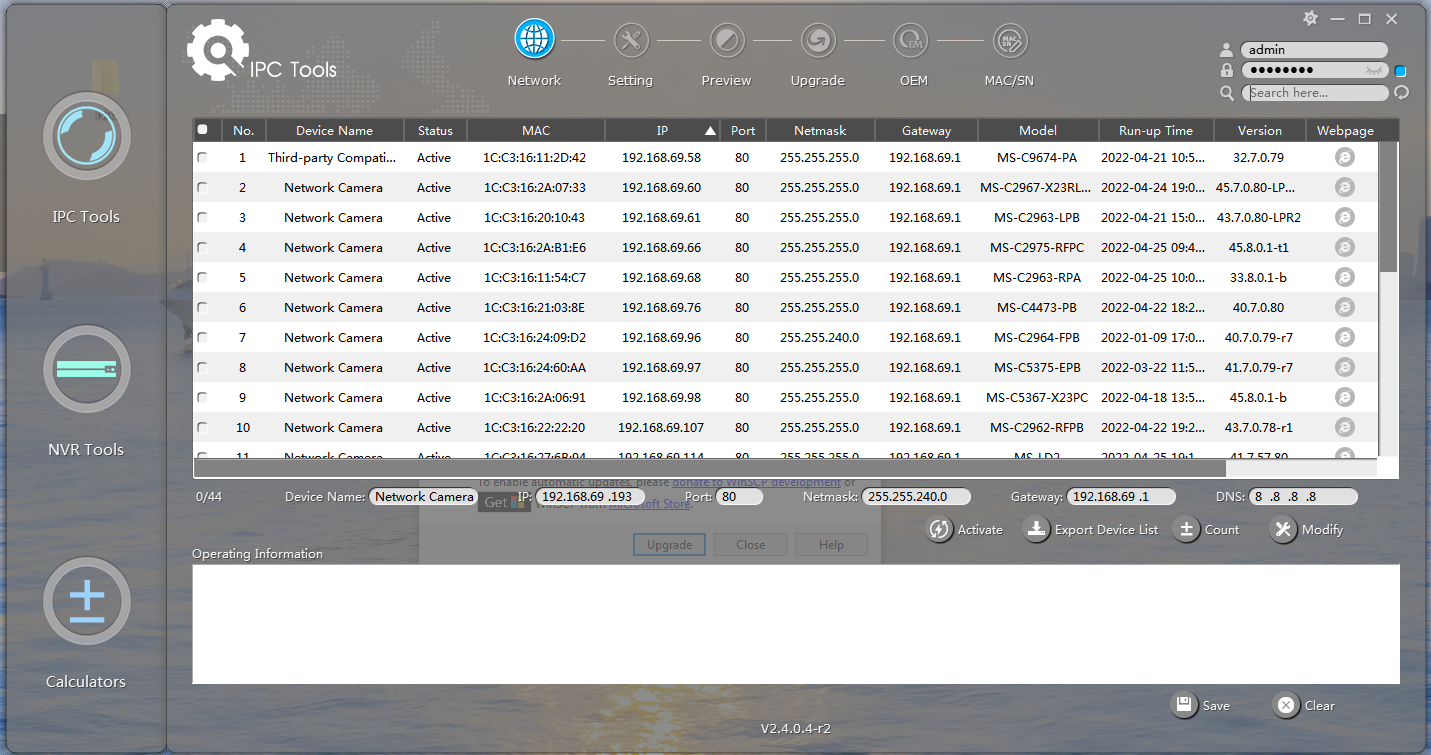
Select the device showing ‘Inactive’ in the status bar and click “Activate” to set the password when using it for the first time.
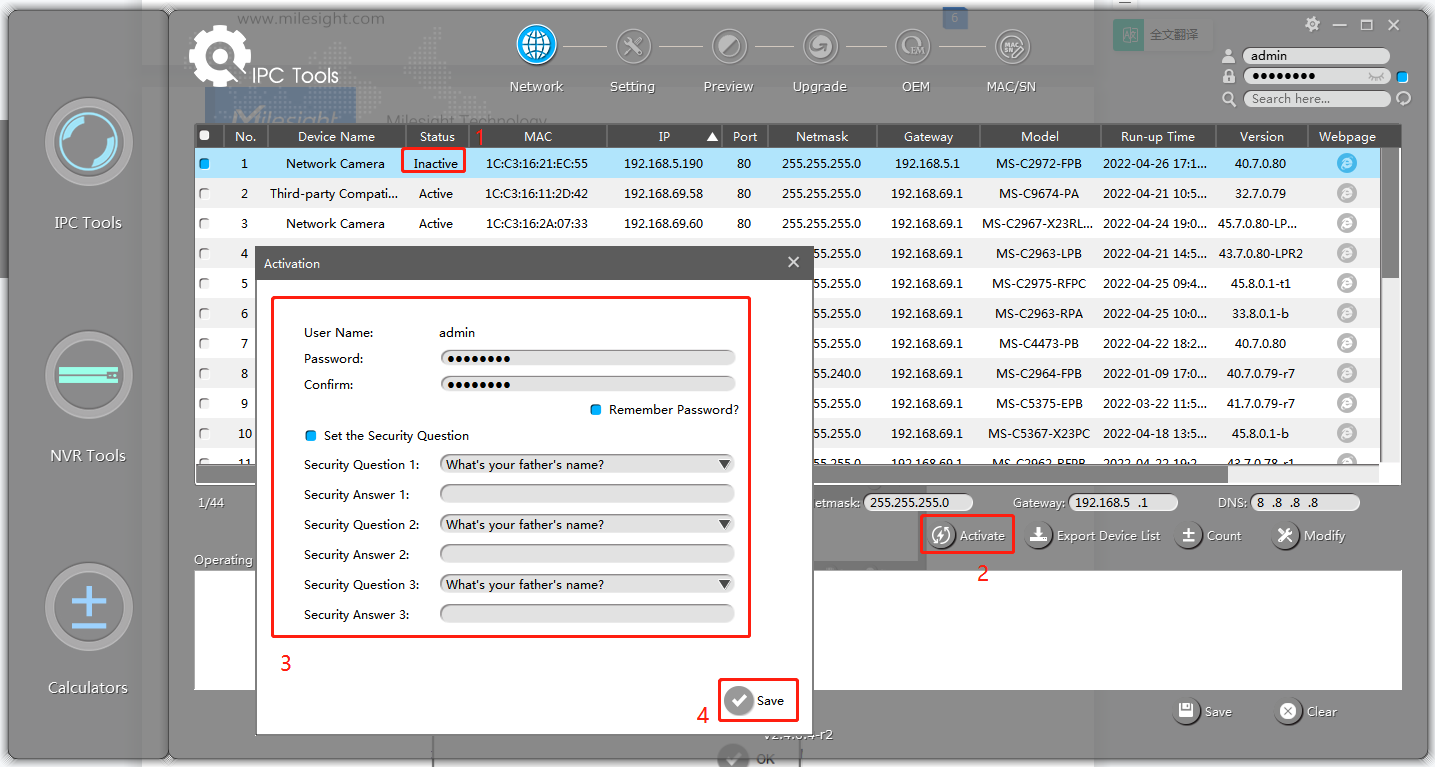
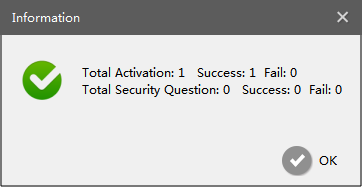
Click ‘Save’ and it will show that the activation was successful.
Note:
① Password must be 8 to 32 characters long.
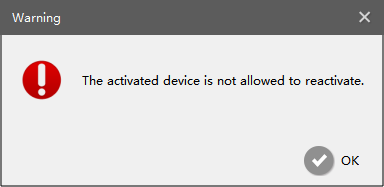
② If your device shows ‘Active’ in the status bar, you can use it directly without activating it. If you click "Activate", it will display ‘The activated device is not allowed to reactivate’.
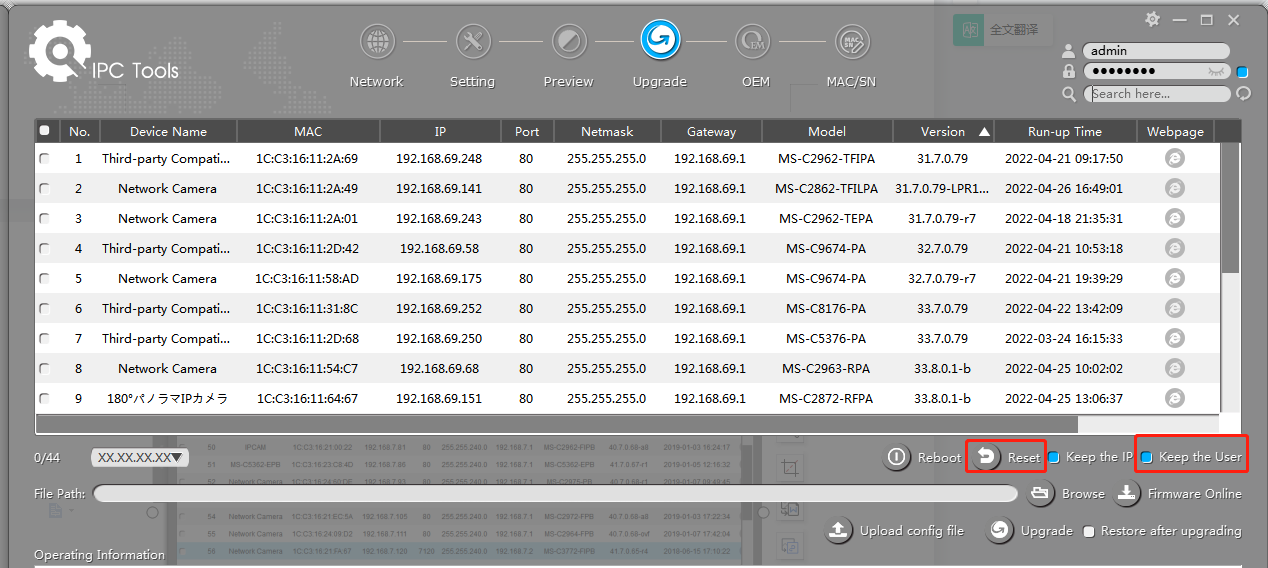
③ If you directly upgrade your device from lower version to V4x.7.0.69 or above(For camera)/V7x.9.0.3 or above(For NVR), it will still show ‘Active’, unless you disable the ’Keep the User’ option when resetting it, it will erase the user information and reset the device to ‘Inactive’ status.
2.4 Activate on CMS
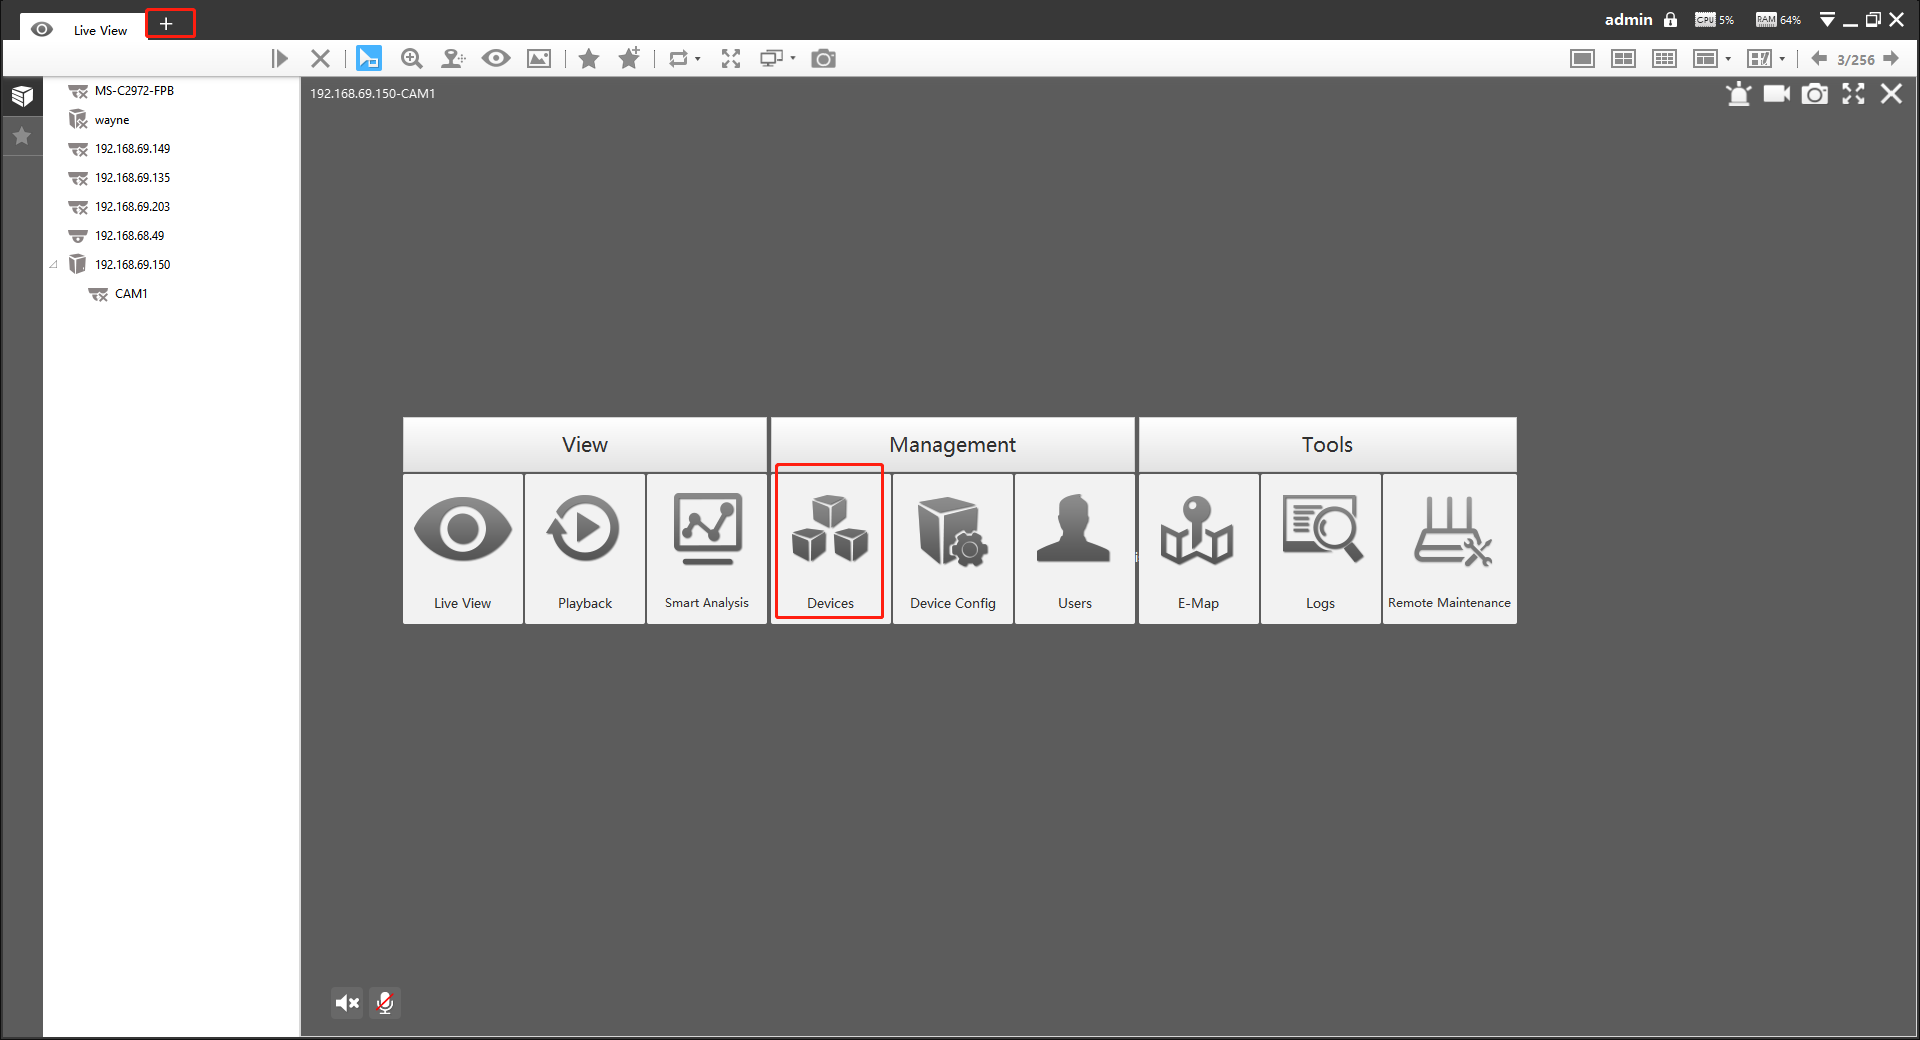
Open CMS and click ‘+’ ‘Devices’ to enter Devices interface.
Select device type(Camera or NVR) and then click "Search" button to search the Milesight devices in the same network.
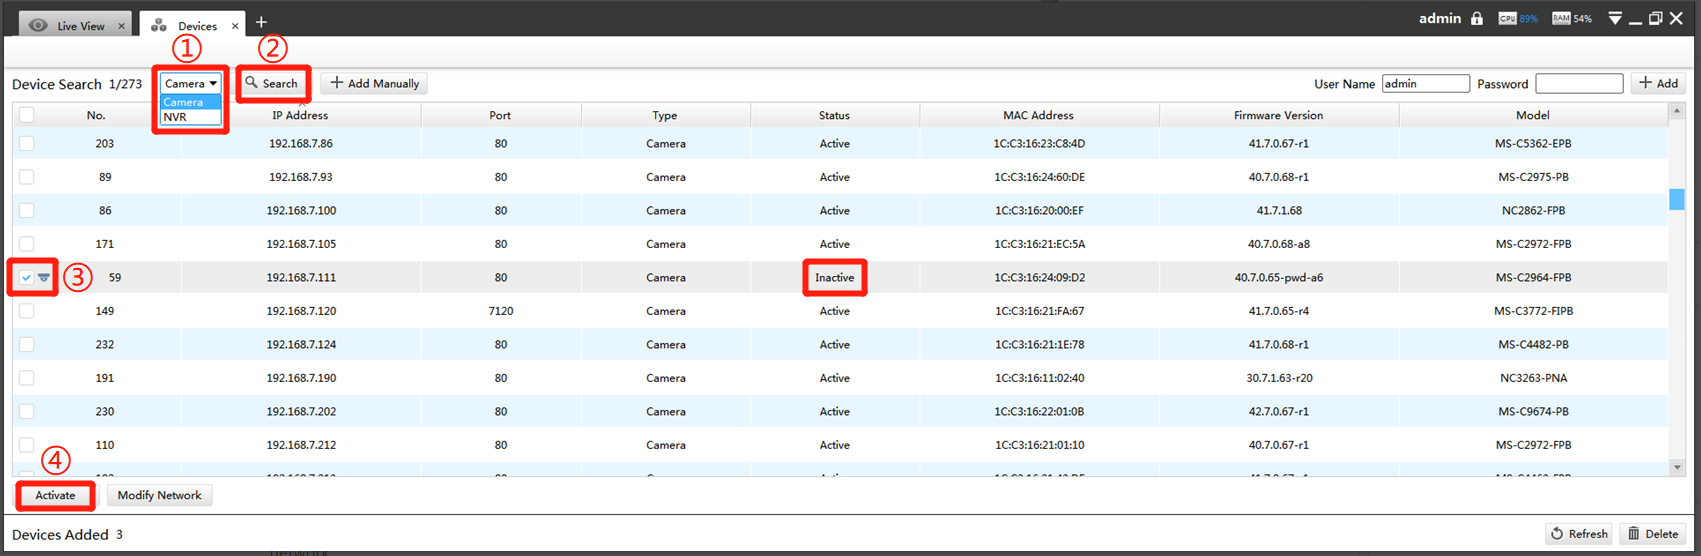
Select the device showing ‘Inactive’ in the status bar, and click "Activate" to set the password when using it for the first time.
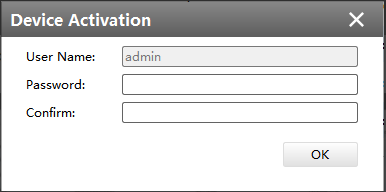
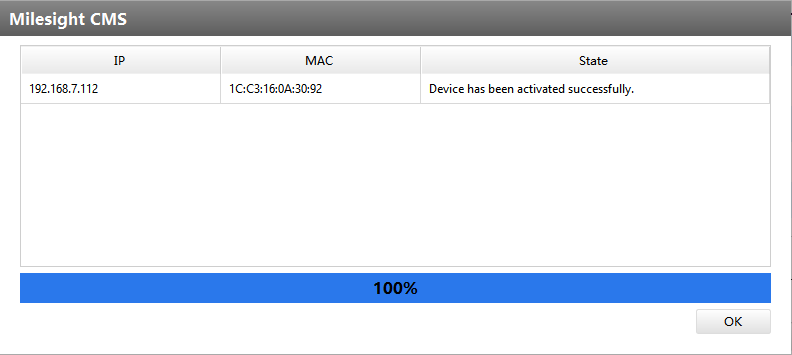
Click ‘OK’ and it will display ‘Device has been activated successfully’ when activation is successful.
Note:
① Password must be 8 to 32 characters long.
② If your device shows ‘Active’ in the status bar, you can use it directly without activating it. If you click "Activate" , it will display ‘The selected device has been activated, cannot activate twice’.
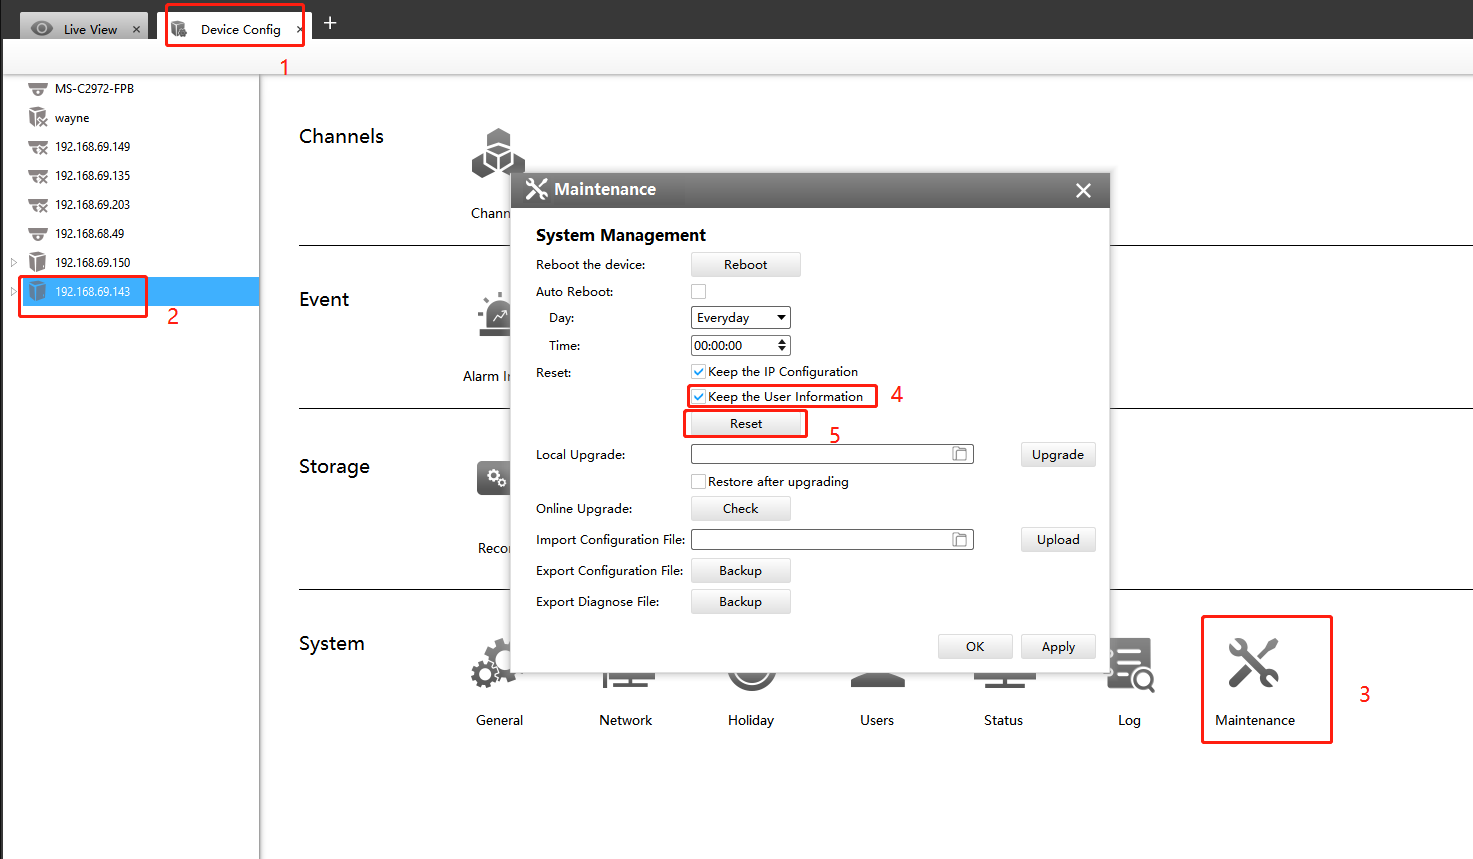
③ If you directly upgrade your device from lower version to V4x.7.0.69(For camera) or above/V7x.9.0.3 or above(For NVR), it will still show ‘Active’, unless you disable the ’Keep the User Information’ option when resetting it, it will erase the user information and reset the device to ‘Inactive’ status.
3. How to set the security question for Milesight device
You can set the security questions directly when activating Milesight device, or set the security questions in the configuration interface. In case that you forget the password, you can reset the password by answering three security questions correctly. It support to set the security questions for the device on Smart Tools, CMS or directly on device.
Note:
① You need to set three security questions for your device.
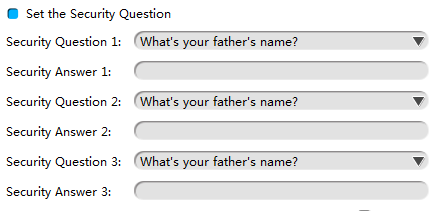
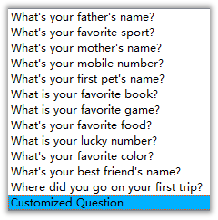
② There are twelve default questions below, you can also customize the security questions.
3.1 Set the security questions on web
① If the network segment of the computer and that of the camera/ NVR are different, please follow the same steps on “Activate on web” part in the sixth page to change the IP address when using it for the first time.
Enter the login interface, and set three security questions for your device after setting the password to activate it. Then you can log in the device through web browser.
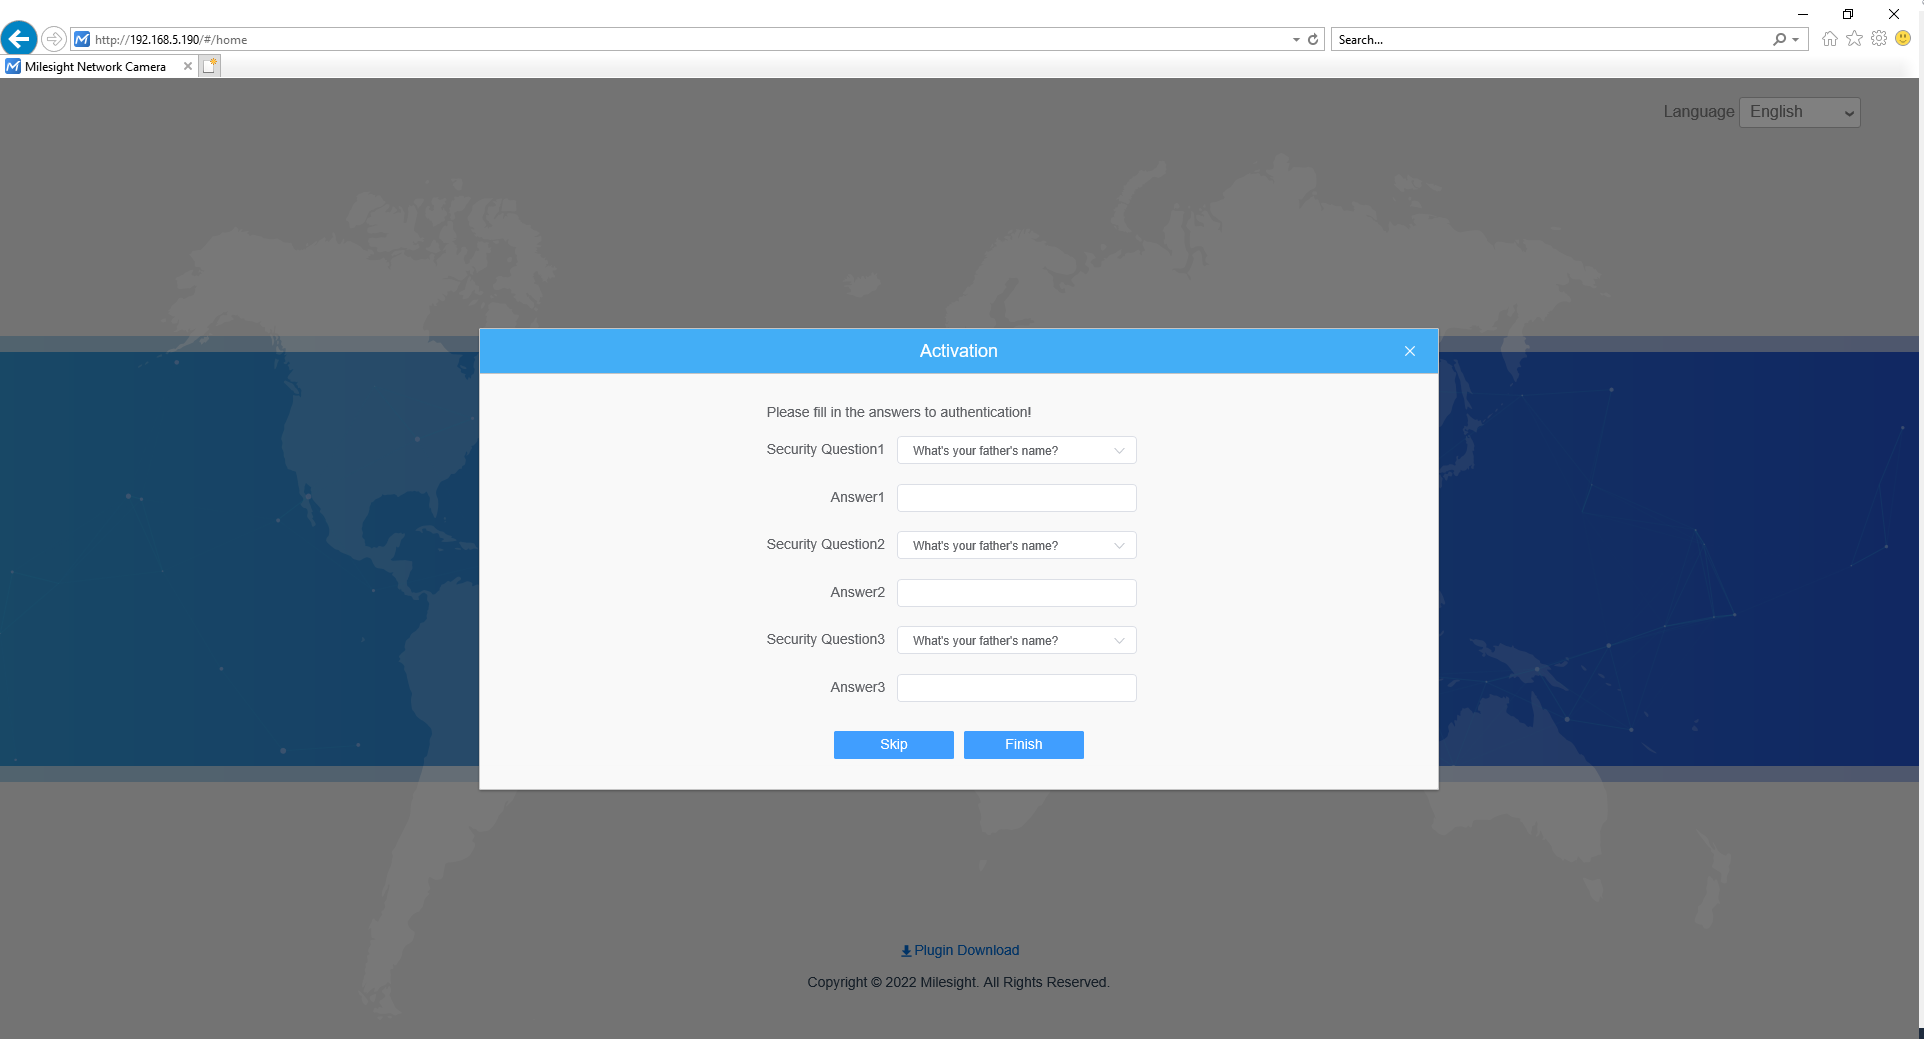
Set the security questions on camera’s web
Set the security questions on NVR’s web
② You can also log in the device, then, set the security question in ‘User’ interface.
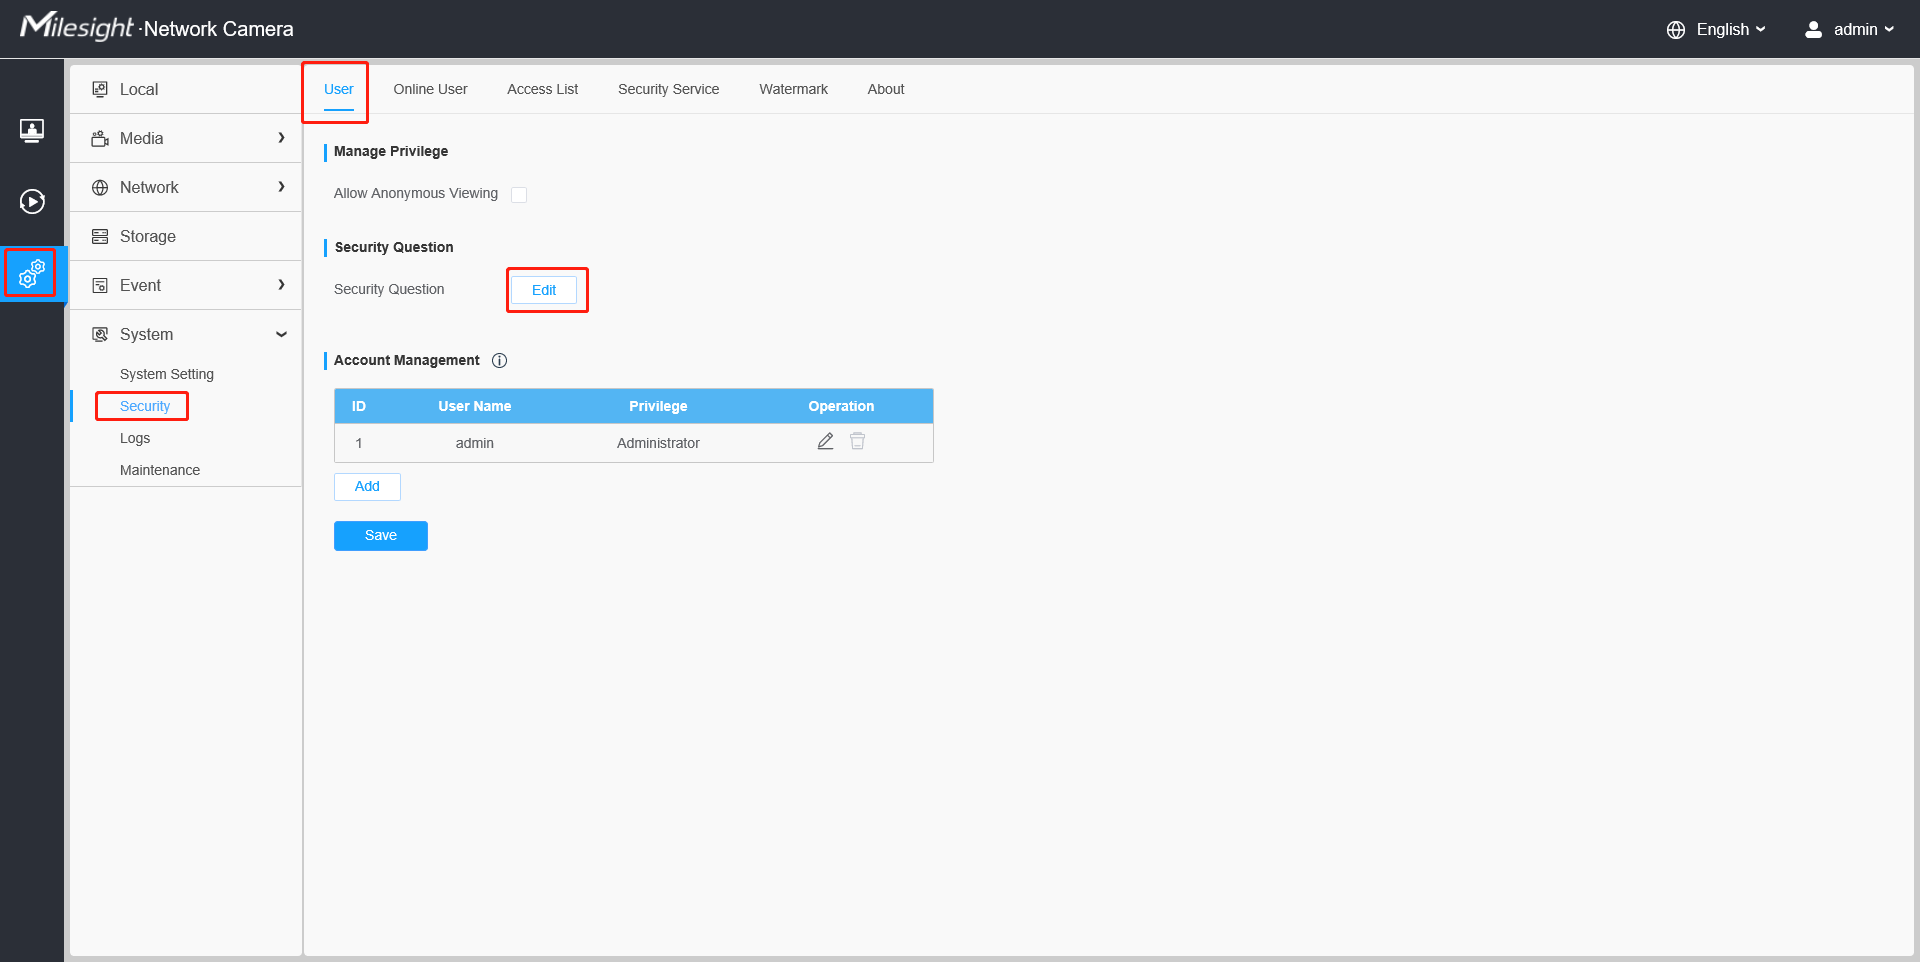
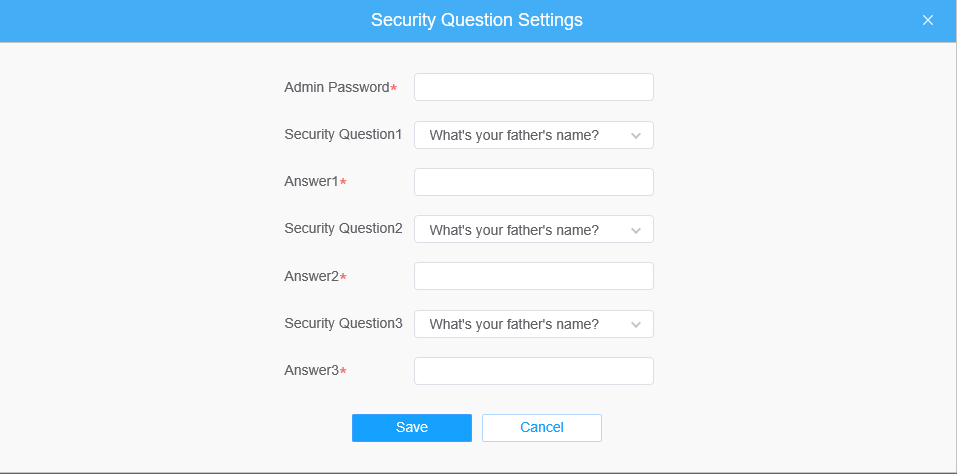
Set the security question on camera’s web
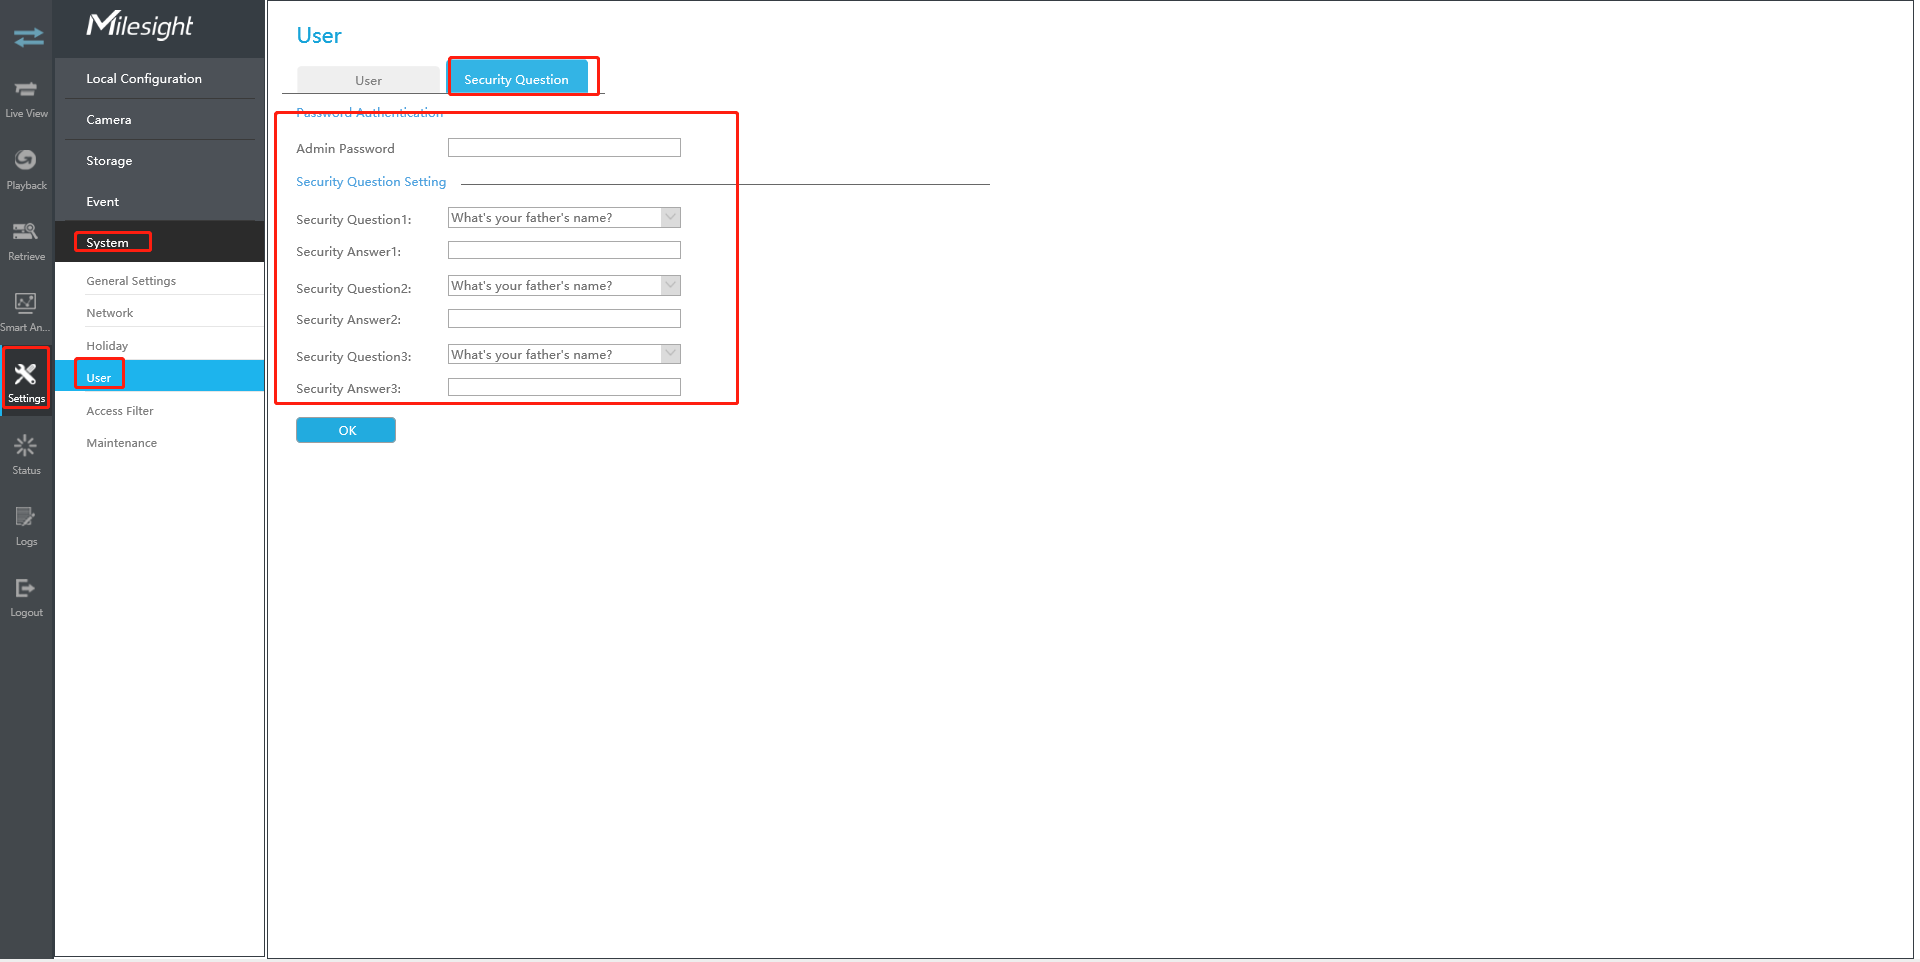
Set the security question on NVR’s web
3.2 Set the security questions on monitor
For NVR, you can also set the security questions on monitor directly.
① When using the NVR for the first time, connect a monitor to the NVR to enter the login interface, set three security questions after activating it.
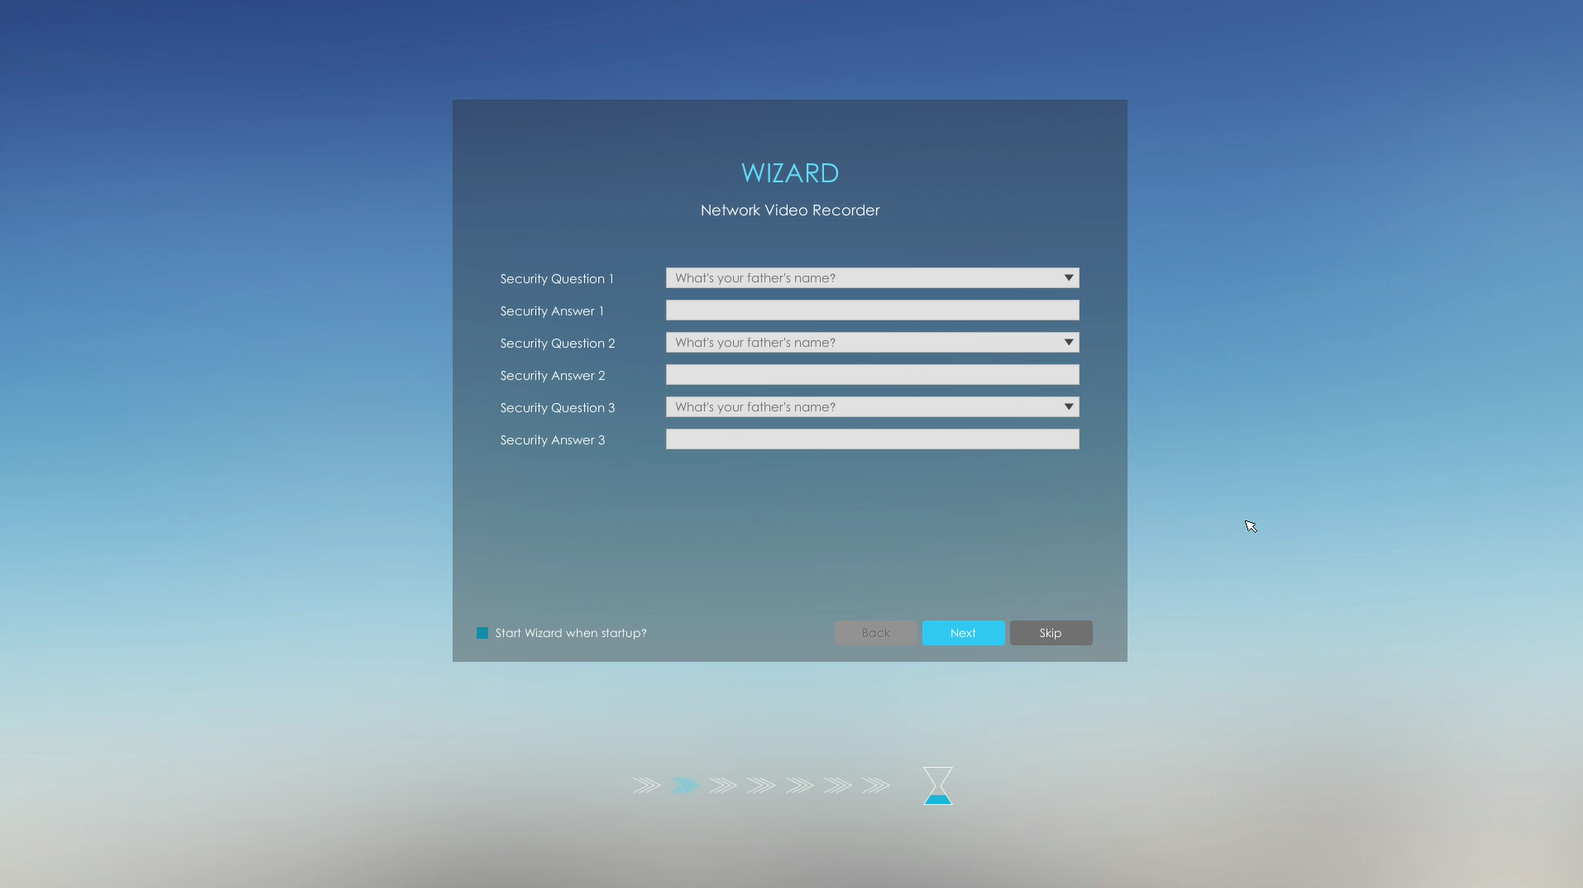
② You can also log in the NVR and set the security question in ‘User’ interface.
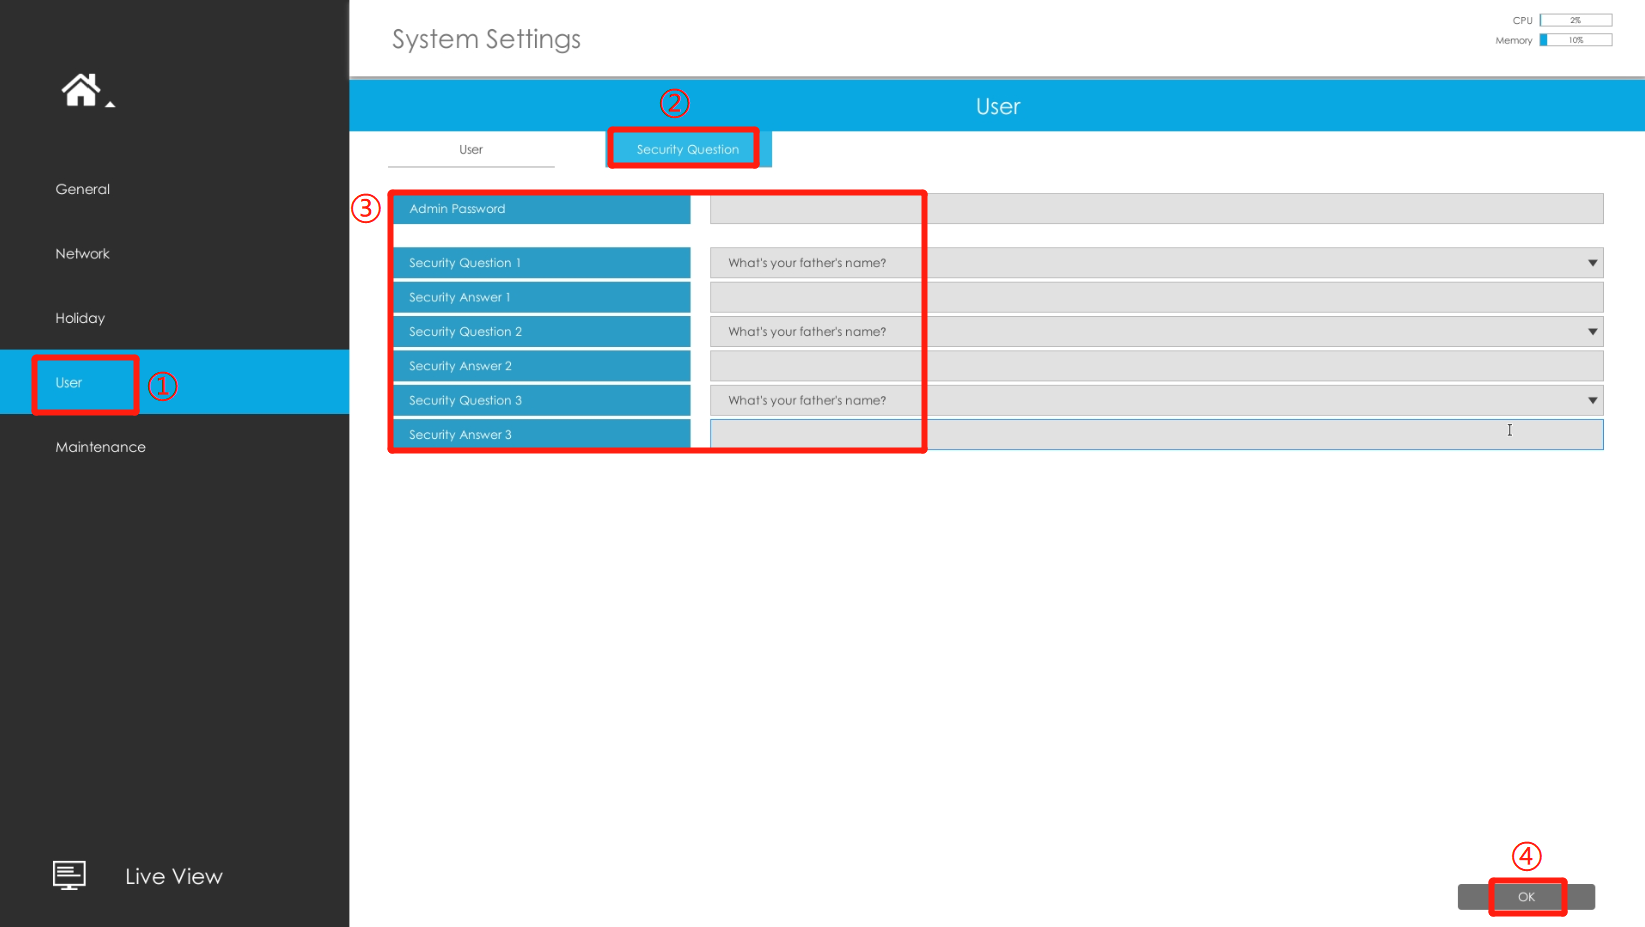
3.3 Set the security question on Smart Tools
① Open Smart Tools, and click ‘IPC Tools’ / ‘NVR Tools’ ‘Network’. Then, set three security questions for your device(Camera or NVR) when activating it.
② You can also set the security question for your devices in ‘IPC Tools’ / ‘NVR Tools’ ‘Setting’ ‘User’ interface.
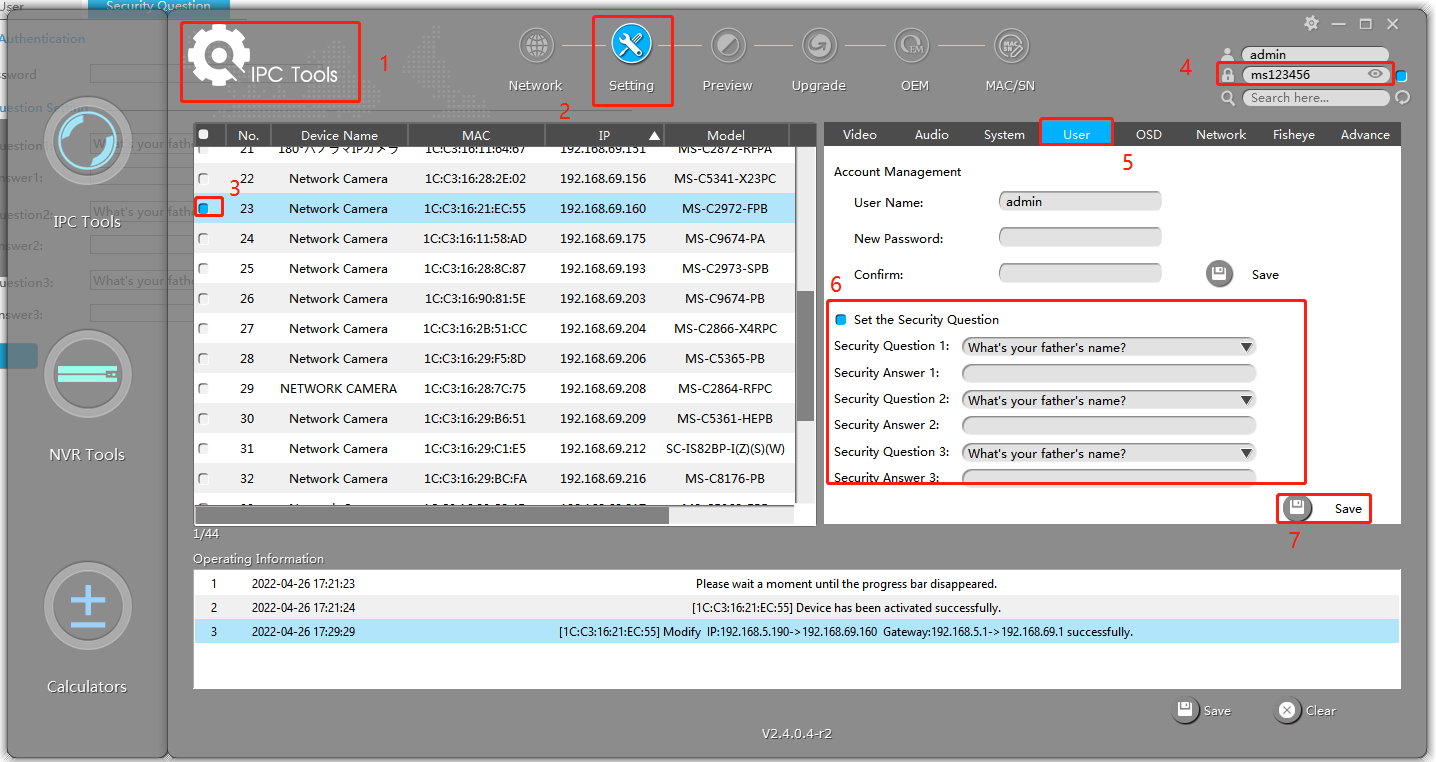
Set the security questions for camera
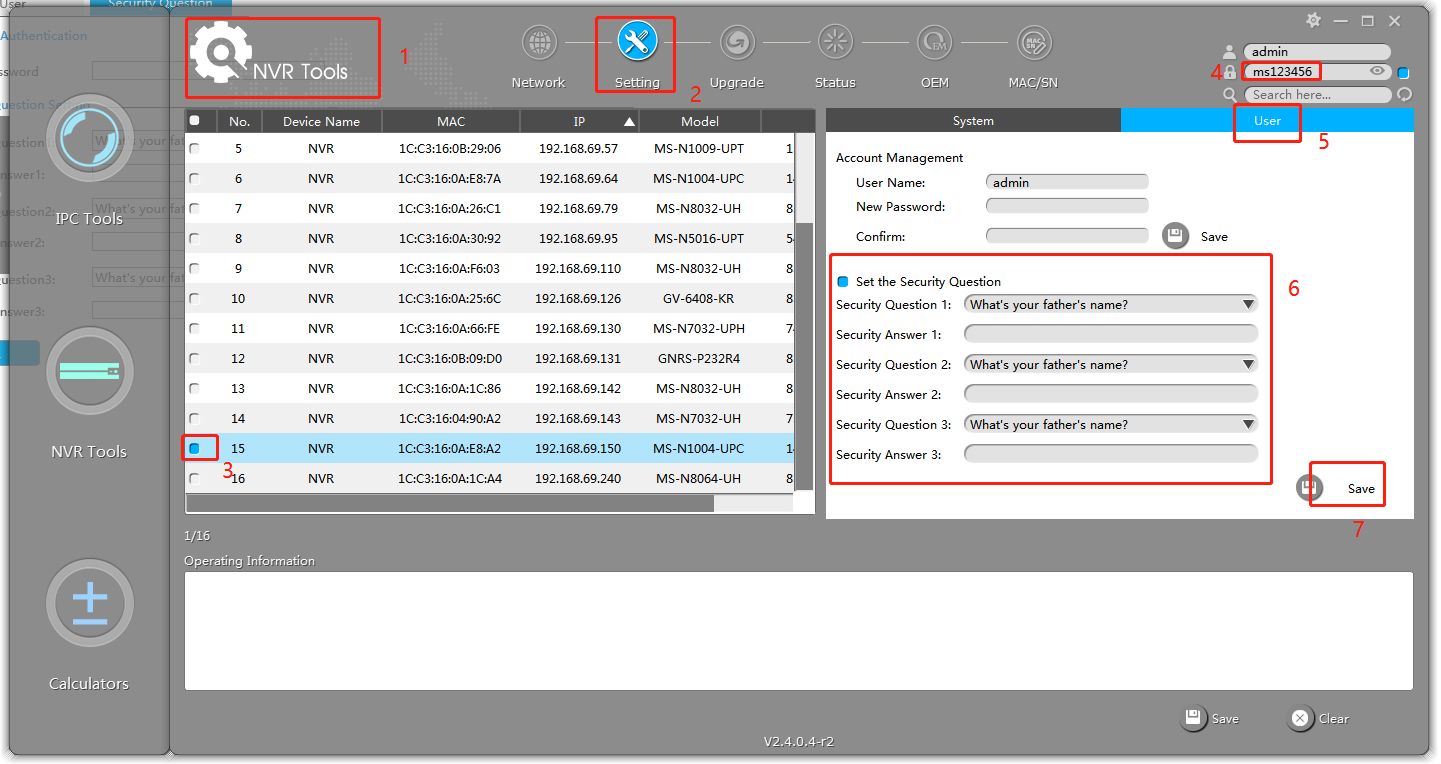
Set the security questions for NVR
3.4 Set the security question on CMS
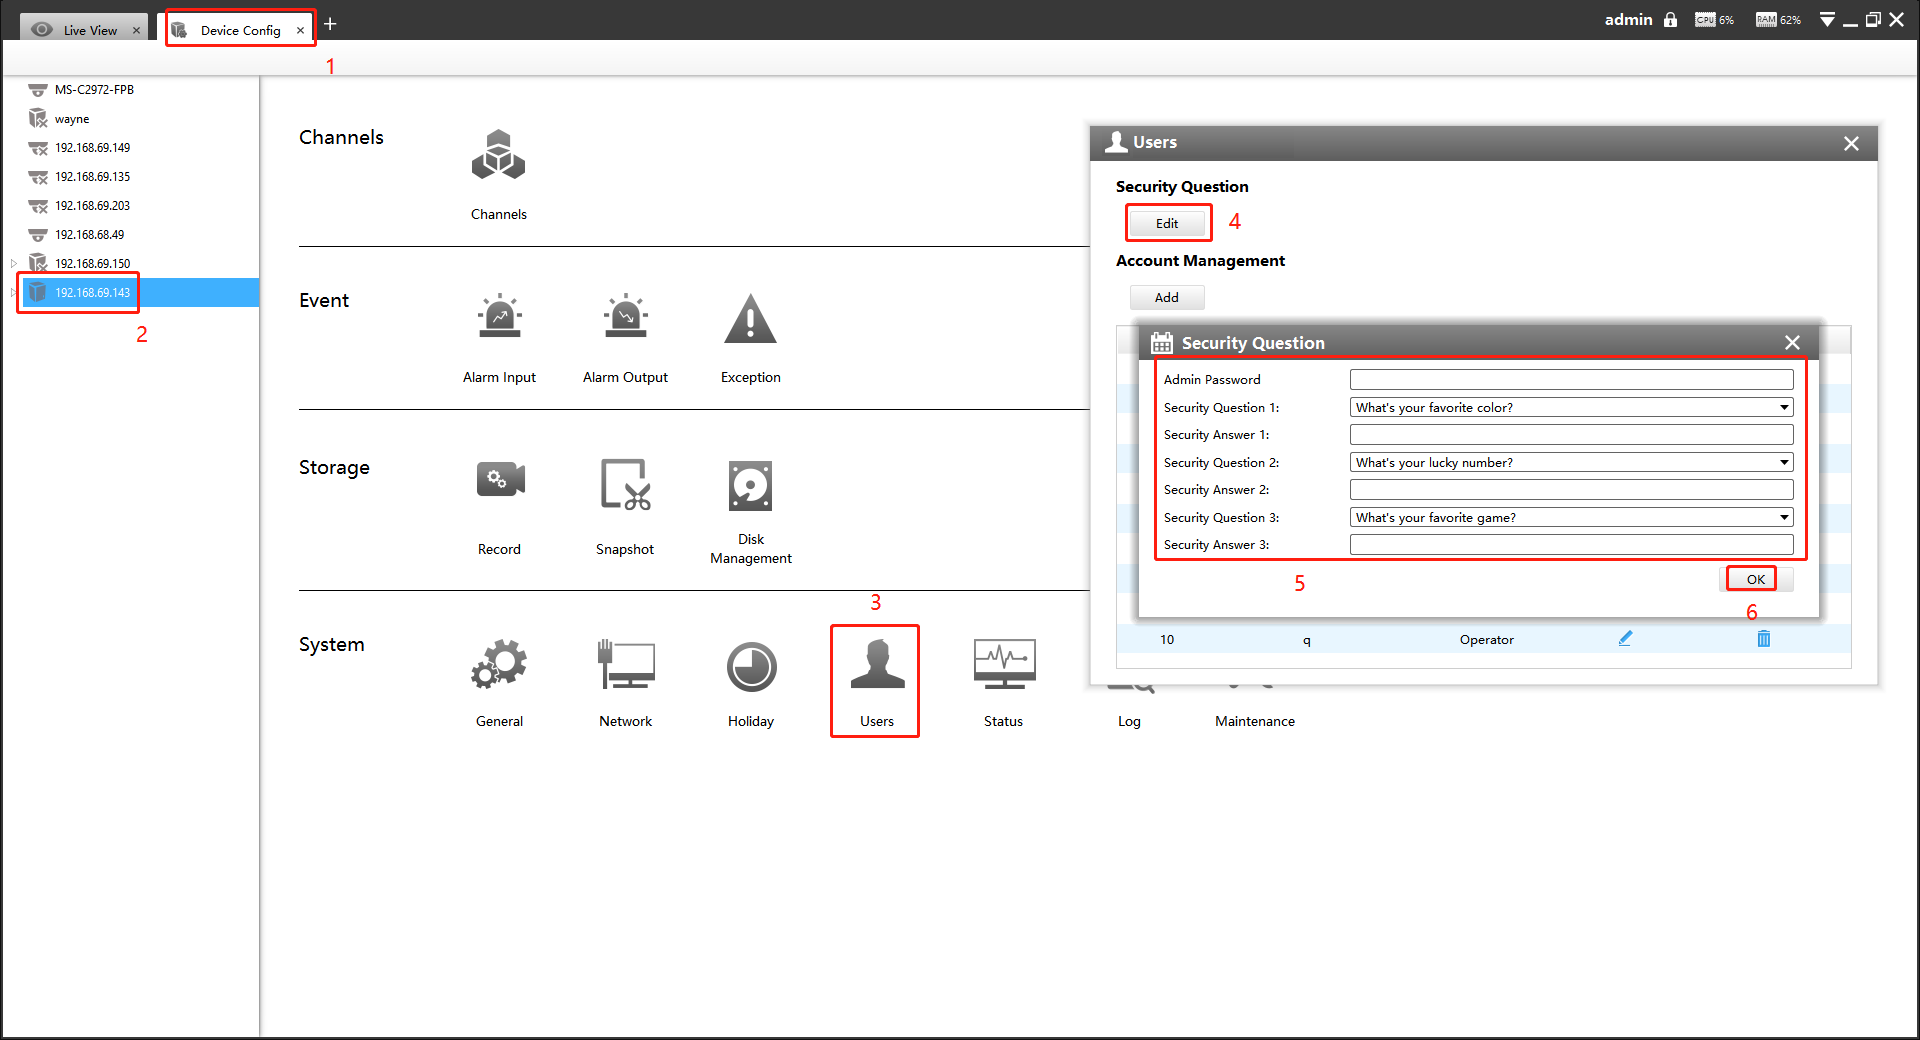
① Open CMS, and click ‘+’ ‘Device Config’ to enter Device Config interface.
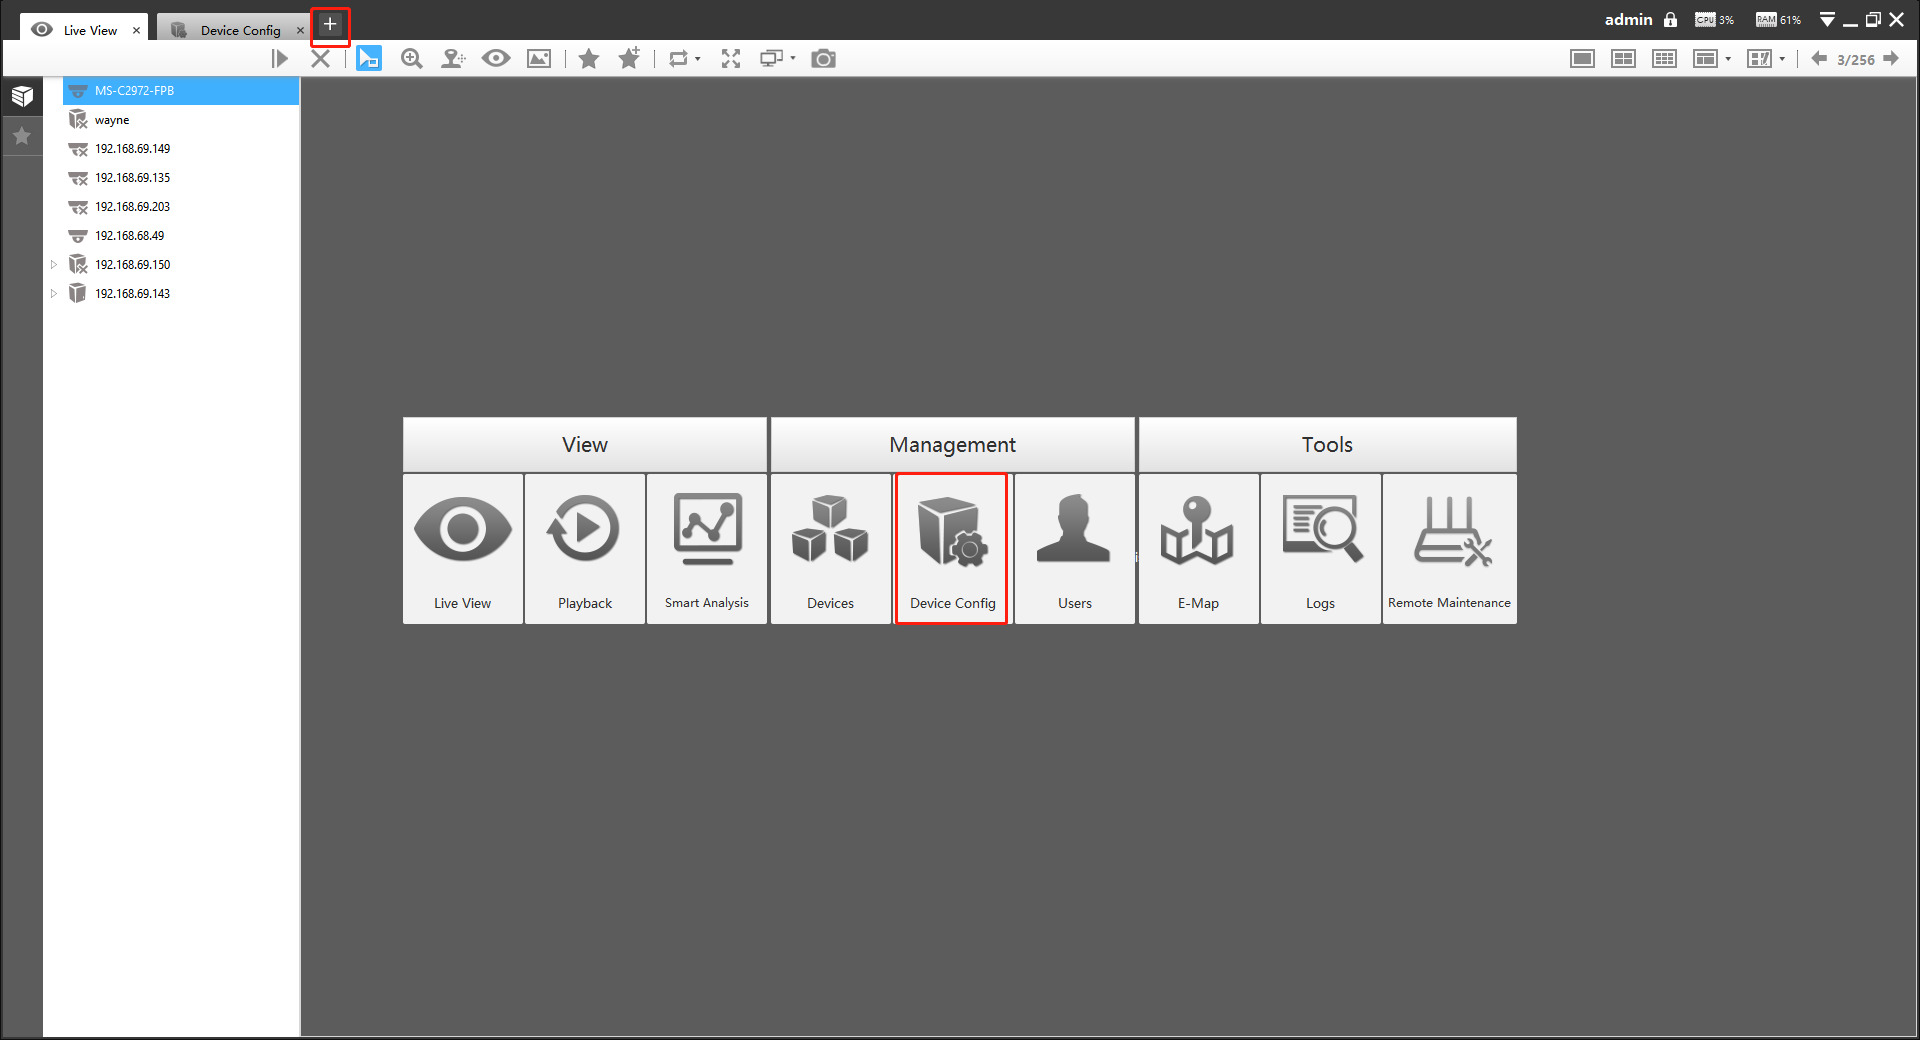
② Select the device(Camera or NVR), and click ‘Users’ ‘Edit’ to input Admin Password. Set three security questions for your device, then, click “OK”.
4. Reset the password
If you forget the password, you can reset the password by answering three security questions correctly in the device’s login interface.
Enter the IP address of the device(Camera or NVR) in the browser to enter the login interface, click ‘Forget Password’ on camera or ‘?’ on NVR.
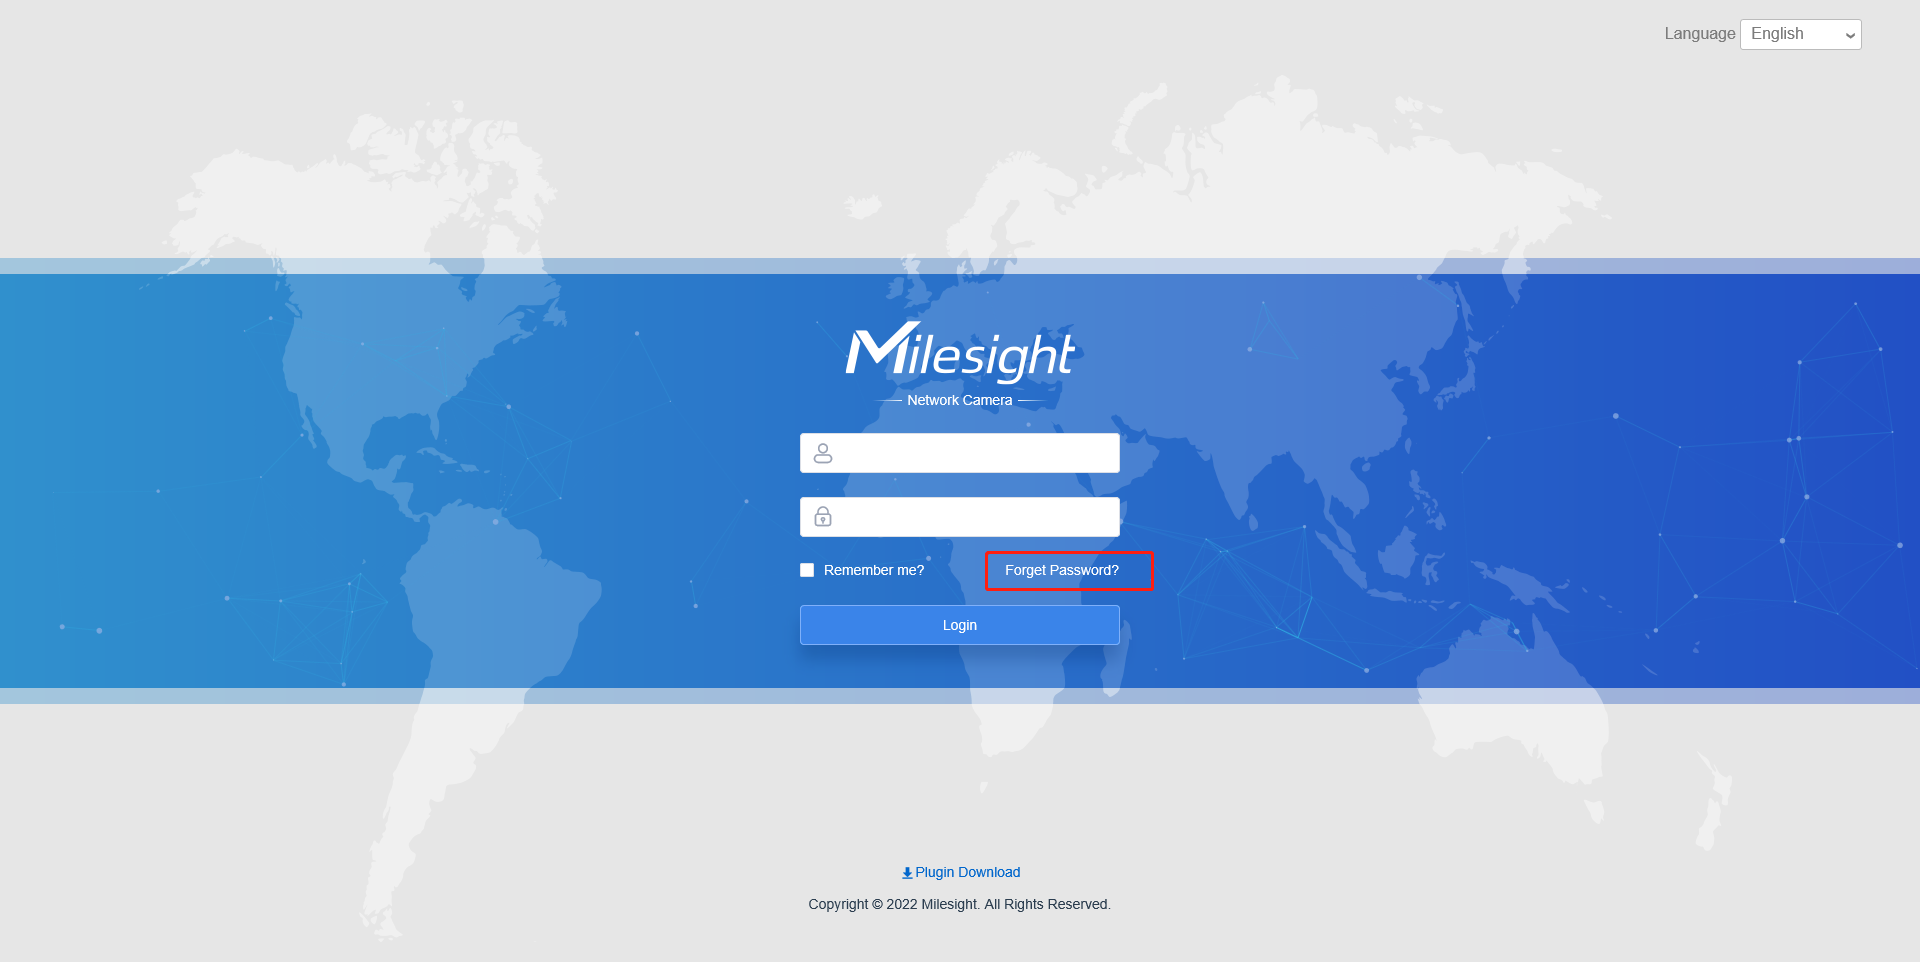
On camera
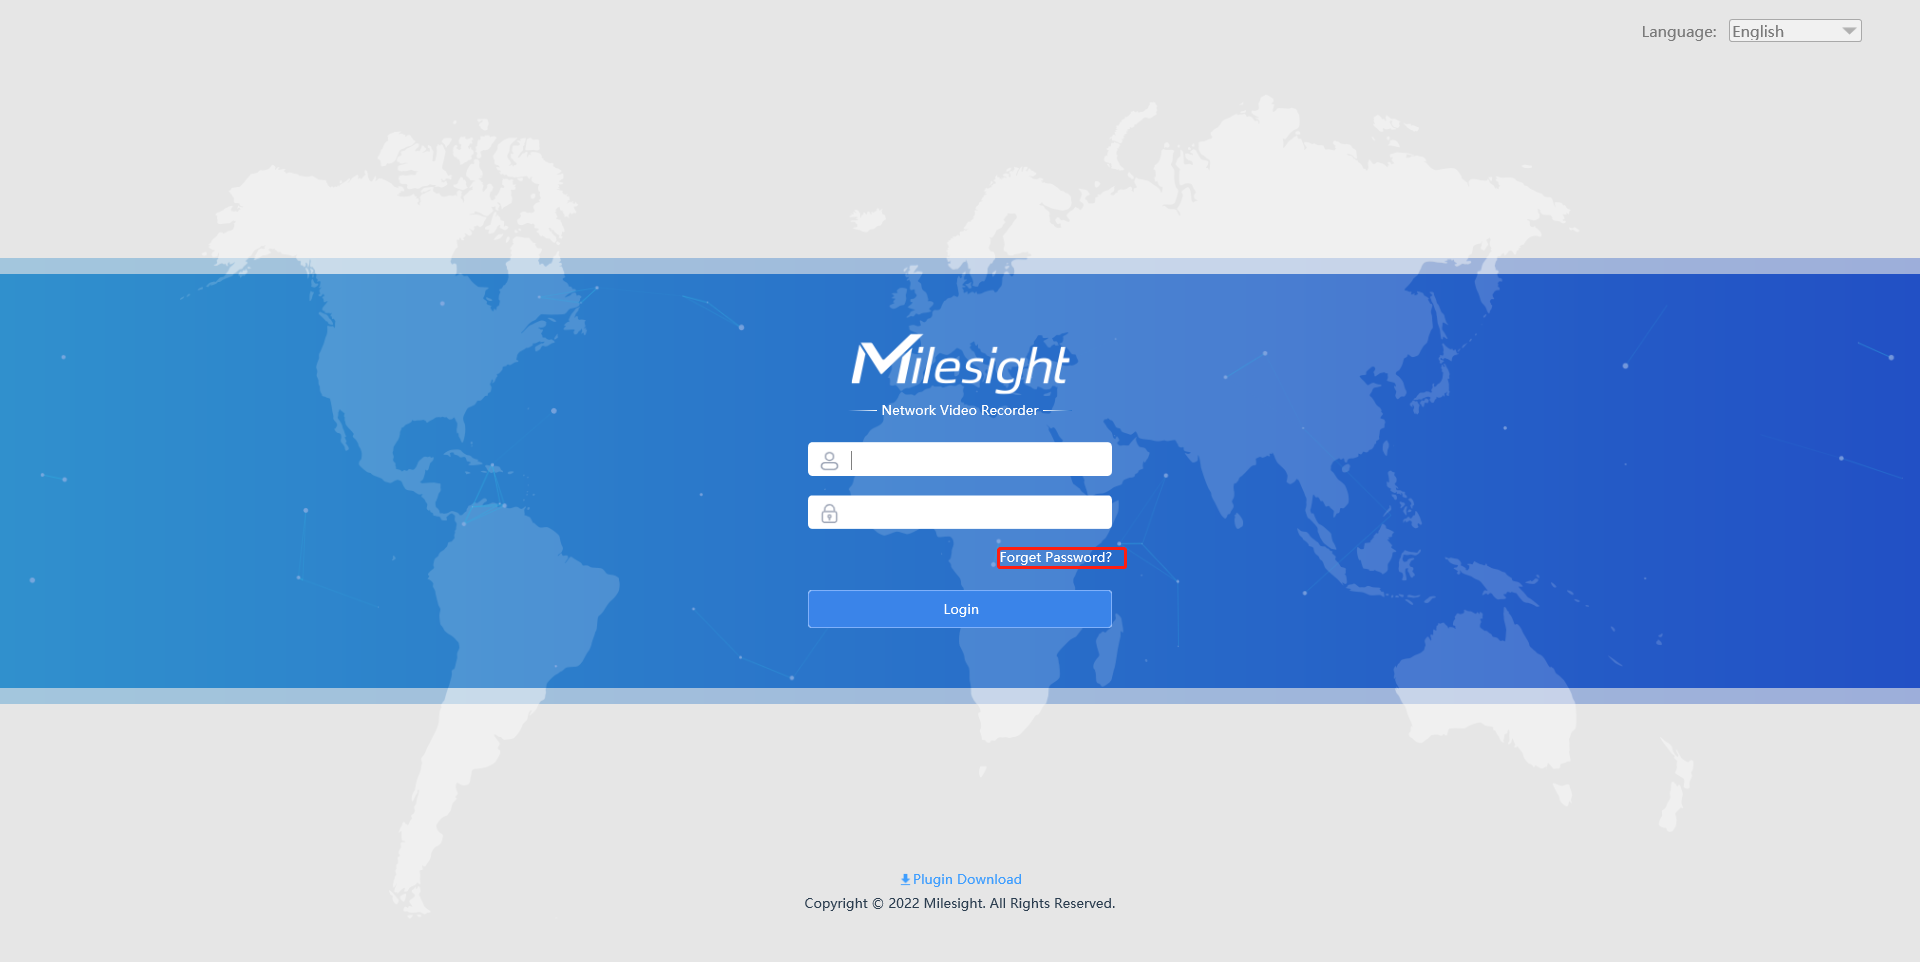
On NVR
For NVR, you can also connect a monitor to the NVR to enter the login interface, then, click ‘?’ on NVR.
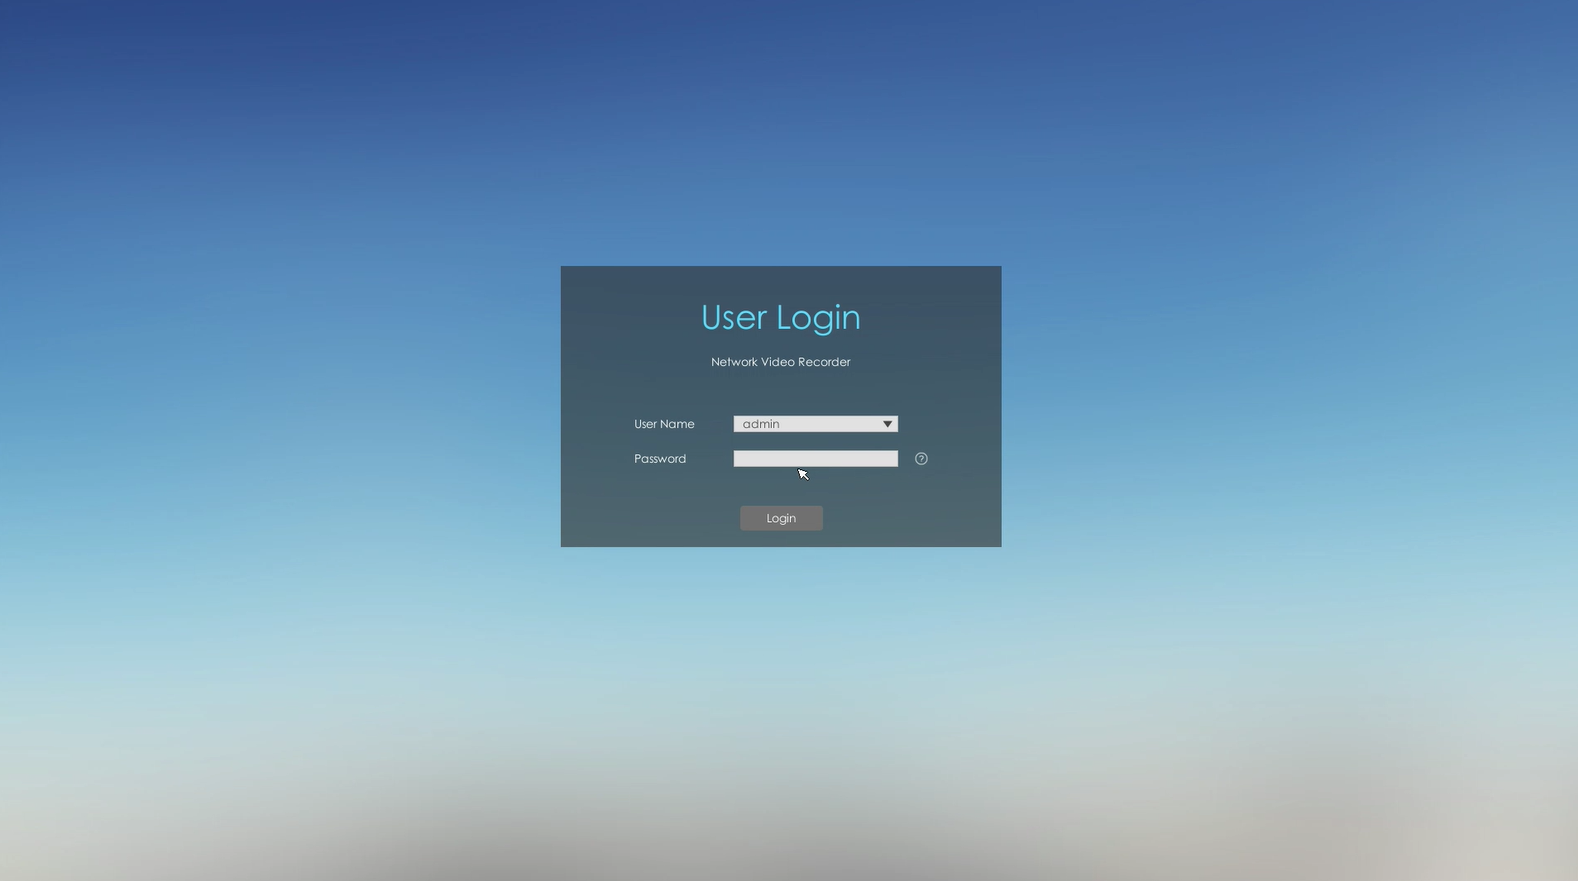
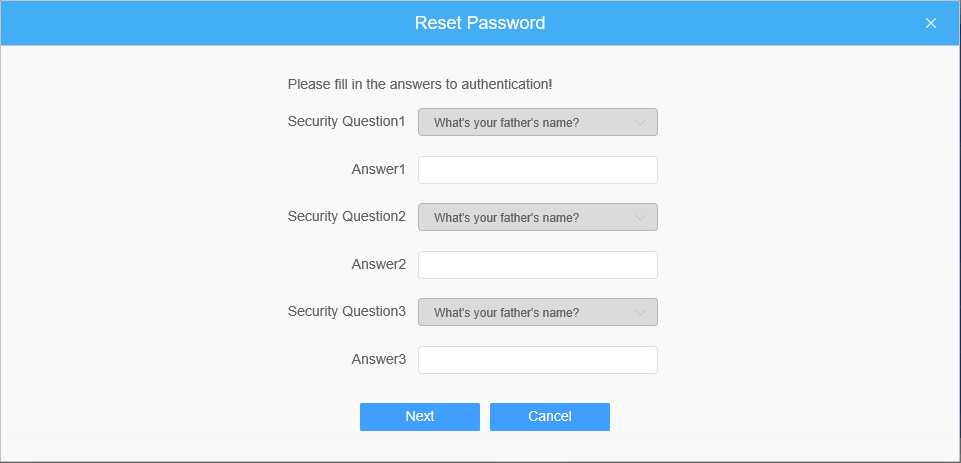
Fill in the answers of three security questions and click ‘Next’.
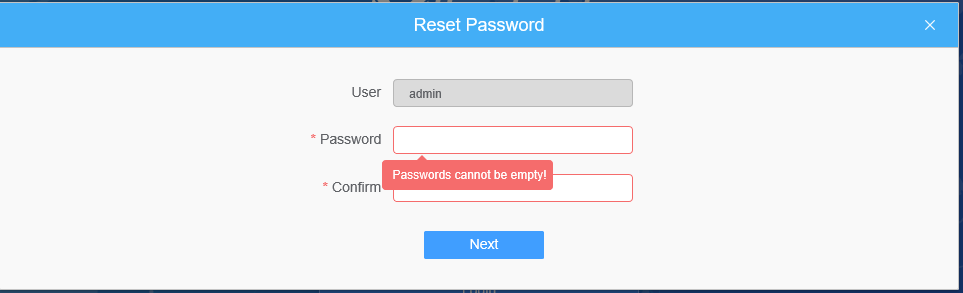
Enter the new password twice to reset the password.
——————END——————