
1.Introduction
This guide covers the complete Security section of the Milesight network camera web interface, including user creation, password-recovery settings, online-user monitoring, and access filtering.
Note: Menu names and available options may vary slightly by camera model and firmware version. Confirm the actual items displayed on the camera web interface. |
2. Open the Security Page
Step 1: Log in to the camera web interface with the administrator account.
Step 2: Go to Settings > System > Security.
Step 3: Select the required tab: User, Online User, Access List, Security Service, Watermark, About or Certificate Management.
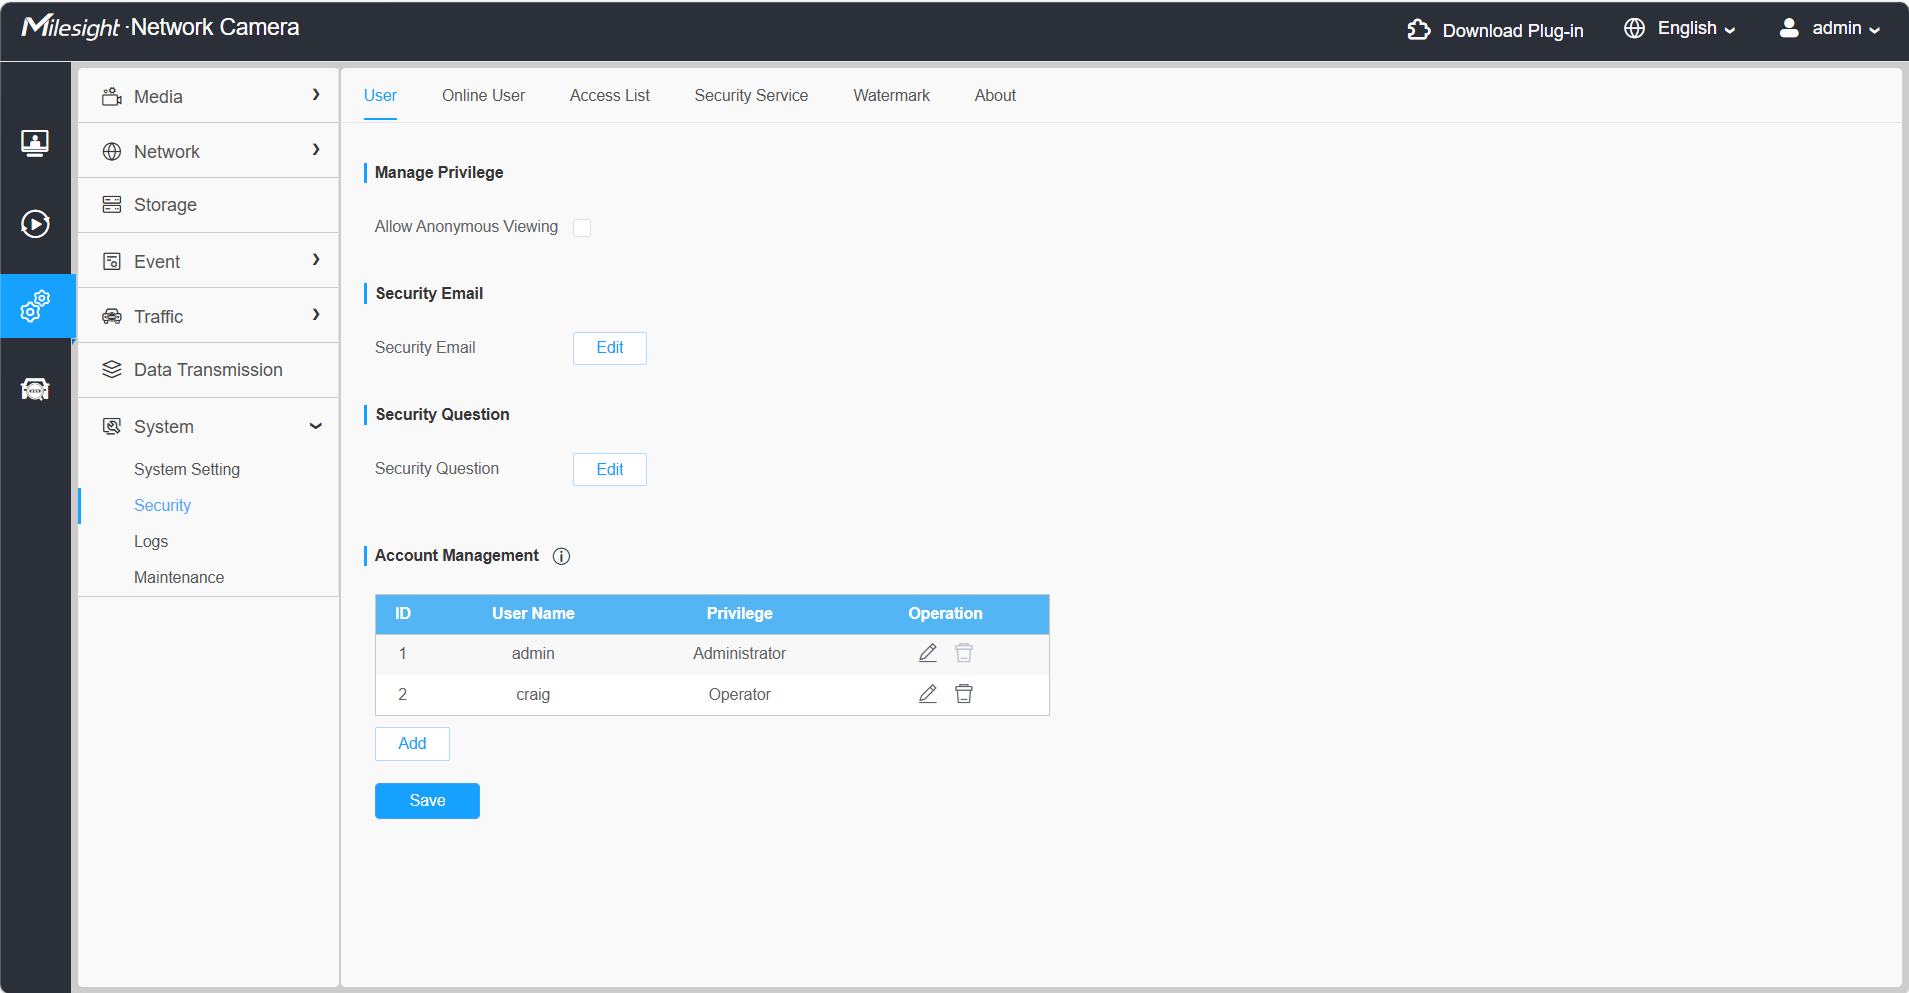
Figure 1. Security > User page
3. Configure User and Password-Recovery Settings
3.1 Manage Anonymous Viewing
Enable Allow Anonymous Viewing only when users without a device account must be allowed to visit the camera. This option can expose live video without account authentication.
Note: Anonymous viewing may cause video leakage. Keep it disabled unless the project specifically requires unauthenticated viewing and the security impact has been accepted. |
3.2 Configure the Security Email
The security email can be used for password reset and improves account recovery.
Step 1: On the User tab, click Edit under Security Email.
Step 2: Enter the current Admin Password and the security email address.
Step 3: Click Save to complete the configuration.
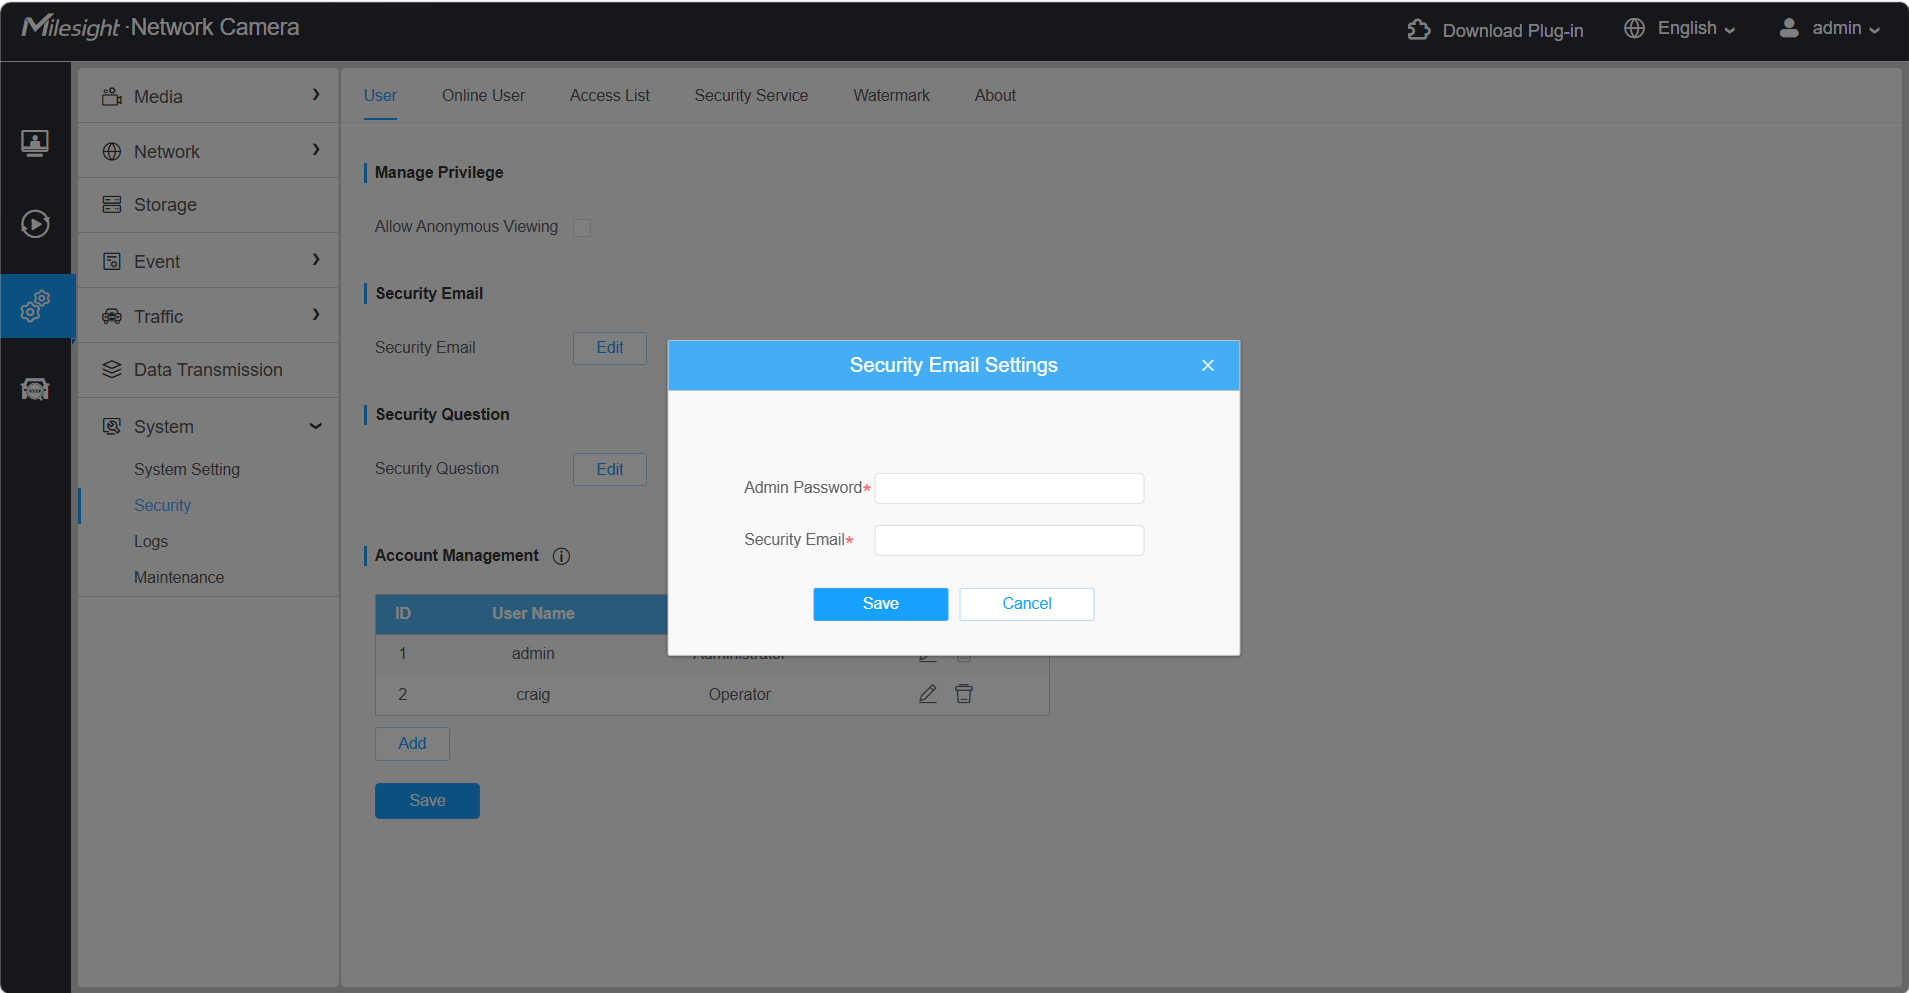
Figure 2. Security Email Settings
3.3 Configure Security Questions for First-Time Use
After the camera is activated or during initial commissioning, configure three security questions. If the administrator password is forgotten, the questions can be answered from Forget Password on the login page to reset the password.
Step 1: On the User tab, click Edit under Security Question.
Step 2: Enter the current Admin Password.
Step 3: Select three different questions and enter the corresponding answers. The camera provides twelve default questions and also supports customized questions.
Step 4: Click Save. Record the answers securely as part of the project handover information.
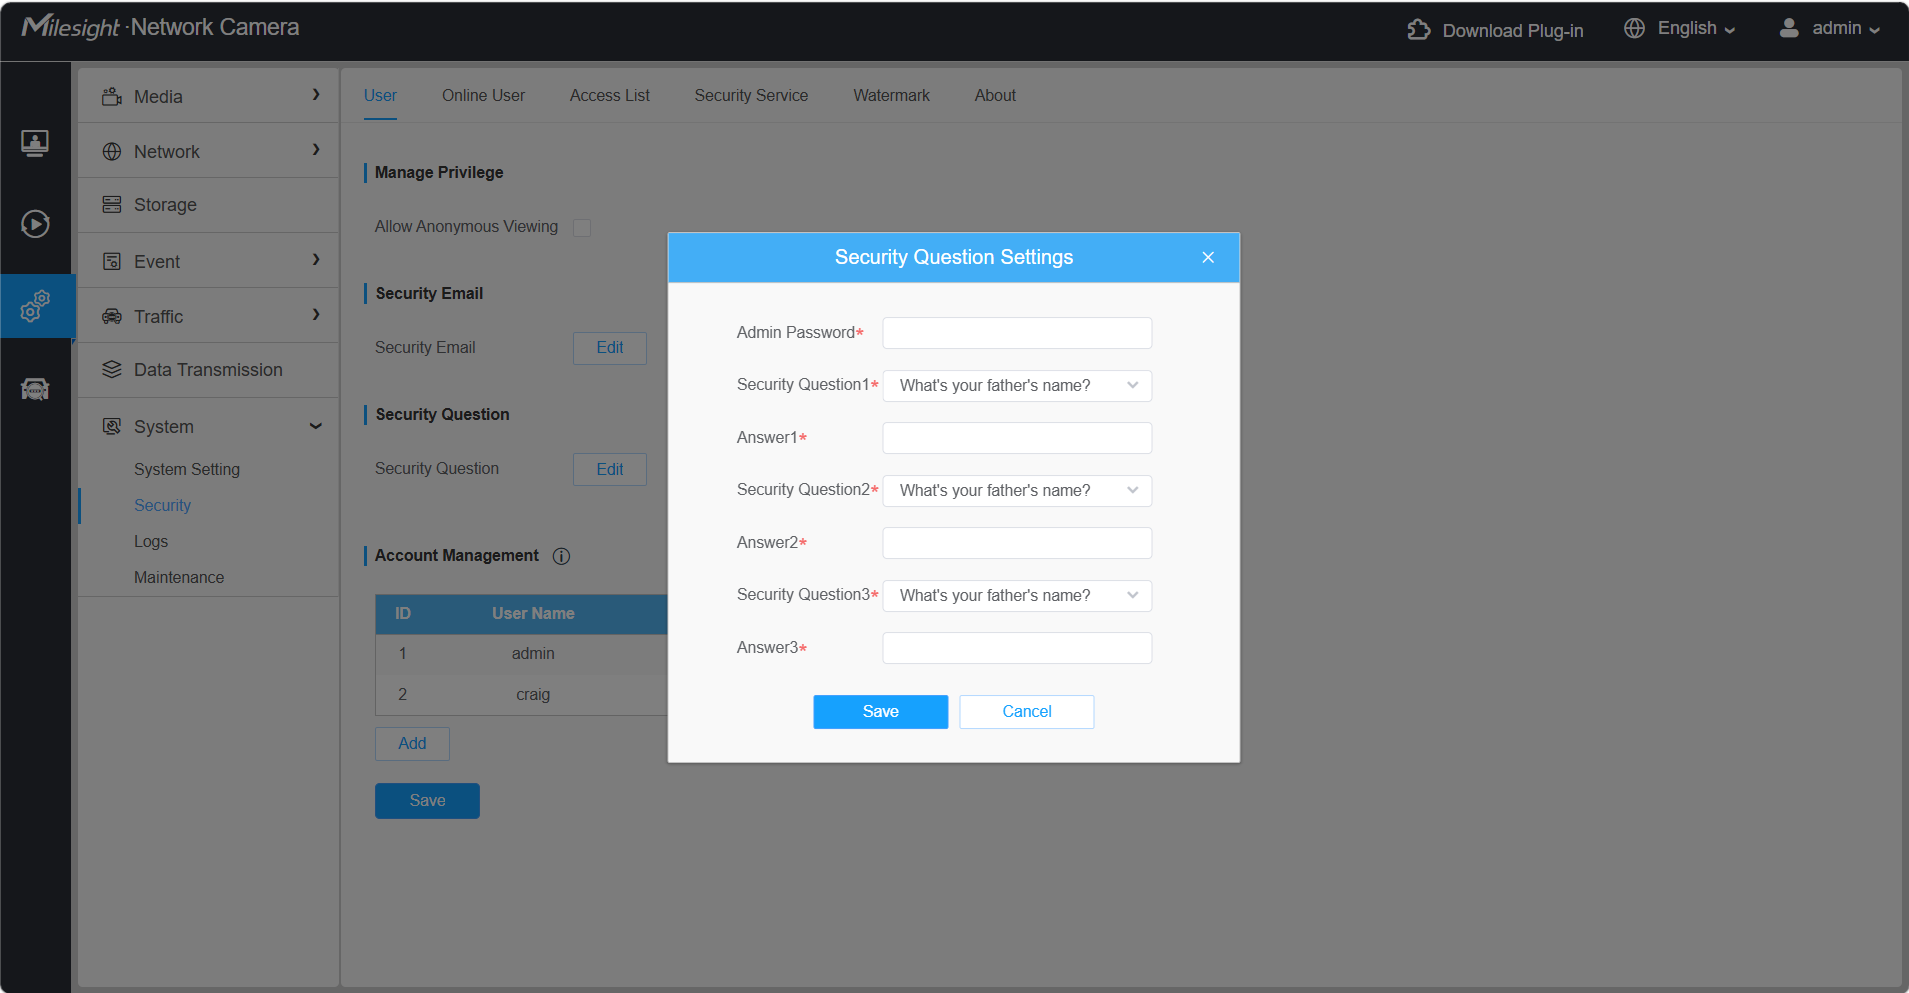
Figure 3. Security Question Settings
Note: Security questions should not use answers that are easy to guess or publicly available. Treat the answers as account-recovery credentials. |
3.4 Understand User Levels
User Level | Typical Use | General Description |
Administrator | Installation / maintenance | Full device management, including account and security configuration. |
Operator | Daily operation | Operational and configuration permissions according to the privileges assigned. |
Viewer | Monitoring | Primarily for live viewing with restricted configuration privileges. |
Note: The available privilege items depend on the camera model and firmware. Operator privileges are selected by default and can be adjusted. |
3.5 Create a User
Step 1: Under Account Management, click Add.
Step 2: Enter the current Admin Password. An account can be added only after the correct administrator password is entered.
Step 3: Select the User Level and enter the User Name.
Step 4: Enter the New Password and Confirm password.
Step 5: Open User Privilege and grant only the permissions required for the account.
Step 6: Click Save, then verify the account by logging in with the new credentials.
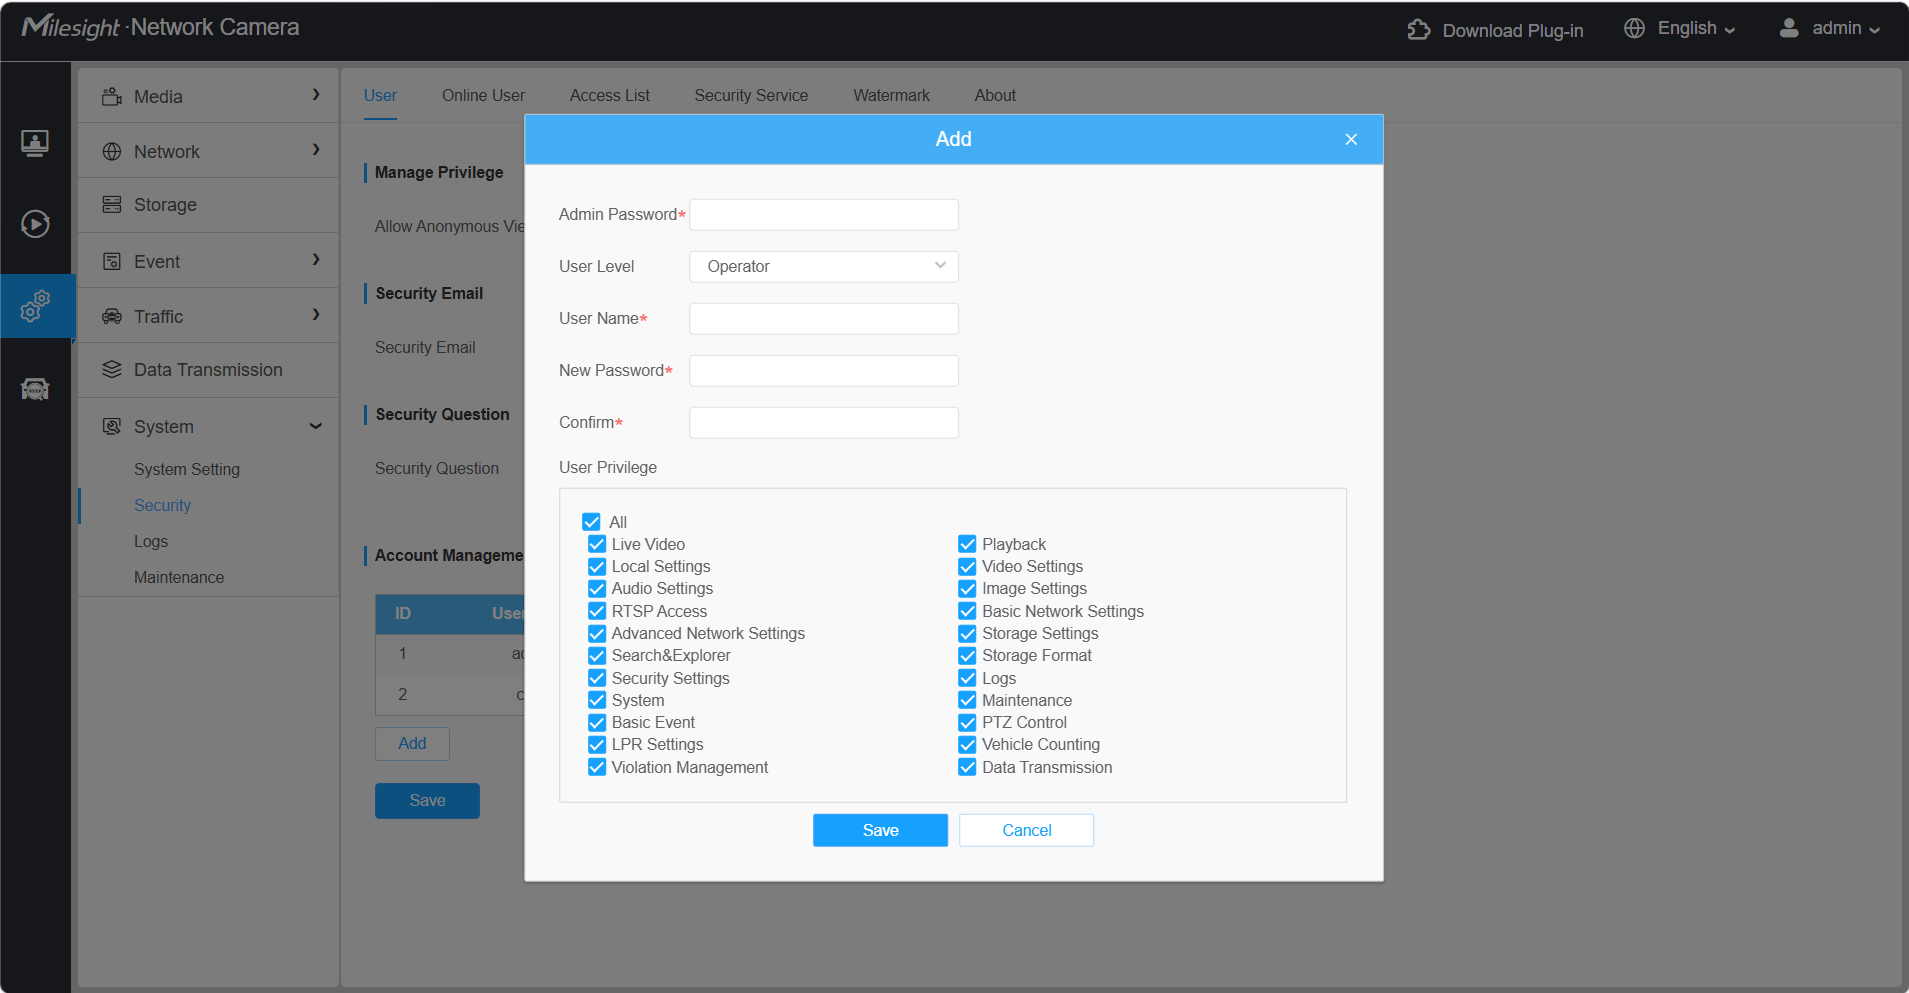
Figure 4. Assigning privileges to a custom user
3.6 Edit or Delete a User
• Use the edit icon to change a custom user's level, name, password or privileges.
• Use the delete icon to remove a custom account.
• The default administrator account cannot be deleted; only its password can be changed.
• The camera supports up to 20 users: one default user and up to 19 custom users.
4. View Online Users
The Online User tab displays the real-time status of users logged in to the camera.
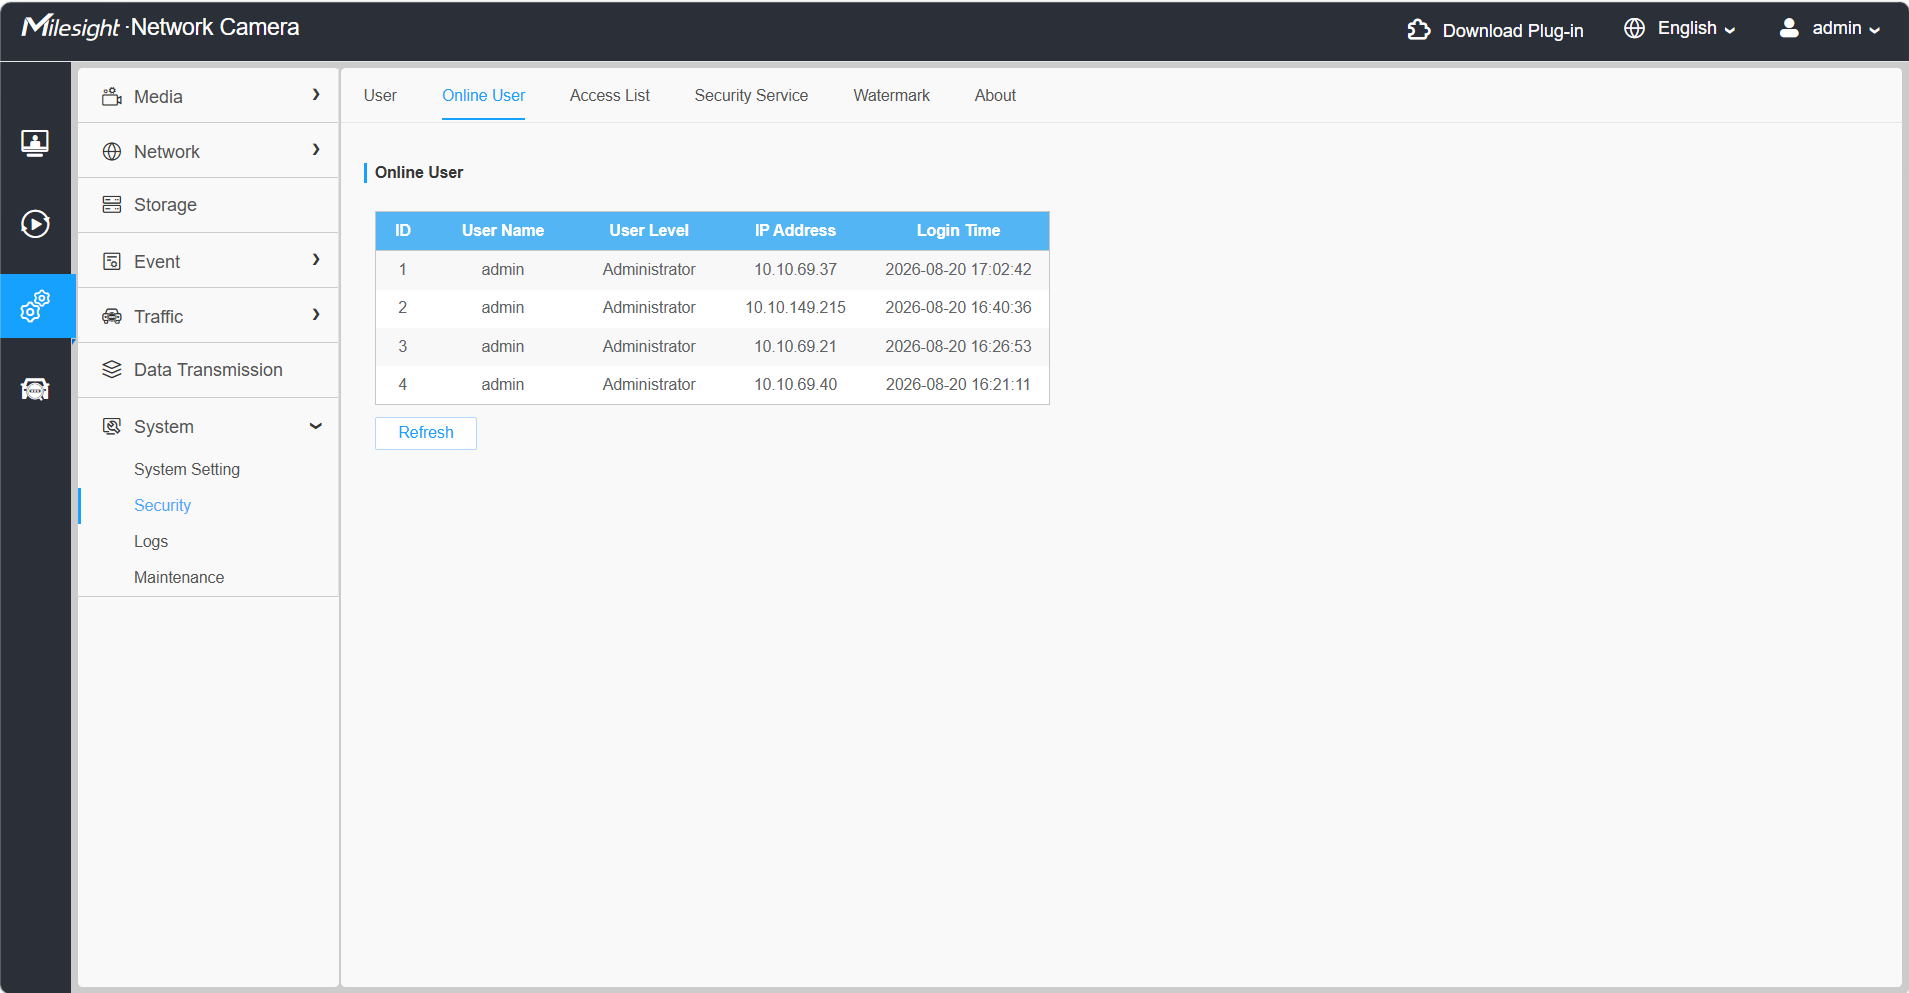
Figure 5. Online User page
Parameter | Description |
Refresh | Gets the latest status of users accessing the camera. |
ID | Record number of the logged-in user. Up to 30 records are shown. The same user from the same IP address is shown as one record. |
User Name | Name of the user logged in to the camera. |
User Level | Access level of the logged-in user. |
IP Address | IP address of the device from which the user accessed the camera web interface. |
Login Time | Camera system time when the user logged in. |
5. Configure the Access List
The Access List tab controls concurrent streaming connections and allows or denies device access according to address rules.
5.1 Set the Maximum Number of Connections
Under General Settings, select the maximum number of concurrent streaming connections. The count includes channels displayed by logged-in users, RTSP connections and ONVIF connections. Available options are No Limit or 1 to 10.
5.2 Enable Access List Filtering
Step 1: Enable Access List Filtering.
Step 2: Select the Filter Type: Allow or Deny.
Step 3: Add a rule and select the required rule type.
Step 4: Enter the address information and save the configuration.
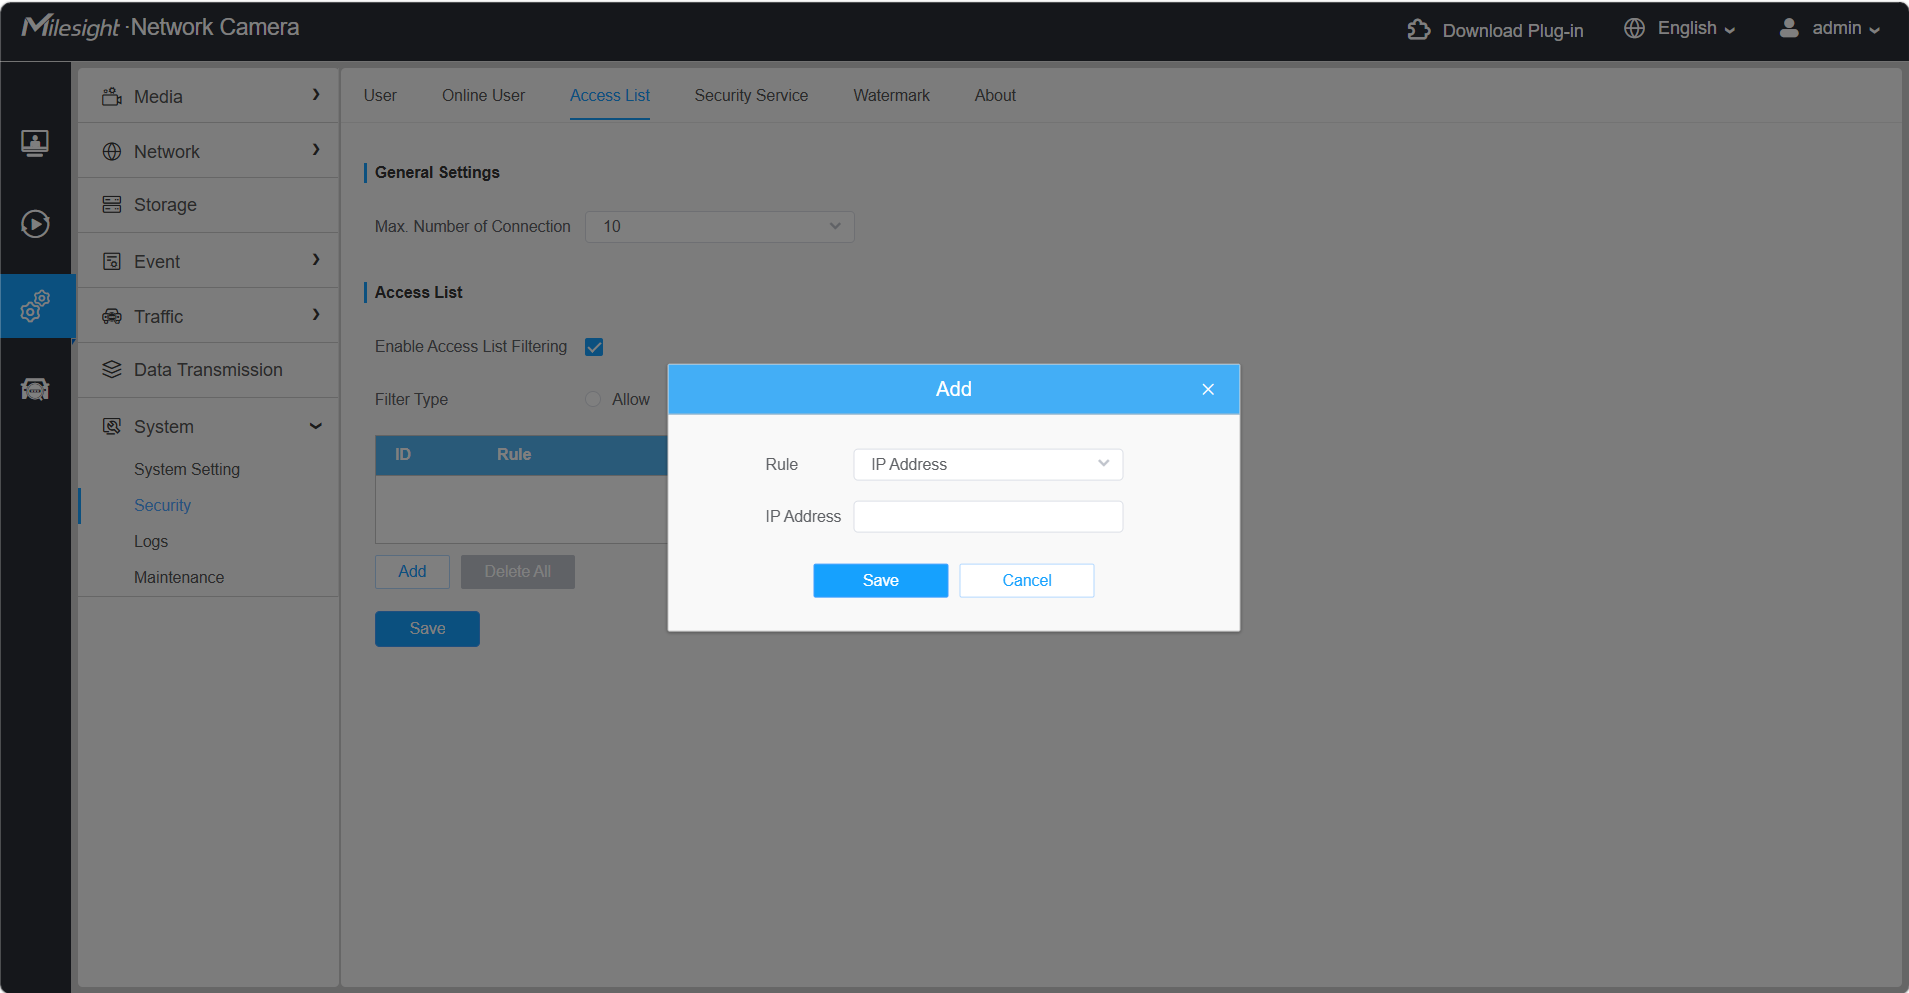
Figure 6. Access List page
Rule Type | Description |
IP Address | Controls access for one device IP address. |
Network Address | Controls a subnet. Enter the base Address and Mask. |
IP Range | Controls a continuous range of IP addresses. |
MAC Address | Controls access according to the physical hardware address of the network interface. |
• Use Edit to modify the selected rule.
• Use Delete to remove the selected rule.
• Use Delete All to clear the access list.
• Click Save after making changes.
Note: Before enabling an Allow list, add the administrator's current IP address or network first. An incorrect rule can block web, RTSP or ONVIF access and may require local recovery. |
6. Recommended Handover Checks
• Confirm that the administrator password, security email and security questions are recorded securely.
• Test every custom account and confirm that its privileges match the user's responsibilities.
• Review the Online User list and Access List rules after commissioning.
——————END——————