
1.What is SIP
SIP (Session Initiation Protocol) is a signaling communication protocol, which is widely used for controlling multimedia communication sessions such as voice and video calls over Internet Protocol (IP) network. The protocol defines the message that are sent between peers, which govern establishment, termination and other essential elements of a call. The SIP version we currently support is SIP 2.0.
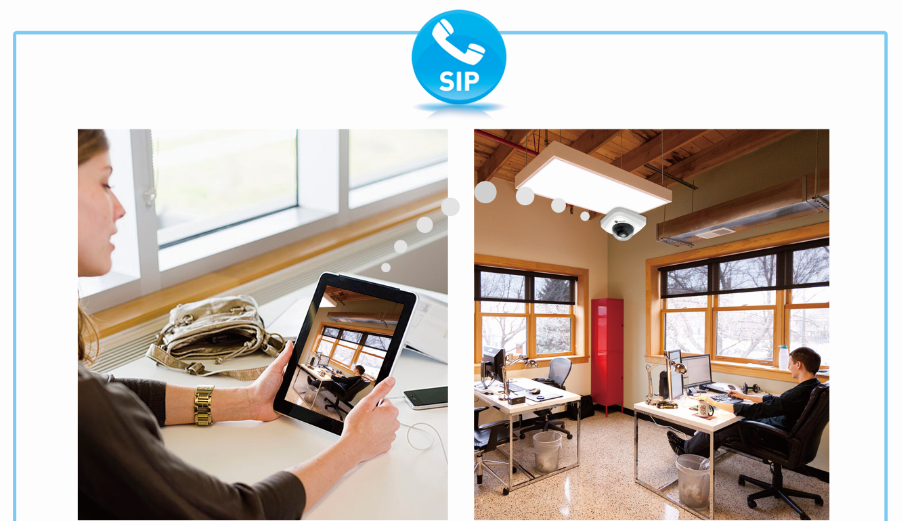
Figure 1 Communication Live View
Now the SIP machine can support the following call ways(Figure 2).
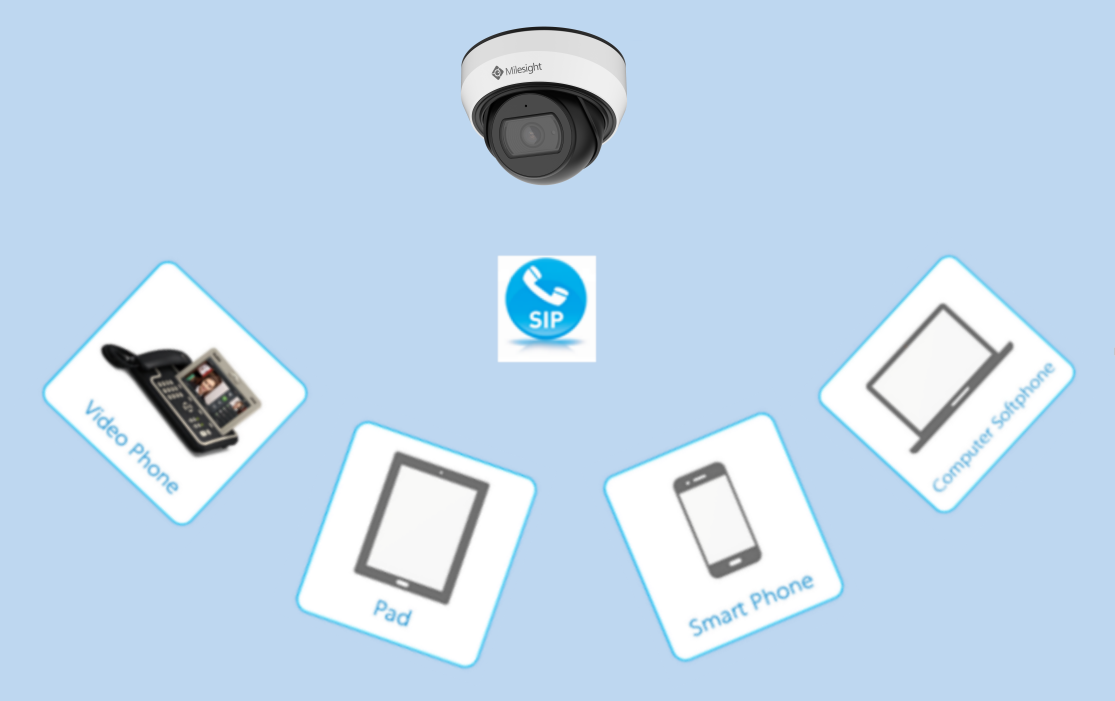
Figure 2 The Call Ways SIP Supports
2. How to Use SIP on Milesight Camera
So far, Milesight network cameras with compression H.264 are able to support SIP, for both primary stream and second stream. So please check the SIP Phone, and make sure that it supports H.264.
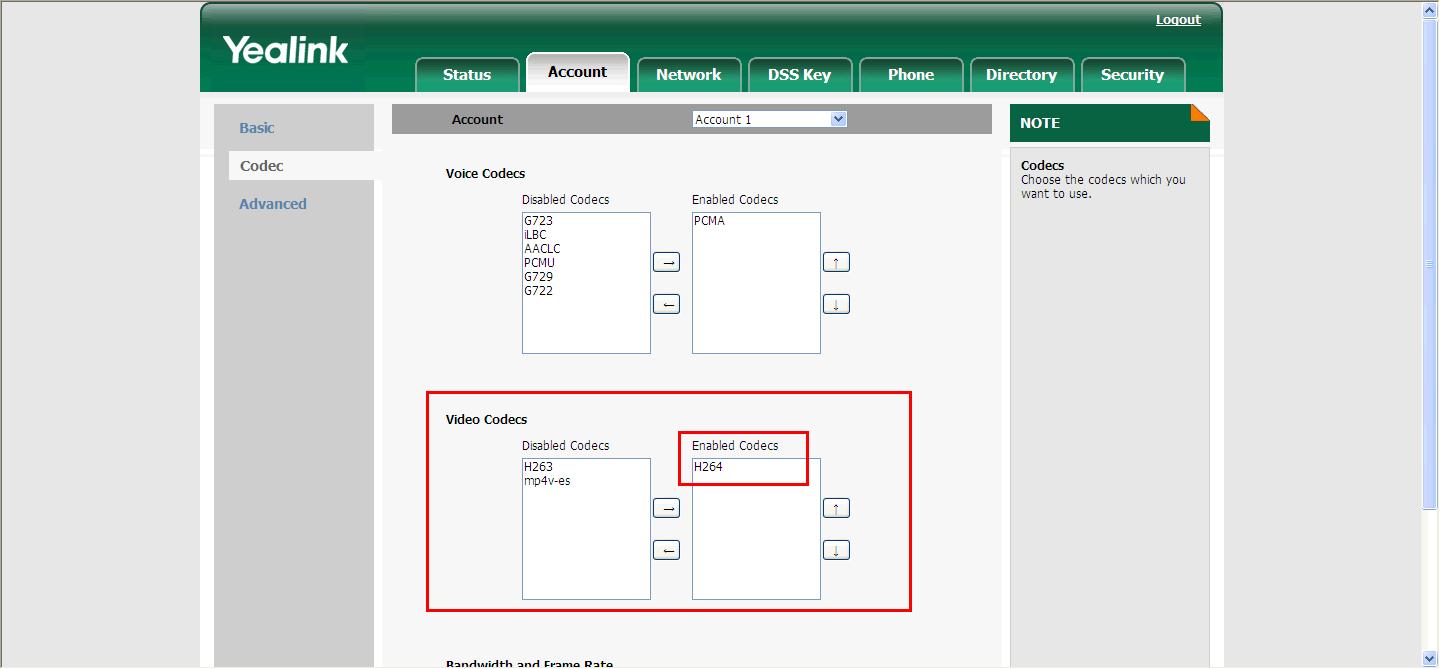
Figure 3 SIP Phone
There are two ways to call a SIP phone:
2.1 Register on a Server
Take Yeastar S20 for example:
Step1: Please log in the web, and then create a new account for the camera. Input your PBX server address into the browser till it turns to figure 4 interface, like https://192.168.64.250:8088/ , then input the account Username and Password to log in;
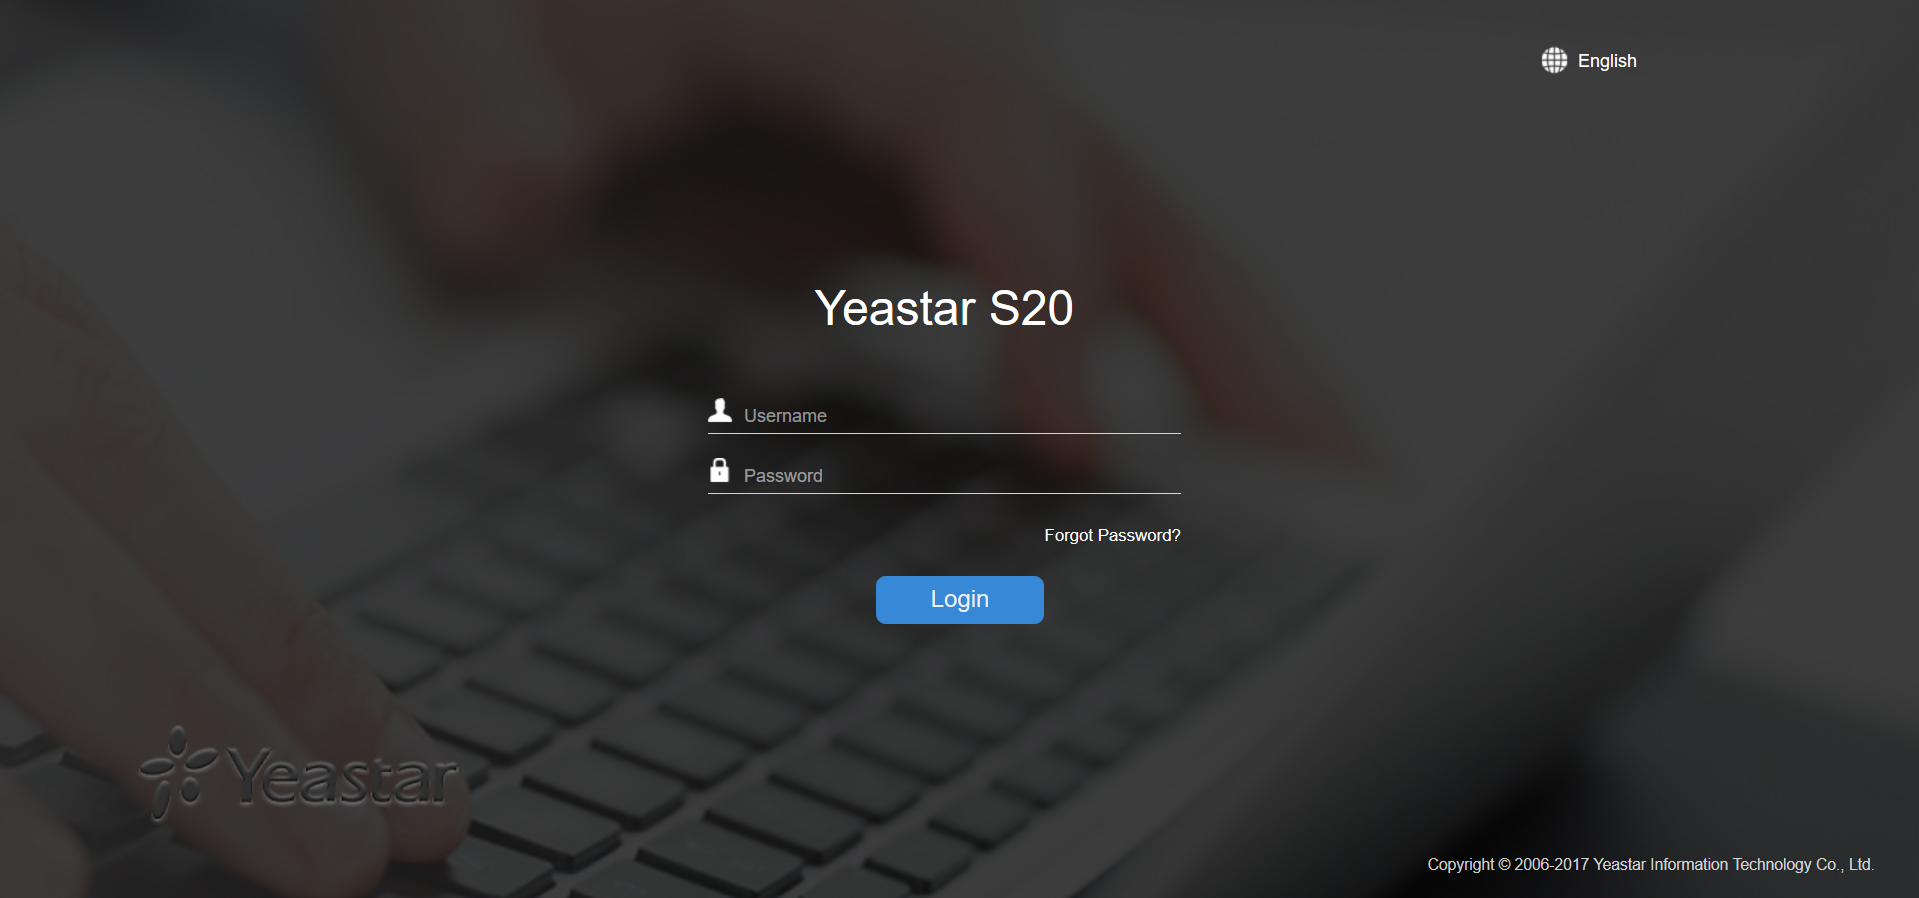
Figure 4 Yeastar S20
Step2: After Logged in, please go to the following interface by clicking on “Settings”. Then click on the “Extensions” option (figure 5);
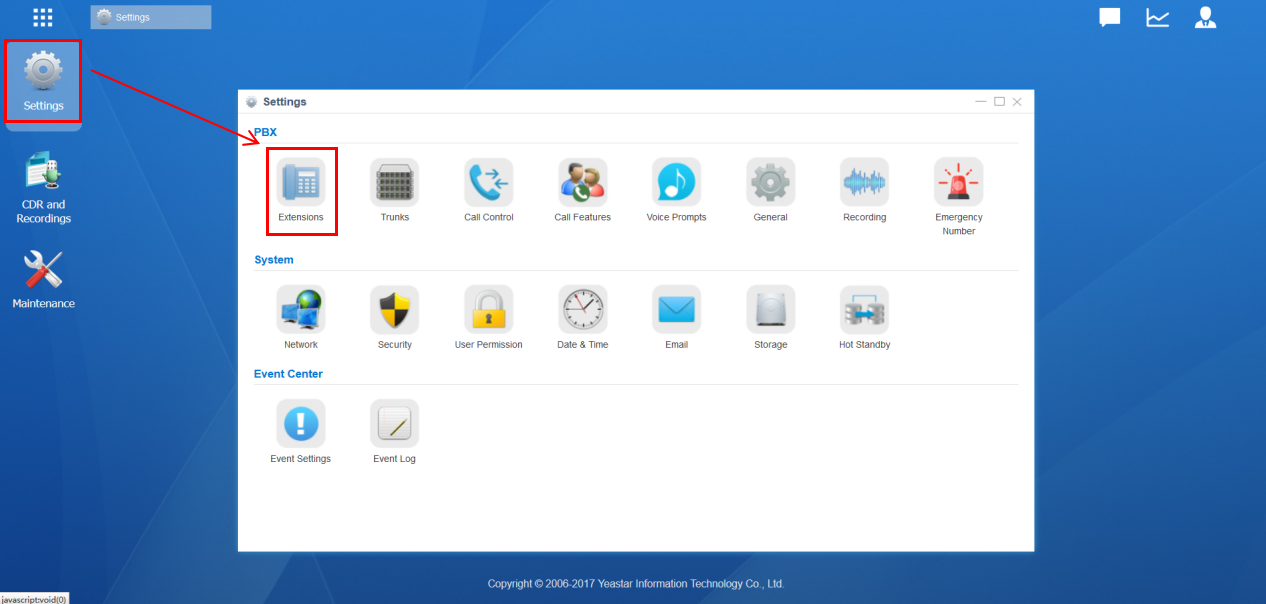
Figure 5
Step3: Choose to add a new extension by clicking the “Add” button or click the “Bulk Add” button to add in bulk and then complete basic setup (figure 6);
|
|
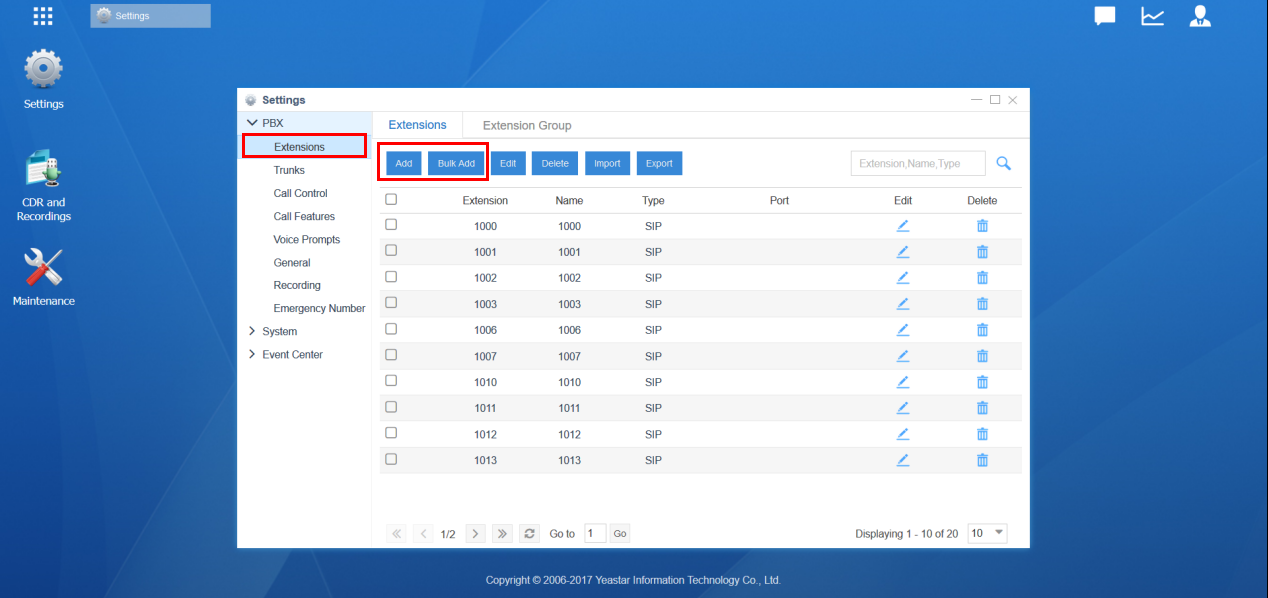
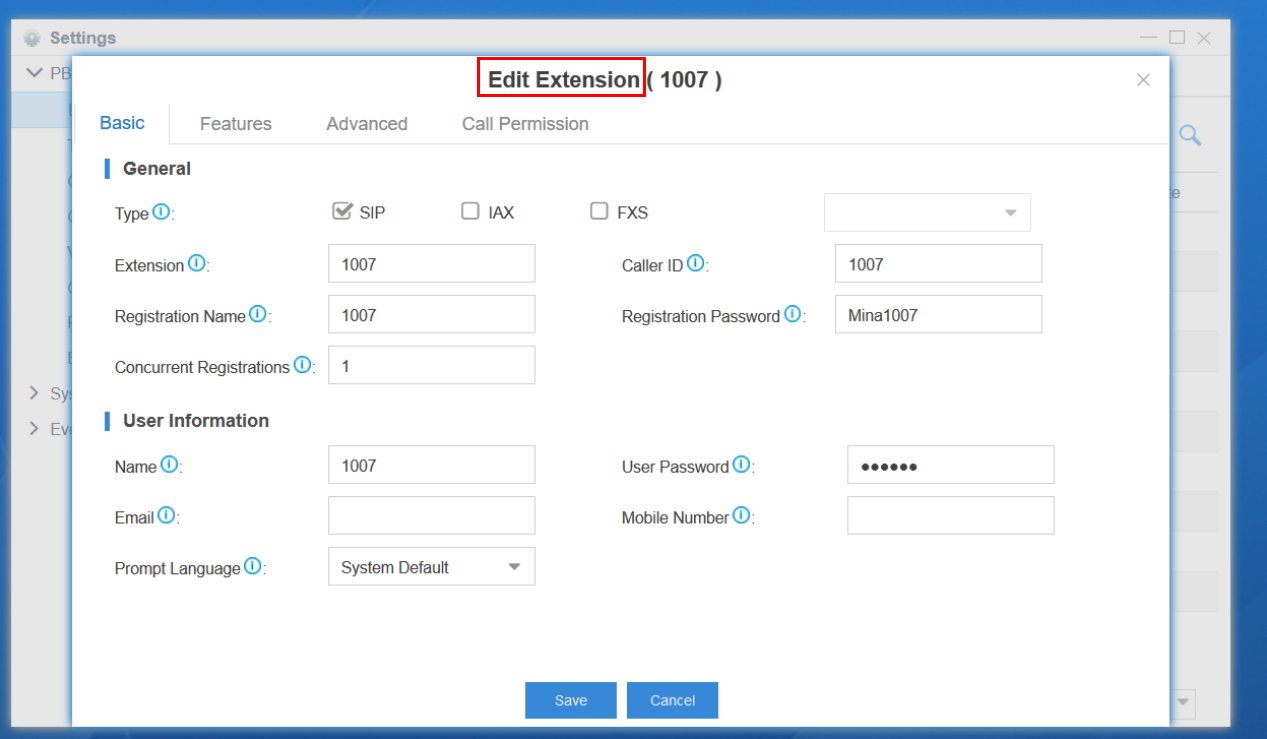
Figure 6 SIP Extension
Step 4: After completing the above steps, please back to Home page and go to the following interface by clicking on this icon (figure 7). Click on the “PBX Monitor” option for confirming whether the account is successfully registered(figure 8);
|
|
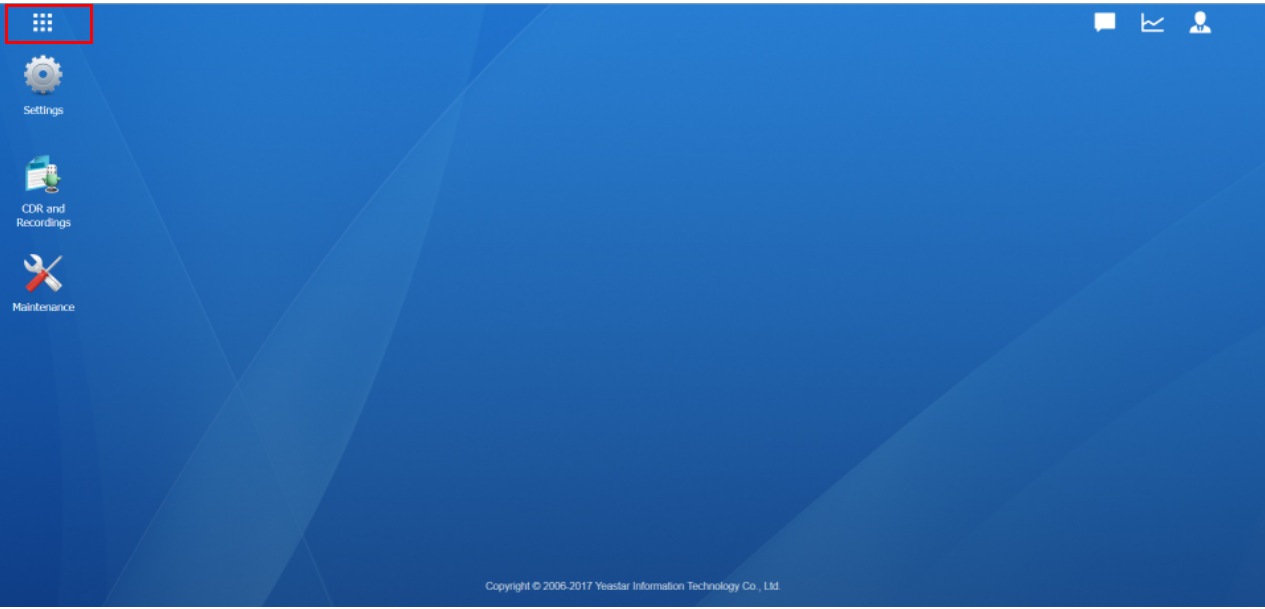
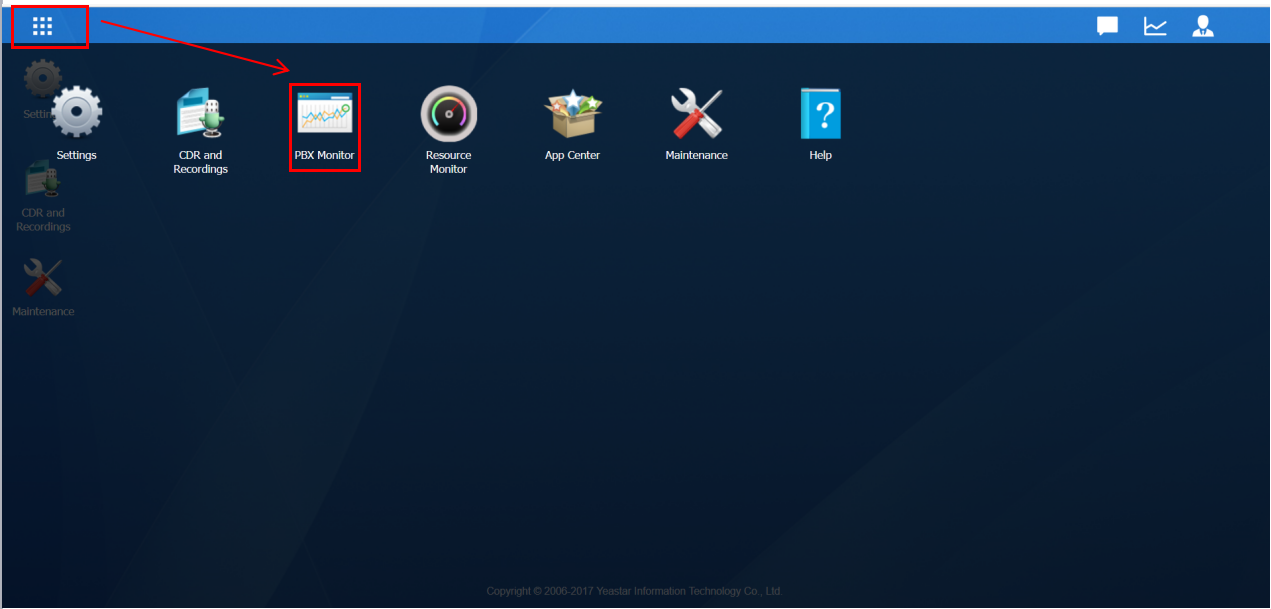
Figure 7 Figure 8
Step 5: If the account is successfully registered, the phone icon will turn green and the IP and Port are shown in the last column.
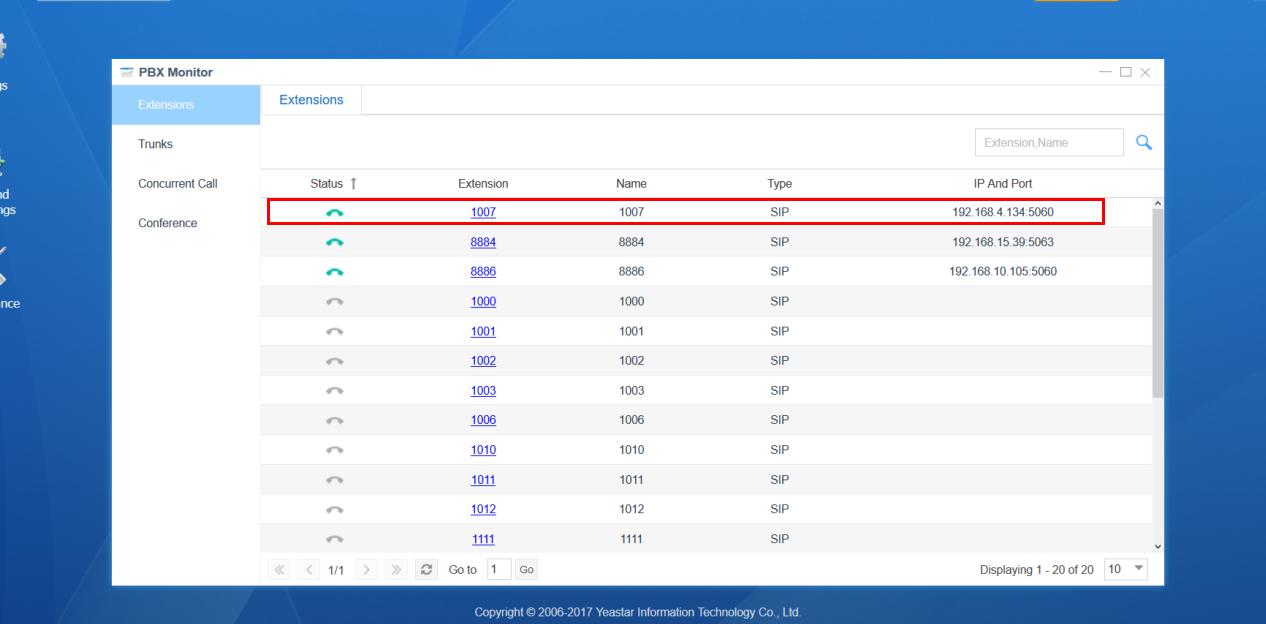
Figure 9 Check Register Status
Step 6: Enter the information of the account on SIP server. And if the information is correct, the status of SIP will turn to be “Registered”.
Step 7: Input your camera’s IP and log in the web page via browser. Go to “Media”→ “Video”, choose the right stream you want to use for SIP function. Then set the “Profile” to “Base” ( the sip function only works in Base mode ),then click“Save”for saving your setting.
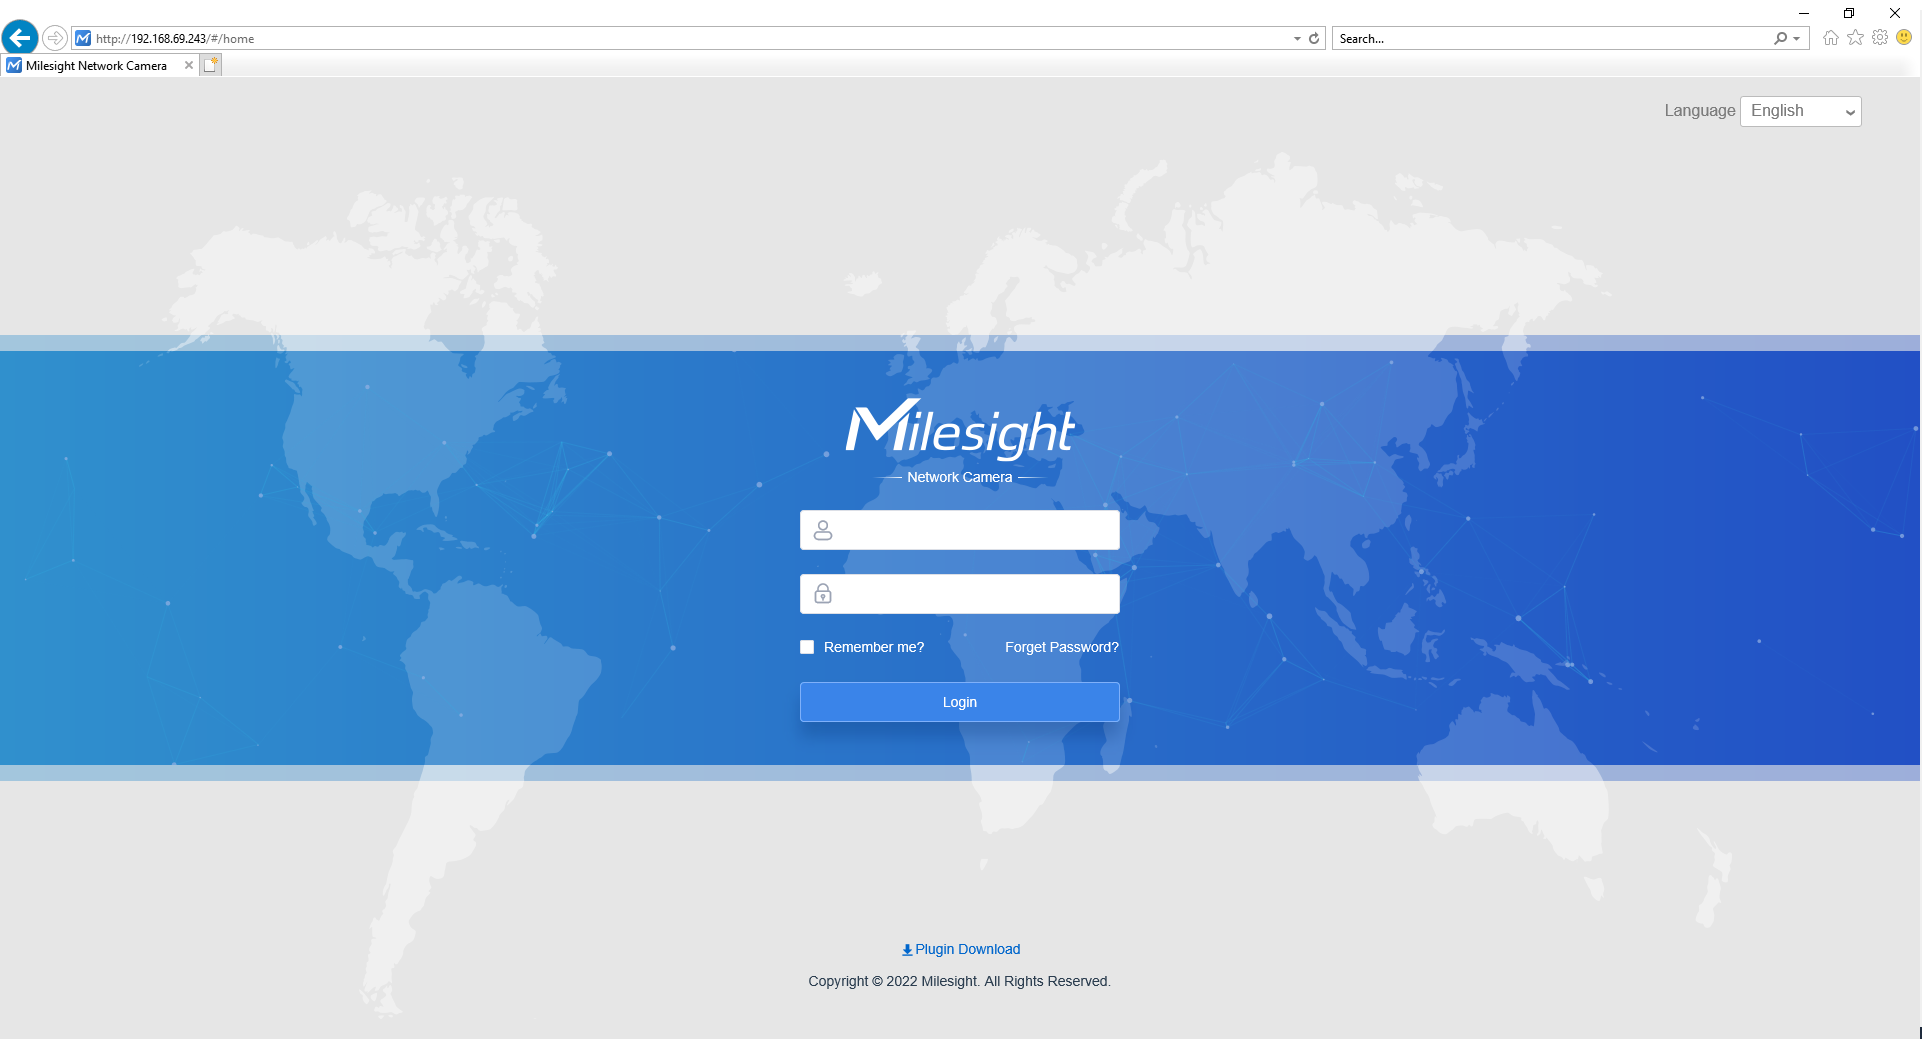
Figure 10 Log in Web Page
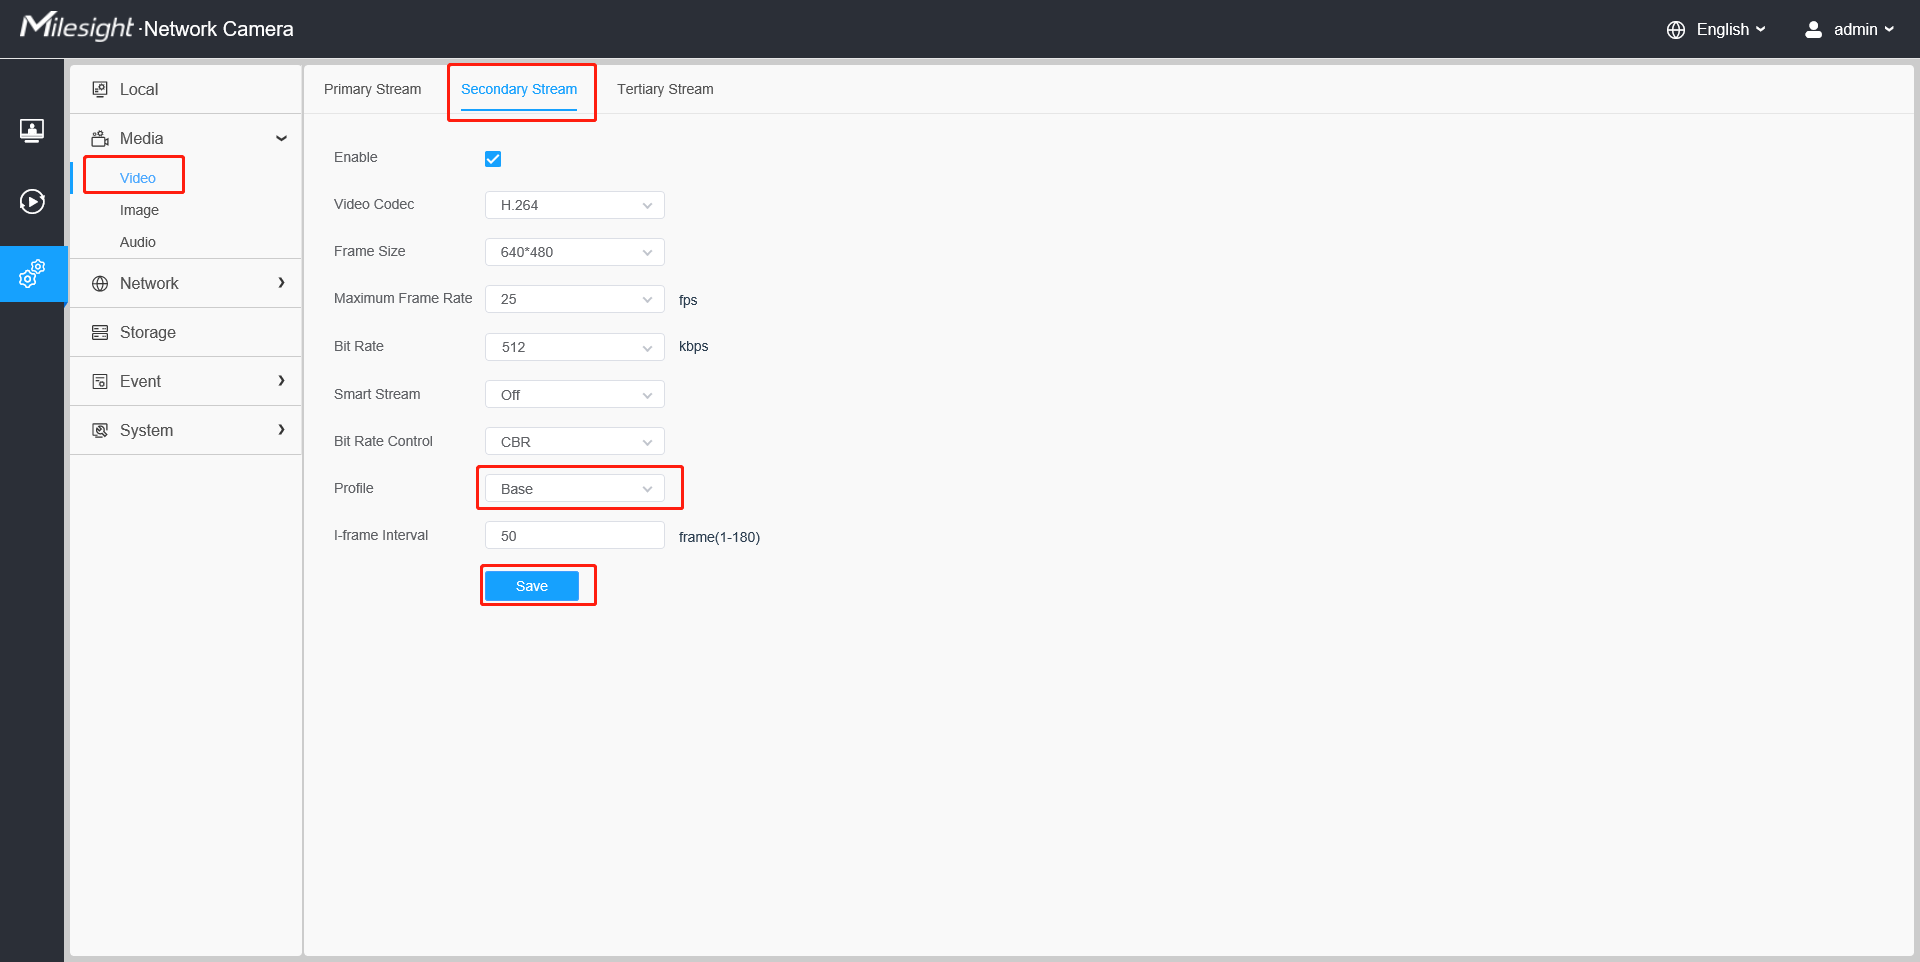
Figure 11 Set Profile Base
Step 8: Register an account for SIP devices through SIP server. Fill in the information set in Step 3, click submit to see the blue “Registered” on the status.
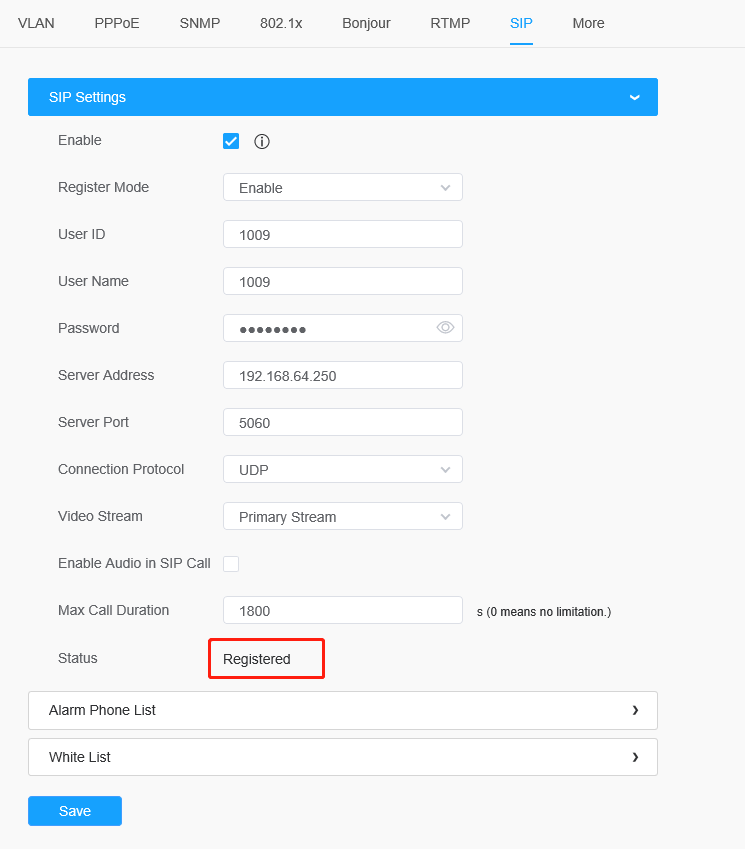
Figure 12 Register Mode
2.2 Call IP Directly
Choose “Disable” mode, then you can call SIP phone via dialing IP directly.
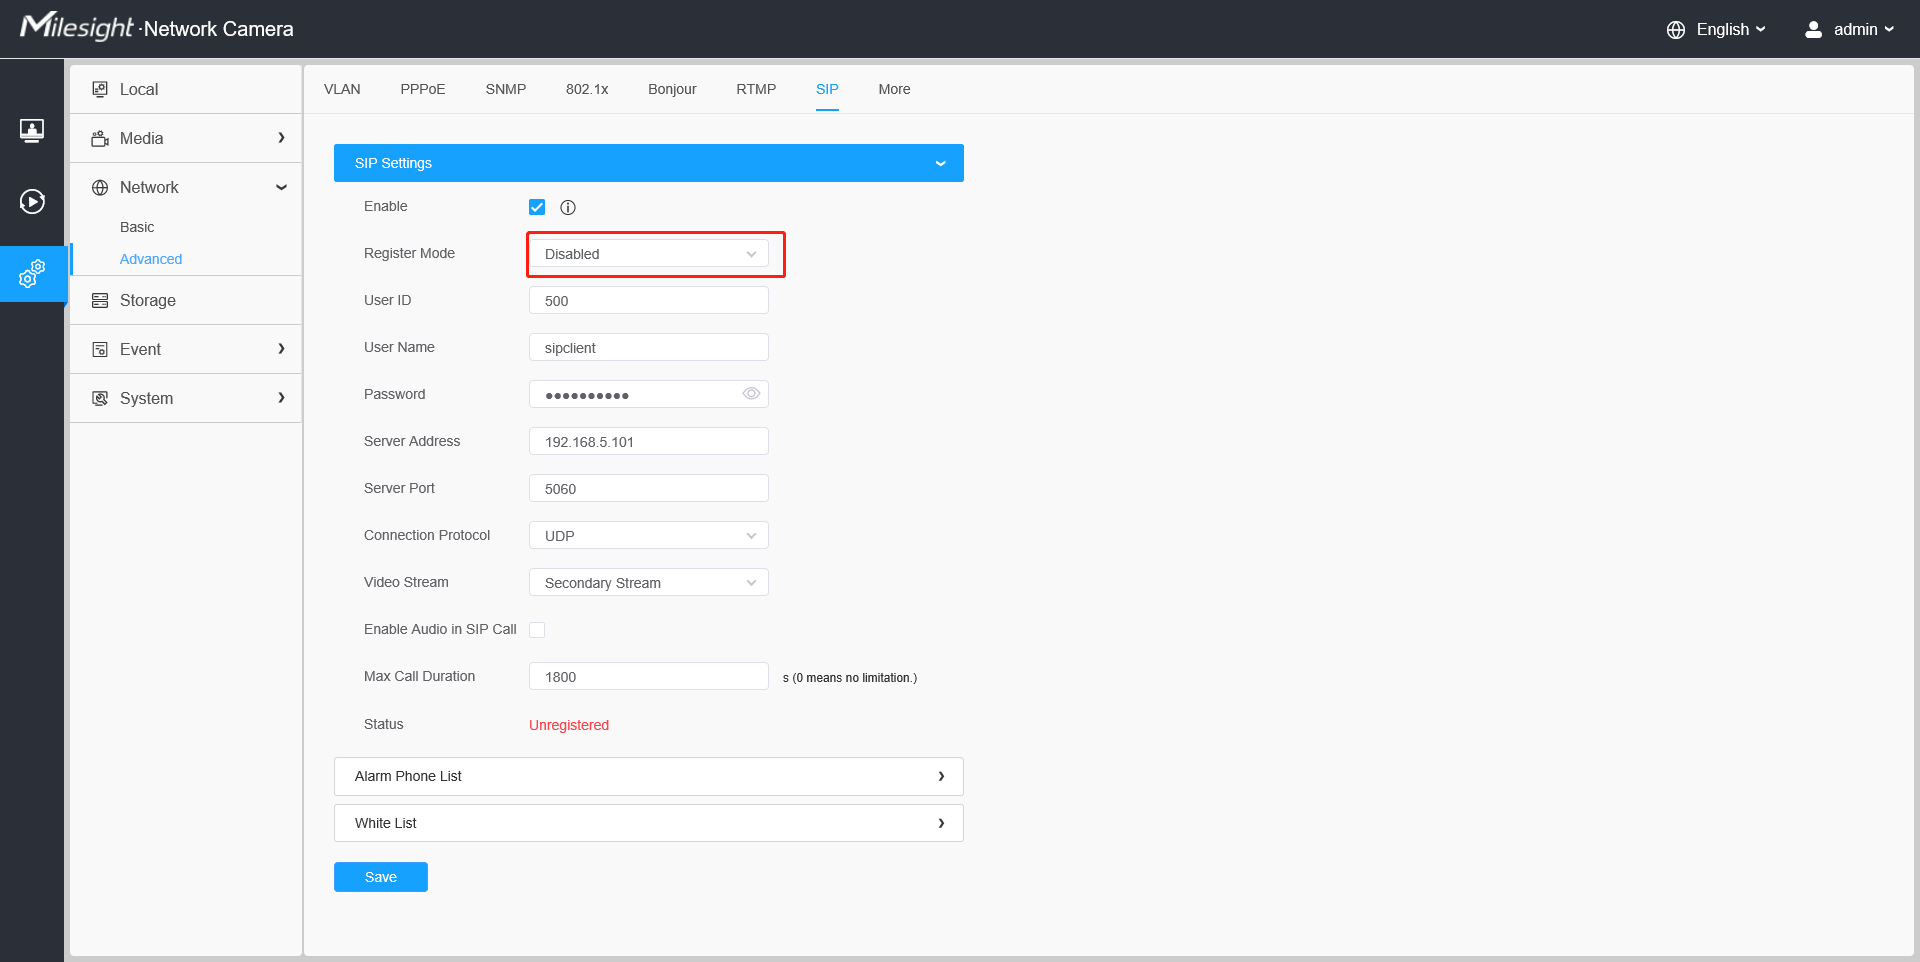
Figure 13 Call IP directly
3. Telephone Alarm Settings
There are two phone types available to set when alarm is triggered:
3.1 Phone Number
Step1: Go to “Network”→“Advanced”→“SIP”→“Alarm Phone Setting”, click “Add” to choose “Phone Type”, input the number of SIP phone, and set alarm “Duration”, then click “Save”;
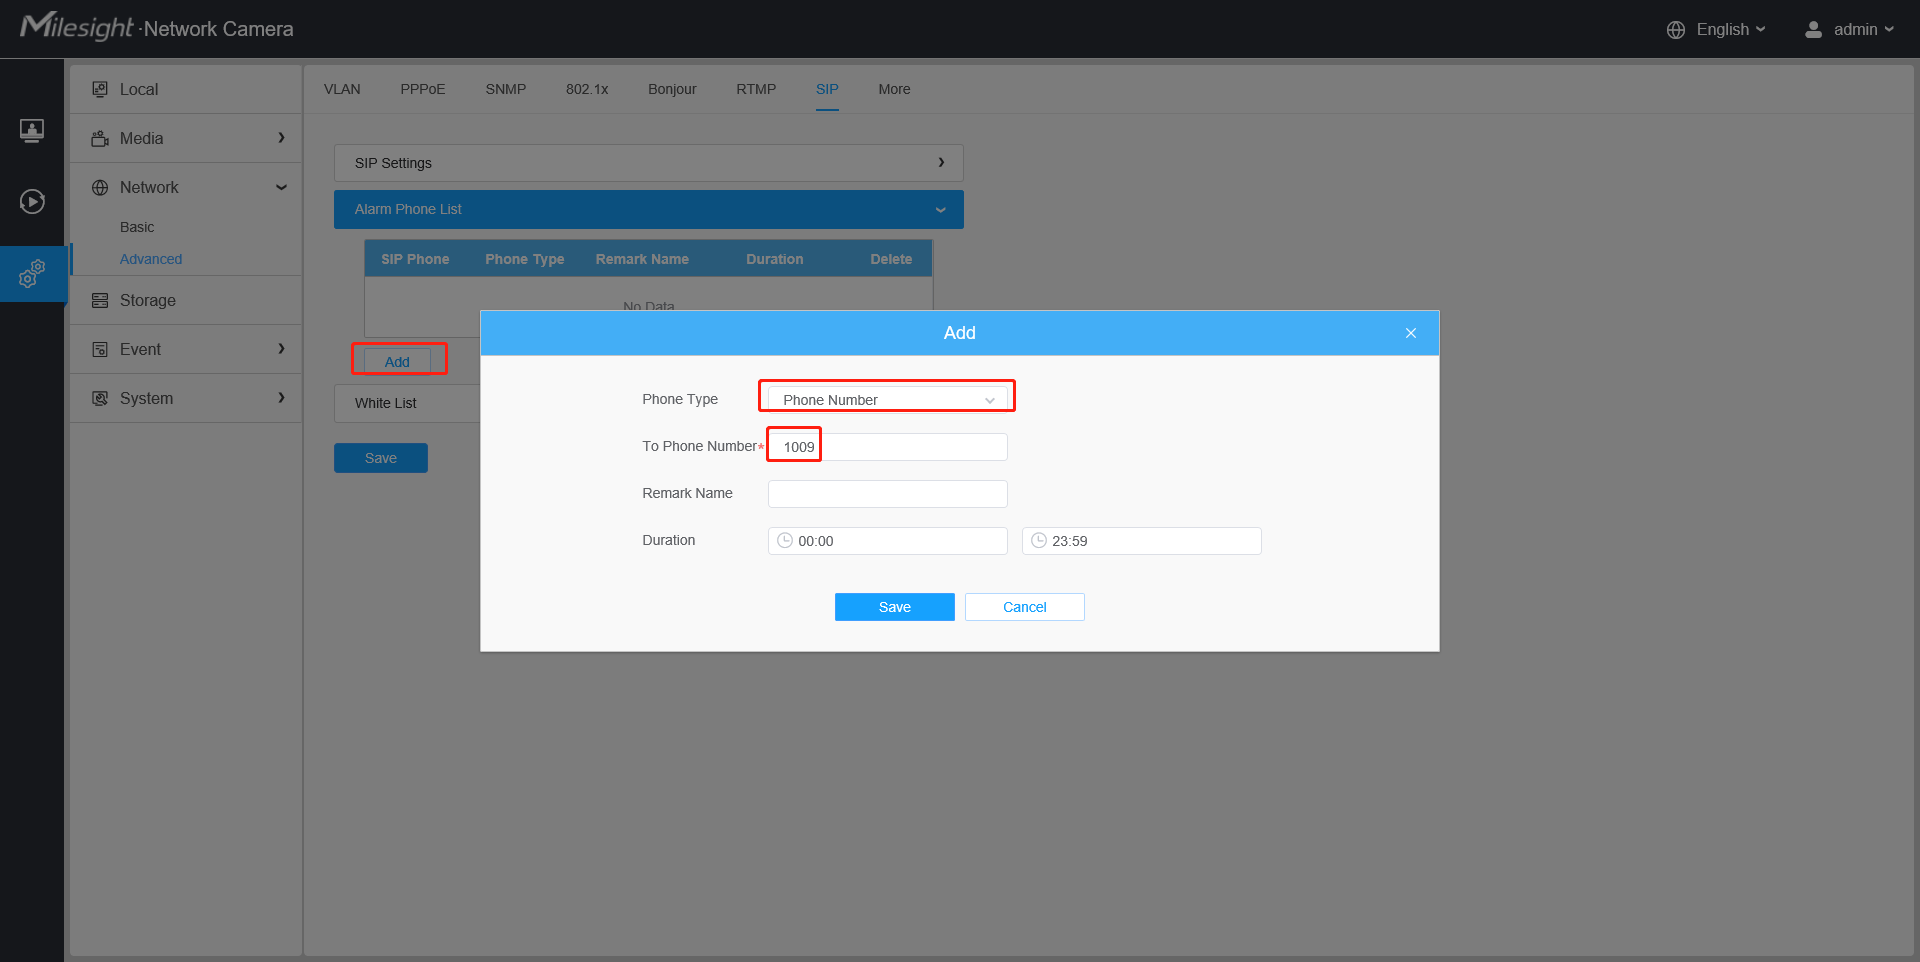
Figure 14 Add phone number
Step2: Go to “Event”→“Basic Event”, enable Motion Detection, choose “Alarm to SIP Phone” under the “Alarm Action” option, and click “Save”;
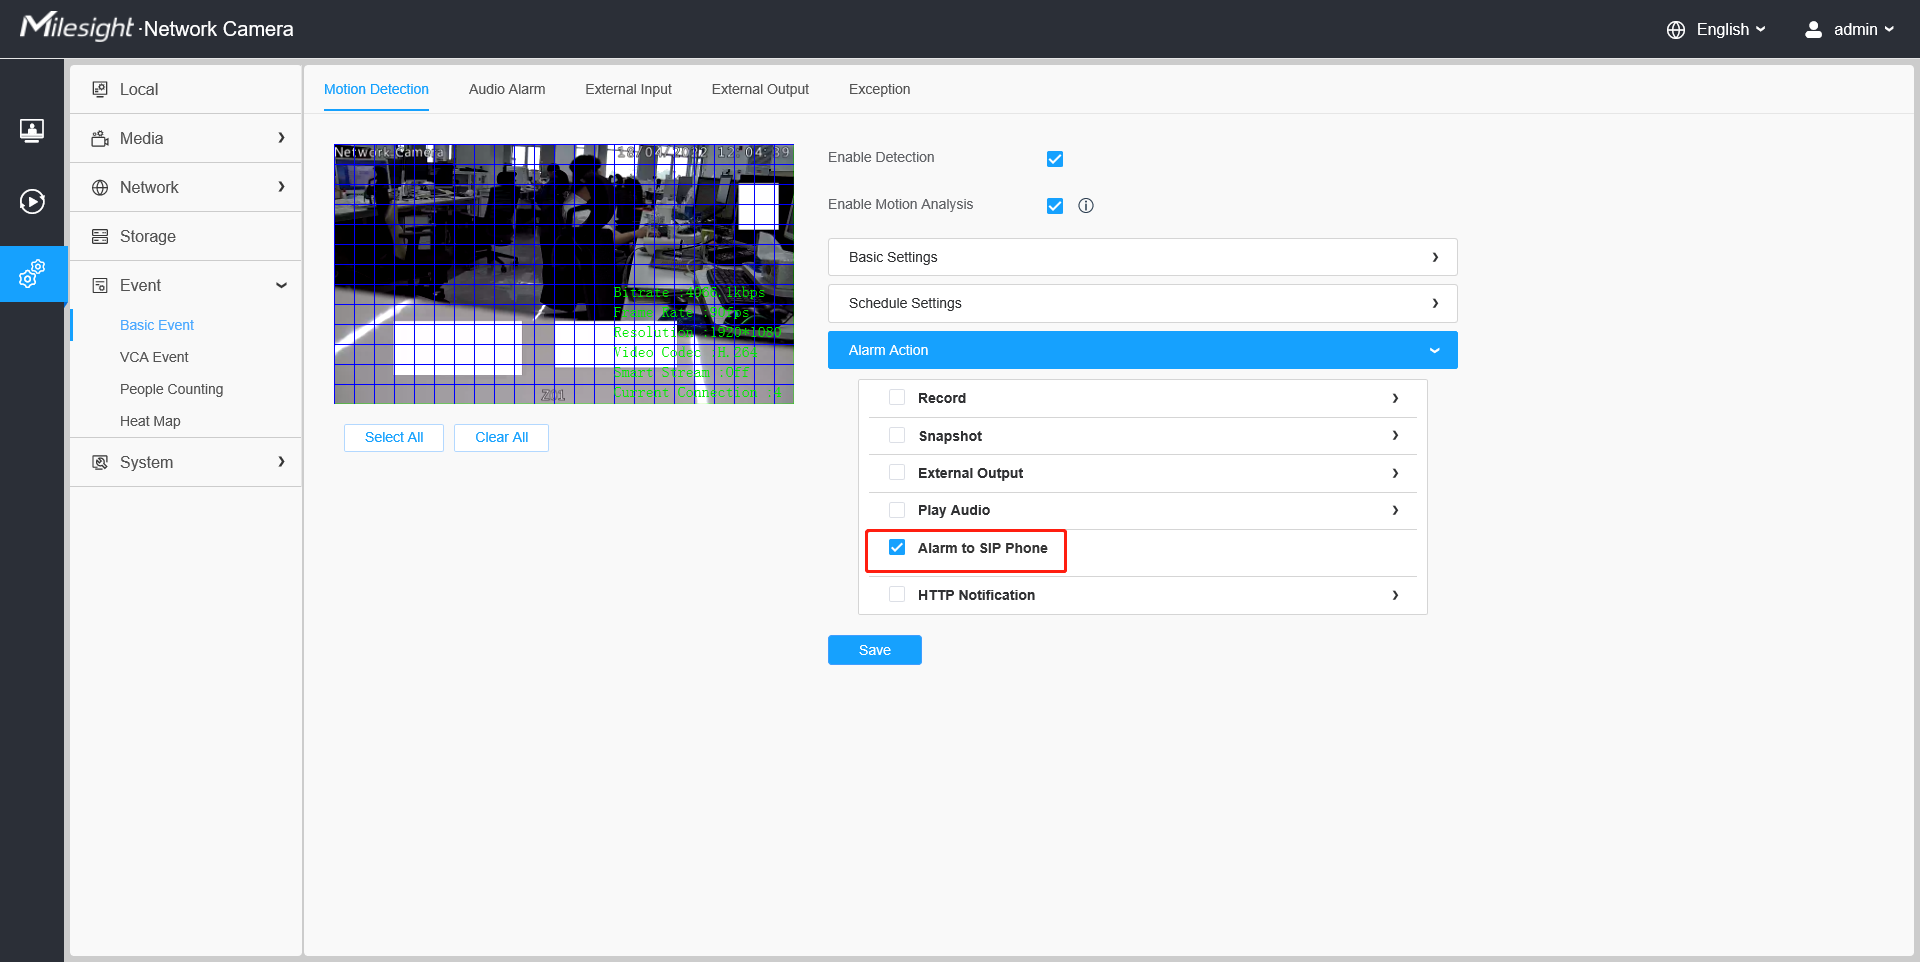
Figure 15 Alarm to sip phone
Step3: When the alarm is triggered, the camera will call SIP Phone through dialing the phone number. At the same time, we can see video images on the SIP device ;
3.2 Direct IP Call
Step1: “SIP”→ “Alarm Phone List”-> “Phone Type”→ “Direct IP Call”;
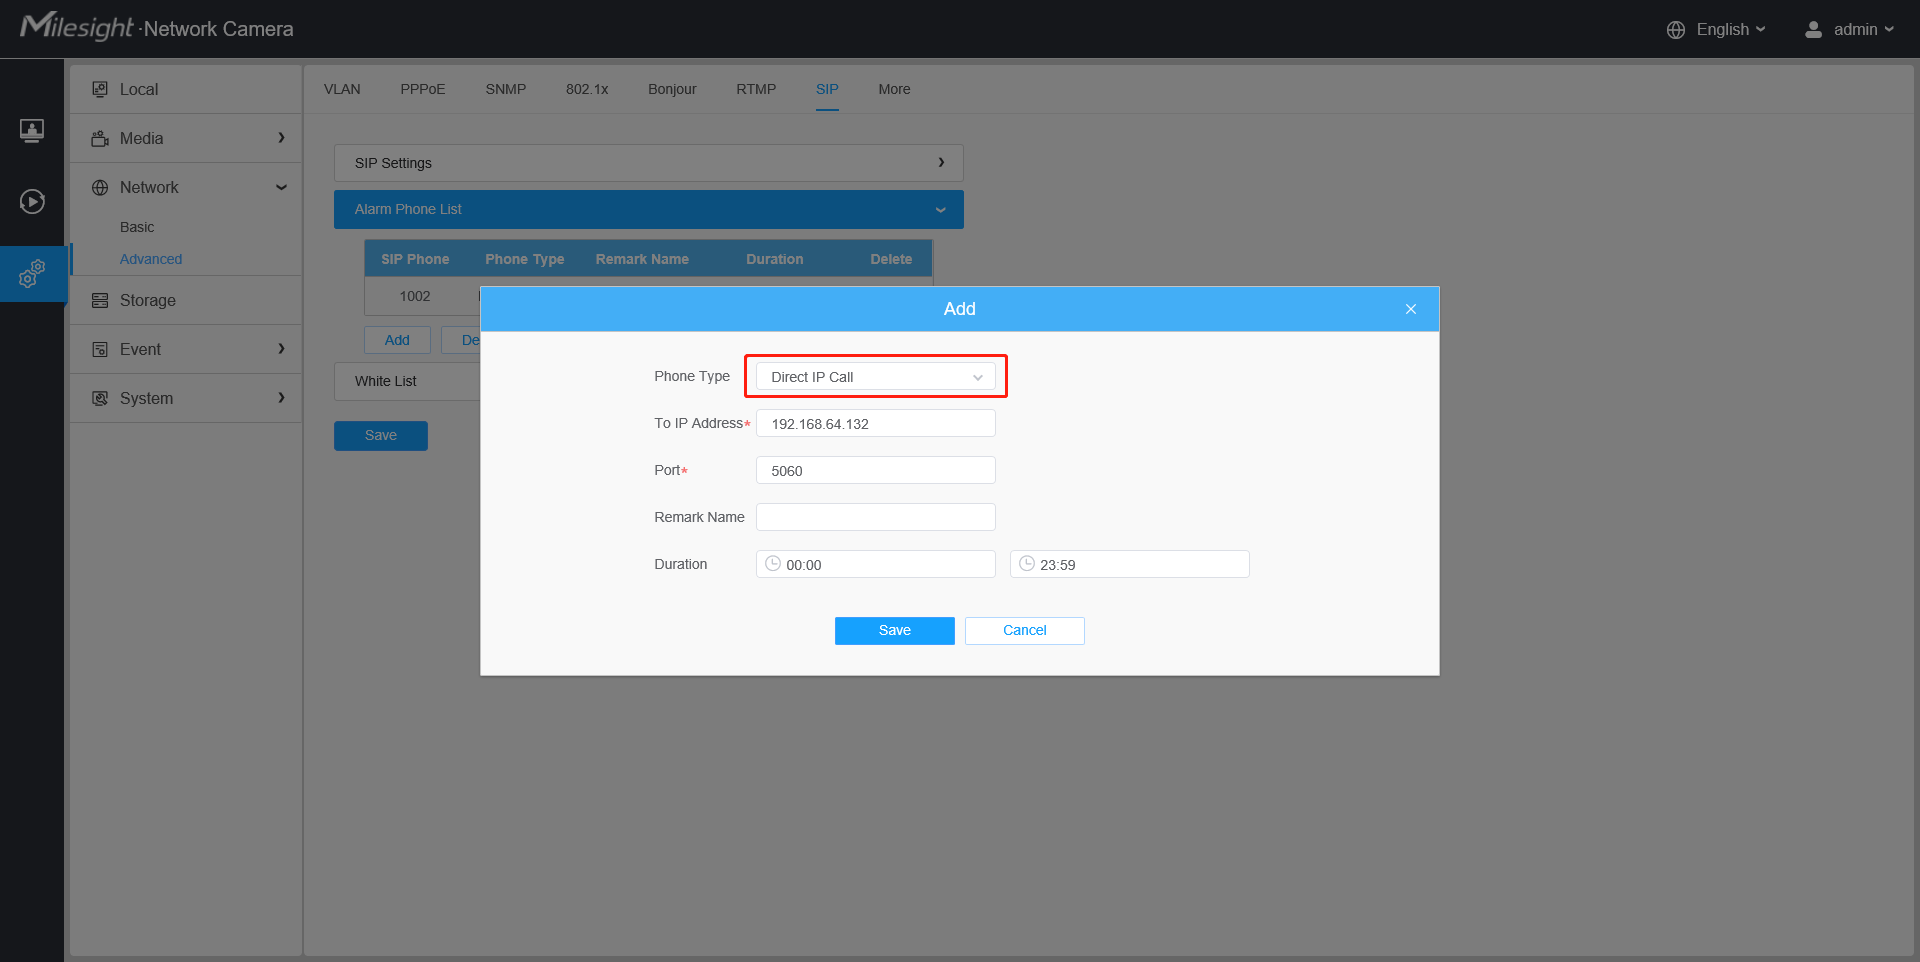
Figure 16 Set IP call
Step2: When the alarm is triggered, the camera will call SIP Phone through IP directly. At the same time, we can see video images on the SIP device .
Note:
The camera and SIP Phone should be on the same network segment, making sure that they can ping each other first.
——————END——————