
VPN stands for Virtual Private Network. It is a network protocol that can provide you secure encrypted connection over the public internet. It is a significant technology in surveillance industry. Imagine that you have a network camera connected via public IP address, it’s possible for others to log in or listen illegally if someone knows the specific IP address and forwarded port. Via VPN the camera streams and data will be transferred through an encrypted tunnel. This encrypted VPN tunnel makes it appear as though you are directly connected to the private network, keeping your online activity (including your browsing history) hidden. For Milesight camera, VPN feature allows us to log in the camera via a virtual IP, which makes it easier to configure the camera remotely.
2.How to use VPN on Milesight Camera?
There are two VPN modes on Milesight camera: General VPN and Milesight VPN. General VPN mode allows us to upload OpenVPN configuration file directly. For Milesight VPN mode you need to configure parameters manually. Please note that both of the modes are working under OpenVPN protocol. You can take the camera as an OpenVPN client.
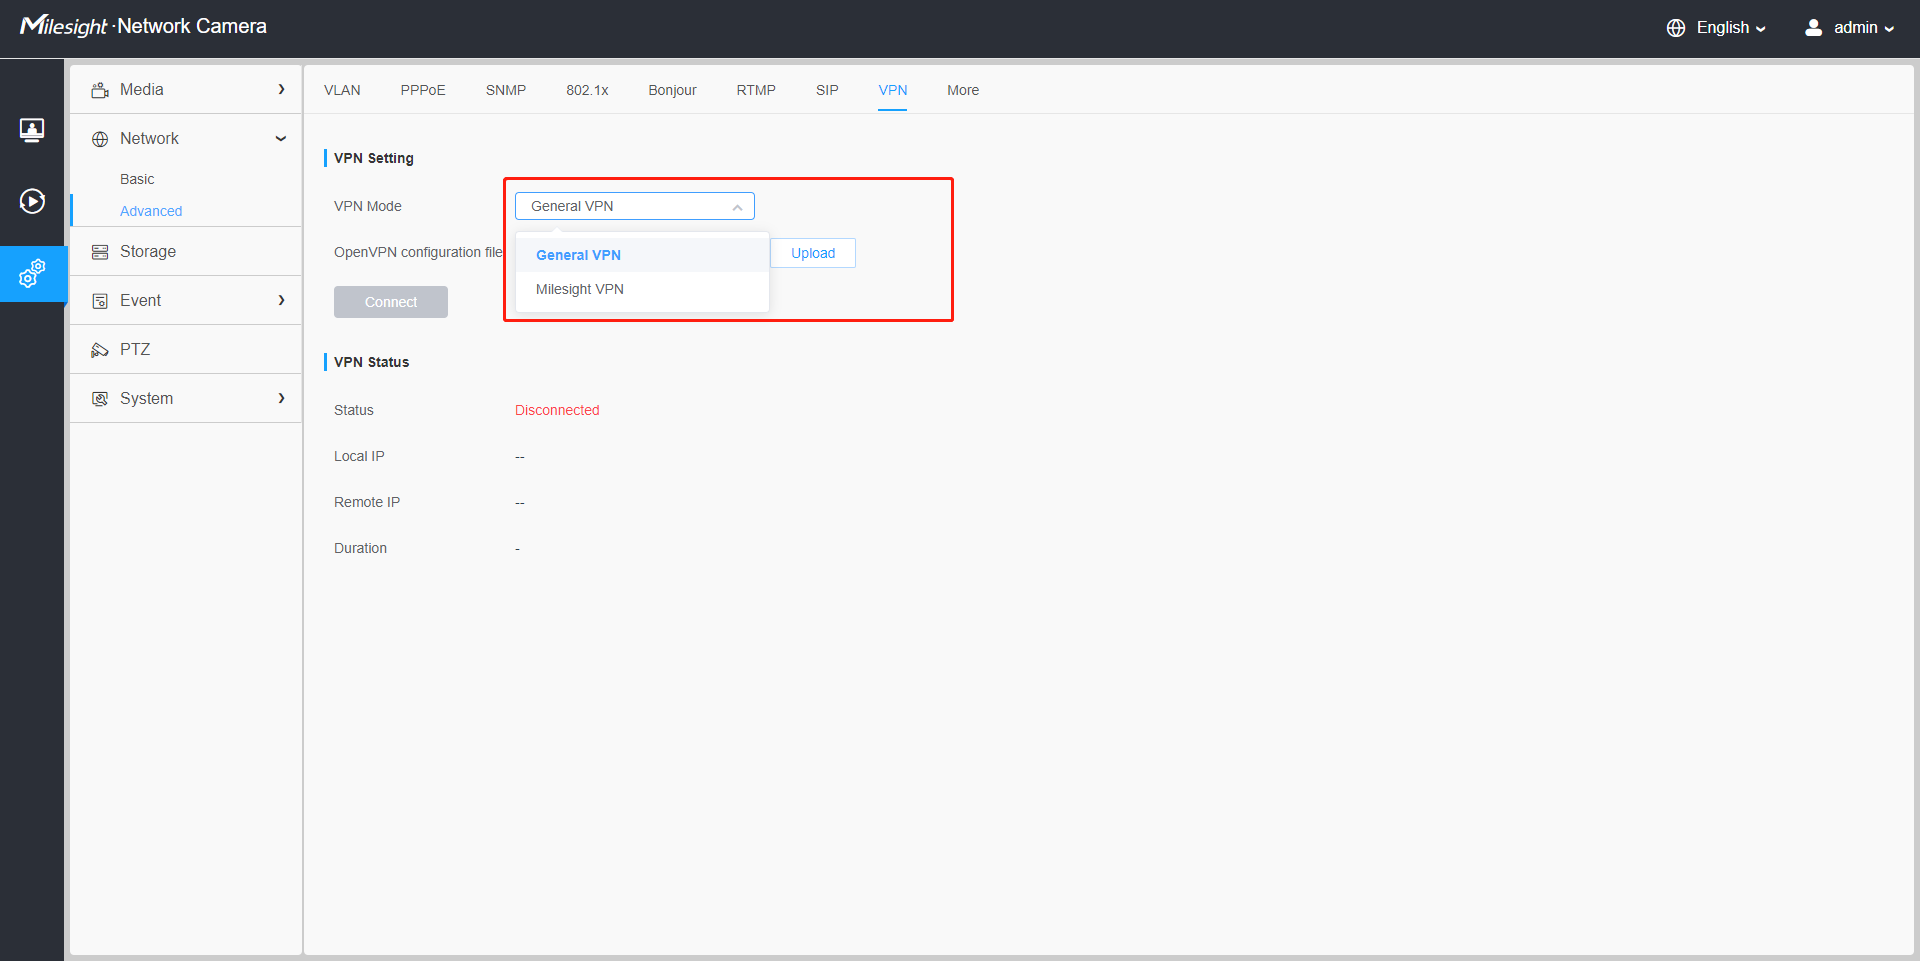
Different VPN mode
2.1General VPN
First we need to prepare an OpenVPN configuration file. Configuration file (also known as connection profile) is a .ovpn text file that contains the directives, parameters, and certificates required to establish the server-client connection. You can export configuration file from certificate page of MIlesightVPN server:
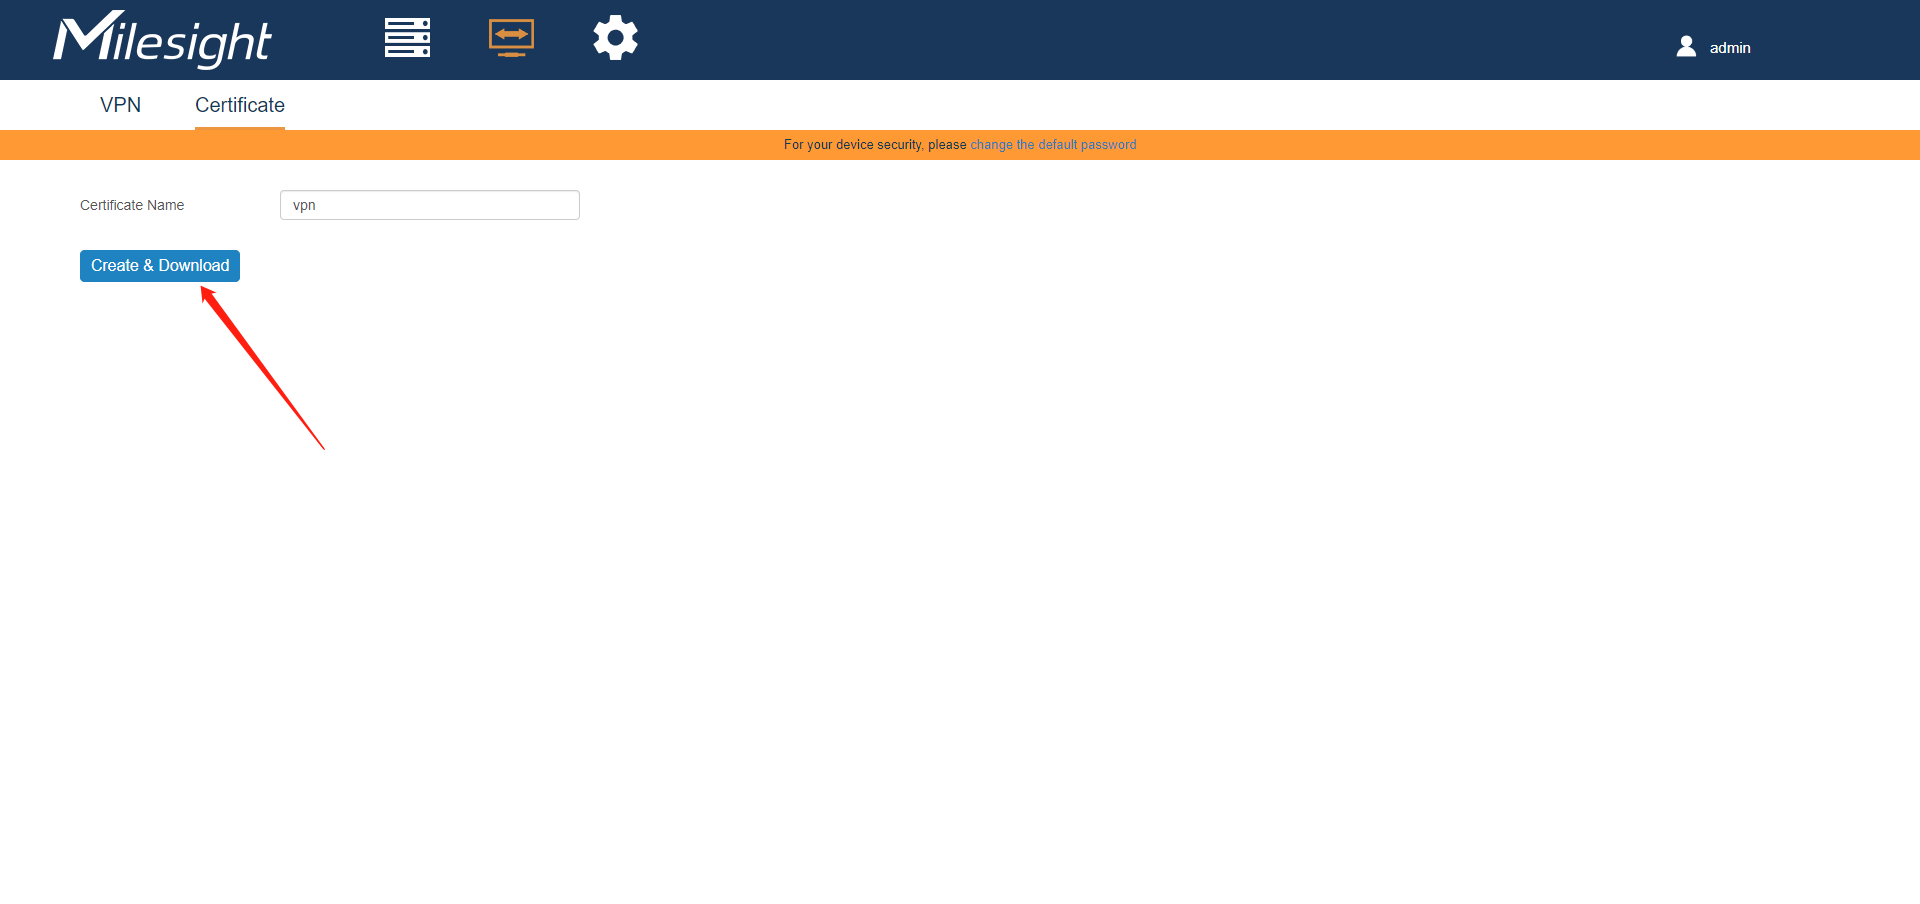
Create OpenVPN profile
Then you will get an OpenVPN connection profile:
Note: If you are using OpenVPN server, please refer to official instruction regarding the configuration file exporting:
https://openvpn.net/vpn-server-resources/create-connection-profiles-and-connect-client-installers/
Next we need to upload the configuration file. The connection will start automatically once the uploading is done:
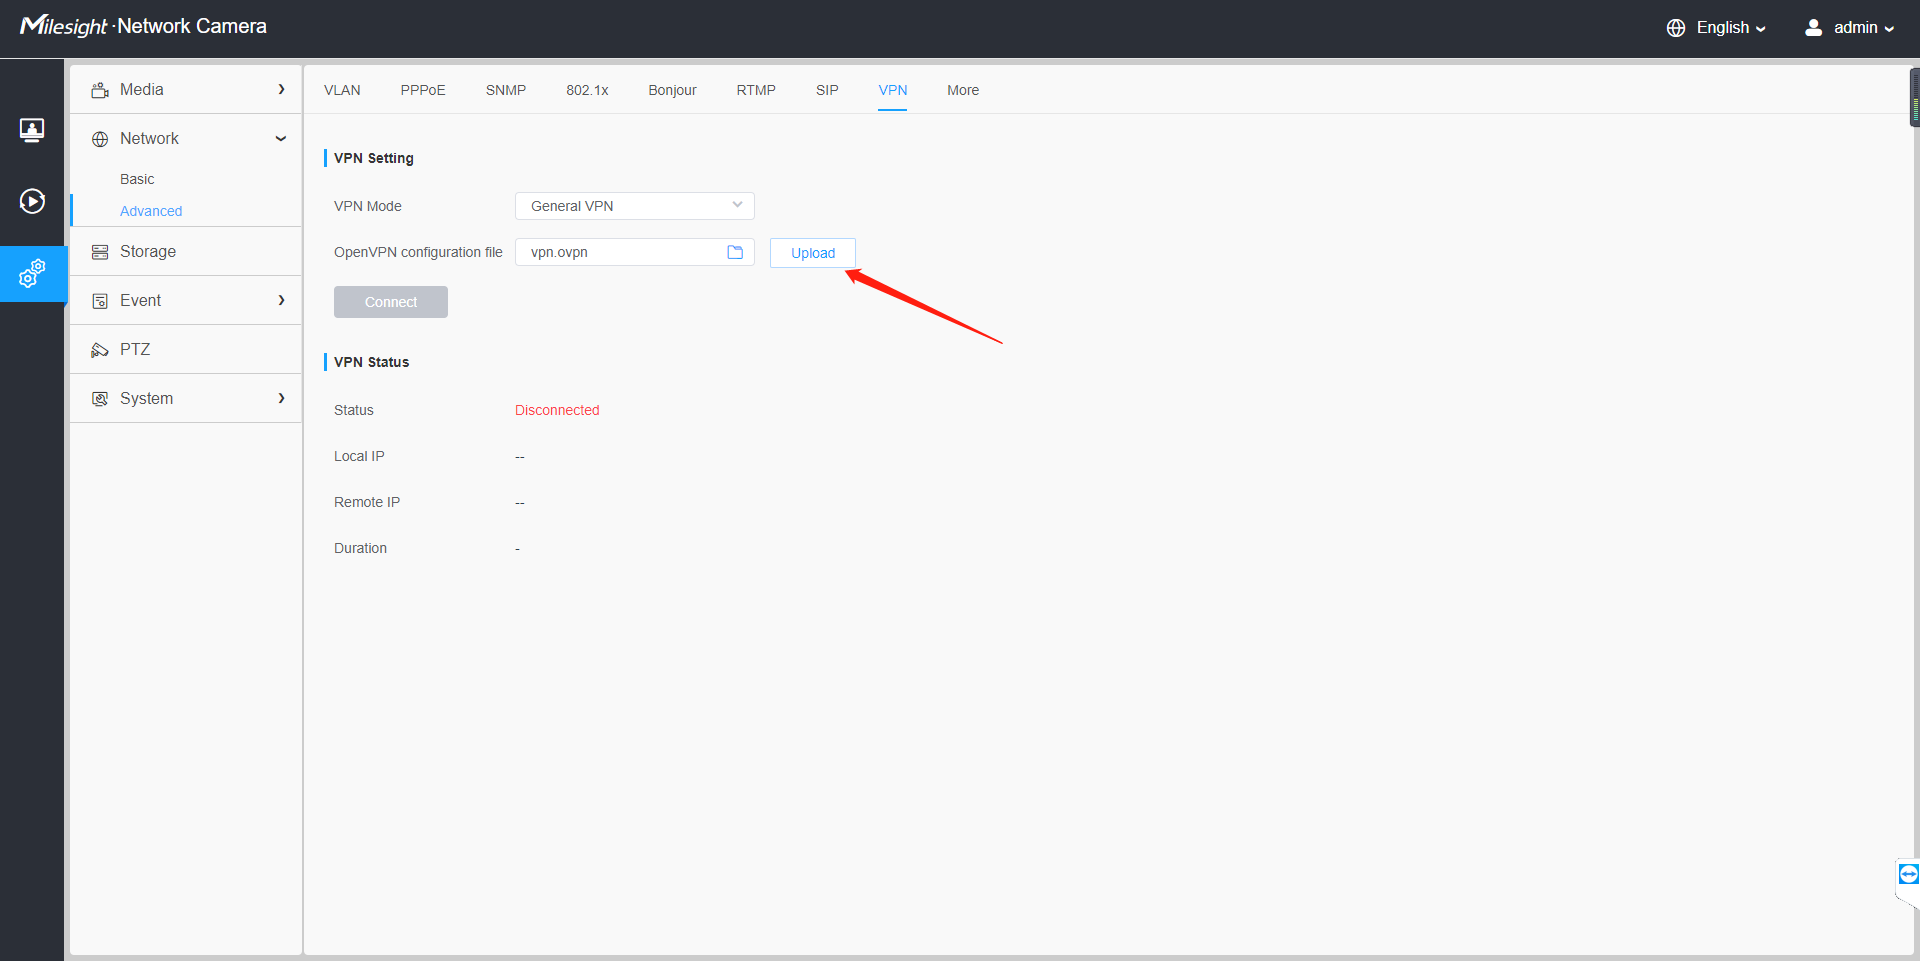
Note: If you disconnect the VPN manually or the connection is broken due to network error, to restore connection you need to upload the configuration file on this page again.
Check the connection status. The picture below shows a normal connection status:
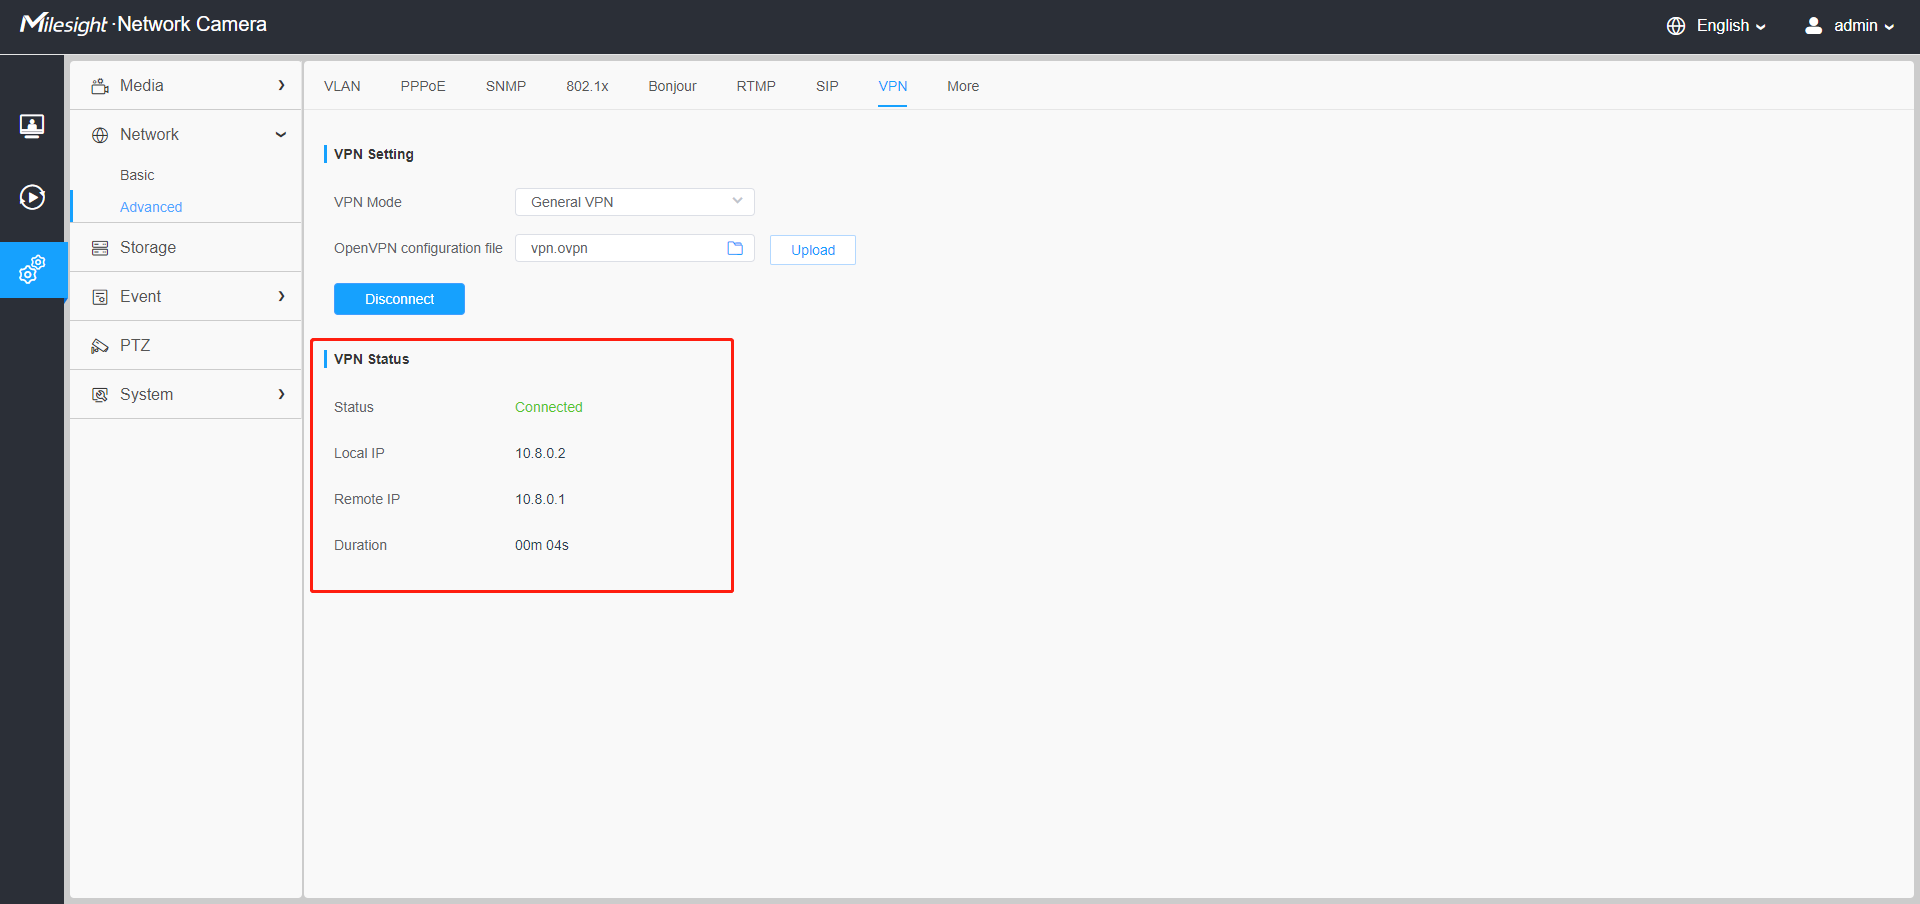
Connection Status
2.2Milesight VPN
Milesight provides Milesight VPN service. If you have signed up for Milesight VPN service, you can enter the server information on camera to enable VPN feature.
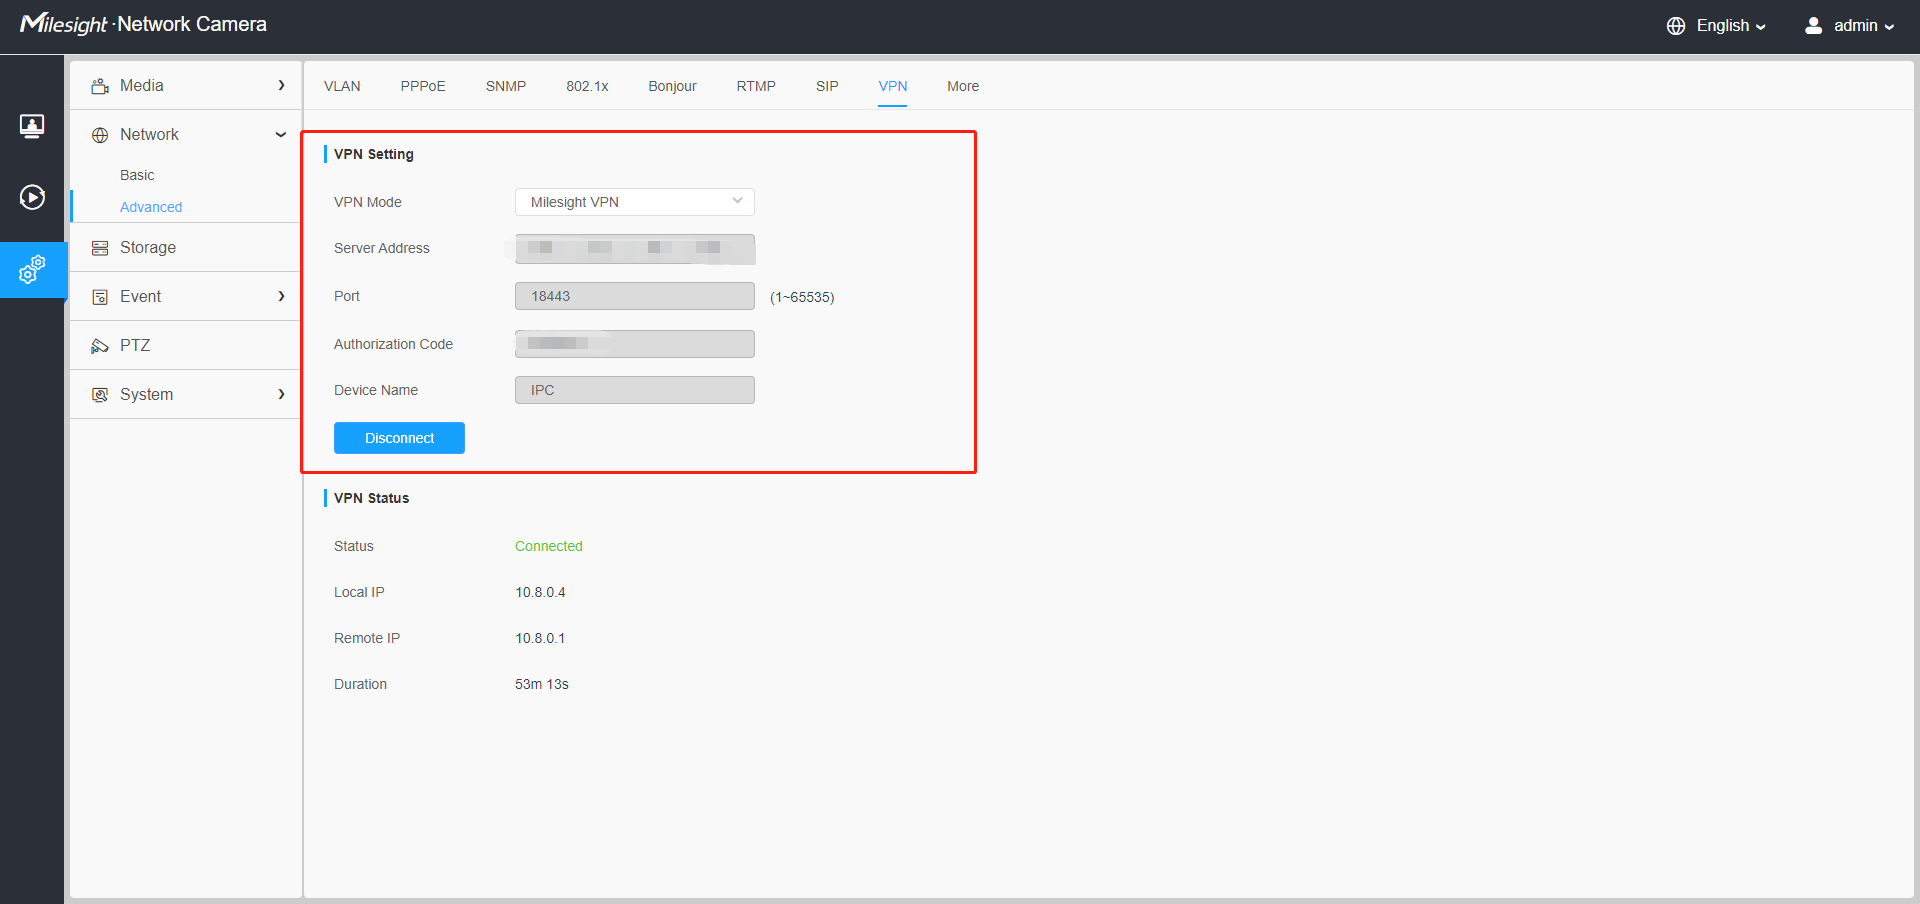
Parameters | Definition |
Server Address | Milesight VPN server IP address |
Port | Milesight VPN server port |
Authorization Code | Code for authentication |
Device Name | Define camera device name on server |
3.How to connect camera via VPN
After the VPN connection is established, we can log in the camera via virtual IP address.
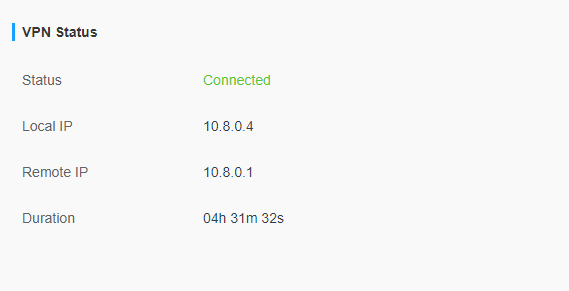
Parameters | Definition |
Status | Status of VPN connection |
Local IP | Camera virtual IP |
Remote IP | VPN virtual IP |
Duration | Connection duration |
3.1Preparation
First please make sure your computer is also connected to VPN. For example, you can download OpenVPN client for Windows from:
https://openvpn.net/client-connect-vpn-for-windows/
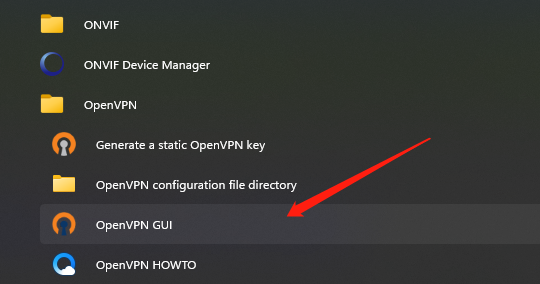
After installation you can see the application in Start menu, open the app:
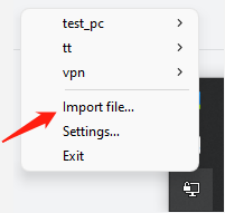
Right click at the VPN connection icon on tool bar and select Import file. Please prepare another OpenVPN configuration file that is different from camera’s.
In this area you can see all the configuration file you’ve uploaded. Select corresponding file to connect:
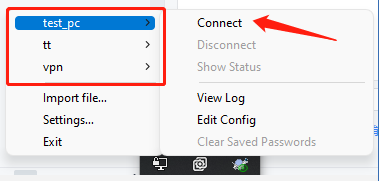
When the connection is done, computer will show this icon:
3.2Login via web
Then open browser and enter camera virtual IP address:
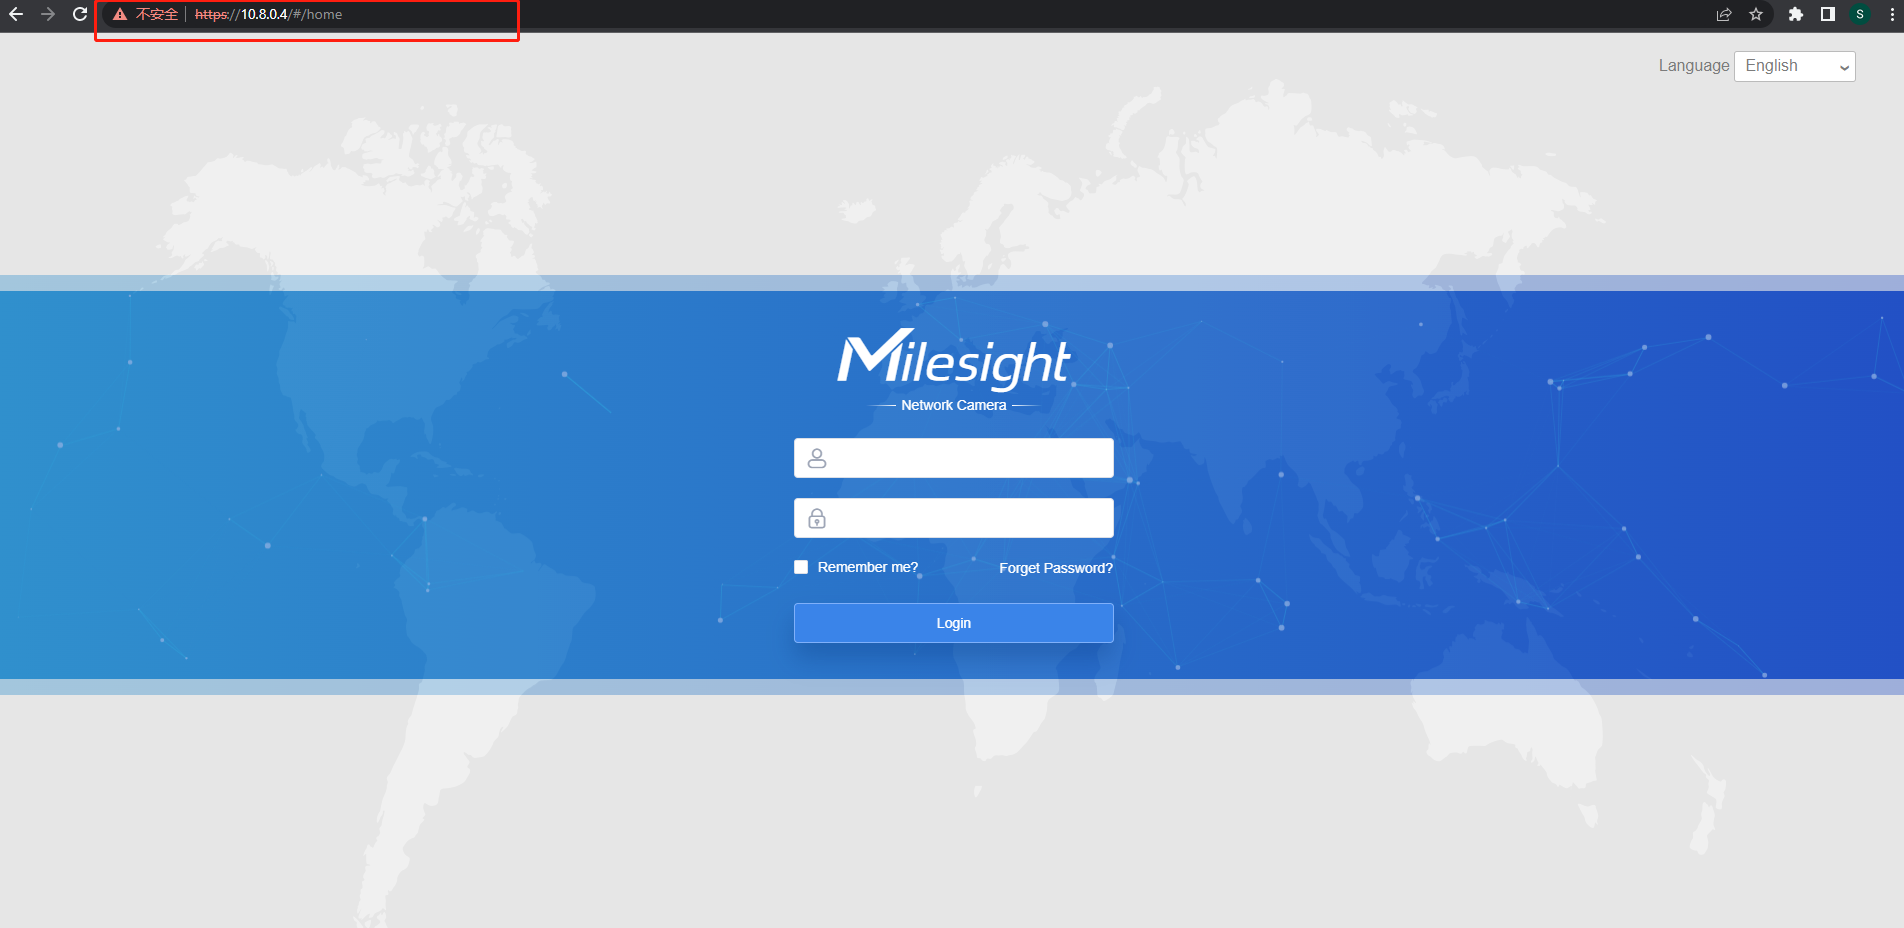
If you meet other problem when using VPN feature, please contact Milesight support team for help:
https://support.milesight.com/support/tickets/new
——————END——————