
1.Introduction
To monitor the flow of people, we added People Counting as an advanced function to our cameras. It has been well-received by the market since released.
Now, our newest firmware version separating People Counting from VCA and adding
Statistics Report function. From this article, you can have a better understanding about People Counting, Analysis Settings and Analysis Search.
Note:
We recommend you update to the latest camera firmware to use.The latest version can be downloaded from
https://www.milesight.com/support/download/firmware#camera
1.1 What is People Counting
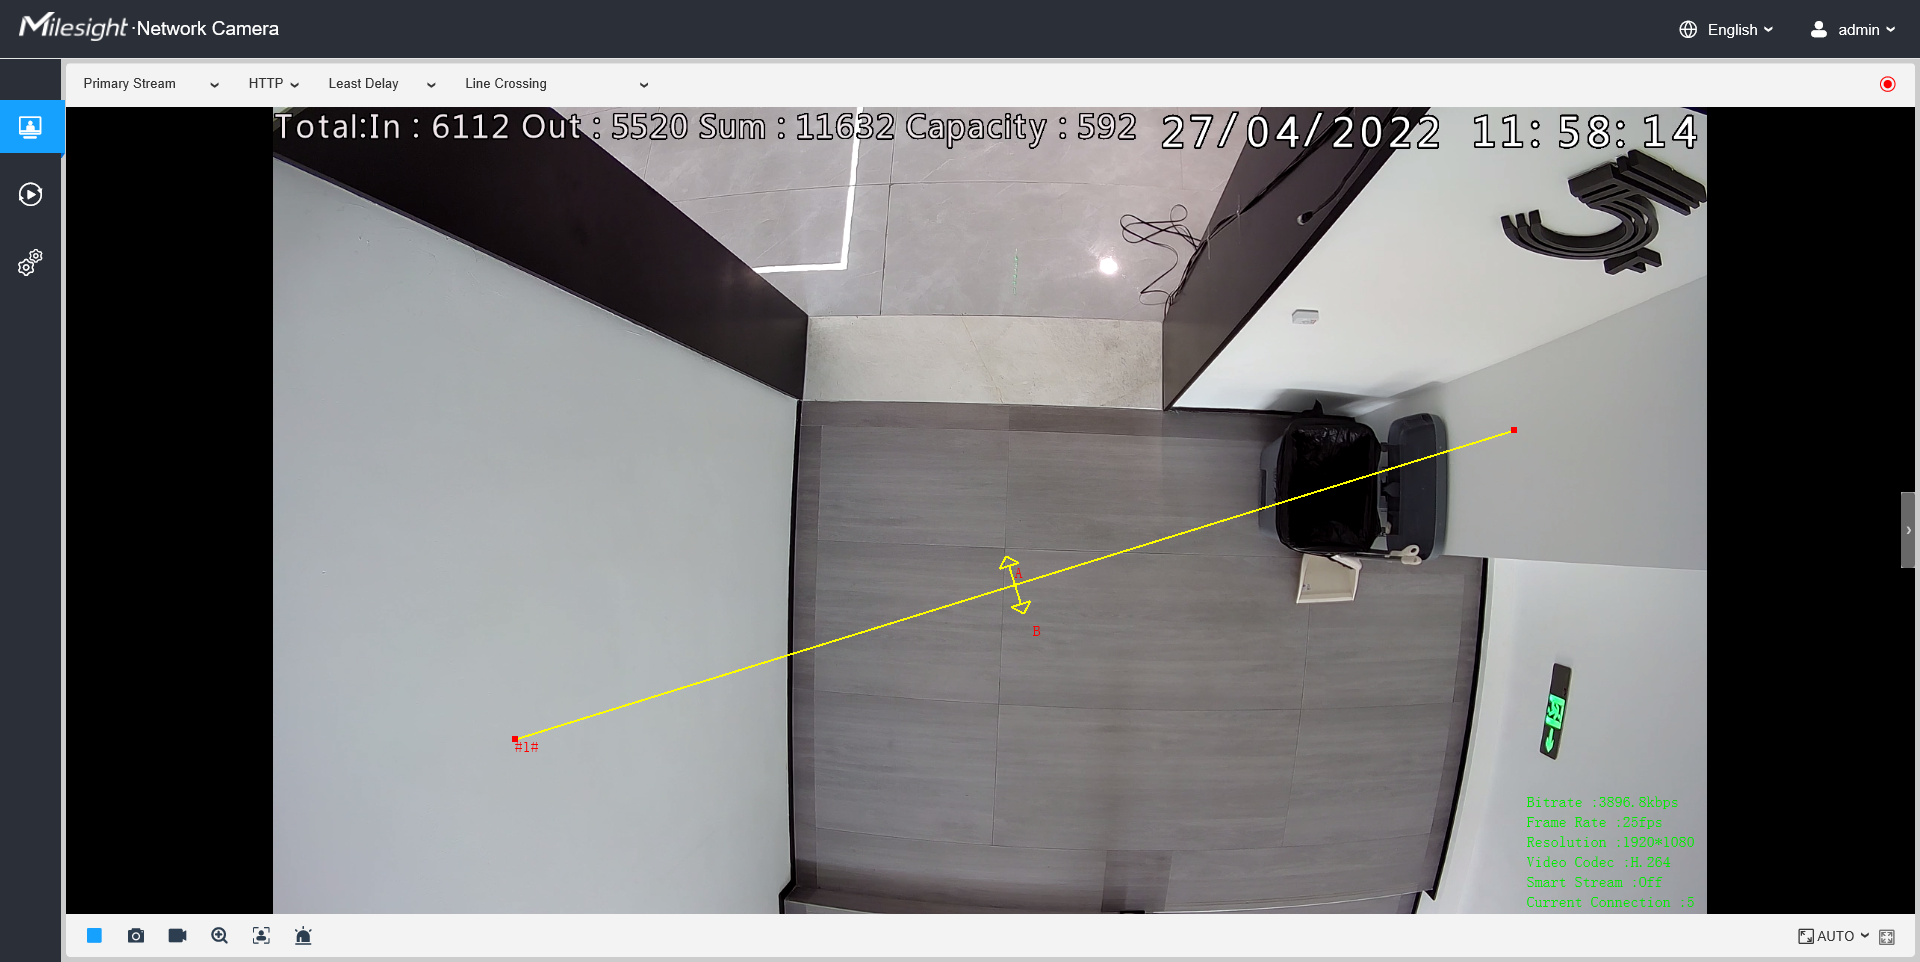
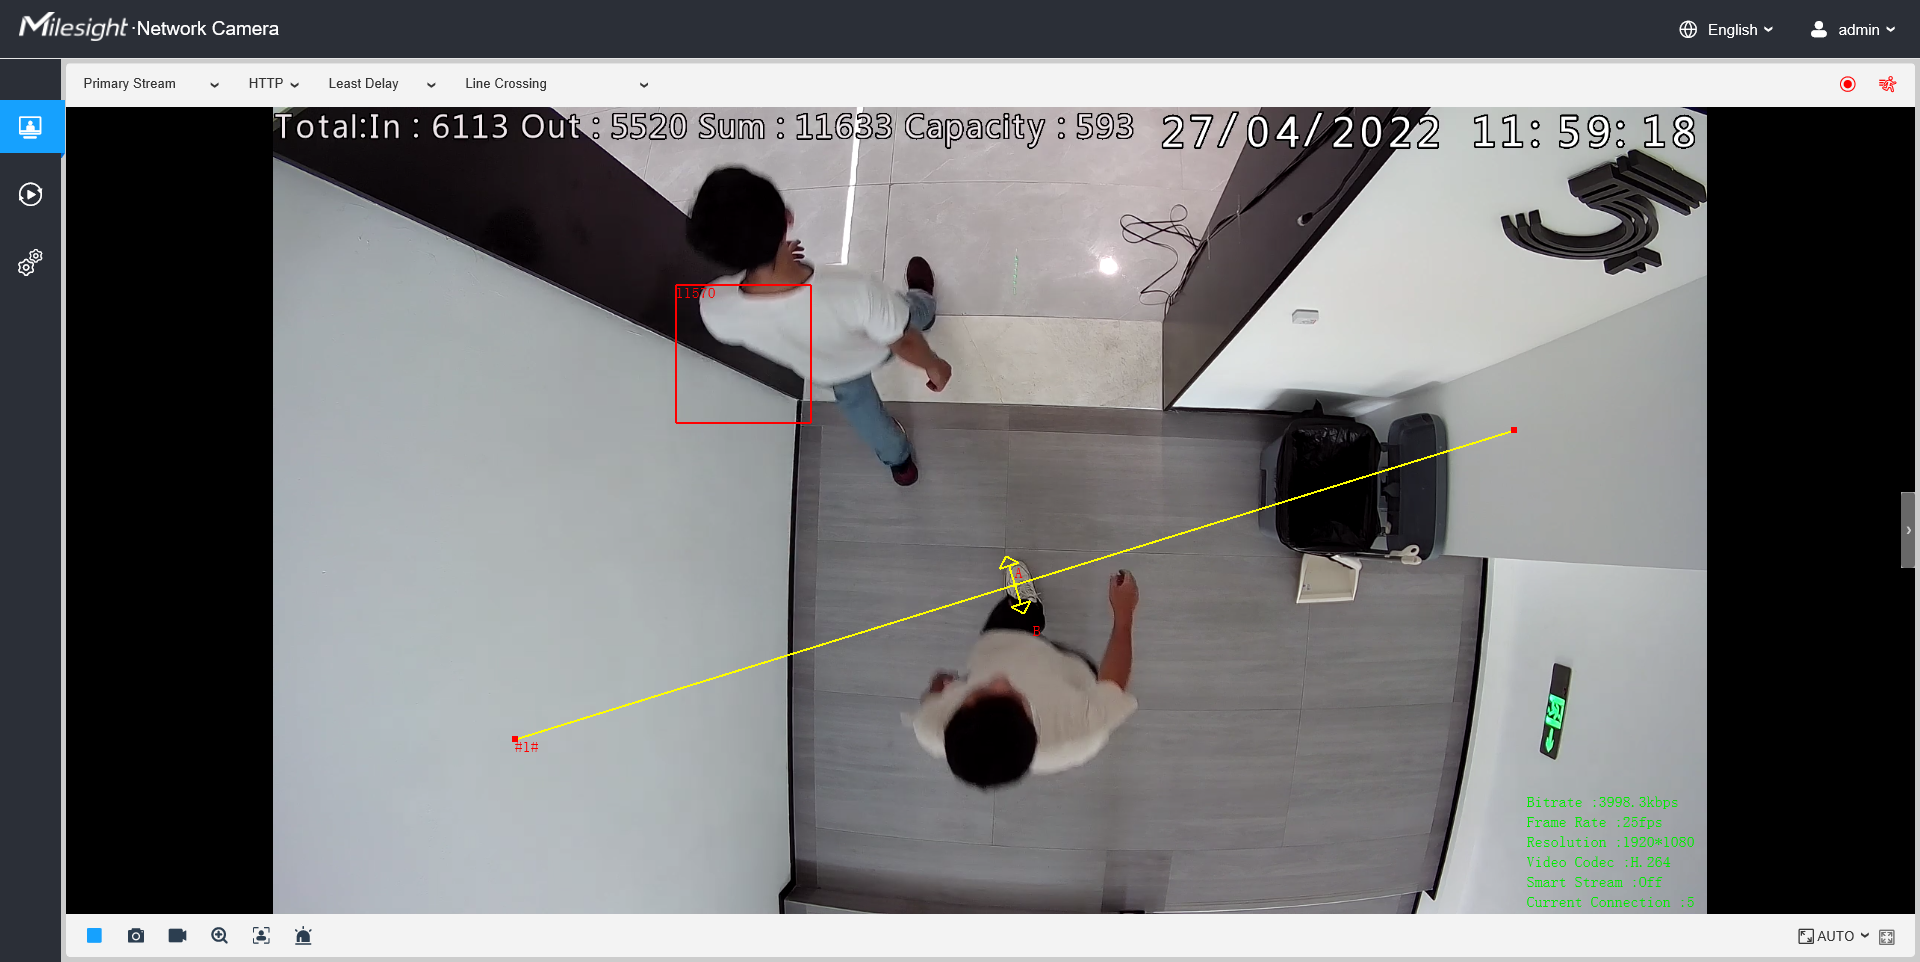
People Counting is able to count how many people enter or exit during the setting period, which can therefore serve multiple purposes such as helping retailers to count how many customers came in a day. It records the number of people passing through the line automatically. People who cross along the direction of the arrow will be recorded as IN. On the contrary, they will be recorded as OUT.
1.2 Installation Suggestions
When the camera counts, it will frame each object. To ensure the accuracy of counting, we need to let the object pass the line completely. There are two installation suggestions as follows.
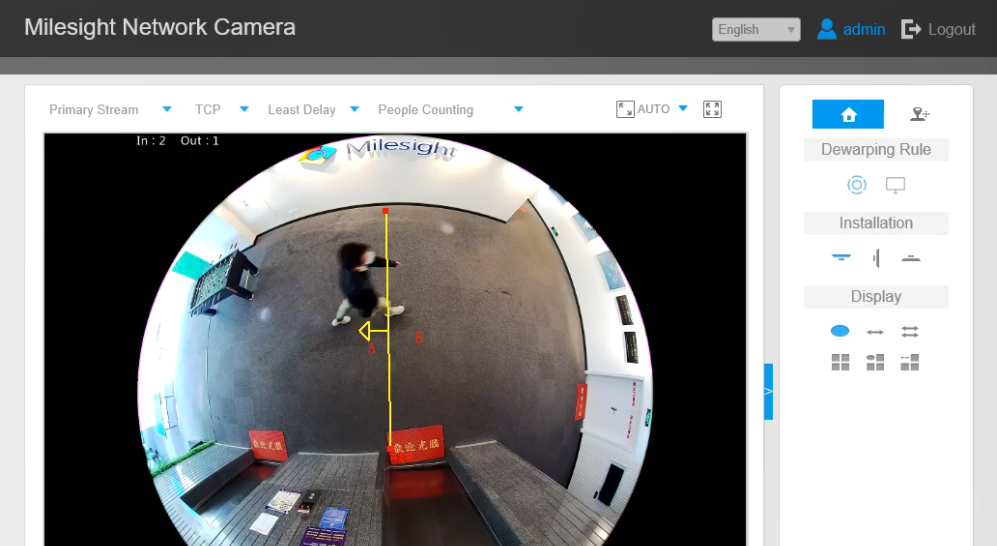
Top Mounting: Top-mounted cameras can better separate people passing side-by-side.
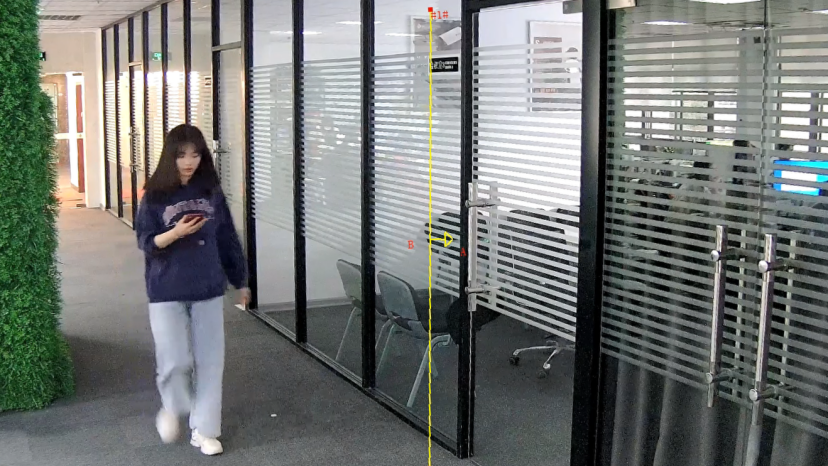
Wall Mounting: Wall-mounted cameras can better identify people.
Note: Either way, you need to make camera and people have a proper distance. And there is enough area in front and behind the detection line for the camera to recognize the object.
2.How to Set People Counting
2.1 Basic Settings of People Counting
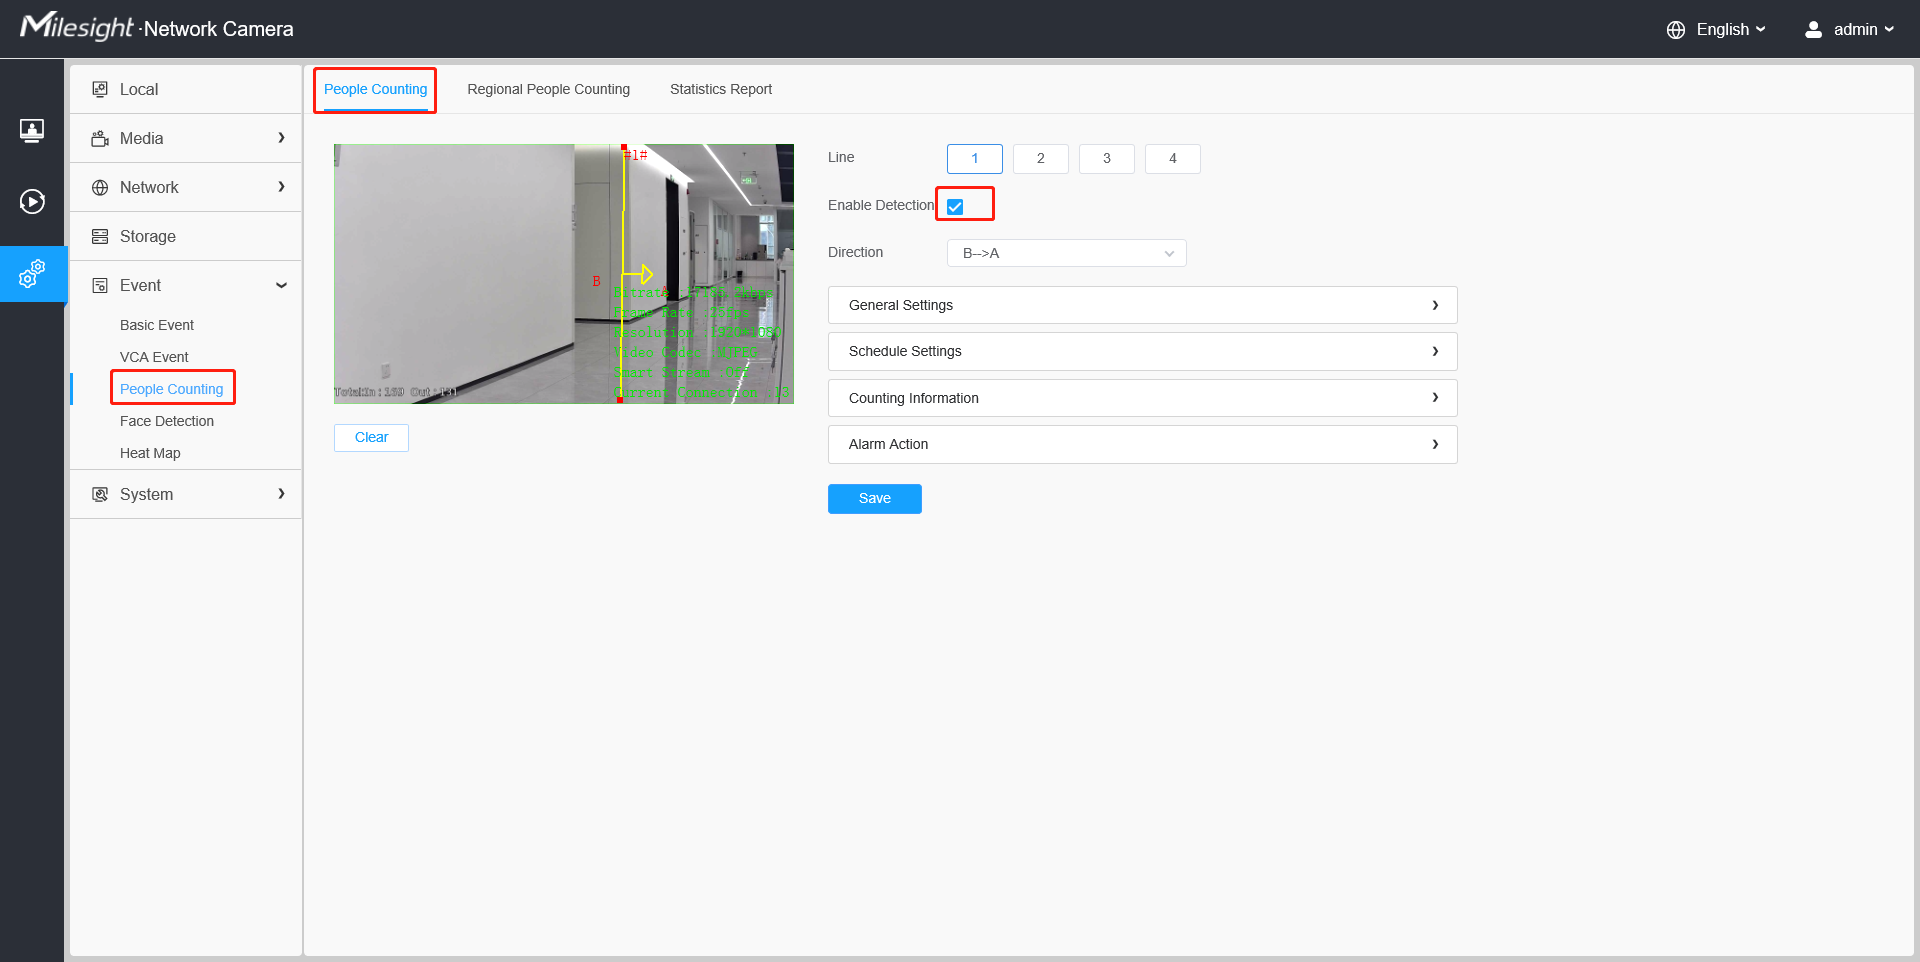
Step 1: Select Event→People Counting→People Counting in Configuration and enable it. PTZ series cameras have advanced options to select and configure different preset points.
Step 2: Draw a line(Up to 4 lines can be set). The direction of the arrow is IN. If necessary, you can also set Min and Max size limits of object to exclude abnormal targets.
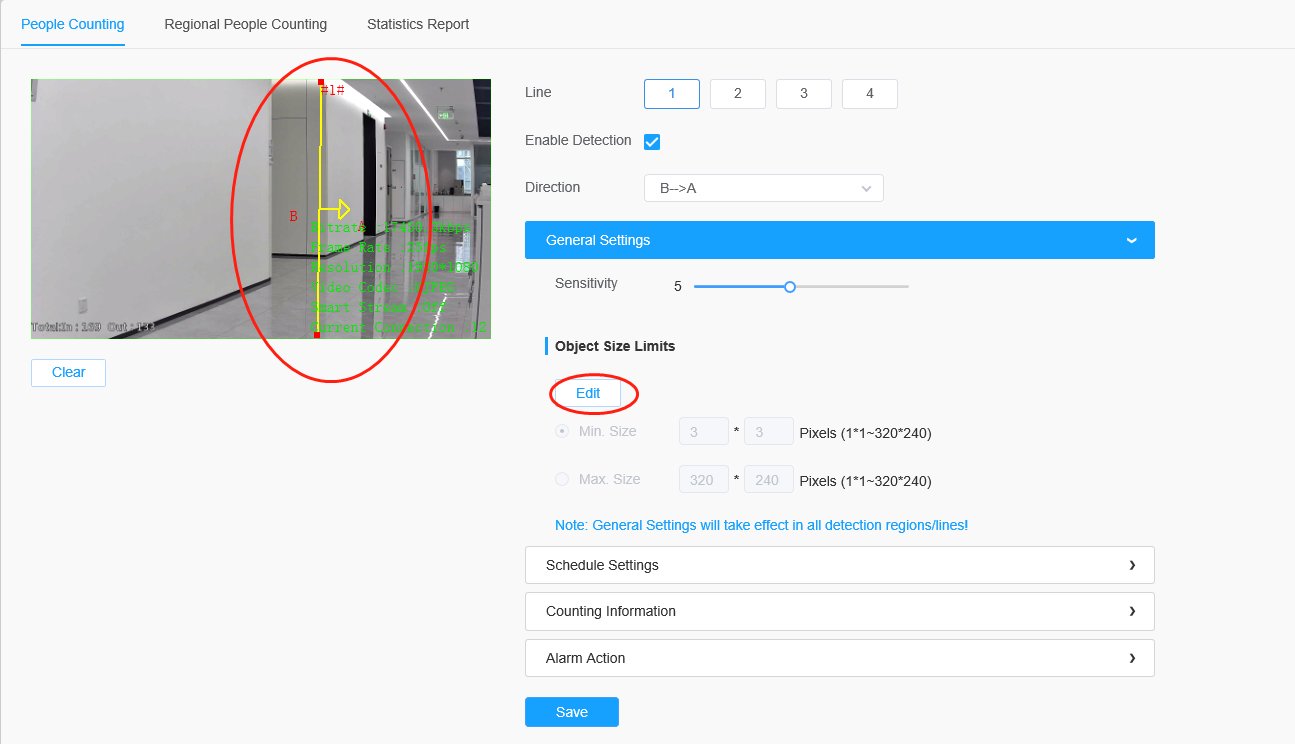
Note: If you choose Normal Mode, it supports configuring the detection line for the current area. If you choose Advanced Mode (Only for PTZ series), it supports configuring the detection line for different PTZ presets(Only support Preset 1~4 so far).
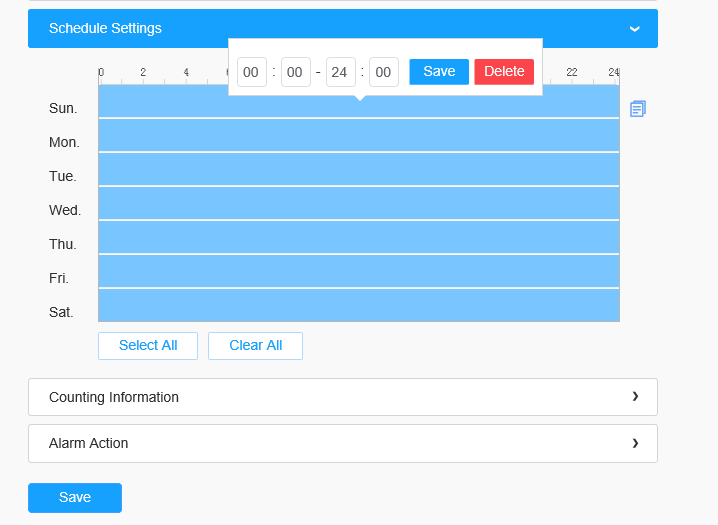
Step 3: Click Schedule Settings and Choose when to count people.
Step 4: If necessary, turn on Counting OSD to display People Counting on the LiveView.
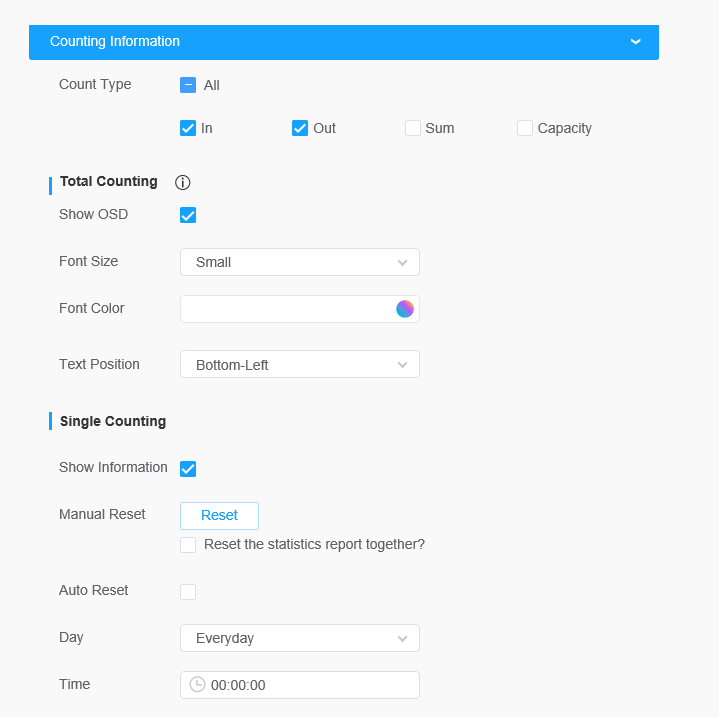
Table1 Description of the buttons
Parameters | Function Introduction | |
Counting Type | Check them to display these statistical categories | |
Font Size | Smallest, Small, Medium, Large, Largest and Auto | |
Font Color | Select the color you need | |
Text Position | Top-Left, Top-Right, Bottom-Left and Bottom-Right of the frame | |
Counting Reset | Reset the count of the OSD or the count of the report together | |
Enable Auto Reset | Day | Select the certain day to auto reset |
Time | Select the certain time to auto reset | |
2.2 Alarm Settings of People Counting
Alarm Trigger: You could chose the total counting or the single counting and set Thresholds first, and then you could do other settings.
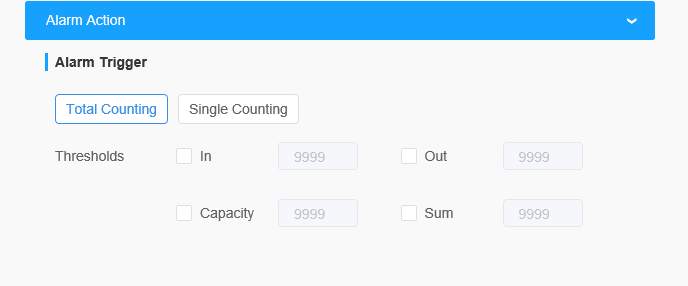
Table2 Description of the buttons
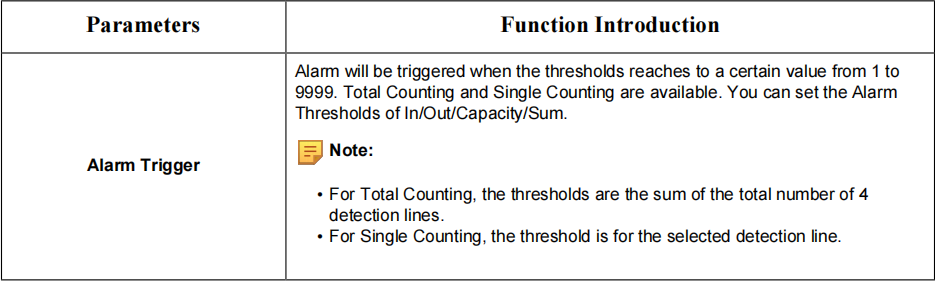
Alarm Action: Configure the specific actions of the camera when the alarm is triggered.
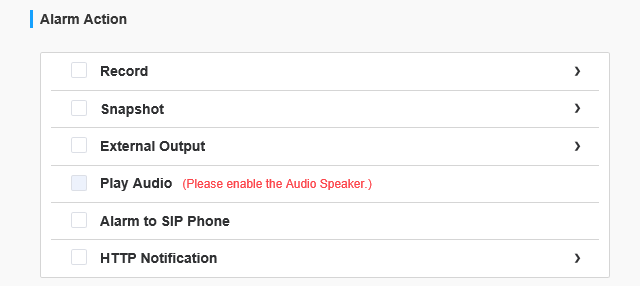
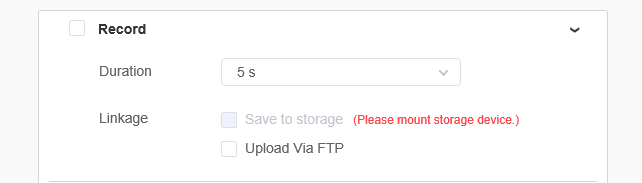
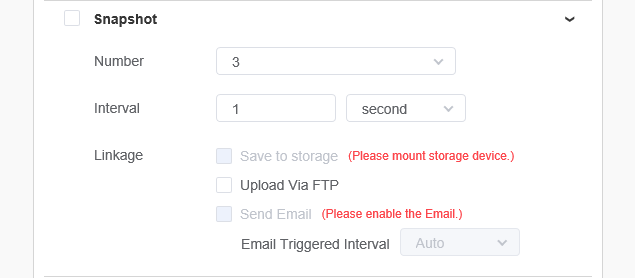

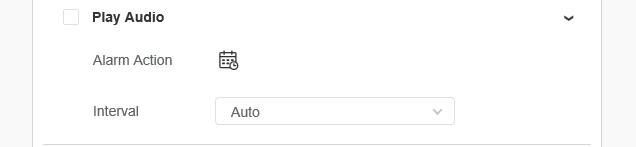
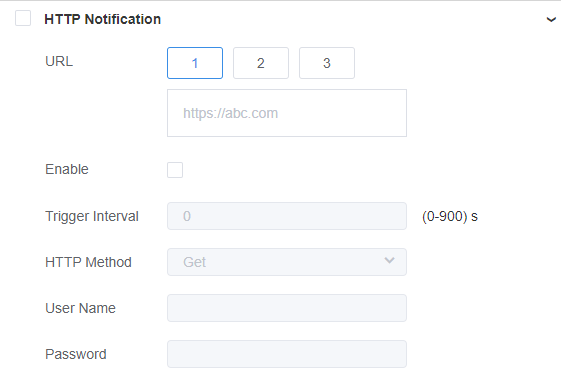
Table3 Description of the buttons
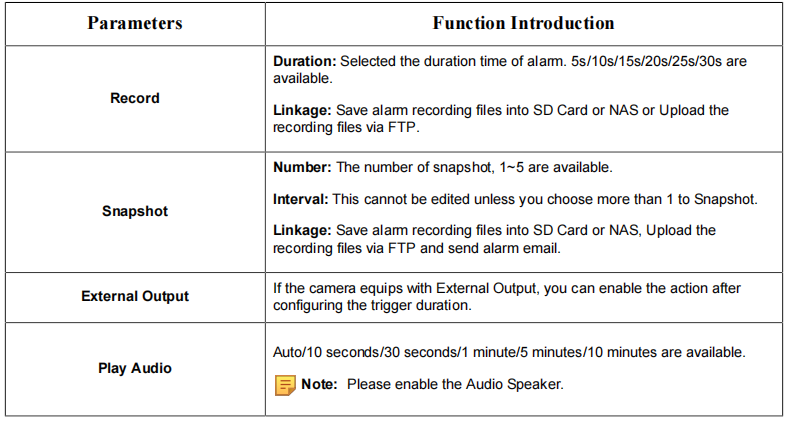
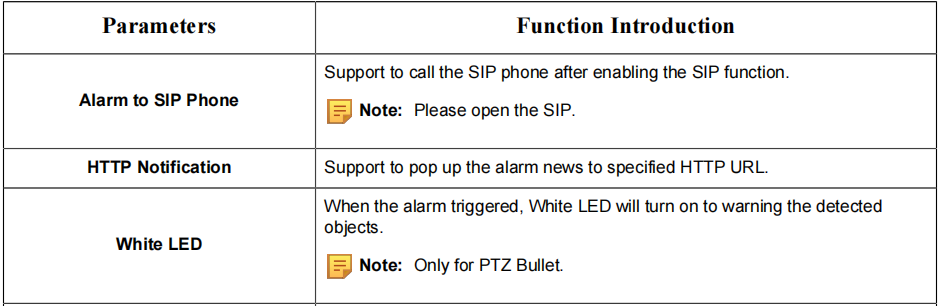
Note:
• The alarm action is effective on 4 detection lines simultaneously.
• If you enable External Output and choose Constant External Output Action Time, when the thresholds reach to a certain value you set, External Output Action alarm time will be always constant till the alarm is released.
3.How to set Regional People Counting
3.1 Basic Settings of Regional People Counting
When enabling regional people counting, users can check the real-time number of people and the time of each person’s stay in the detection region.
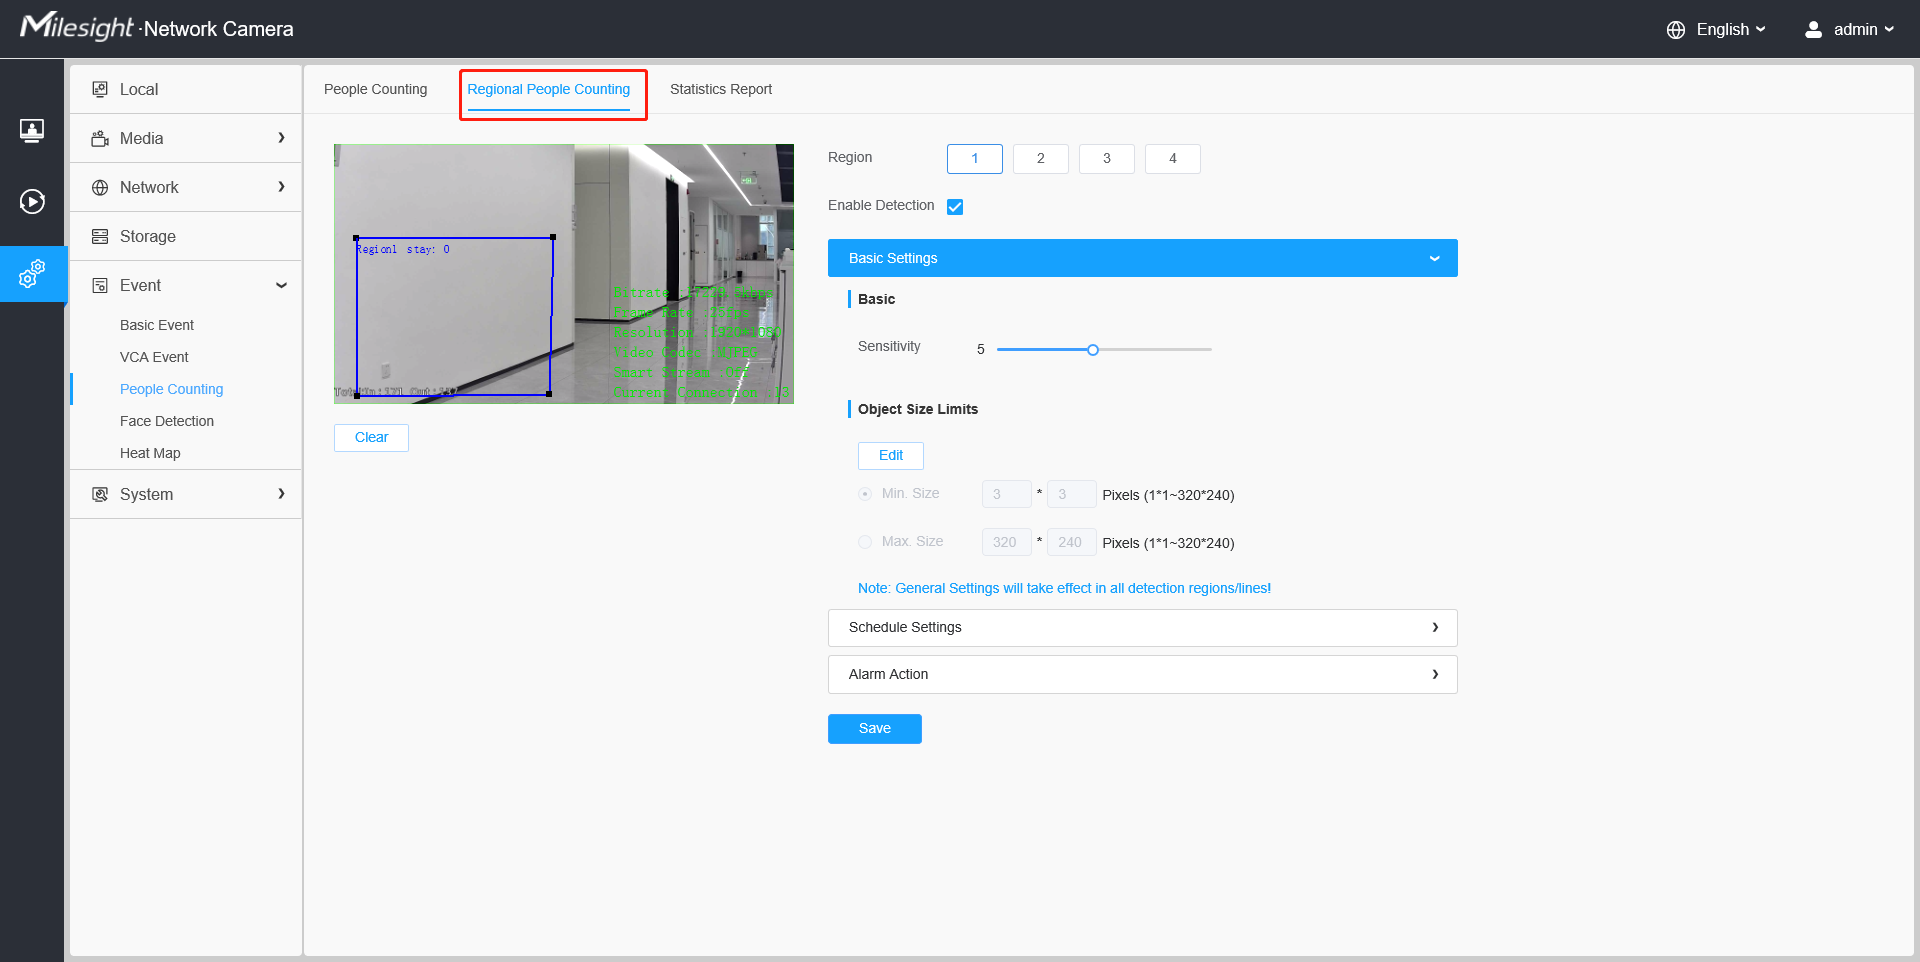
Settings steps are as shown below:
Step1: Enable Regional People Counting;
Step2: Set detection region, sensitivity and object size limits. The object size limits can refer to screenshot above;
Note: If you choose Normal Mode, it supports configuring the detection line for the
current area. If you choose Advanced Mode (Only for PTZ series), it supports configuring the detection line for different PTZ presets(Only support Preset 1~4 so far).
Table4 Description of the buttons
Parameters | Function Introduction |
Sensitivity | Level 1~10 are available, the default level is 5. The higher the sensitivity, the easier it is for moving objects to be recorded in the results. |
Min. Size | Draw the screen or input pixel number to set the minimum size of the detected object. When the object is smaller than this size, it will not be detected. The default minimum size is 3*3. |
Max. Size | Draw the screen or input pixel number to set the maximum size of the detected object. When the object is larger than this size, it will not be detected. The default maximum size is 320*240. |
Step3: Set detection schedule, edit the schedule settings and choose when to count people.
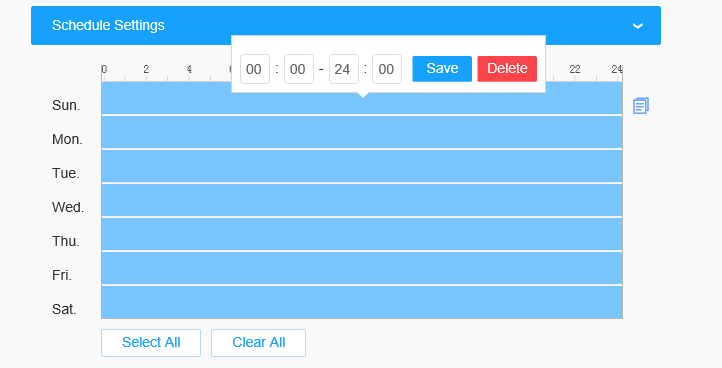
3.2 Alarm Settings of Regional People Counting
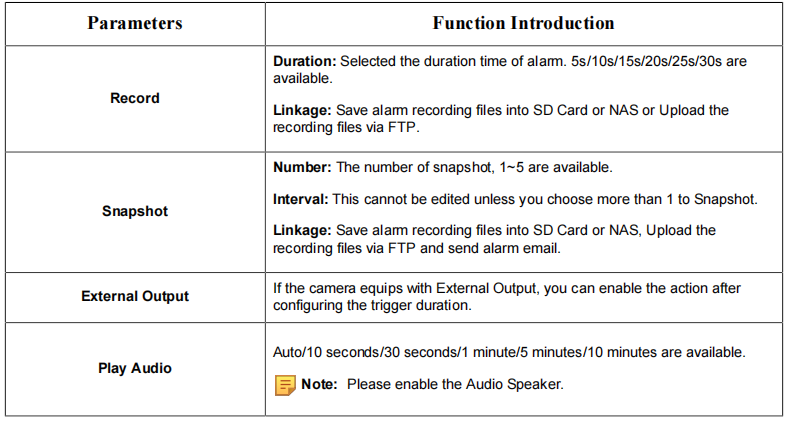
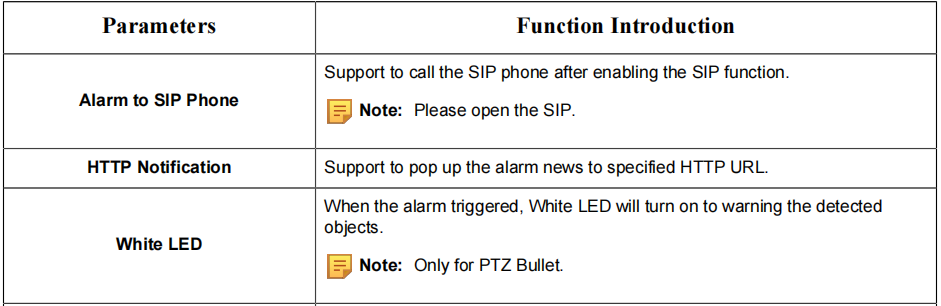
Set Alarm Trigger and Alarm Action, Alarm will be triggered and take actions what you choose when the thresholds reaches to a certain value.
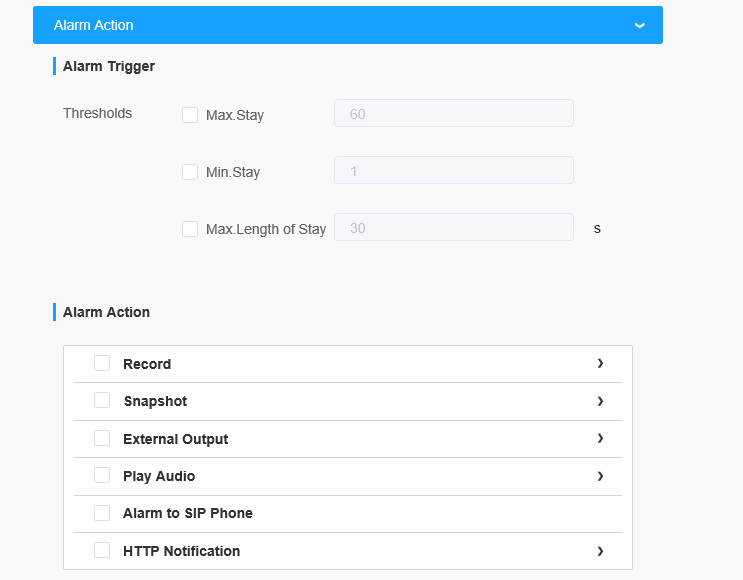
Table5 Description of the buttons

Note:
• Camera firmware version xx.7.0.78 or above support regional people counting.
• The alarm action is effective on 4 detection regions simultaneously.
• If you enable External Output and choose Constant External Output Action Time, when the thresholds reach to a certain value you set, External Output Action alarm time will be always constant till the alarm is released.
4.Statistics Report
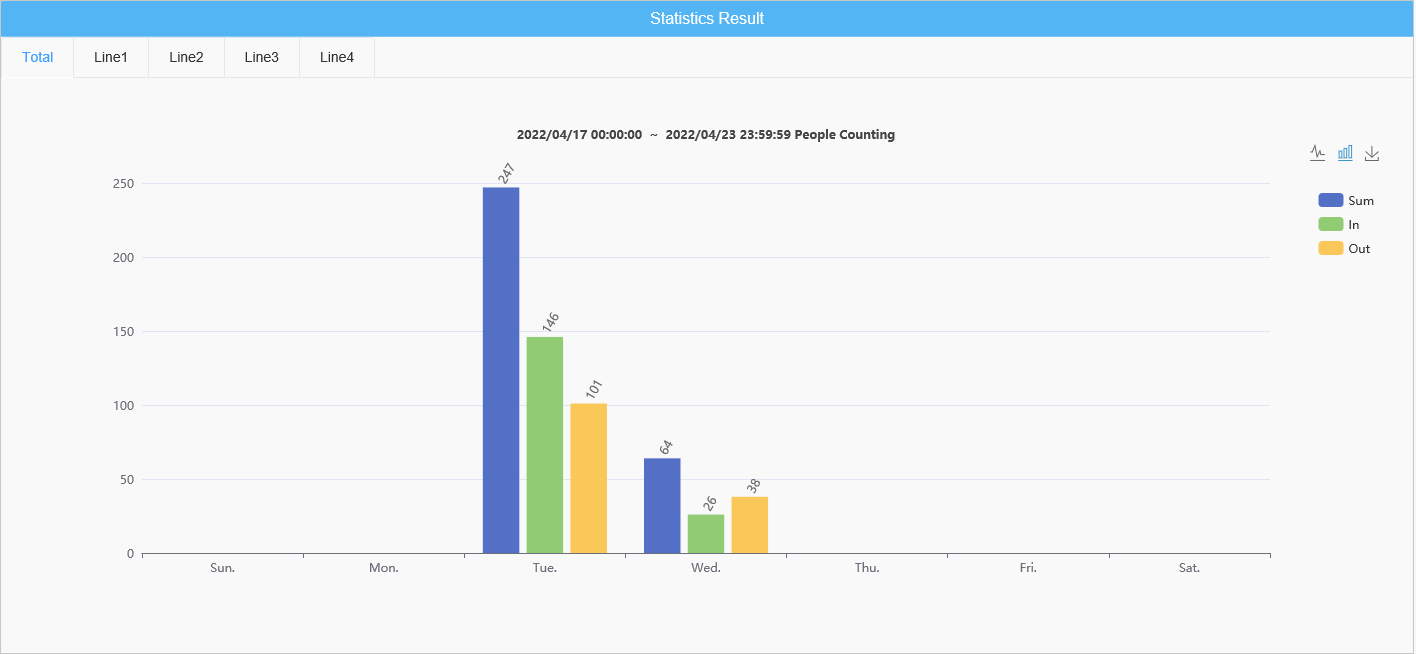
After a certain time of counting, you can start using the Statistics Report function. With this function, you can search by Statistics Types or Report Type. The search result supports Line Chart and Histogram, which could help users to study flow trend.
Search: Select Event→People Counting→Statistics Report in Configuration. Before click Search, you need to configure each parameter.
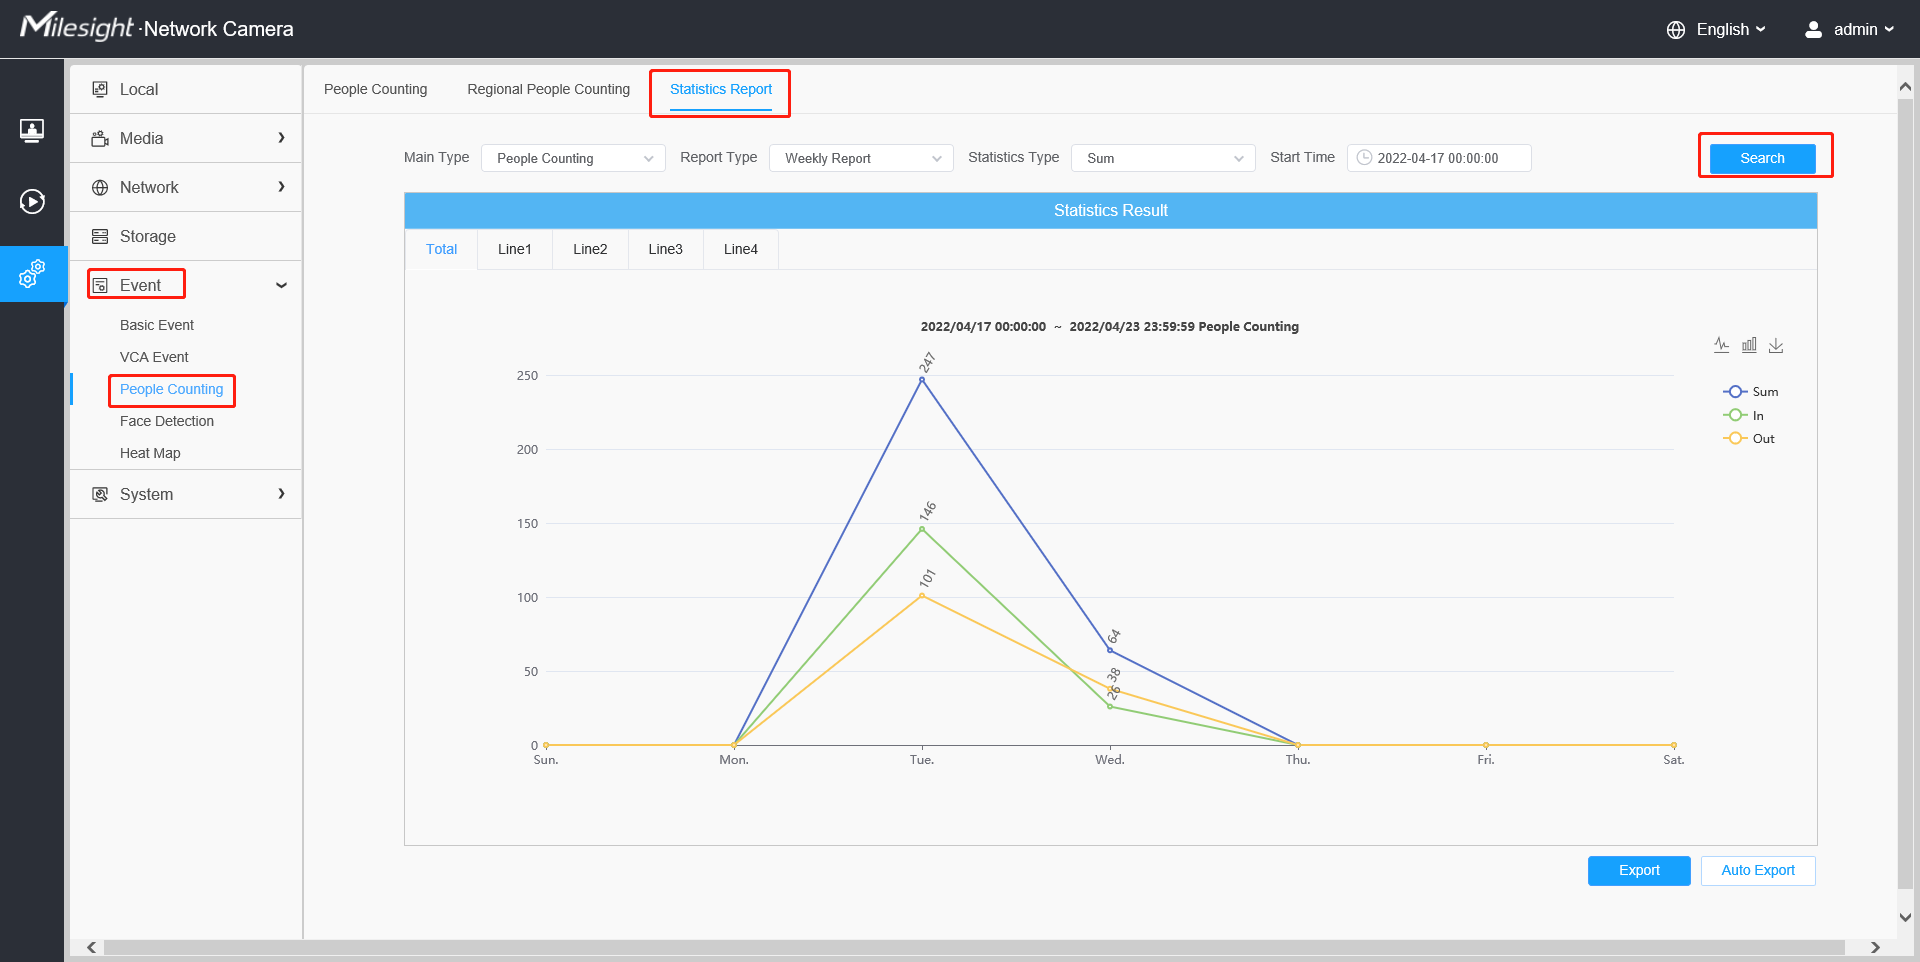
Table4 Description of Parameters
Parameters | Function Introduction |
Main Type | People Counting and Regional People Counting both available after camera firmware version XX.7.0.79. |
Report Type | Choose to report by day, week, month or year. |
Statistics Type | Only for People Counting, you can choose to report by the number of entering, the number of leaving or the total number. |
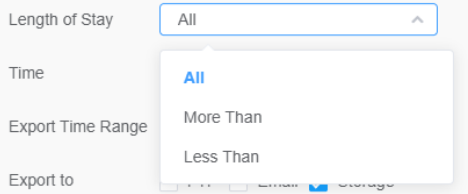
Length of Stay | Only for Regional People Counting, you can choose All, More Then and Less Then and set the time of more then/less then. |
Start Time | Select the starting time point of the search. |
4.1 People Counting
Click the button in the top-right corner to switch Line Chart and Histogram.
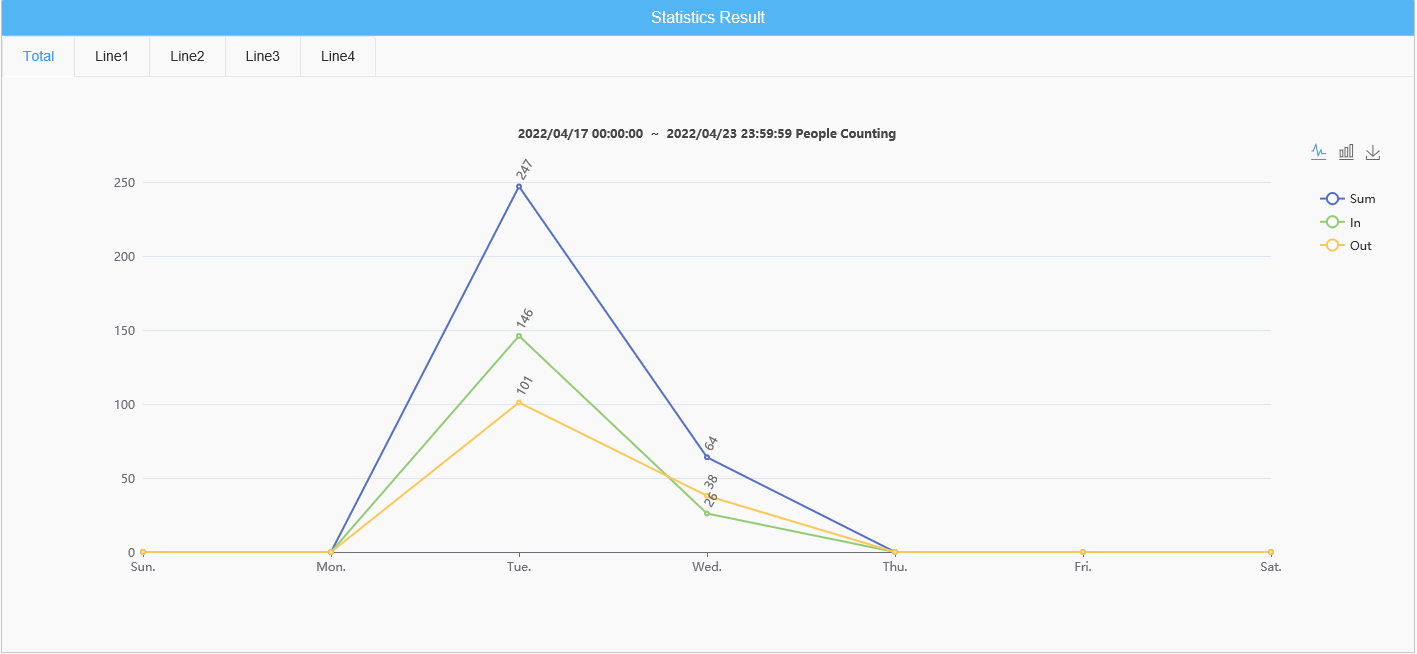
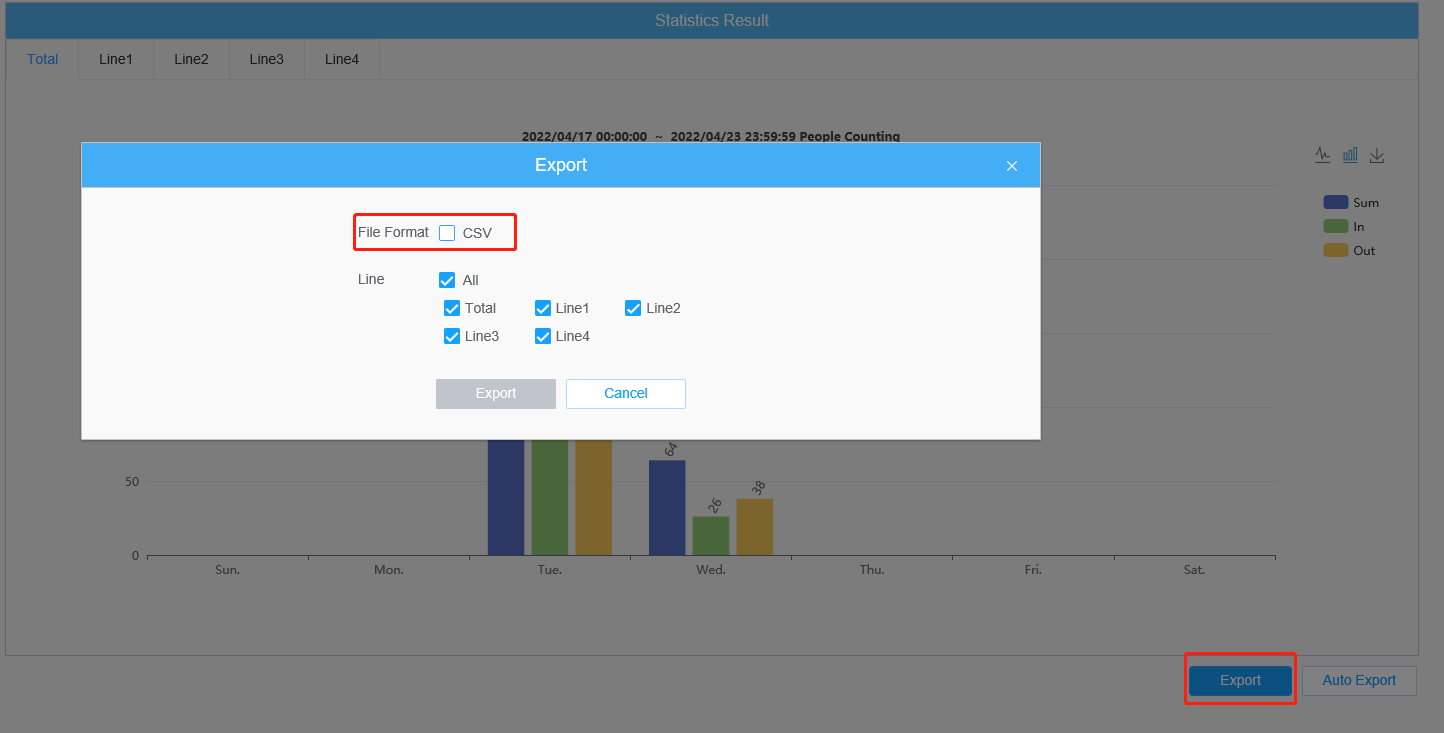
Export: Click Report Export to manually export a CSV sheet of current display result.
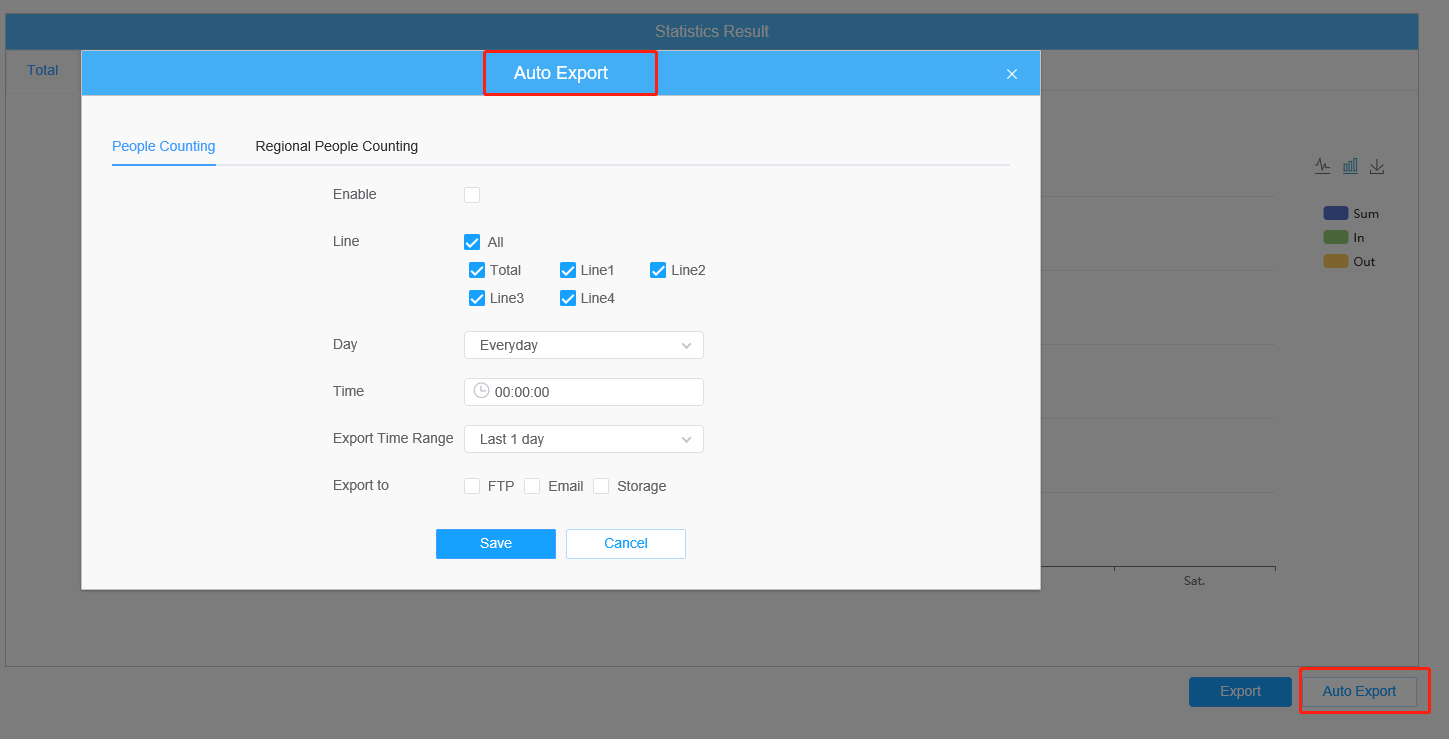
Click Auto Export to configure the time, range and direction for automatic export, which only supports CSV sheets.
4.2 Regional People Counting
Click the button in the top-right corner to switch Line Chart and Histogram.
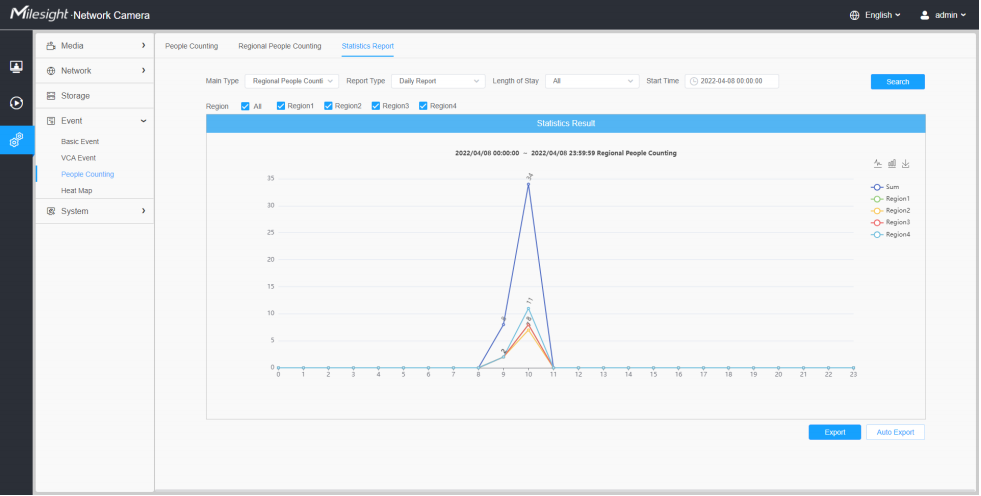
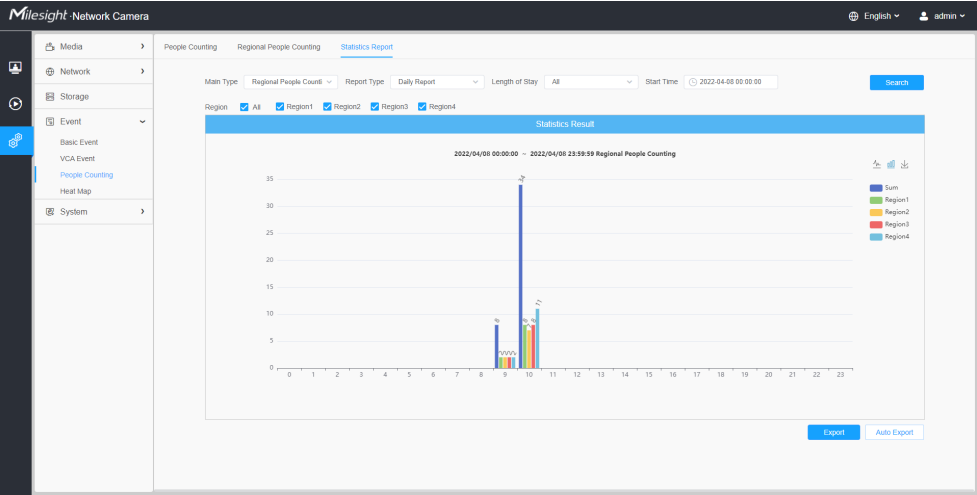
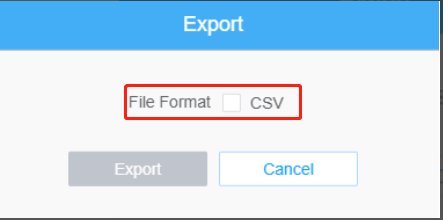
Export: Click Report Export to manually export a CSV sheet of current display result.
Click “Auto Export” button to pop up the Statistic Report Settings as shown below.
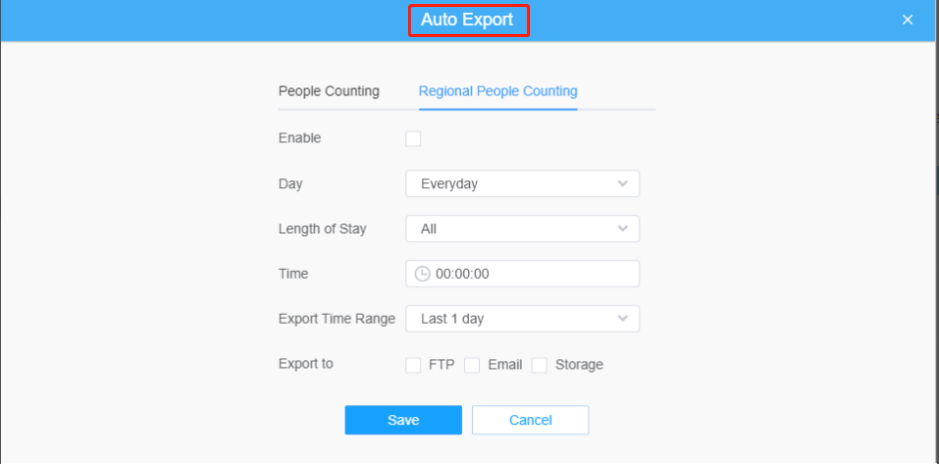
• Check the check box to enable the auto export of regional people counting.
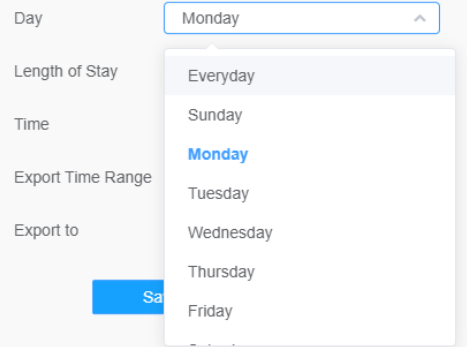
• Set Day. User can choose Everyday to export daily reports, while choosing others to export reports on a specific day of the week;
• Set Length of Stay.
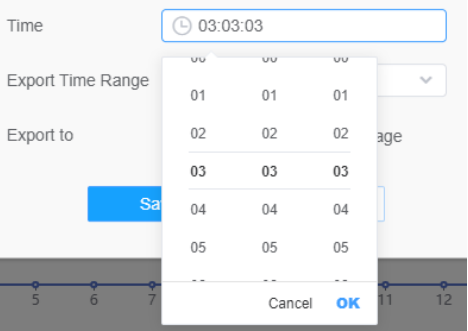
• Set Time. User can choose the time of day to export the Statistics Report automatically, click the calendar icon to pop up the following Quick Selection;
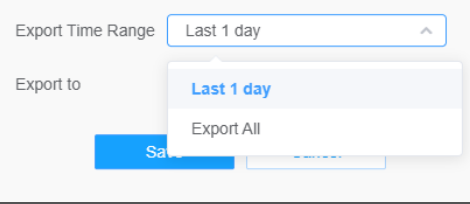
• Set Export Time Range;
• Set the destination path of the automatically exported report. The report can be exported to FTP/ Email/Storage automatically as the form of an Excel spreadsheet according to the day, time and export time range you set. Then click “Save”.
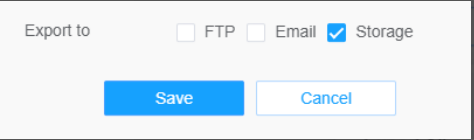
Note: If the current Statistics Report is generated, it will be saved as a csv form.
——————END——————