
1. Introduction
Motion Detection monitors changes in the configured video area and generates an event when the trigger conditions are met. The event can then start recording, take snapshots, activate an external output, play audio, send an HTTP notification, or perform another configured alarm action.
The current interface provides three practical detection paths: Normal Mode without AI, Normal Mode with AI Advance Detection, and Region Mode. Their trigger logic is different, so the appropriate mode and parameters should be selected for the scene.
Note: The Motion Detection interface and available options may vary by camera model and firmware version. If the interface on your camera differs from the screenshots or descriptions in this document, Please follow the options actually available on the camera. This document illustrates the latest Motion Detection functions available in the current reference interface.
2. How to Set Motion Detection?
2.1 Enable Detection and Define the Monitored Area
Step 1: Go to Event > Basic Event > Motion Detection and enable Enable Detection. On the video image, use Select All, Clear All, or Zoom in and Draw to define the monitored cells. The blue grid indicates the area participating in motion analysis.
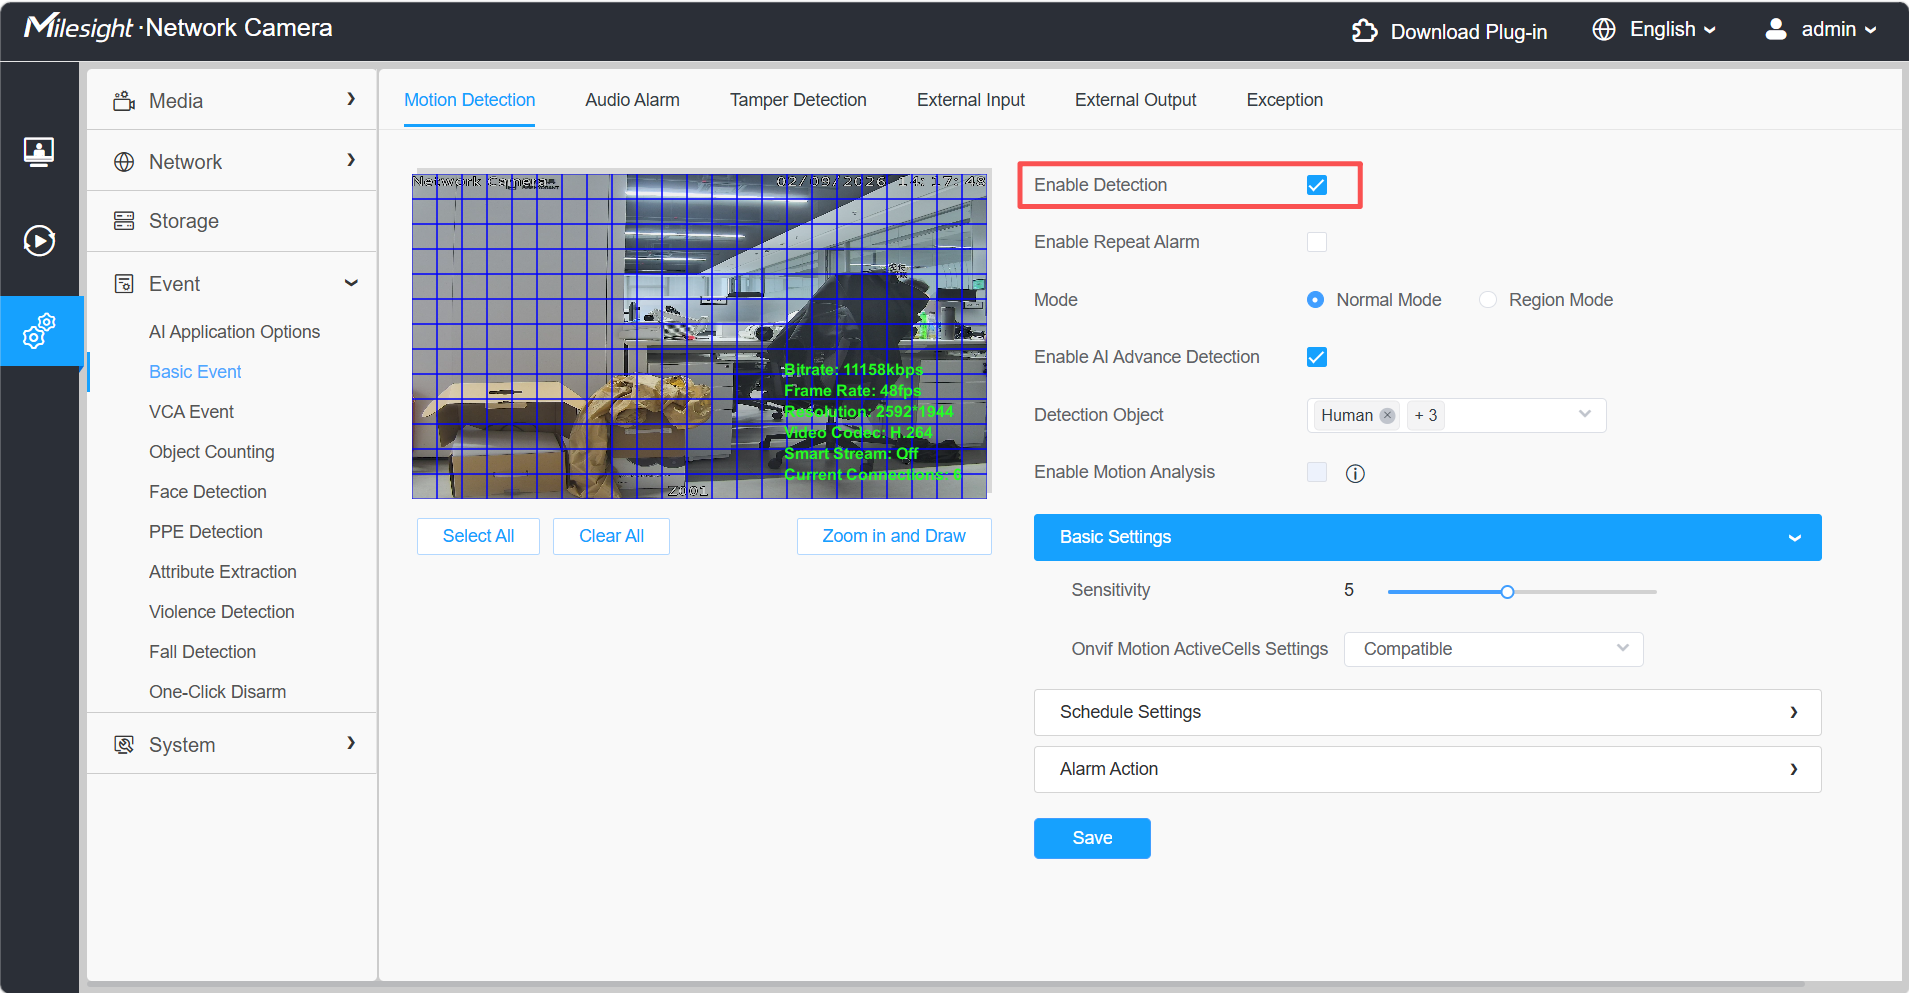
Figure 1. Enable the Motion Detection event
Step 2: If Enable Repeat Alarm is enabled, a continuing motion event can trigger the configured alarm actions again at the Repeat Alarm Interval. The interval can be set from 3 to 60 seconds. Disable this option when only the first alarm of one continuous event is required.
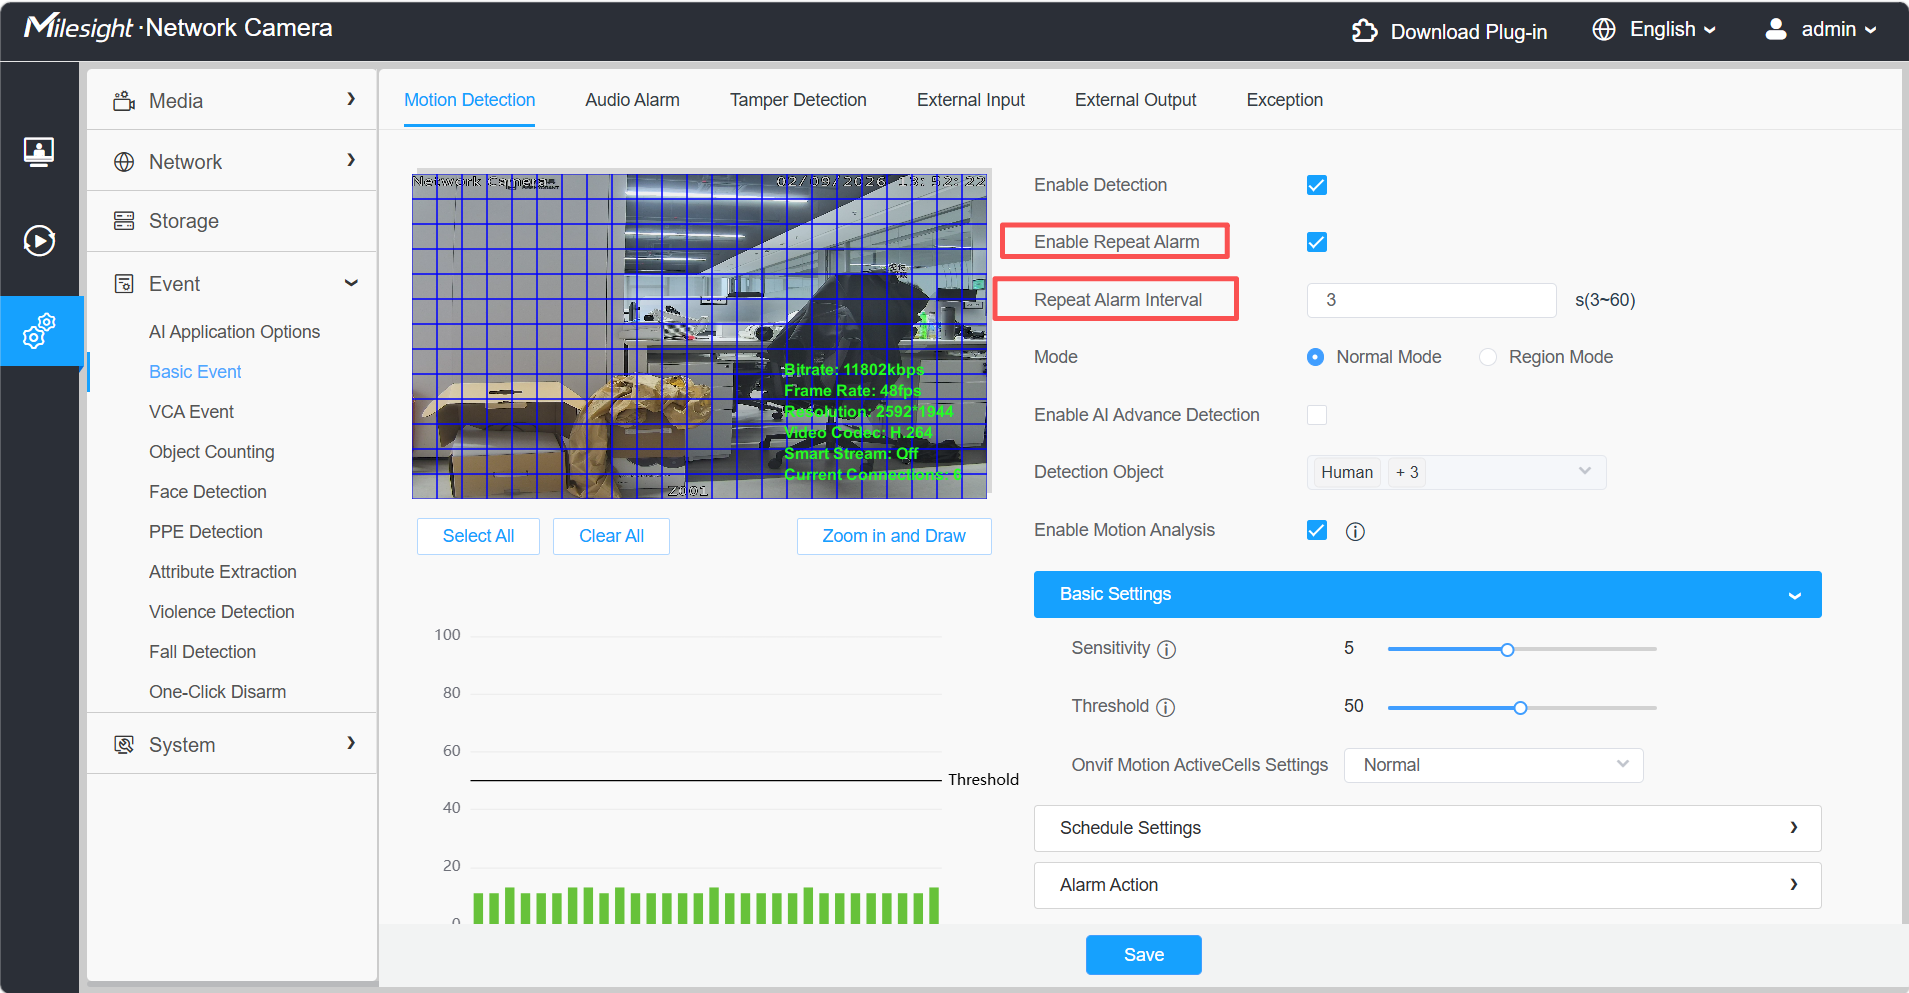
Figure 2. Define the grid and configure Repeat Alarm
2.2 Understand Sensitivity, Threshold, and Motion Analysis
Step 3: Enable Motion Analysis to highlight detected motion cells in yellow, making it easy to see where motion occurs, this mode is only supported when the HTTP protocol is selected in Live View.
Note: Motion Analysis is only available on Pro PG1 Series and NDAA Dual-lens Models with firmware version 63.8.0.6 or later.
The green bars below the video represent the real-time changes between the current and previous frames, and the black horizontal line represents the set threshold. This graph can be used to determine whether the total change in the current frame is close to or exceeds the threshold.
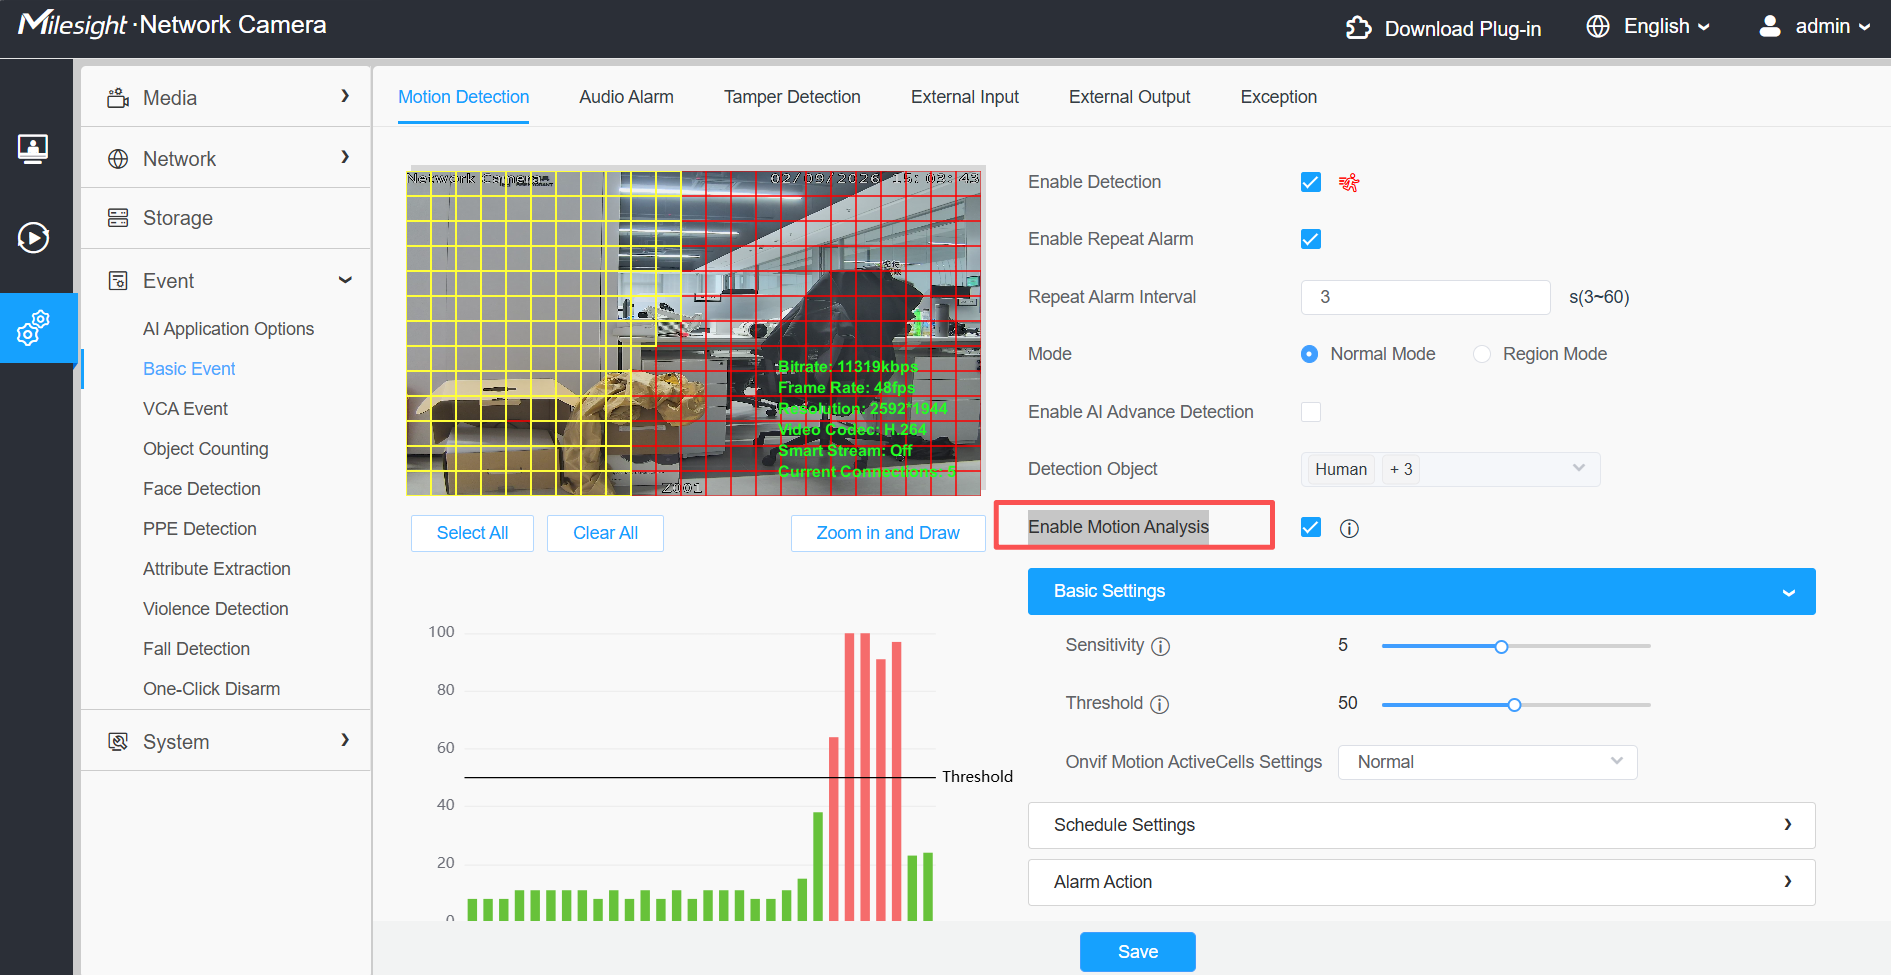
Figure 3. Yellow motion cells and the Threshold chart
Sensitivity controls how small a single moving target can be while still being treated as motion. A higher value makes smaller targets easier to trigger, a lower value helps ignore small targets or slight local movement.
Threshold controls the required total changed area between consecutive frames. A higher value requires a larger overall image change, a lower value allows a smaller overall change to satisfy this condition.
Important: In Normal Mode without AI, both conditions must be satisfied at the same time:
(1) the single moving target meets the Sensitivity condition.
(2) the total changed area meets the threshold condition.
If either condition is not met, the Motion Detection alarm is not triggered.
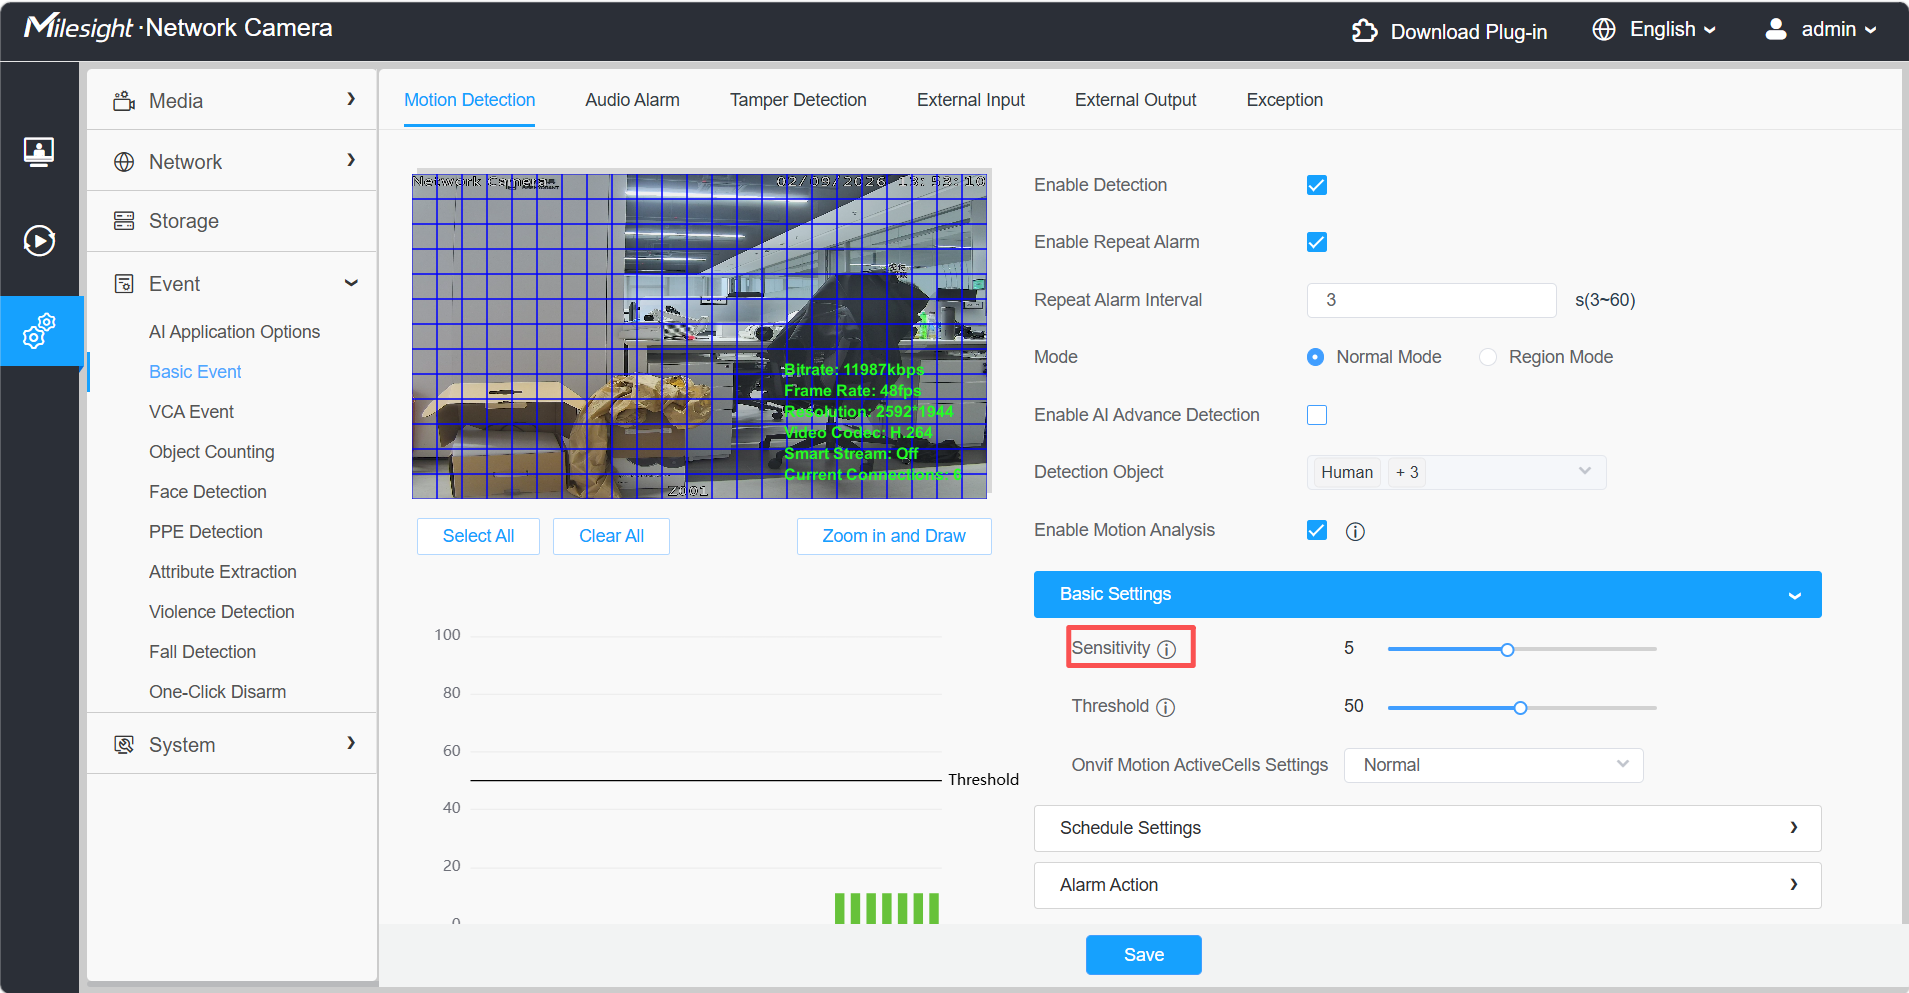
Figure 4. Sensitivity setting in non-AI Normal Mode
2.3 Select Normal Mode or AI Advance Detection
Step 4: Select Normal Mode for a single set of detection parameters across the selected grid. When AI Advance Detection is disabled, the camera uses the traditional frame-change logic controlled jointly by Sensitivity and Threshold.
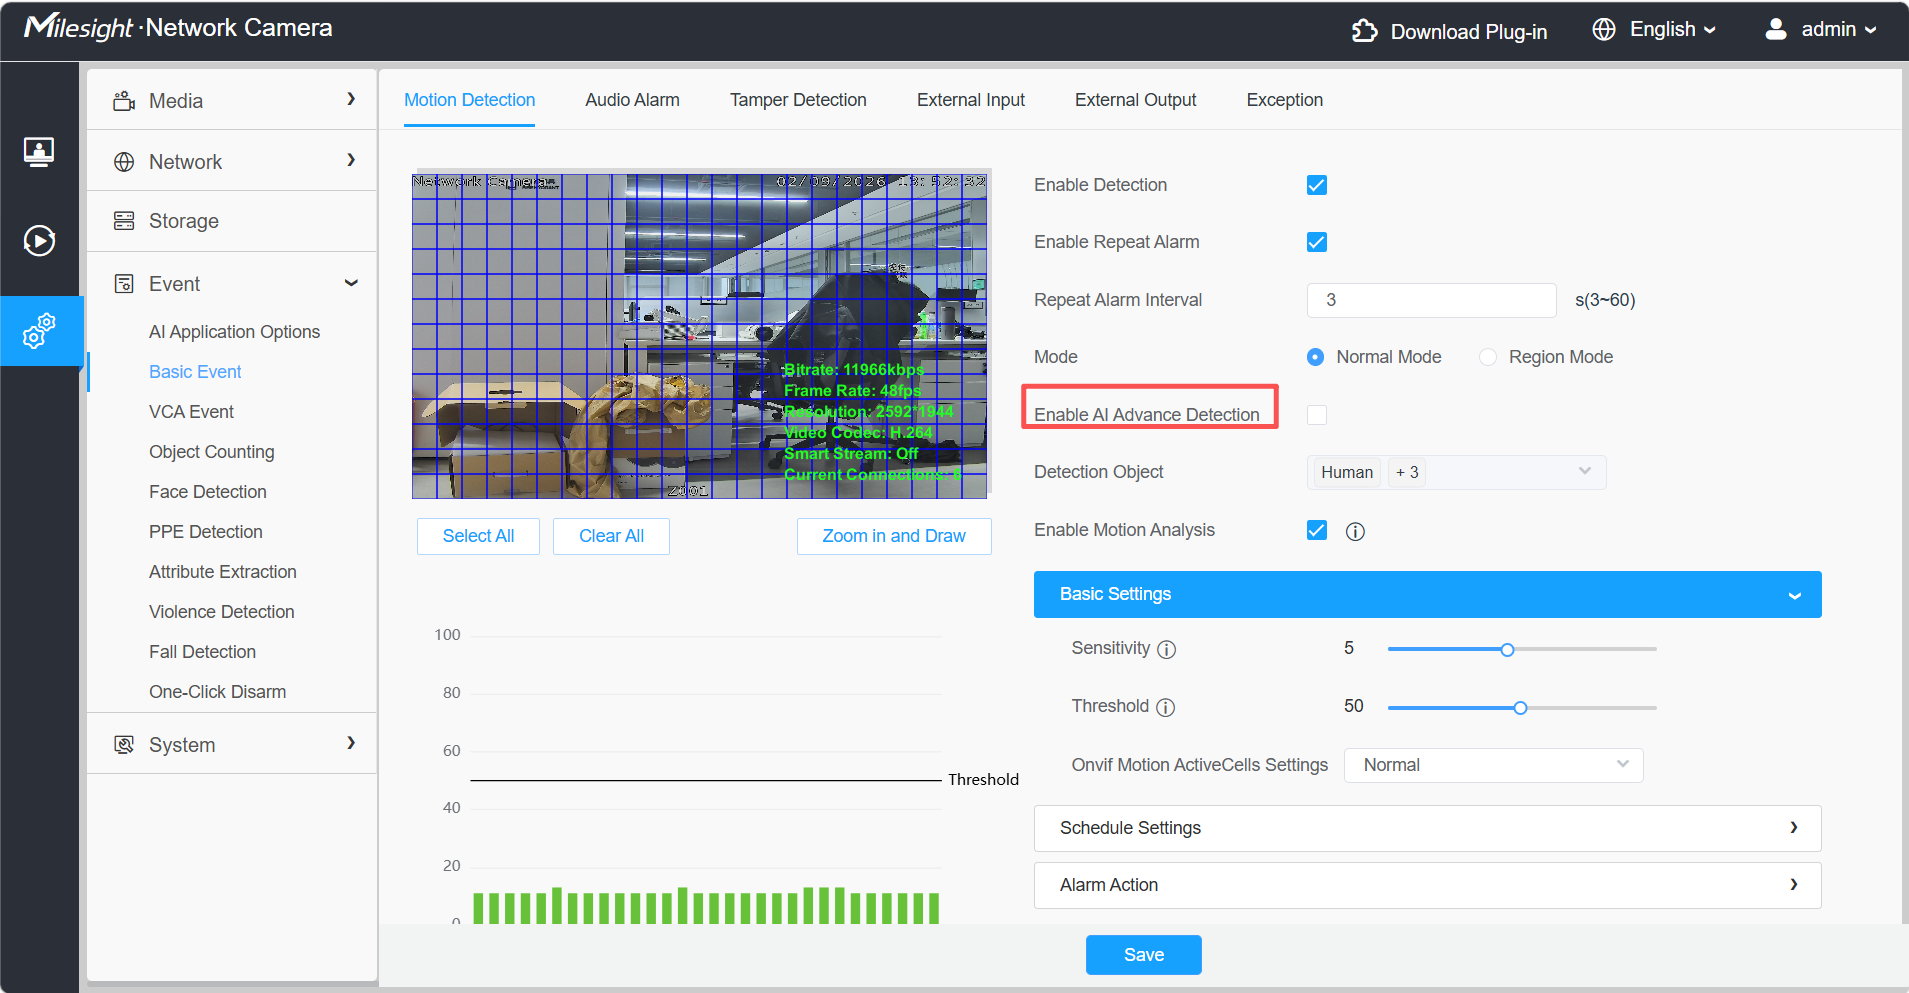
Figure 5. Enable AI Advance Detection when target-based filtering is required
After AI Advance Detection is enabled, select the required Detection Object types. The example interface includes Human, Vehicle, and Non-motor Vehicle,the additional options depend on the camera model and firmware. The camera then judges movement only for the selected objects. In this mode, Threshold is hidden and does not participate in the trigger decision, the sensitivity remains available.
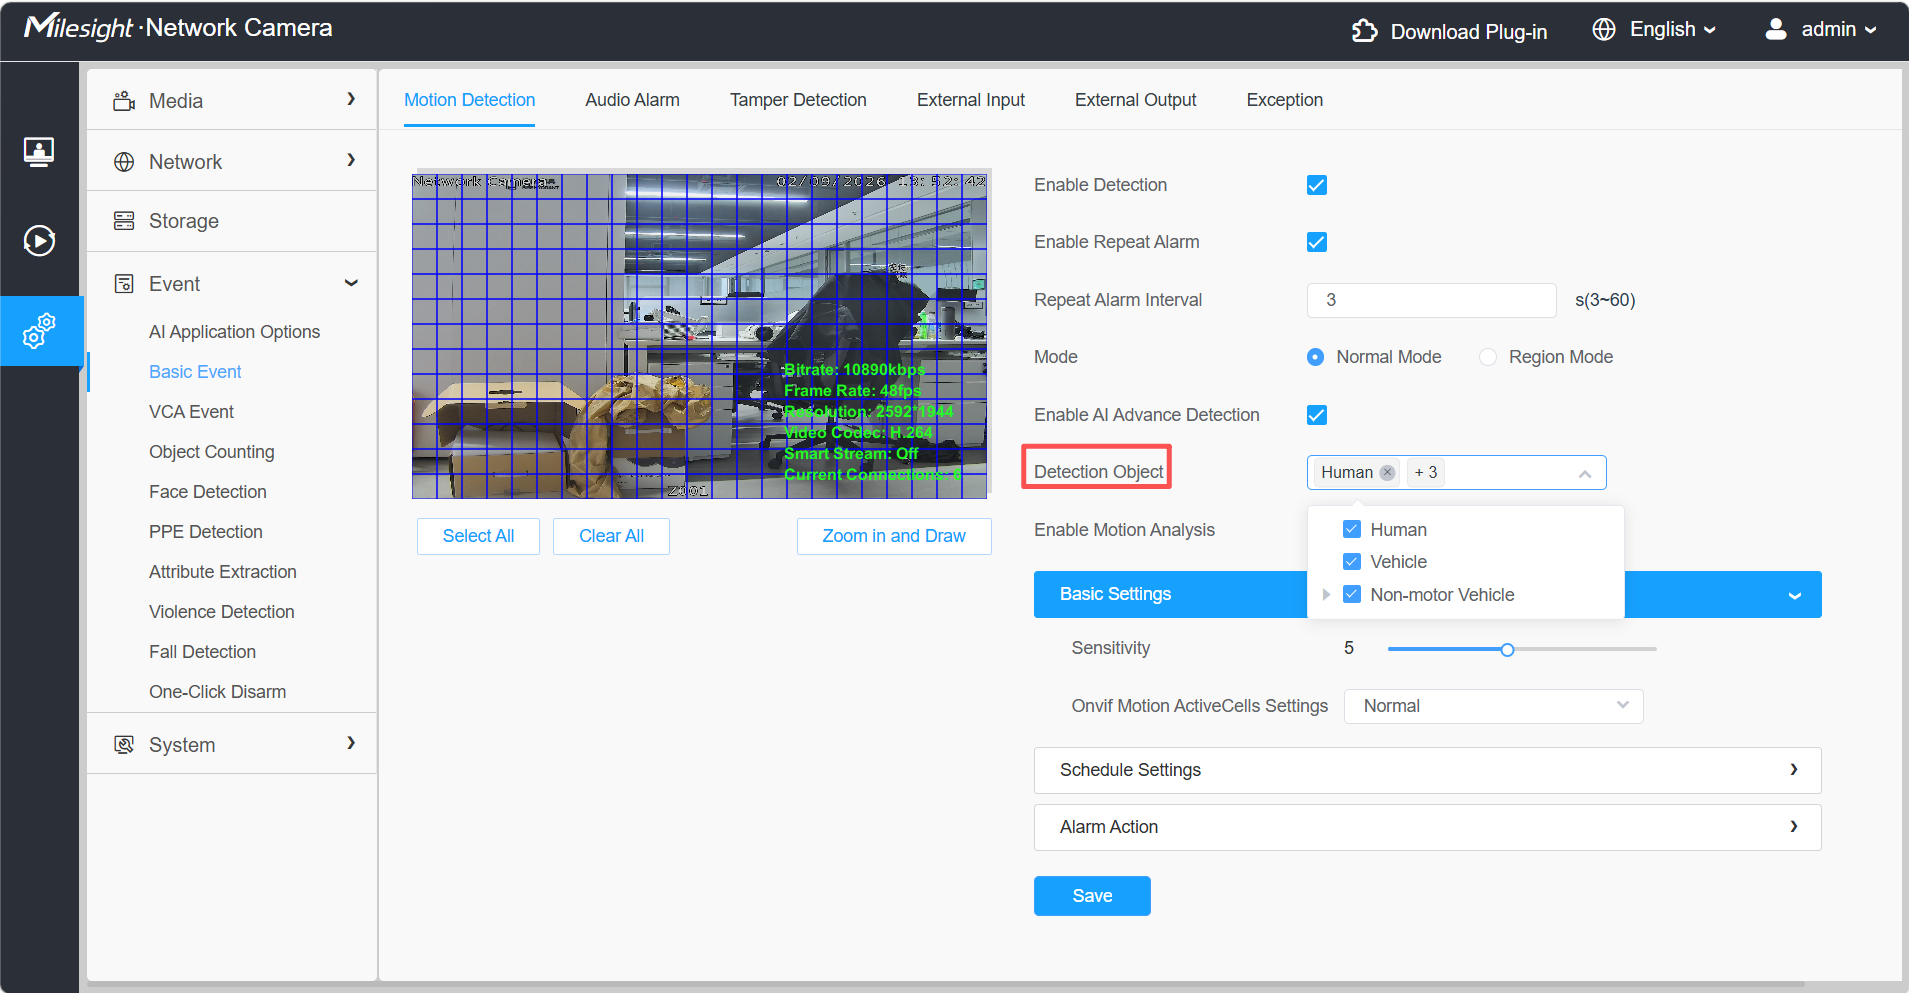
Figure 6. Select the object types to be evaluated in AI mode
Note: Use AI mode to reduce alarms caused by lighting changes, shadows, vegetation, rain, or other image changes that are not the selected target types.
2.4 Configure ONVIF Reporting and the Active Schedule
Step 5: Onvif Motion ActiveCells Settings controls how motion-cell information is reported through ONVIF. Use Normal by default. If an older or third-party VMS/NVR cannot correctly receive or display the motion-cell information, try Compatible and verify the event again. This option concerns ONVIF reporting and does not replace the camera-side trigger conditions.
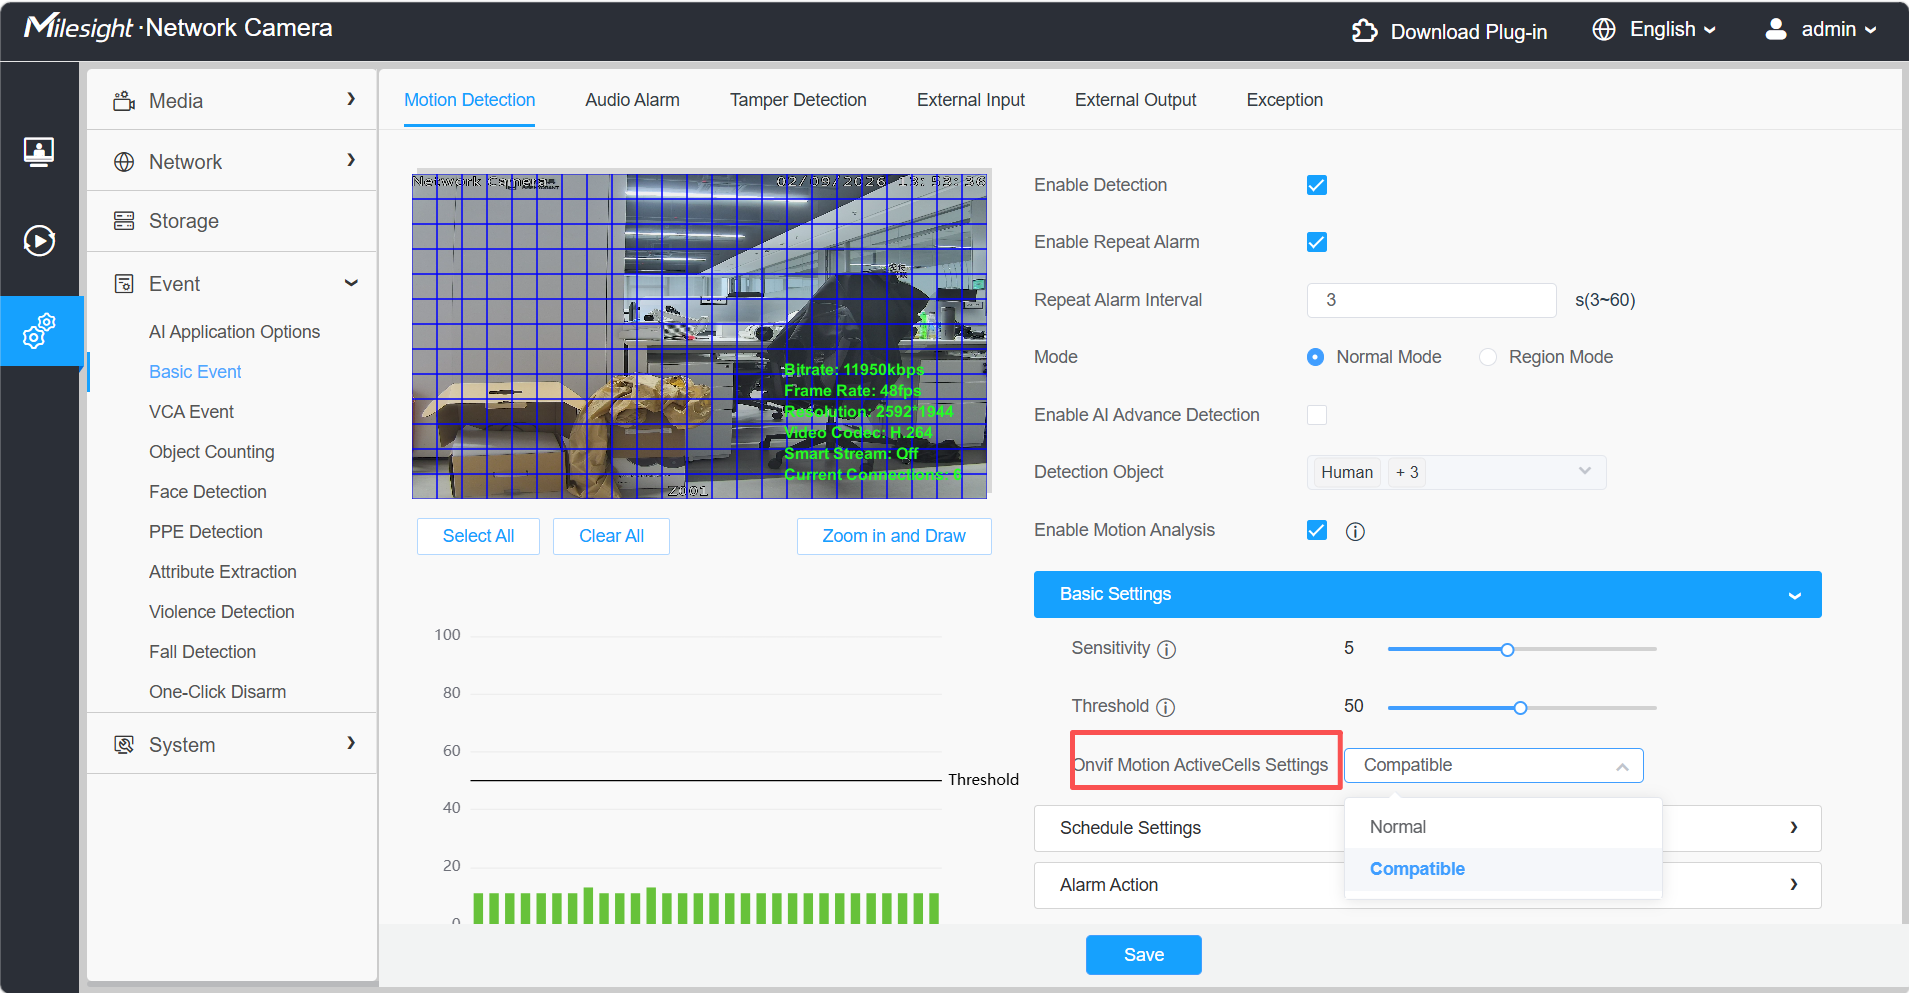
Figure 7. ONVIF Motion ActiveCells reporting mode
Step 6: Expand Schedule Settings and select the time periods during which Motion Detection is active. Blue time blocks are active periods. Use Select All or Clear All as required, then save the configuration. Events outside the active schedule do not execute the configured alarm actions.
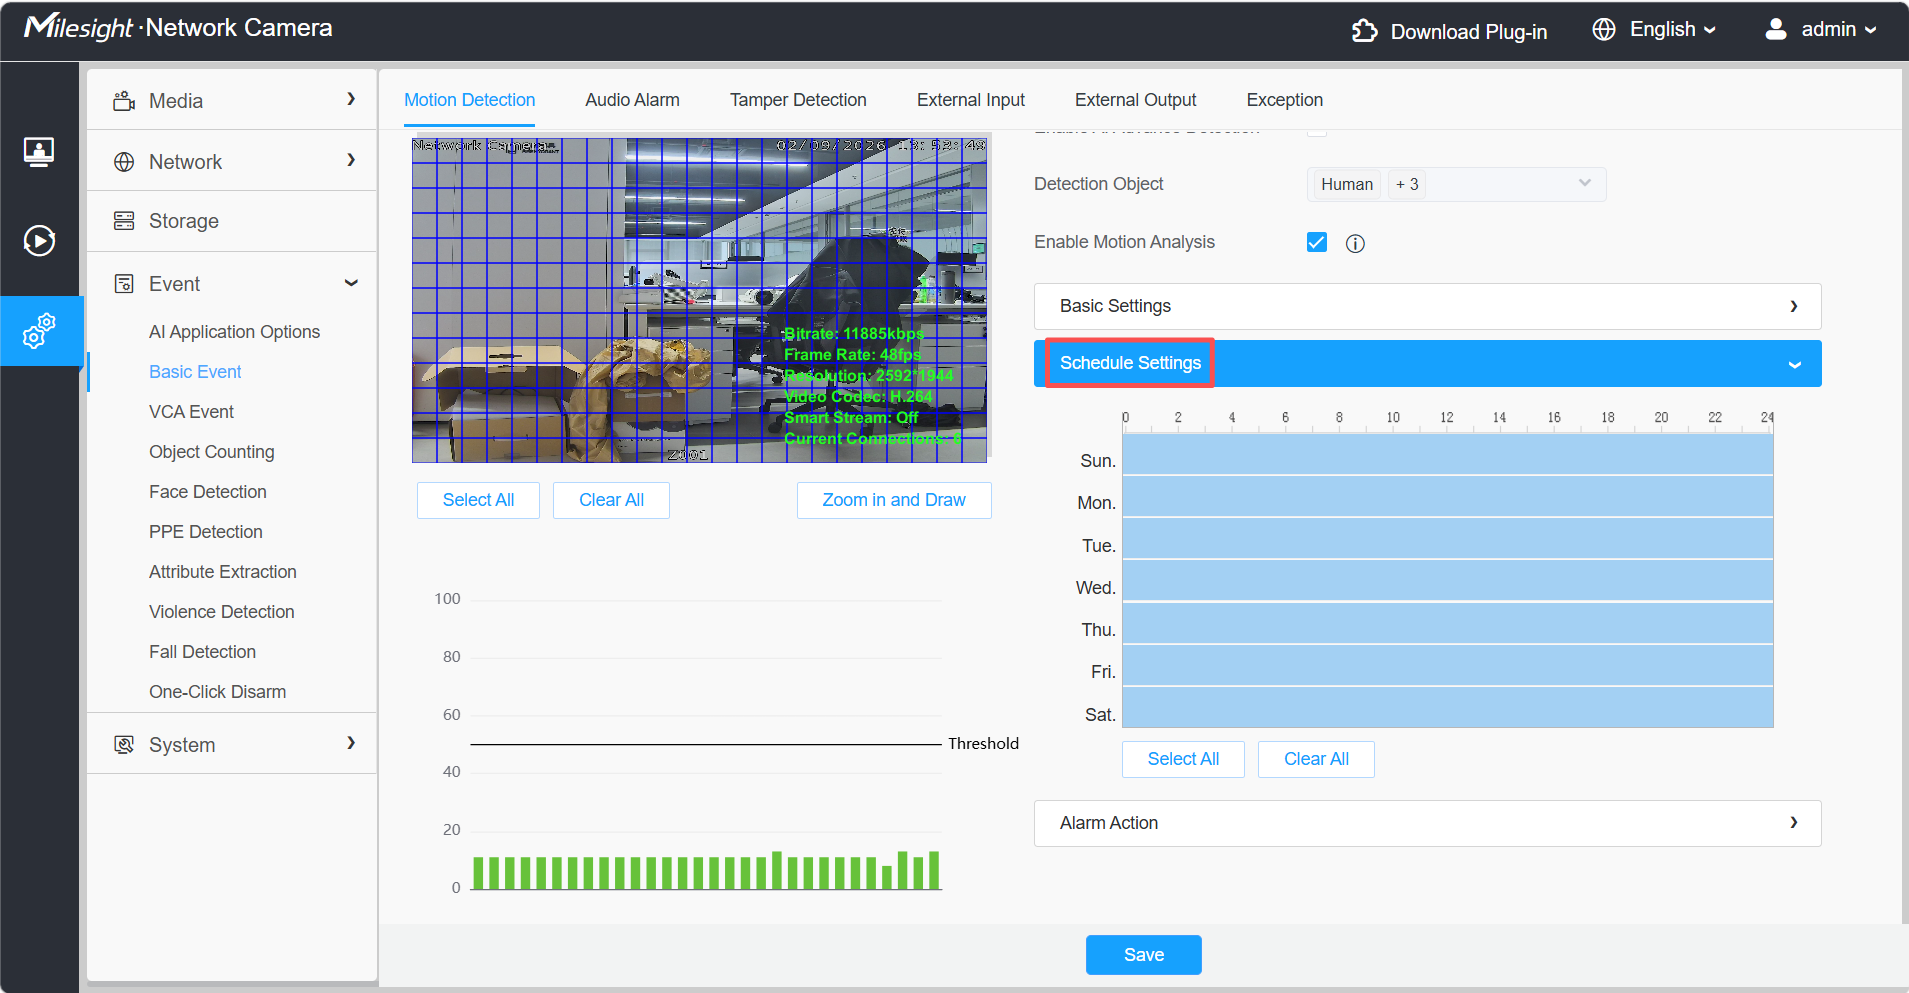
Figure 8. Weekly Motion Detection schedule
2.5 Configure Alarm Actions
Step 7: Expand Alarm Action and enable the actions required by the application. The current interface can provide Record, Snapshot, External Output, Play Audio, Alarm to SIP Phone, and HTTP Notification. Expand an item to configure its detailed parameters. Options shown in gray require the related function, such as the speaker or SIP service, to be enabled first. Click Save after completing the settings.
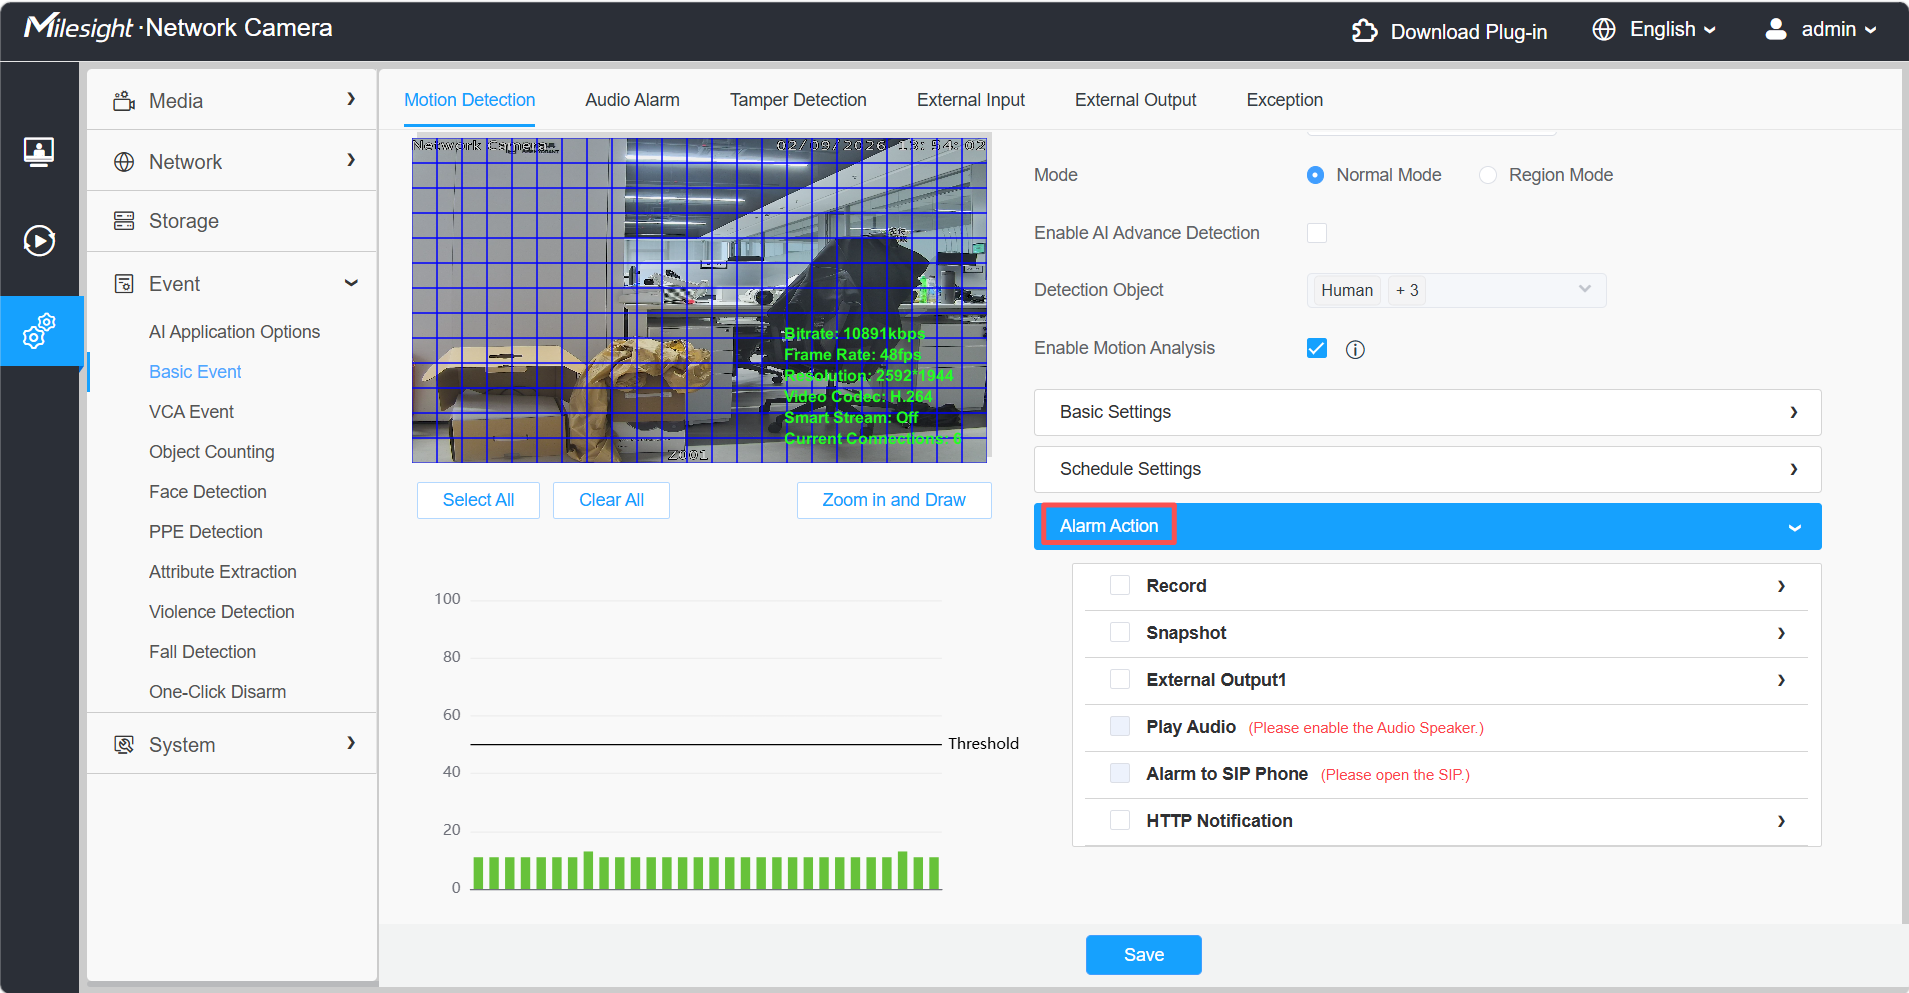
Figure 9. Available Motion Detection alarm actions
2.6 Configure Region Mode and Shield Regions
Step 8: Select Region Mode when different parts of the image require independent parameters. Up to four regions can be selected from Region 1 to Region 4. Choose a region, draw its detection area on the video, and configure its own Sensitivity and Threshold. In the illustrated interface, Region Mode and AI Advance Detection cannot be enabled at the same time.
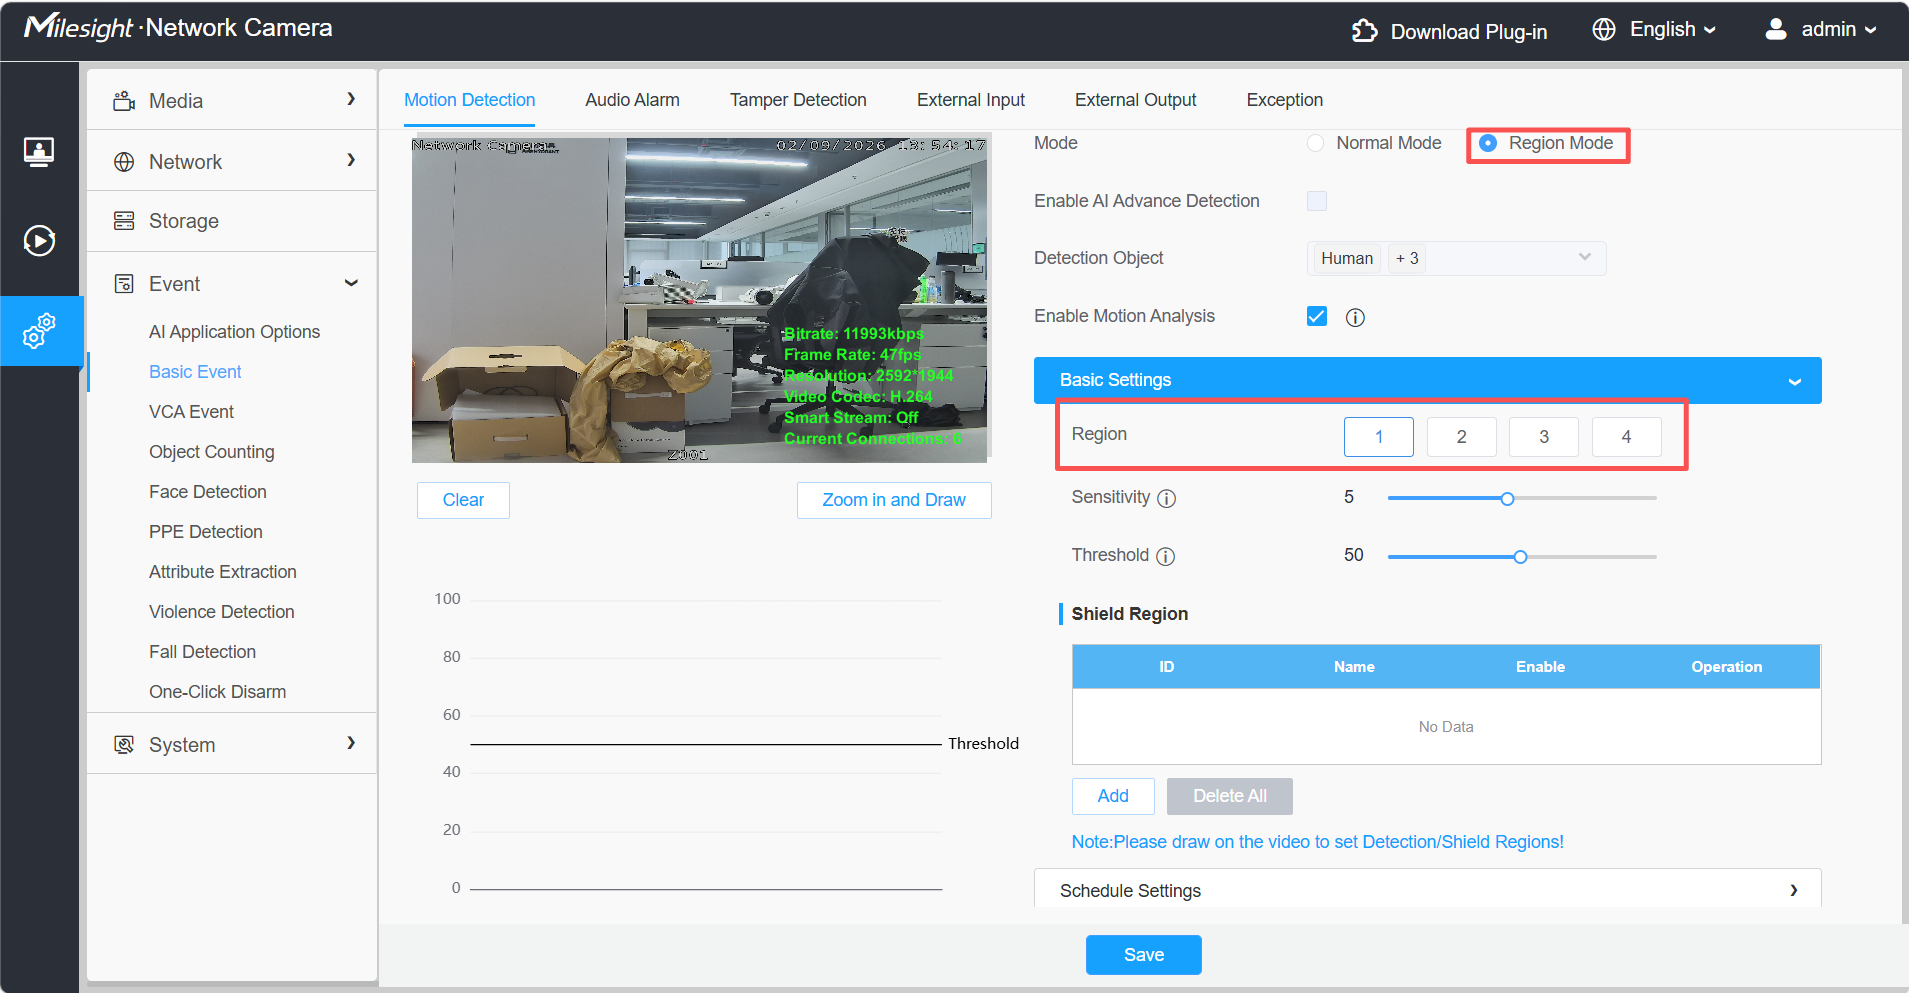
Figure 10. Region Mode with four independently configurable regions
Step 9: Use Shield Region to exclude an interference area from motion analysis. Click Add, draw the shield area on the video, enter a name if required, enable the item, and save it. Typical shield areas include moving trees, reflective surfaces, or a road outside the monitoring target.
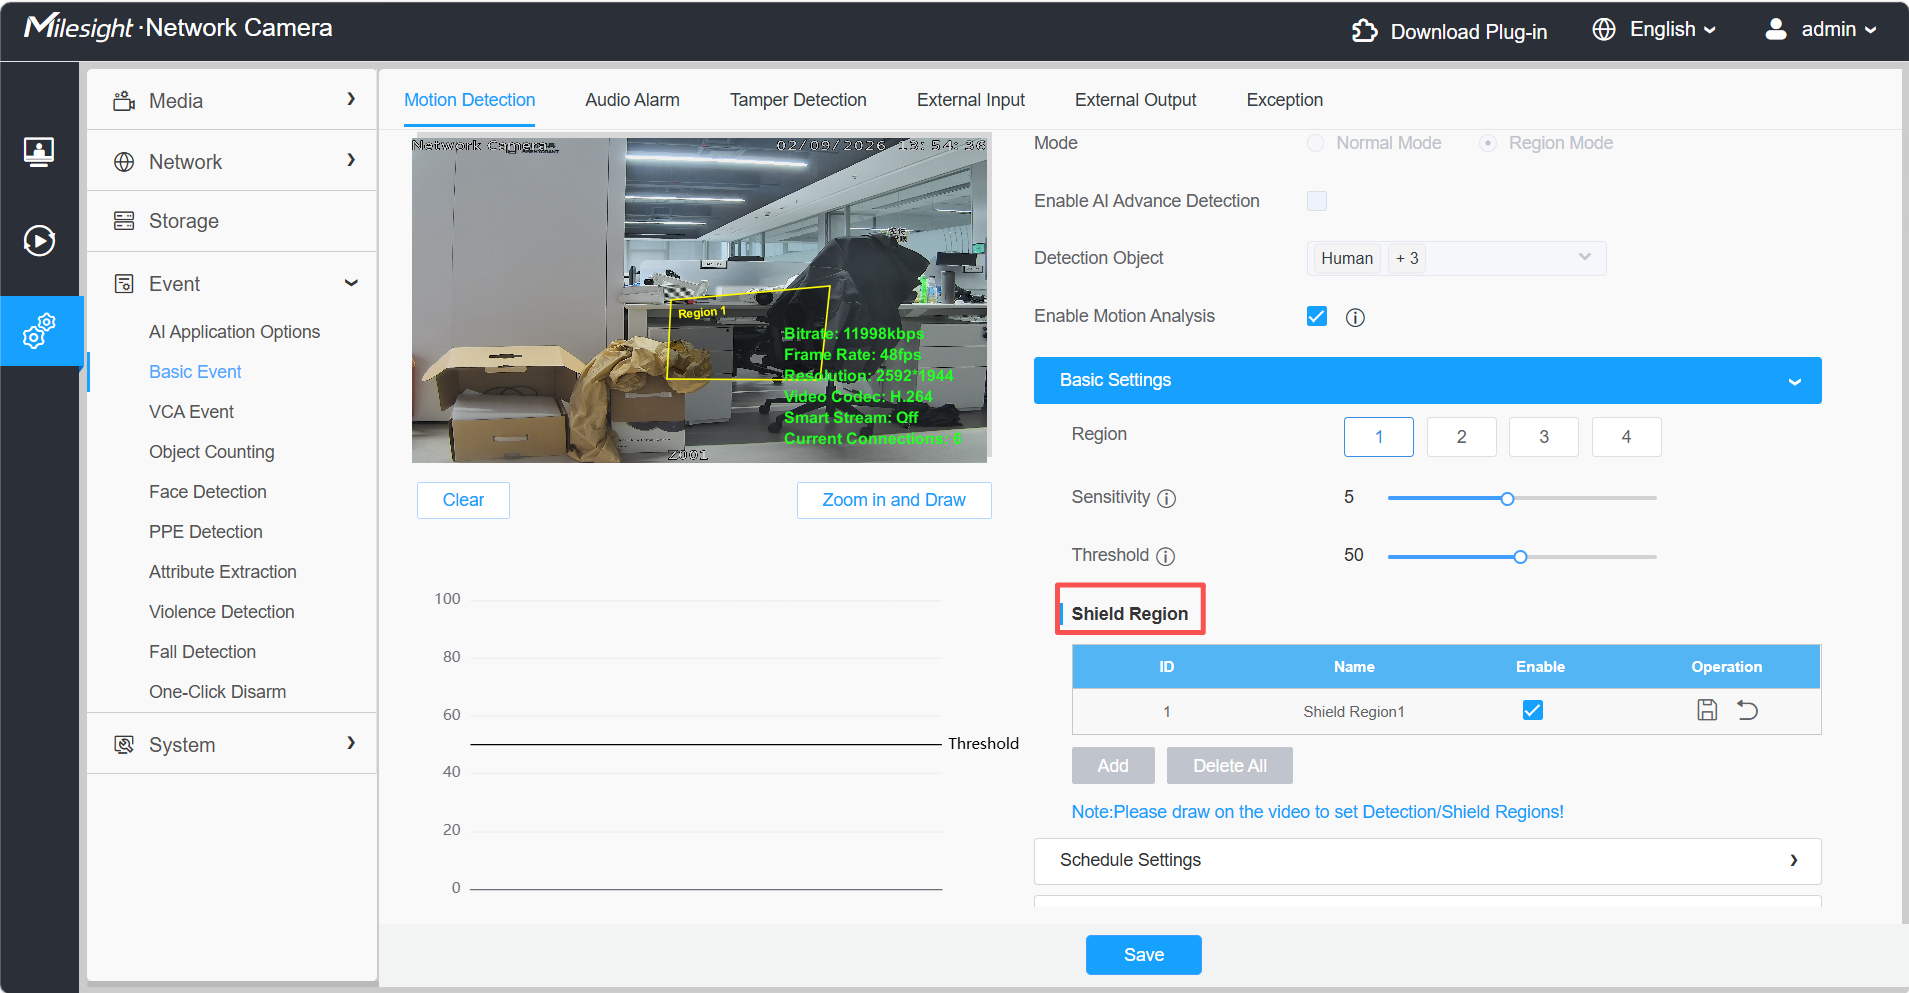
Figure 11. Add and enable Shield Region
3. Motion Detection Trigger Process
Normal Mode without AI: The camera analyzes the selected grid, identifies each moving target, checks whether the target meets Sensitivity, adds the changed area between consecutive frames, and compares it with Threshold. When both conditions are met during the active schedule, the configured alarm actions are executed.
Normal Mode with AI: The camera first detects the selected object types, then judges whether those objects are moving and applies Sensitivity. Other frame changes are ignored. If the condition is met during the active schedule, the alarm actions are executed.
Region Mode: The camera first applies the selected detection region and any Shield Region, then evaluates the independent Sensitivity and Threshold of that region. When the region conditions are met during the active schedule, the alarm actions are executed.
4. Adjustment Suggestions
(1) If small or distant targets are missed, increase Sensitivity gradually and/or reduce Threshold.
(2) If leaves, rain, shadows, or minor movement cause frequent alarms, reduce Sensitivity and/or increase Threshold, a Shield Region can also be used for a fixed interference area.
(3) Use Motion Analysis to identify where motion occurs. When Threshold is available, use the bar chart to observe frame-to-frame changes, and adjust only one parameter at a time. Values shown in the screenshots are examples, not universal recommended settings.
——————END——————