Introduction
This guide provides a brief overview of common LPR image issues—such as blur, overexposure, and underexposure—and how to correct them using basic image settings. Although we have improved default image processing to minimize these problems, certain environments may still require manual tuning. The following sections outline where to find key settings and offer simple adjustments to help ensure clear, consistent, and reliable license plate capture.
General LPR image issues
LPR (License Plate Recognition) image issues typically fall into three types: blur, caused by fast-moving vehicles or long exposure times; overexposure, where strong reflections make the plate appear too bright; underexposure, where the plate is too dark due to insufficient lighting or low exposure settings. Understanding these categories helps identify the right adjustments later.
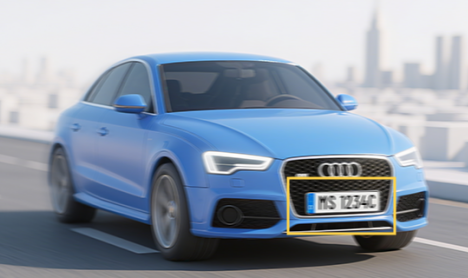
license plate blurriness

License plate overexposure
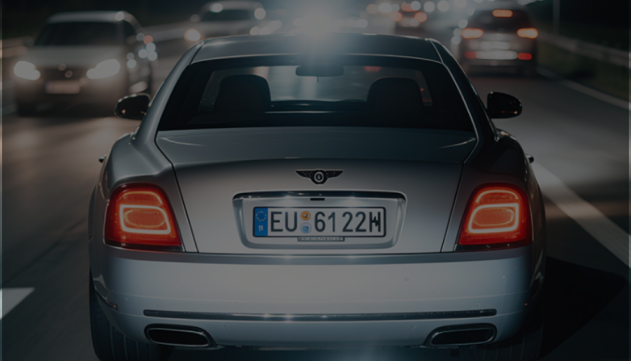
License plate underexposure (too dark)
Image Settings Page Introduction
There are two versions of the image settings page, each with a different UI, but both are located at Media > Image > General > Day/Night Parameters. These settings should be adjusted as needed to improve image quality. ANPR camera models end with PC and PE (or PG1), they use different interfaces, just like the images below(Figure 1 and Figure 2) . In general case, if you are using the latest firmware, you don’t need to do any adjustment, this document is for special cases only.
1 PC models display the interface shown in the example image.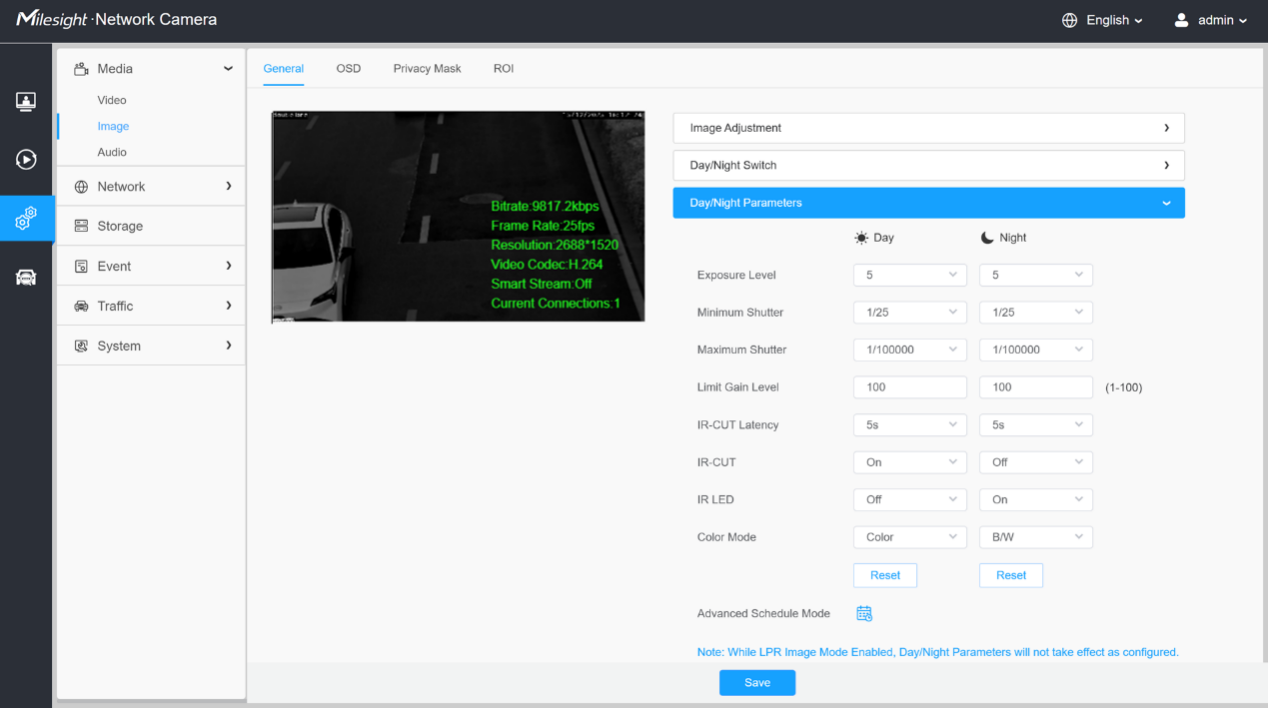
Figure 1: PC model image settings page
2 PE(PG1) models display a different interface, as shown in the example image.
Figure 2: PE(PG1) model image settings page
Different Image Issue solutions
1. Blurred license plate
When the vehicle speed is high, the current exposure time may not be sufficient to capture a clear image. In this case, reduce the shutter time to minimize motion blur. Adjust the slider shown in Figure 3. If blur is the only issue, keep all other settings at their default values.

PC model setting

PE (PG1) model setting
Figure 3: PC & PE(PG1) model adjust shutter time to reduce plate blur effect.
Real-world examples of license plates under different shutter times:
Maximum shutter (Shutter Time) | Example Image |
1/100(6 ms) |
|
1/1000(1 ms) |
|


2. License Plate Overexposure or Underexposure
At night, license plates can sometimes appear overexposed. Adjusting the target brightness can help make the plate clearly visible. For vehicles moving at 60-70 km/h with shutter time set to 1 ms, try tuning the target brightness parameter as shown in Figure 4. If overexposure or underexposure is the only issue, keep all other settings at their default values.

PC model setting

PE (ProG1) model setting
Figure 4: PC & PE(ProG1) model adjust shutter time to reduce plate overexposure effect.
Target Brightness (Exposure Level) | Effect | Example Image |
10 (5) | Overexposed |
|
5(0) | Balanced |
|
0(-5) | Underexposed |
|


If the license plate appears too dark at night, increase the target brightness slider accordingly (or increase exposure level slightly). Refer to the example images above for the overall effect.
Other Possible Image Issues.
1. Excessive Noise in License Plate Image
If there is excessive noise in the nighttime image but the brightness is adequate, adjust the gain to balance brightness and noise levels, which is shown in Figure 5.
Note: When some plates have weak reflectivity, increasing gain may cause them to appear darker.

PC model setting

PE (ProG1) model setting
Figure 5: PC & PE( ProG1) model adjust limit gain level to reduce excessive noise effect.
Gain Setting | Effect | Example Image |
Default Gain (100) | Noisy image |
|
Gain limited to 20 | Less noise |
|


2. Severe Overexposure
If reducing exposure time and adjusting gain do not improve the image, try lowering the infrared (IR) illumination. Go to Image > Supplement Light Parameters, change Smart IR Mode to Customize, and adjust the IR slider based on the actual scene.
Figure 6: PE & ProG1 image page to reduce excessive noise effect.
3. Improving Character Contrast and Plate Contours
Web interface slides can also help enhance image clarity.

Figure 6: PC & PE (ProG1) image page settings on the live view
3.1 Contrast Slider
Use this to increase the contrast between characters and the plate background.
Side effect: Dark areas become darker.

3.2 Sharpness Slider
Use this to enhance character edges and contours.
Side effect: Noise is also intensified.

4. Region Focus Function
4.1 Function Explanation
When the scene contains both foreground and background, or you want to focus on a specific area, enable this function. It prioritizes focus in the selected area while ignoring out-of-region focus, ensuring optimal focus on the region of interest.
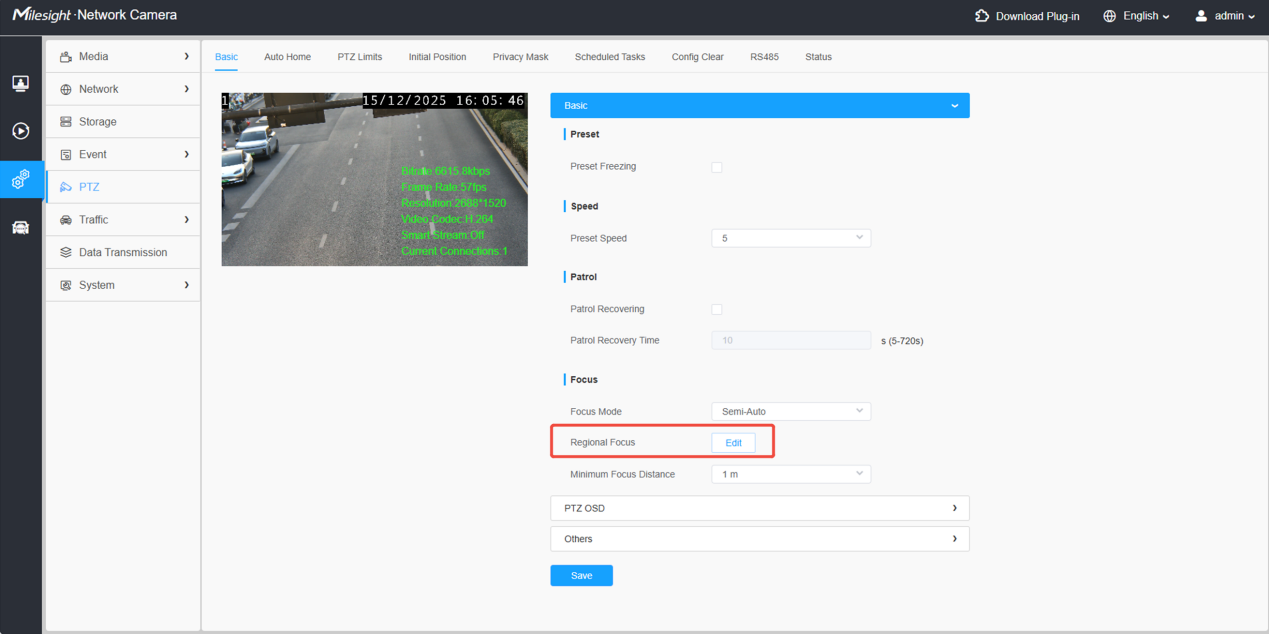
4.2 How to Use
Click the Edit button; blue lines will appear on the screen. Draw the desired region, then confirm the selection. Back on the main page, click Focus to maintain focus within that selected area.

Example
 Figure 7: The doll is selected as the focus area, so the focus prioritizes it and ignores the background.
 Figure 8: Without region focus, the camera may mistakenly focus on the background.
Case Study:
Using a Non-ANPR Camera for Road Monitoring
Officially, we do not recommend using Non-ANPR Camera for road scenarios, as they are not designed for this purpose and we cannot guarantee image quality or recognition effectiveness. The image settings page for these cameras is the same as the ANPR PC model, which you can refer to in the section above.
 Figure 9: Non-ANPR Camera image setting page example
If you have any questions about image parameters adjustment, please feel free to contact support@milesight.com.
——— END ———