M-Sight Pro is an Milesight Application designed for Milesight camera. There are two methods for us to use M-Sight Pro to view the cameras remotely.
1. Port Mapping
Please do the port mapping as follows:
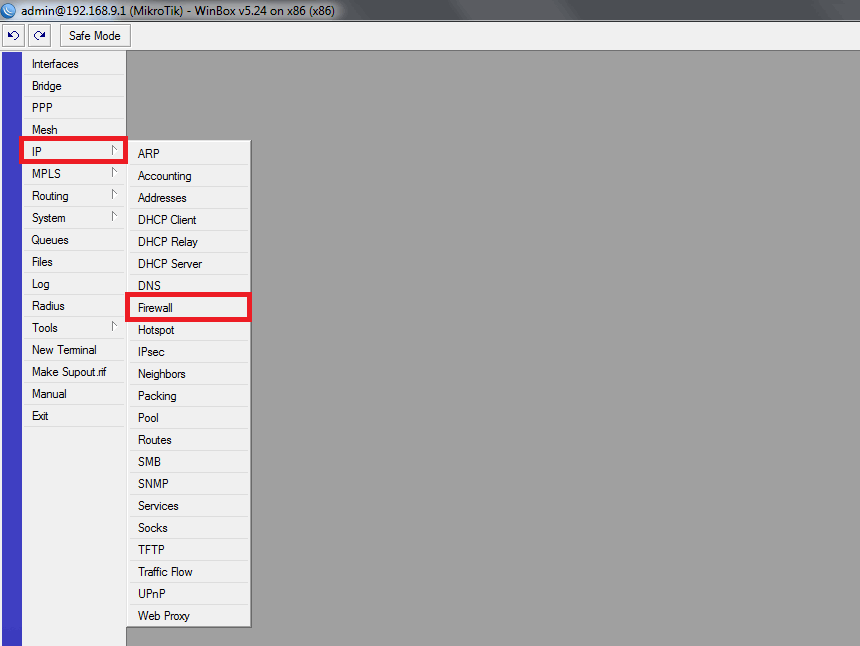
Step1: Log in router via “winbox” software, enter the IP address, username and password:

Step2: Click IP→Firewall→NAT
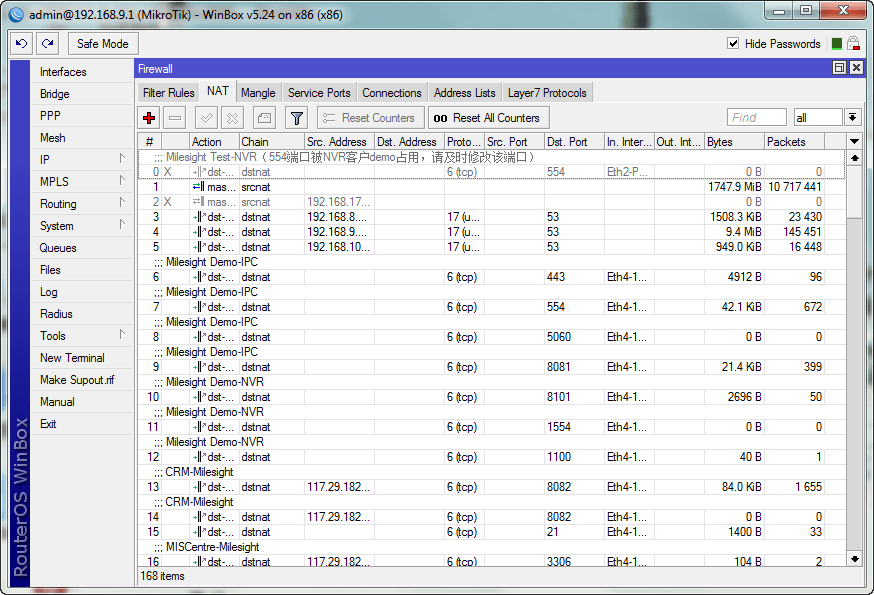
Step3: Click [+], add a new NAT rule, refer the mapping and fill in the info as follows:
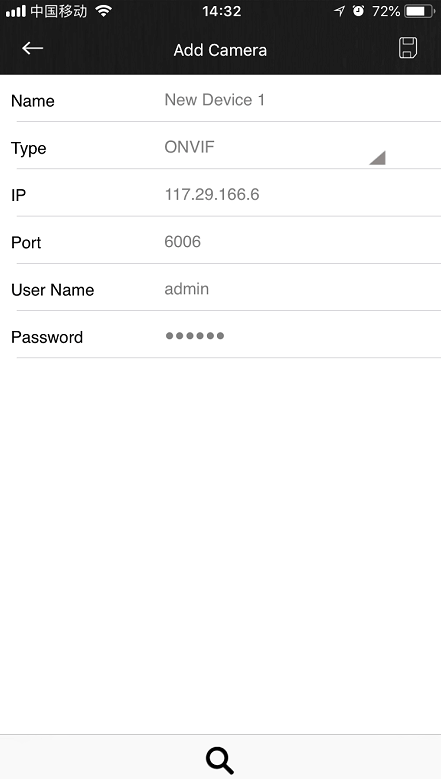
HTTP: 117.29.166.6:6006→ 192.168.8.151:6006
RTSP: 117.29.166.6:5594→ 192.168.8.151:5594
HTTP:


RTSP:


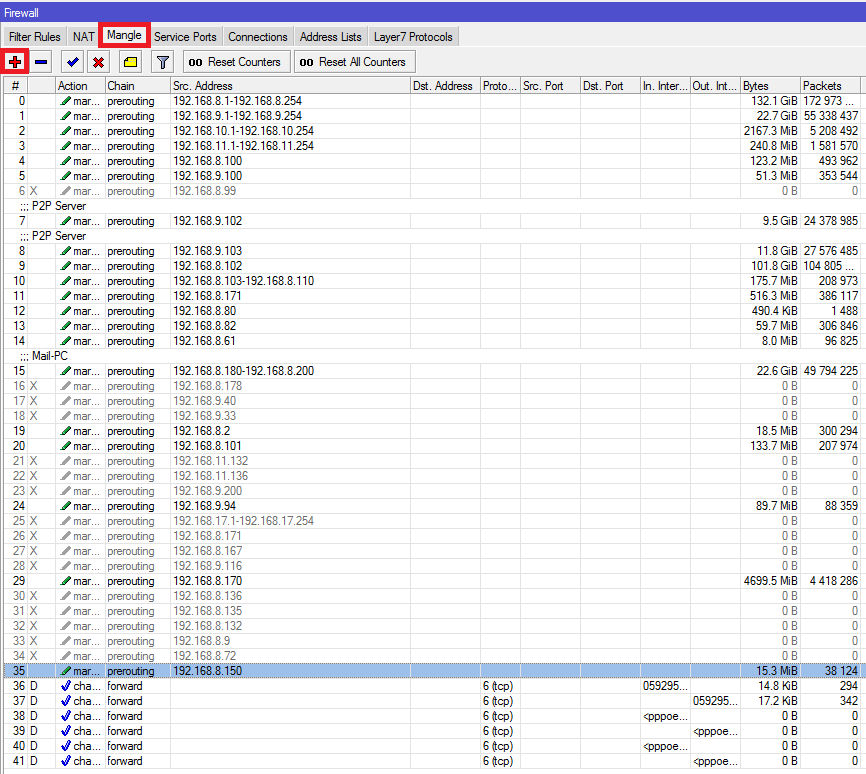
Step4: Click [Mangle]→[+], add a new rule to set the Wan:


Step5: Change the HTTP port and RTSP port via Web:


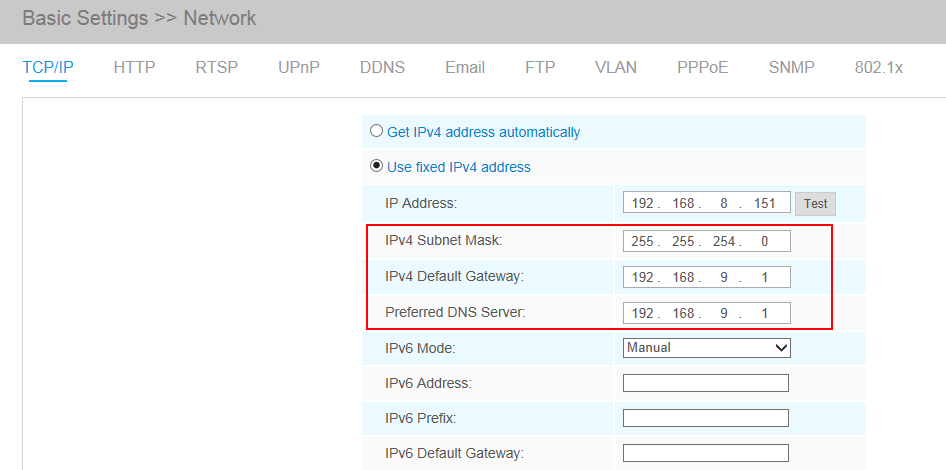
Step6: Change the Subnet Mask, Gateway and DNS:
Step7: There are two ways to visit the camera, Fixed IP or DDNS:
Fixed IP:
Open the App and enter the public IP address to check whether the port mapping is working or not:
DDNS:
If you feel that it is difficult to remember the IP address when visiting the camera, we can link the camera IP address with a domain name, and visit the camera by the domain name. The steps are as follows:
Add a subdomain on the website http://freedns.afraid.org;
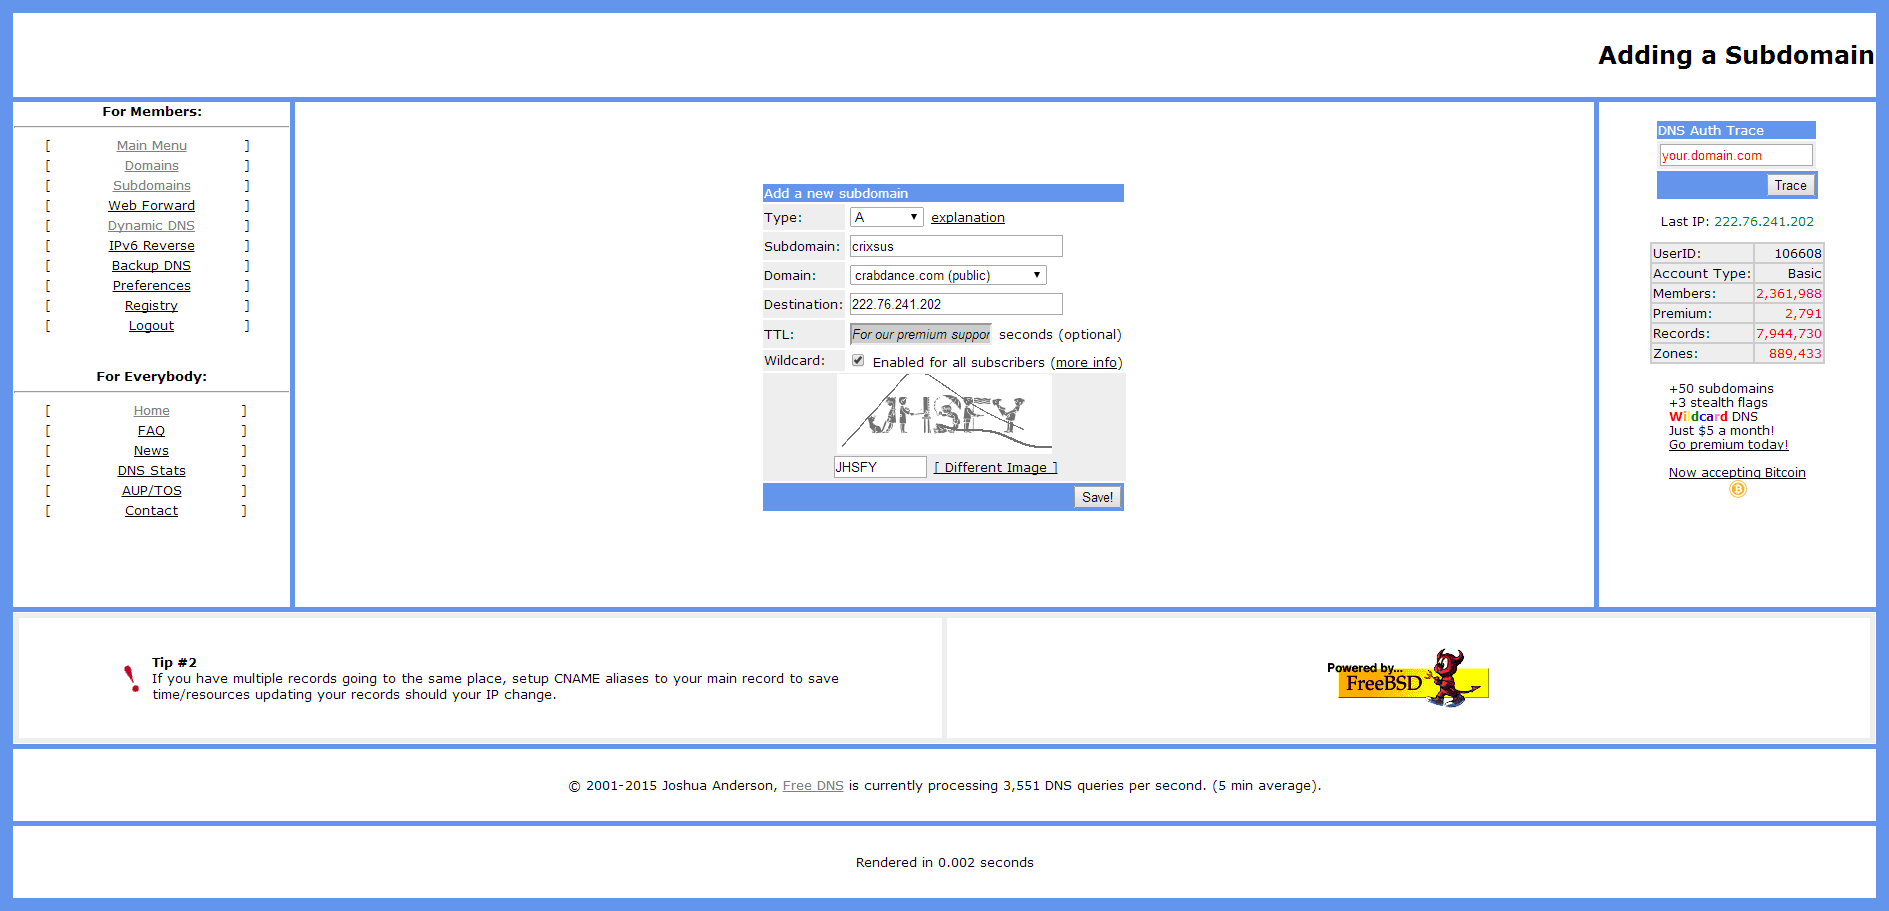
Link the domain name with the IP address, 117.29.166.6, which we have mapped before:

Add the camera to M-Sight Pro by domain name(ONVIF mode);
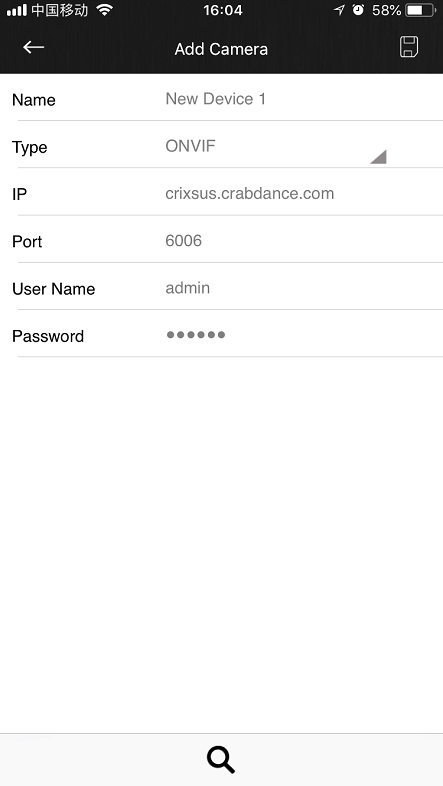
Or add the camera to M-Sight Pro by domain name(RTSP mode);

2. P2P
Send the MAC address of your camera to us, we will activate your camera. Then M-Sight can visit the camera by the P2P mode.
Please do steps as follows:
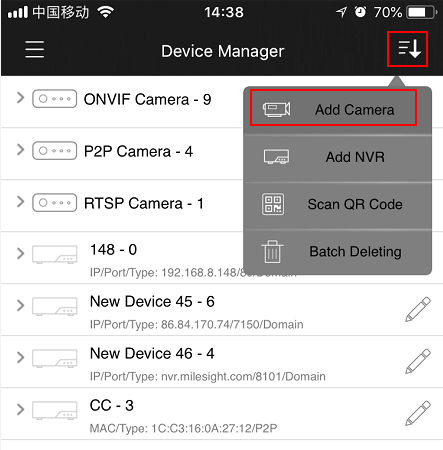
Step1: Click on the top-left button, choose “Device Manager”, click top-right button and choose “Add Camera” to add device. There are three adding types, you should choose to add via “P2P”;

Step2: Enter the MAC address of the camera, the user name and the password. The MAC address of the camera can be generated automatically by scanning the bar code, or you can scan the QR code from web interface. The default user name is: admin, default password is: ms1234;


Step3: Click on the “Save” button to save the device info. After being added successfully, it will get the device number and device name automatically;
Step4: Play the devices. You have two ways to play live view via P2P;
Choose the devices you want to play in the “Device Manager” interface, and click the devices to play the live view;
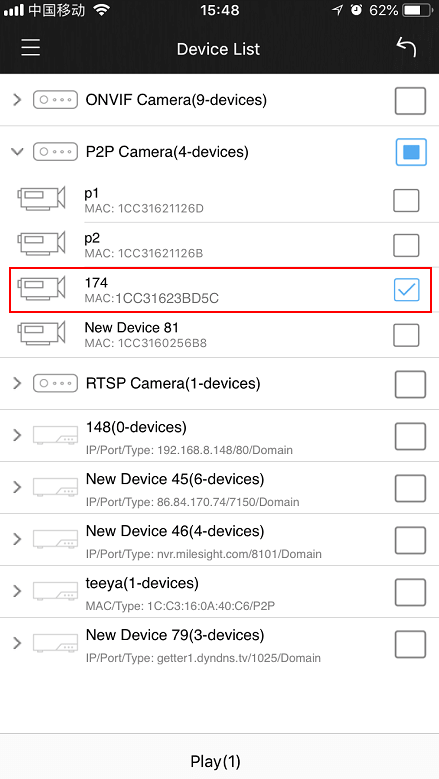
Click on the top-right button in the “Live View” interface, choose the devices you want to play, and click the “Play” button ;



Note:
You can enter the MAC address of the camera as well as scan the bar code/QR code to automatically generate the MAC address.
